Integrate with Google Workspace through LDAP
In this topic, you will learn how to integrate Portnox™ Cloud with Google Workspace using the Google Workspace secure LDAP function and Portnox AD Broker.
Configure Portnox Cloud directory integration
In this section, you will configure Portnox Cloud for LDAP directory integration with Google’s secure LDAP.
-
In the Cloud portal top menu, click on the Settings option.

-
In the Cloud portal left-hand side menu, click on the option.

- Under the DIRECTORY INTEGRATION SERVICE section, click on the Add new domain link.
-
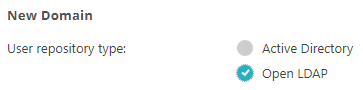
In the User repository type field, select the OpenLDAP option.
-
In the Display name field, type a display name for your configuration.

In this example, we used the name Google Workspace, but you can use any name you like.
-
In the Base DN field, type the Distinguished Name (DN) of the starting point for directory
server searches. For Google’s secure LDAP, this is always dc=gsuite,dc=google,dc=com.

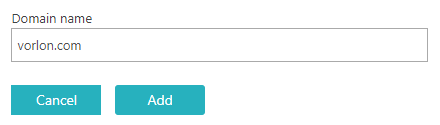
- In the Domain names section, click on the Add new domain name link.
-
In the Domain name field, type the domain name controlled by your Google Workspace
tenant.
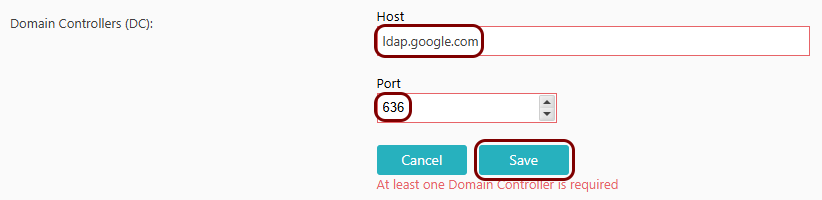
- In the Domain controllers (DC) field, click on the Add new Domain Controller link.
-
In the Host and Port fields, enter the
ldap.google.com and 636 respectively, and then click on the
Save button.
-
Activate the Use SSL checkbox.

- Click on the Save button below to save your configuration.
Configure Google Workspace
In this section, you will add a LDAP client to Google Workspace.
-
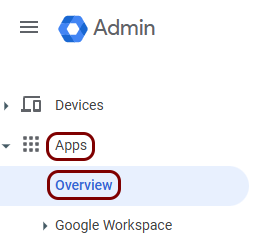
In your Google Workspace administrative interface, in the left-hand side menu, click on the option.
-
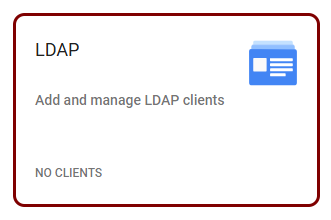
In the right-hand side pane, click on the LDAP tile.
-
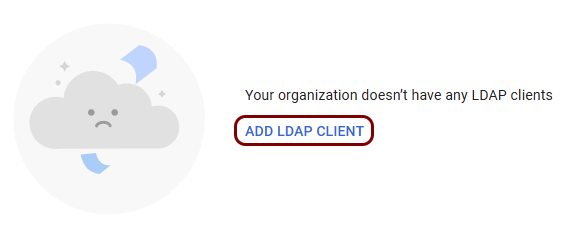
In the right-hand side pane, click on the ADD LDAP CLIENT link.
-
In the Client details pane, enter the LDAP client name and optionally a
Description. Then, click on the Continue button.
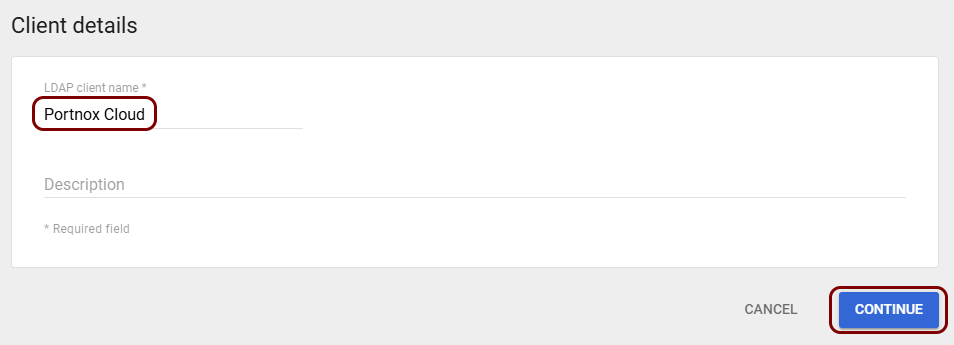
In this example, we used the name Portnox Cloud, but you can use any name you like.
-
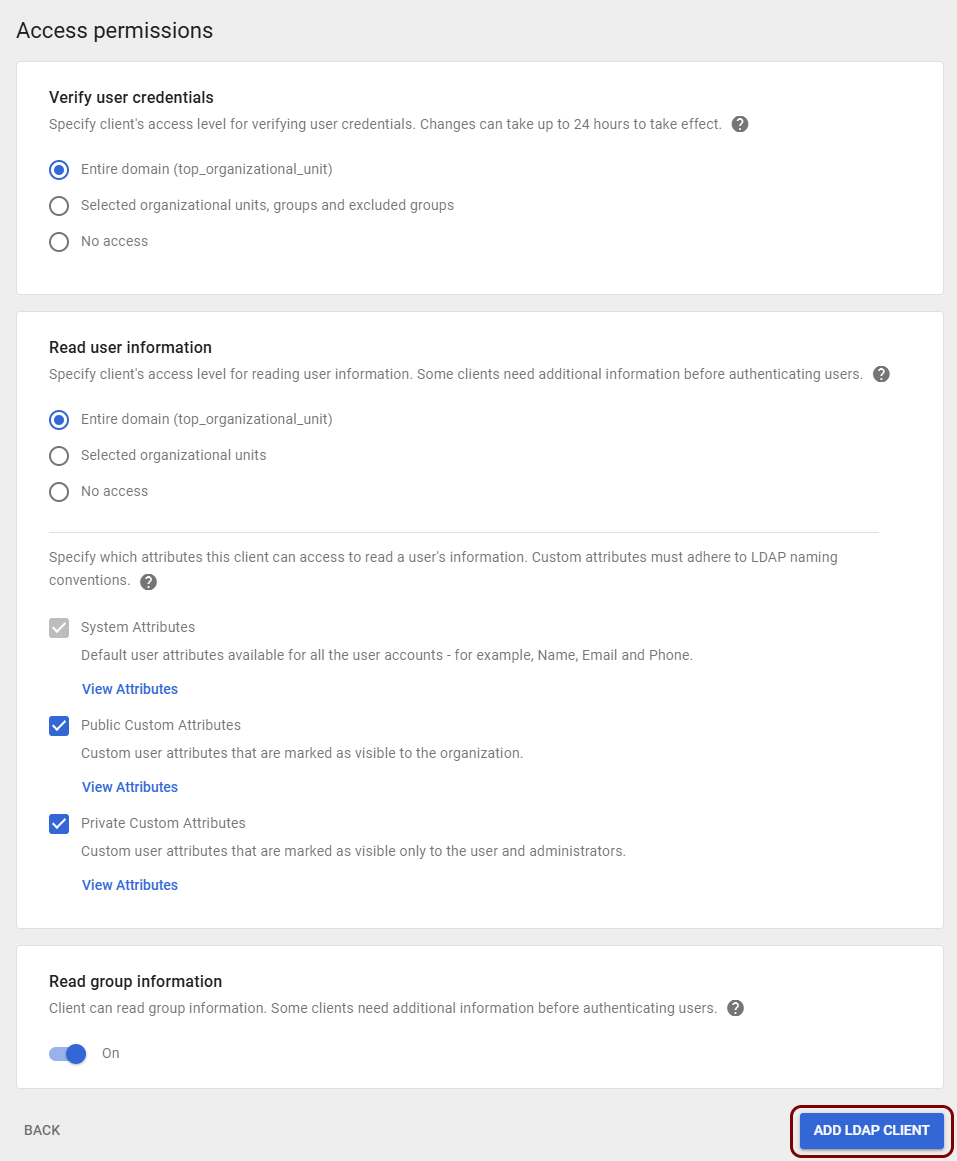
In the Access permissions pane, set the access permissions, and then click on the
ADD LDAP CLIENT button.
Note: Configure the access permissions depending on your Google Workspace structure and organization security requirements. In this example, we allowed the client all permissions, but you may limit them as you see fit. However, it is secure for Portnox Cloud to have access to all the information, just as it would in the case of direct integration with Google Workspace.
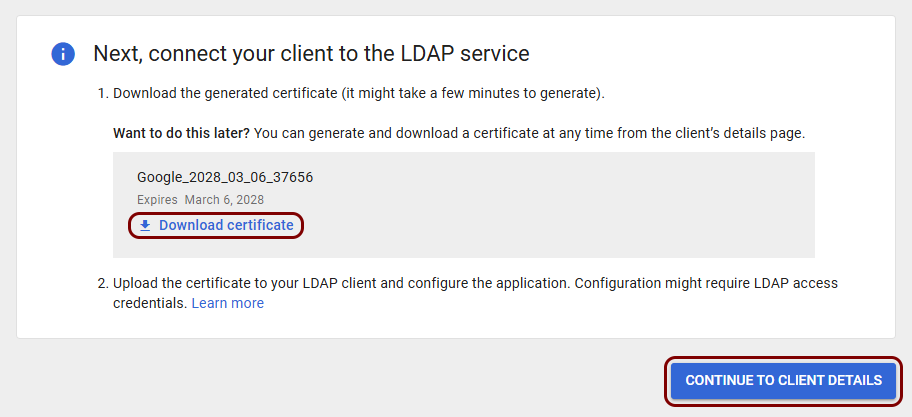
-
In the Next, connect your client to the LDAP service pane, click on the Download
certificate link, and then click on the CONTINUE TO CLIENT DETAILS
button.
Note: You will need this certificate later to establish a connection to Google’s secure LDAP.
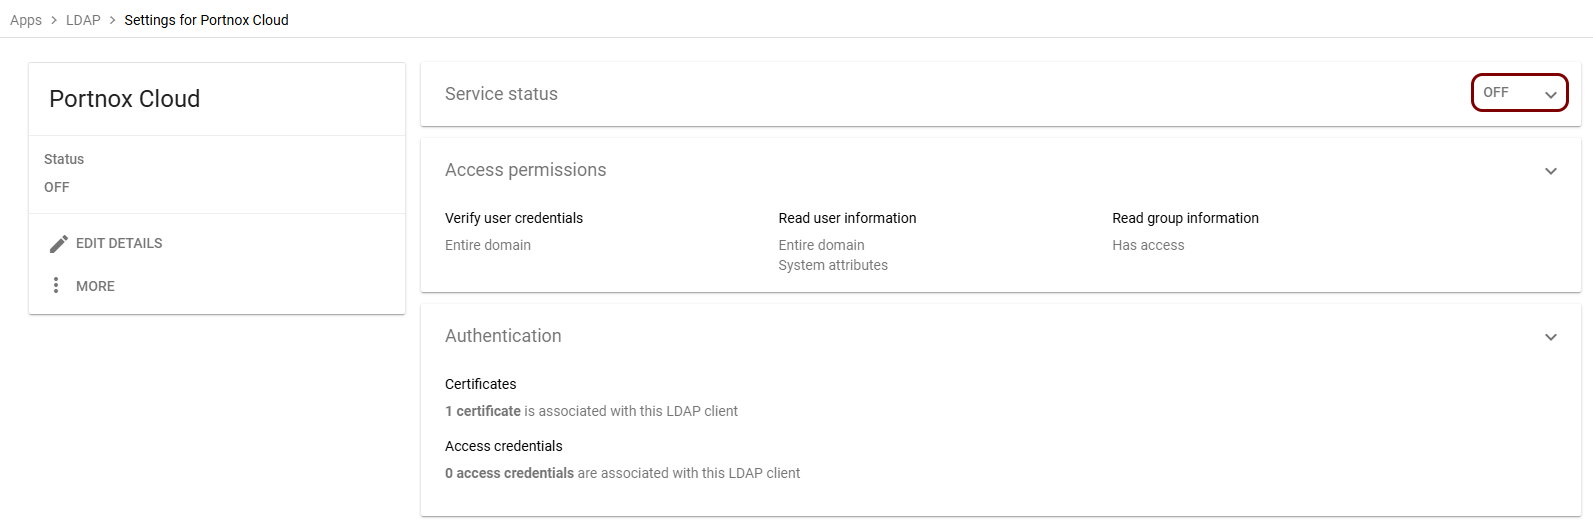
-
In the Apps > LDAP > Settings pane, click on the OFF button in
the top-right corner.
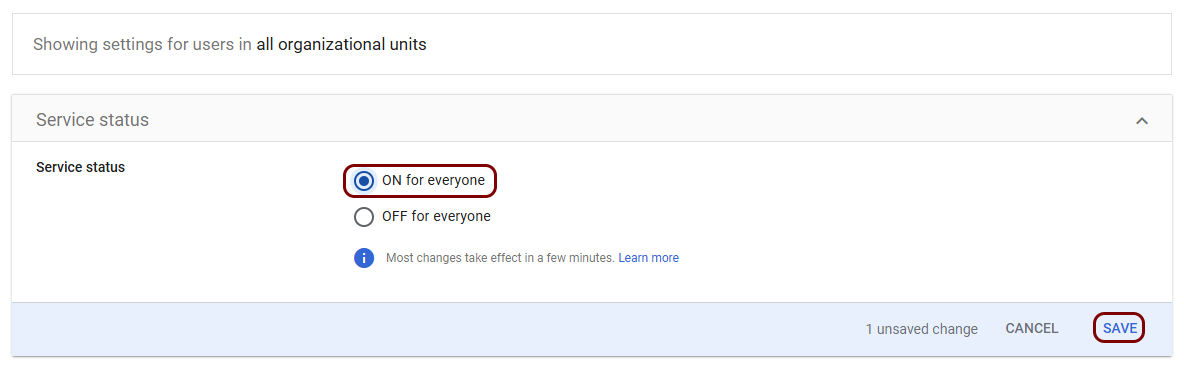
-
In the Showing settings for users section, select the ON option, and
then click on the SAVE button.
Note: Your section may show information for a specific organizational unit, if you configured your client for that unit only in the Access permissions pane.
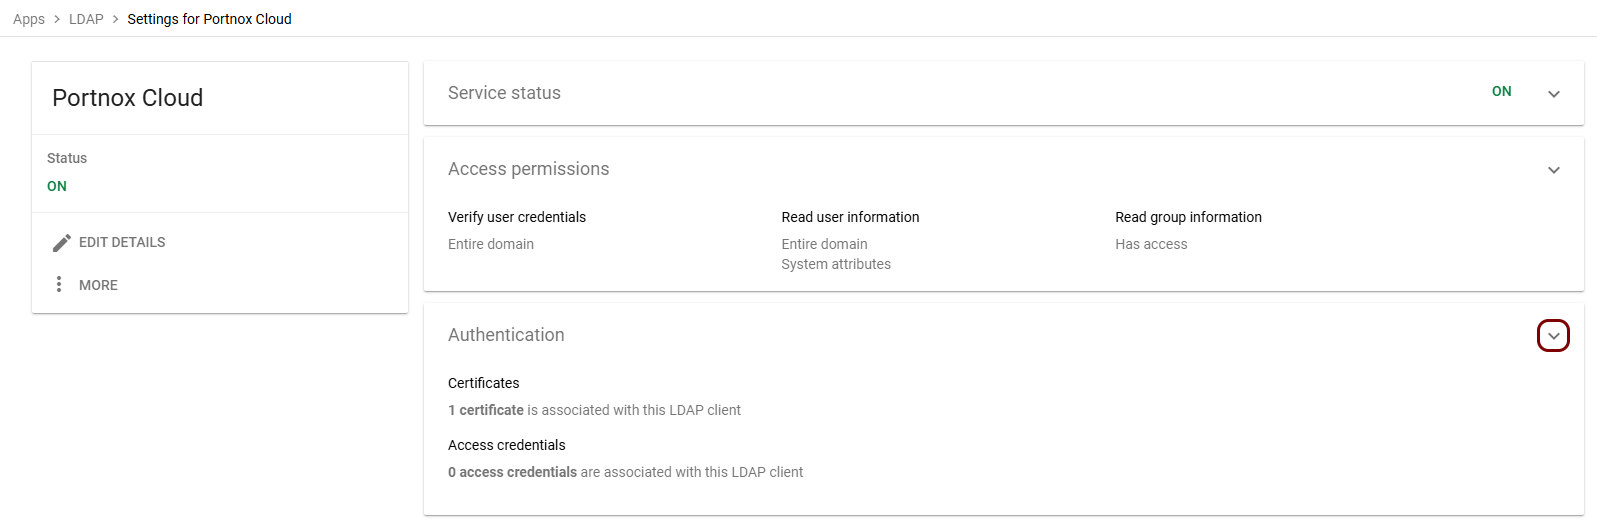
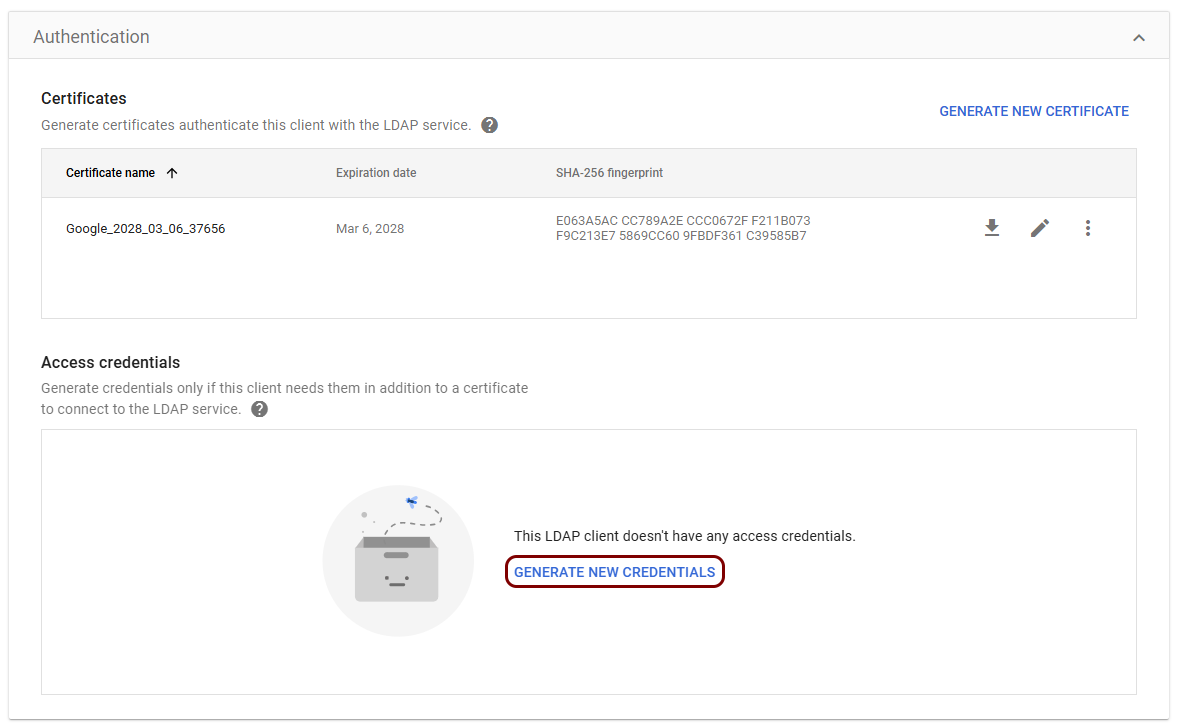
-
In the Apps > LDAP > Settings pane, click on the ⱽ icon in the top-right corner of the Authentication
section.
-
In the Authentication section, click on the GENERATE NEW CREDENTIALS
link.
-
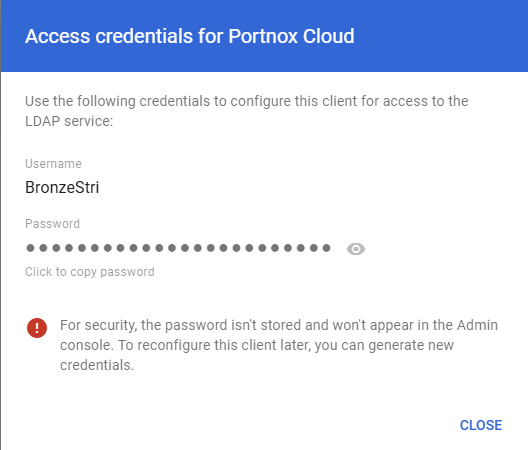
In the Access credentials window, copy the generated credentials and store them in a temporary
text file. You will need them to configure AD Broker later.
Install and configure stunnel
In this section, you will install and configure the free stunnel application that must be used as a proxy to connect to Google’s secure LDAP.
- Download the free stunnel application for Windows from its official download page. Then, install the application.
-
Unzip the certificate package that you downloaded from Google Workspace earlier. Copy the files from this package
to the C:\Program Files (x86)\stunnel\config directory.
Modify the directory if you installed stunnel in a different directory than the default one.
-
Open the stunnel user interface from the Windows system tray (notification area), and in the top menu, select the option.
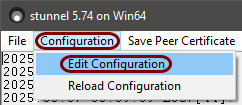
A Notepad window opens with the configuration.
-
Add the following at the end of the configuration file in the Notepad window, and then save the file:
[ldap]
client = yes
accept = 127.0.0.1:1636
connect = ldap.google.com:636
cert = Google_your-certificate-identifier.crt
key = Google_your-certificate-identifier.key
For example:
[ldap] client = yes accept = 127.0.0.1:1636 connect = ldap.google.com:636 cert = Google_2028_03_06_37656.crt key = Google_2028_03_06_37656.key -
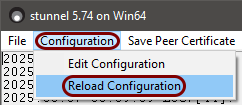
Close Notepad, and in the top menu of the stunnel user interface, select the option.
Install and configure AD Broker
In this section, you will install and configure the Portnox Active Directory Broker (AD Broker).
-
In the Cloud portal top menu, click on the Settings option.
-
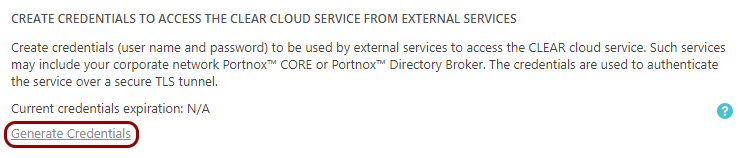
Create credentials to access Portnox Cloud from external services.
Note: Skip this step, if you already created the credentials for another purpose earlier.
-
In the Cloud portal left-hand side menu, click on the option.

-
Click on the Generate Credentials link.
-
Check your email. You will receive the credentials by email.
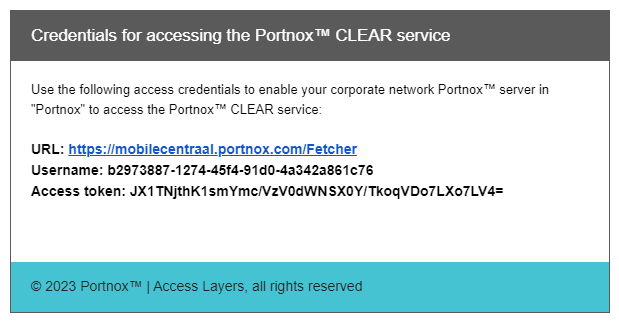 Note: Preferably, check the email on the device where you will be installing the broker or copy the information from the email to a file on that device.
-
In the Cloud portal left-hand side menu, click on the option.
-
Download, install, and configure the Portnox Active Directory Broker software.
Note: The Portnox Active Directory Broker is available for Windows only.
-
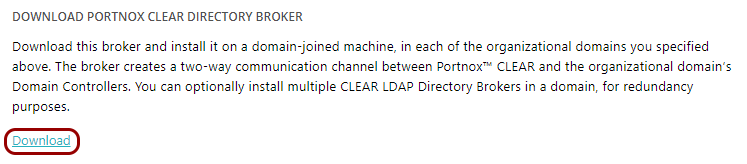
In the DIRECTORY INTEGRATION SERVICE section, scroll down to the DOWNLOAD
PORTNOX CLEAR DIRECTORY BROKER section, and click on the Download
link.
-
Run the broker installation file PortnoxADBroker.exe and click on the
Next button.

-
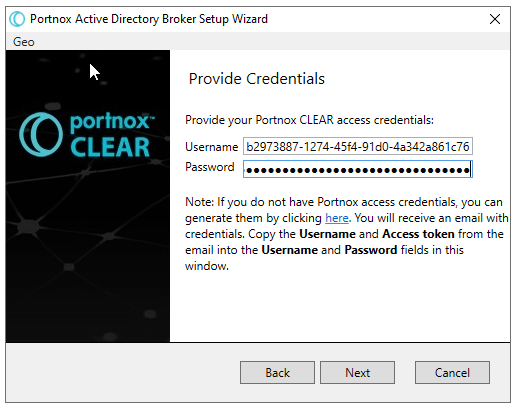
Paste the credentials from the email received earlier into the fields in the broker installation window and
click on the Next button.
-
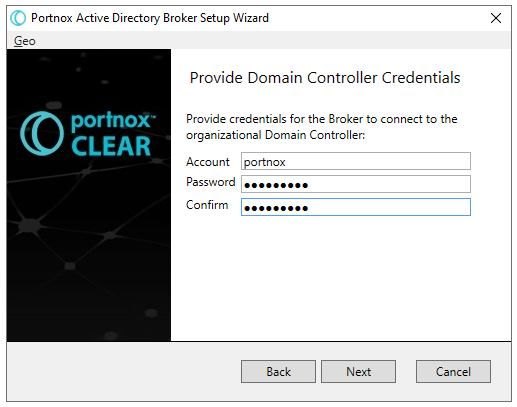
In the Provide Directory Controller Credentials step, input the credentials for a domain
controller user account and click on the Next button.
Note: These are credentials for a user account that exists in your domain controller, not in Portnox Cloud. For security, we recommend that you create a separate user in your domain controller, who only has read access and is only used by the broker.
- Optional:
Click on the Test button to test your configuration.
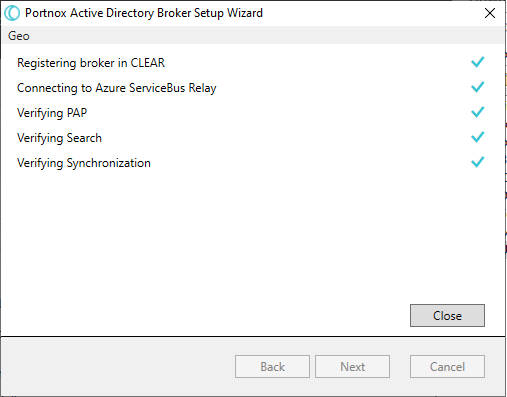 Warning: The testing process may create an extra entry in your list of AD brokers in Portnox Cloud. If so, you can simply delete the extra entry. You can recognize the entry because it has no IP address listed, its state is Not updated, and its version number is 1.1.1.
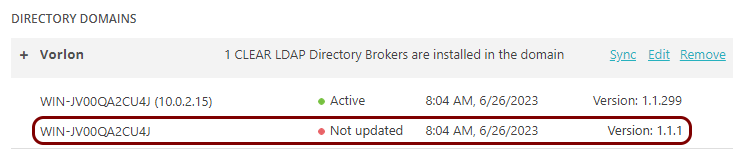
-
In the DIRECTORY INTEGRATION SERVICE section, scroll down to the DOWNLOAD
PORTNOX CLEAR DIRECTORY BROKER section, and click on the Download
link.