Configure user browsers to automatically select the ZTNA certificate
In this topic, you will learn how to configure user browsers on Windows and macOS devices using UEM solutions (Microsoft Intune and Jamf) so that users are not prompted to select a certificate when accessing resources protected by Portnox™ ZTNA.
When a user accesses a resource protected by Portnox ZTNA using a browser, a dialog appears prompting them to select a certificate. In some cases, the operating system may offer multiple certificates, which can make it unclear which one to choose. Even after selecting the correct certificate, the dialog may reappear the next time the browser is restarted.
In certain configurations, it is possible to set up user browsers to automatically select the correct certificate for ZTNA without displaying the selection dialog. This behavior has been tested and confirmed to work in the following combinations:
- Intune, Windows, and Chrome-based browsers
- Intune, macOS, and Chrome-based browsers
- Jamf, macOS, and Safari
- Jamf, macOS, and Chrome-based browsers
However, in the following cases, we were unable to identify a method for automatic certificate selection:
- Intune, macOS, and Safari
- Any UEM, iOS, any browser
Intune, Windows, and Chrome-based browsers
In this section, you will learn how to use Intune to configure Chrome-based browsers on Windows, such as Chrome or Edge, to automatically select the correct ZTNA certificate without prompting the user to make a selection.
- Optional:
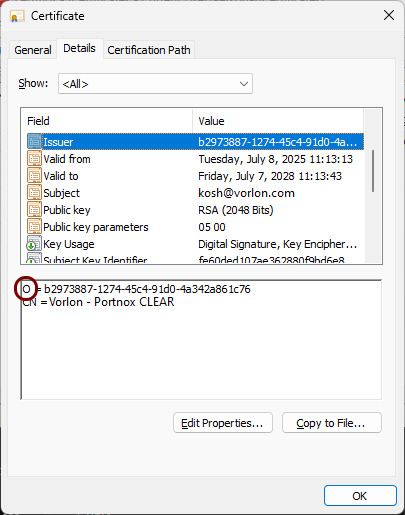
Open the Manage user certificates console on one of your users’ Windows devices. Locate a
Portnox certificate under , and check the Issuer field.
Ensure that the organization ID appears under the O (Organization) attribute. For some older organizations, it may be listed under the CN (Common Name) attribute instead. If this is the case, you will need to update the scripts in the next step by changing the $CertificateIssuerField = 'O' line to $CertificateIssuerField = 'CN'.
-
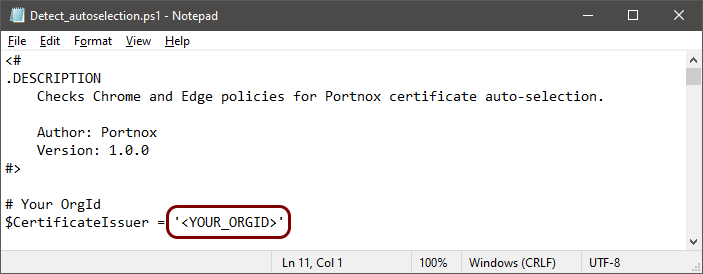
Download and prepare PowerShell scripts for automatic certificate selection:
Note:These scripts were prepared by the Portnox team and are publicly available on our GitHub page.
-
In both scripts, replace the <YOUR_ORGID> string with the organization ID that
you found in the first step.
-
In both scripts, replace the <YOUR_ORGID> string with the organization ID that
you found in the first step.
-
In your Intune tenant, go to:
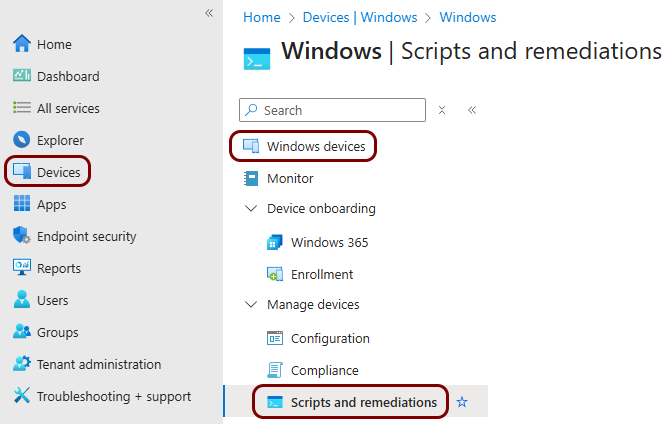
-
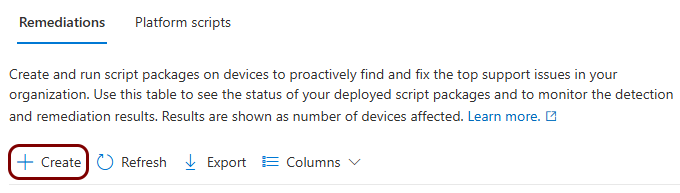
In the Remediations tab, click on the Create button.
-
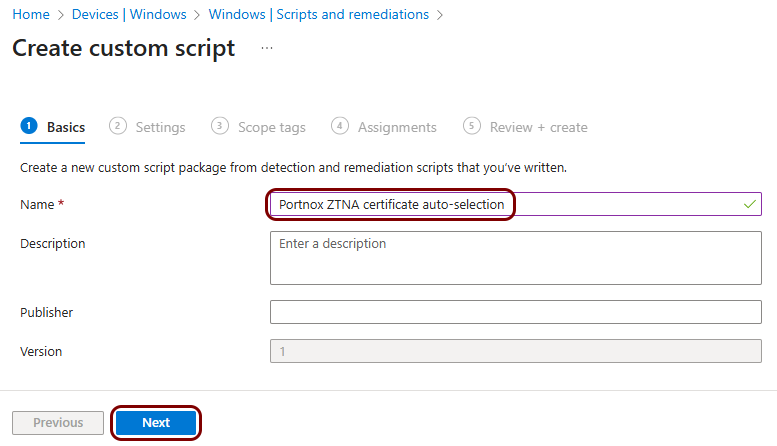
In the Basics step of the Create custom script creator, enter a
Name for this set of scripts, and then click on the Next
button.
-
In the Settings step:
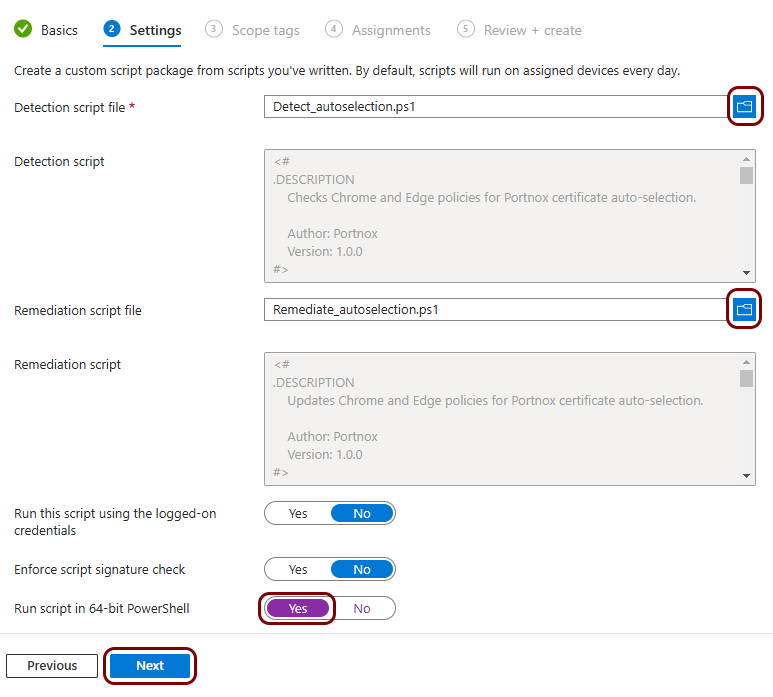
- In the Detection script file field, click on the 🗀 icon to open the Detect_autoselection.ps1 script that you modified and saved on your local disk.
- In the Remediation script file field, click on the 🗀 icon to open the Remediate_autoselection.ps1 script that you modified and saved on your local disk.
- Turn on the Run script in 64-bit PowerShell switch.
- Click on the Next button.
Intune, macOS, and Chrome-based browsers
In this section, you will learn how to use Intune to configure Chrome-based browsers on macOS, such as Chrome or Edge, to automatically select the correct ZTNA certificate without prompting the user to make a selection.
- Optional:
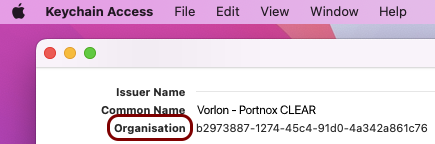
Open Keychain Access on one of your devices, look for a Portnox certificate, and check the
Issuer Name field.
Ensure that the organization ID appears under the Organisation attribute. For some older organizations, it may be listed under the Common Name attribute instead. If this is the case, you will need to update the configuration file in the next step by changing all occurrences of the "O" parameter to "CN".
-
In your Intune tenant, go to:
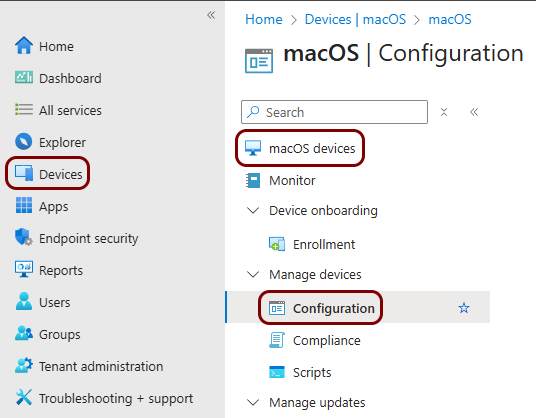
-
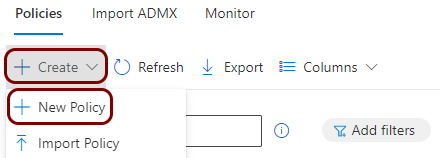
Click on the Create button and select the New Policy option.
-
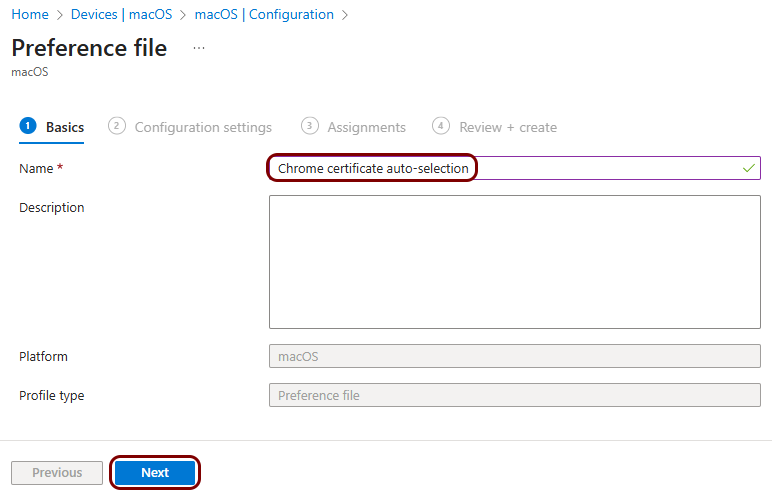
In the Create a profile pane:

- In the Platform field, select macOS.
- In the Profile type field, select Templates
- In the search bar, type pref.
- In the Template name field, click on the Preference file option.
- Click on the Create button.
-
In the Basics step of the Preference file creator, enter the
Name for this configuration profile, and then click on the Next
button.
-
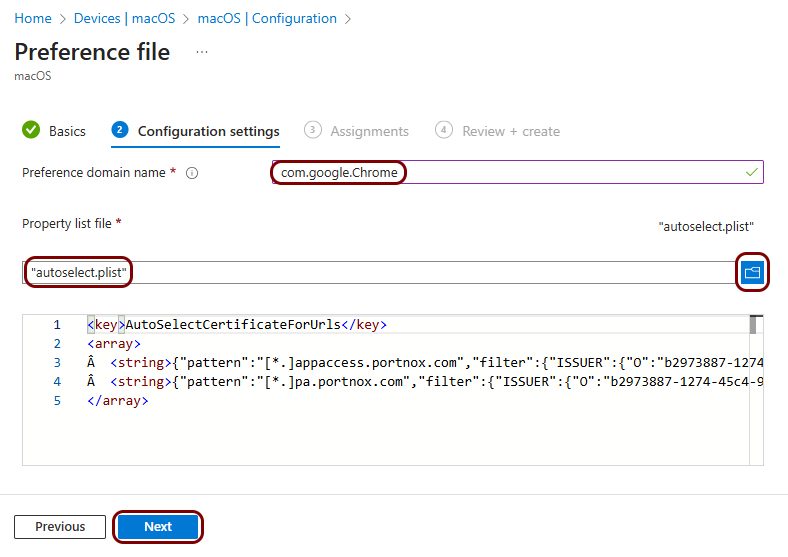
In the Settings step:
Jamf, macOS, and Safari
In this section, you will learn how to use Jamf to configure Safari on macOS to automatically select the correct ZTNA certificate without prompting the user to make a selection.
-
Add the preference items:

- Click on the Add button to add a row to the Preference Items table.
- In the URL / EMAIL ADDRESS column, enter: *.appaccess.portnox.com
- In the PREFERENCE ITEM TYPE field, select the Identity Preference option.
- Click on the Save button.
- Click on the Add button again to add another row.
- In the URL / EMAIL ADDRESS column, enter: *.pa.portnox.com
- In the PREFERENCE ITEM TYPE field, select the Identity Preference option.
- Click on the Save button.
- Optional: If your organization uses custom domains for certificates, add another row with *.your.domain as the URL / EMAIL ADDRESS, where your.domain is your domain name.
Jamf, macOS, and Chrome-based browsers
In this section, you will learn how to use Jamf to configure Chrome-based browsers on macOS, such as Chrome or Edge, to automatically select the correct ZTNA certificate without prompting the user to make a selection.
- Optional:
Open Keychain Access on one of your devices, look for a Portnox certificate, and check the
Issuer Name field.
Ensure that the organization ID appears under the Organisation attribute. For some older organizations, it may be listed under the Common Name attribute instead. If this is the case, you will need to update the configuration file in the next step by changing all occurrences of the "O" parameter to "CN".
-
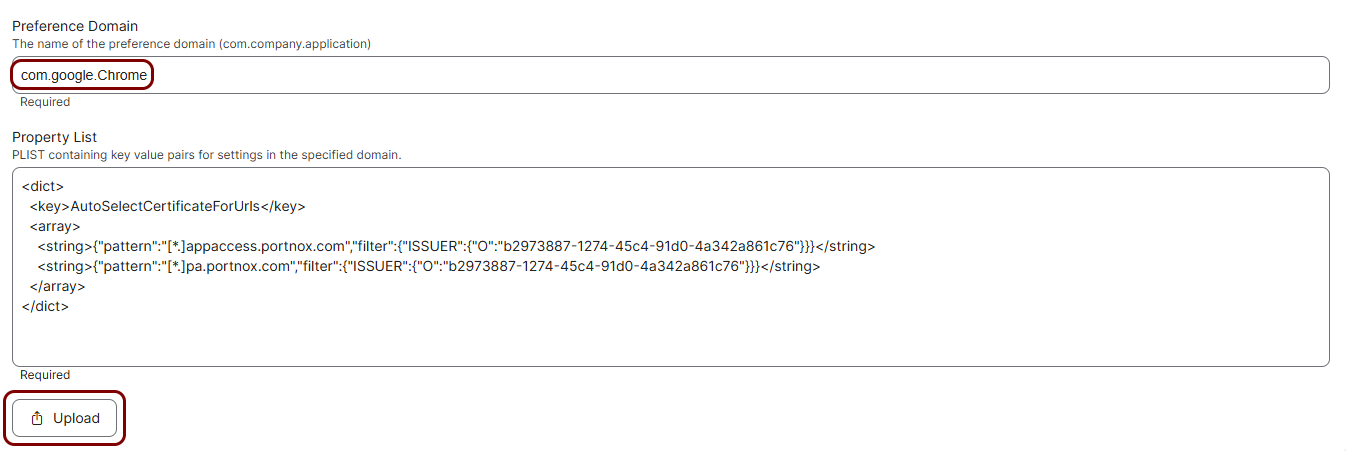
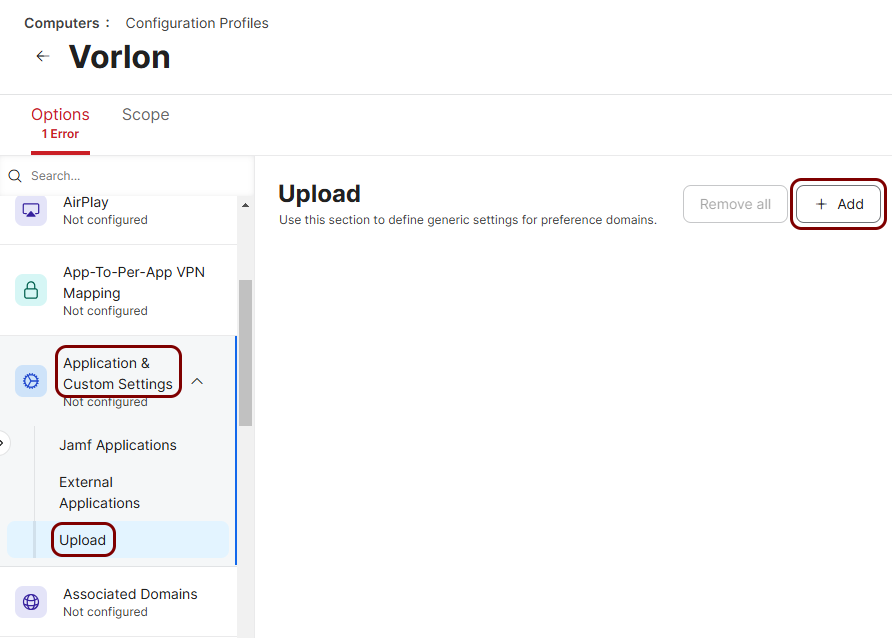
In the list of payloads, click on the Application & Custom Settings payload, click on
the Upload option, and then click on the Add button in the right hand
side pane.
-
In the Property List section, click on the Upload button and upload
the autoselect.plist configuration file that you prepared and saved earlier.