How to configure AgentP to enroll with a specific domain
In this task, you will learn how to configure AgentP to enroll using a specific domain when multiple domains exist in your authentication repositories.
If you have more than one domain configured in your authentication repositories, such as a mix of Entra ID and Active Directory, AgentP may enroll with the wrong domain. For example, it may enroll as VORLON\kosh instead of kosh@vorlon.com.
-
Manual solution: Add the registry key before installing and enrolling AgentP.
If you want to configure this manually on the machine, open the Windows Registry Editor and add the following key:
- Key: HKEY_LOCAL_MACHINE\SOFTWARE\WOW6432Node\Portnox AgentP
- Value type: String
- Value name: Domain
- Value data:
your-domain.com
Replace your-domain.com with your actual domain name.
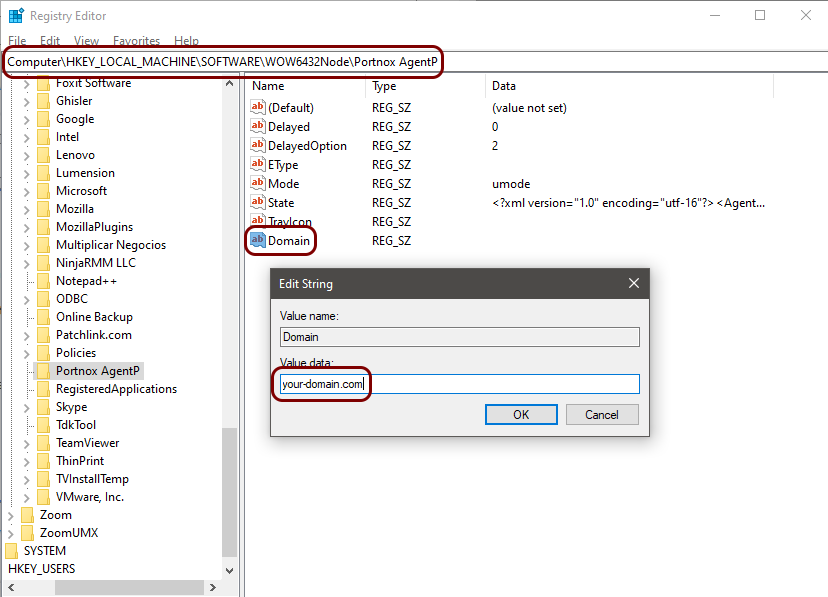 Note:If AgentP is already installed, uninstall it first, add the registry key, then install AgentP again.
 -
Automatic solution: Configure AgentP domain enrollment using Intune.
If you are using Intune to distribute and enroll AgentP and want to automate the above process, follow the instructions to distribute AgentP with Intune, and in addition to the AgentP app, also do the following:
-
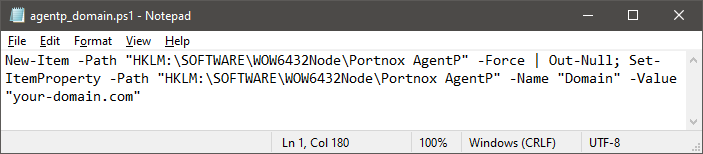
Open a text editor and enter the following content. Then, save this content as a .ps1
file, for example, agentp_domain.ps1.
New-Item -Path "HKLM:\SOFTWARE\WOW6432Node\Portnox AgentP" -Force |
                                Out-Null; Set-ItemProperty -Path "HKLM:\SOFTWARE\WOW6432Node\Portnox AgentP" -Name "Domauin" -Value
                                "your-domain.com"
Replace your-domain.com with your actual domain name.
-
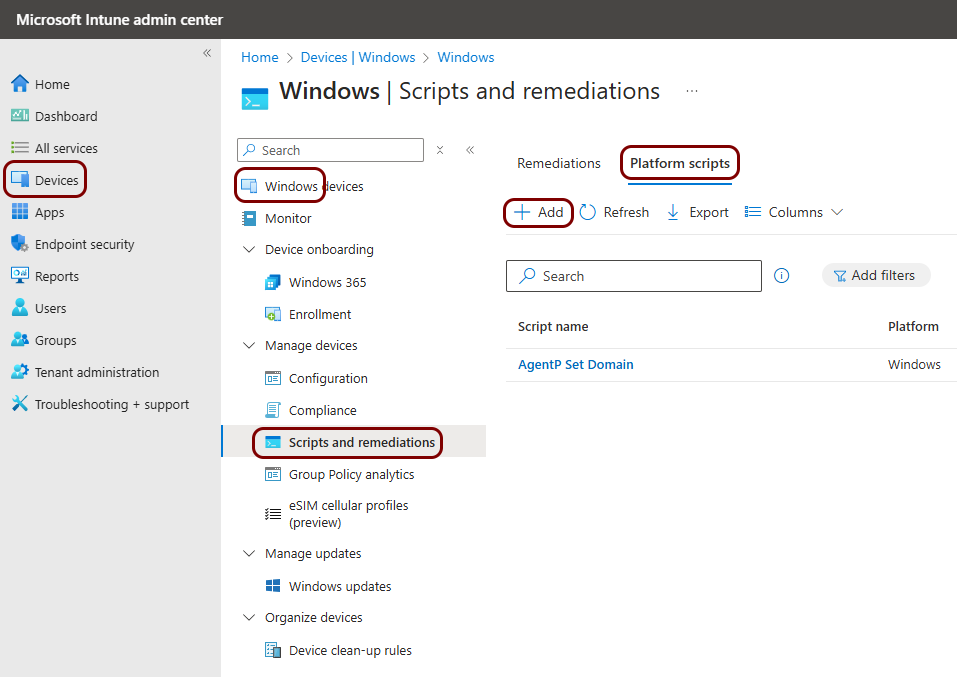
Open Intune, go to , go to the Platform scripts tab, and click on +Add
to add the script to Intune.
-
In the Add PowerShell script pane, follow the wizard to add the script. Select any name
you like, browse for the .ps1 file that you saved earlier, and then assign the script to devices as
needed.

-
Open a text editor and enter the following content. Then, save this content as a .ps1
file, for example, agentp_domain.ps1.