Ethernet 802.1X configuration – Aruba
In this topic, you will learn how to configure Aruba switches to work together with Portnox™ Cloud and 802.1X RADIUS authentication for wired Ethernet connections.
General configuration
This is a general configuration template for Aruba switches.
Important:
This guide gives general instructions for integrating Portnox Cloud with
specific third-party devices. We try to provide useful examples for common models, but settings can differ between
manufacturers, models, and environments. Because of this, we cannot guarantee these steps will work in every case.
For questions or problems with RADIUS setup – which is an industry standard and not specific to Portnox – or with
device-specific settings and troubleshooting, we recommend checking the device manufacturer’s documentation and contacting
their support team. Portnox Support can help when possible, but detailed setup of third-party devices is usually best
handled by the manufacturer. We also recommend updating your NAS device firmware to the latest version, as old
firmware can cause issues.
Important:
All values in this configuration are examples. Make sure to adjust the
configuration to your individual profile names, RADIUS server addresses, ports, and keys by replacing the values that are
presented as underlined italics.
Here is the entire example configuration for your convenience:
radius-server host 20.119.69.248 auth-port 10322 acct-port 10323 key rTHO9HEo9BcqfC9Yg0hHFelK6o0tH8N1
radius-server host 52.232.122.157 auth-port 10476 acct-port 10477 key fnSrSEHhXFZ5Rqpz756NJhkeVqIHTlPt
aaa server-group radius "PORTNOX" host 20.119.69.248
aaa server-group radius "PORTNOX" host 52.232.122.157
aaa authentication port-access eap-radius server-group "PORTNOX" authorized
aaa authentication mac-based chap-radius server-group "PORTNOX" authorized
aaa port-access gvrp-vlans
aaa port-access authenticator active
aaa authentication port-access dot1x authenticator
  radius server-group PORTNOX
    enable
aaa authentication port-access mac-auth
  radius server-group PORTNOX
    enable
interface 1/1/27
  aaa authentication port-access auth-precedence dot1x mac-auth
  aaa authentication port-access client-limit multi-domain 2
  aaa authentication port-access auth-mode multi-domain
  aaa authentication port-access dot1x authenticator
      enable
  aaa authentication port-access mac-auth
      enable
aaa port-access 1/1/27 critical-auth-data-vlan 10Aruba 6200
This is a general configuration template for Aruba 6200 switches.
Warning:
Please treat this configuration as an example template only. To get the most accurate and current
configuration guidance on switch 802.1X configuration, we strongly recommend that you refer to the documentation
provided on these topics for your particular device model and OS version.
Important:
All values in this configuration are examples. Make sure to adjust the
configuration to your individual profile names, RADIUS server addresses, ports, and keys by replacing the values that are
presented as underlined italics.
Here is the entire example configuration for your convenience:
radius-server host 20.119.69.248 port 10322 acct-port 10323 key plaintext rTHO9HEo9BcqfC9Yg0hHFelK6o0tH8N1
radius-server host 52.232.122.157 port 10476 acct-port 10477 key plaintext fnSrSEHhXFZ5Rqpz756NJhkeVqIHTlPt
aaa group server radius PORTNOX
    server 20.119.69.248 port 10322
    server 52.232.122.157 port 10476
aaa accounting port-access start-stop group PORTNOX
aaa authentication port-access dot1x authenticator
    radius server-group PORTNOX
    enable
aaa authentication port-access mac-auth
    radius server-group PORTNOX
    enable
interface 1/1/27
  no shutdown
  no routing
  vlan trunk native 151
  vlan trunk allowed 151,651
  port-access onboarding-method concurrent enable
  aaa authentication port-access client-limit multi-domain 3
  aaa authentication port-access client-limit 4
  aaa authentication port-access auth-mode multi-domain
  aaa authentication port-access dot1x authenticator
      enable
  aaa authentication port-access mac-auth
enableAruba 1930
This is a general configuration template for Aruba 1930 Instant On switches.
-
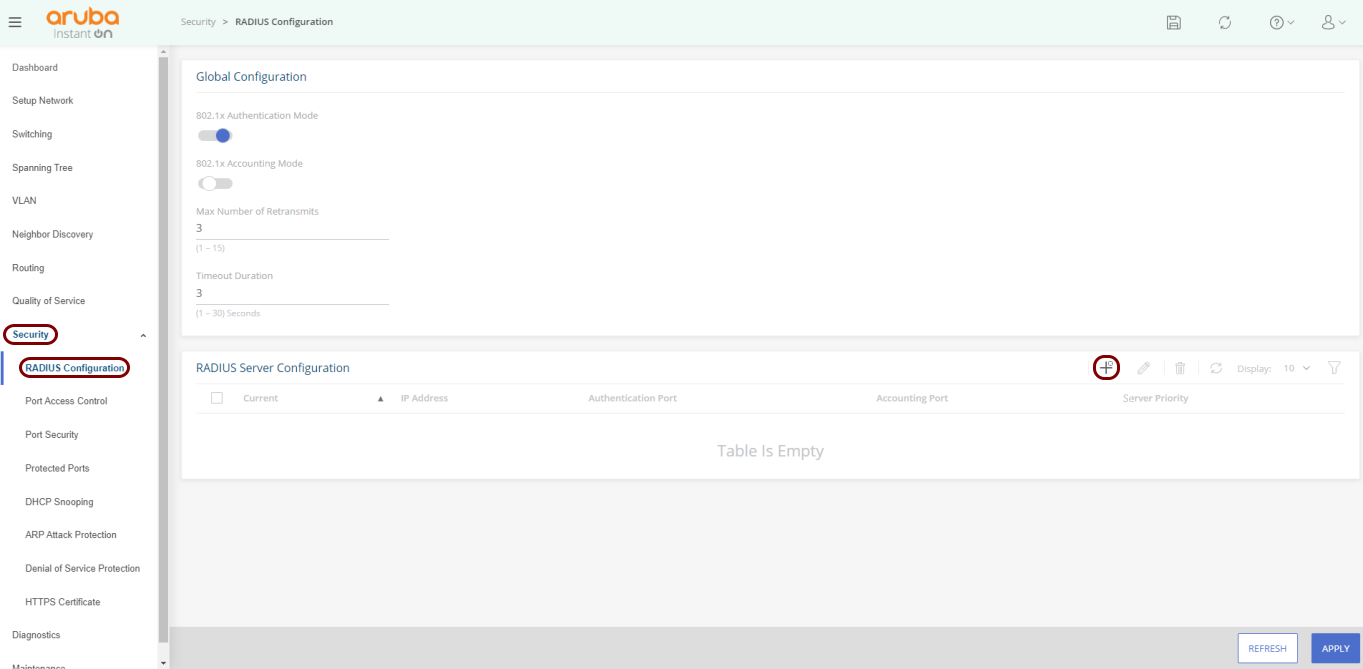
In the left-hand side menu, select the option. Then, in the RADIUS Server Configuration pane, click on the
+ button to add a RADIUS server.
-
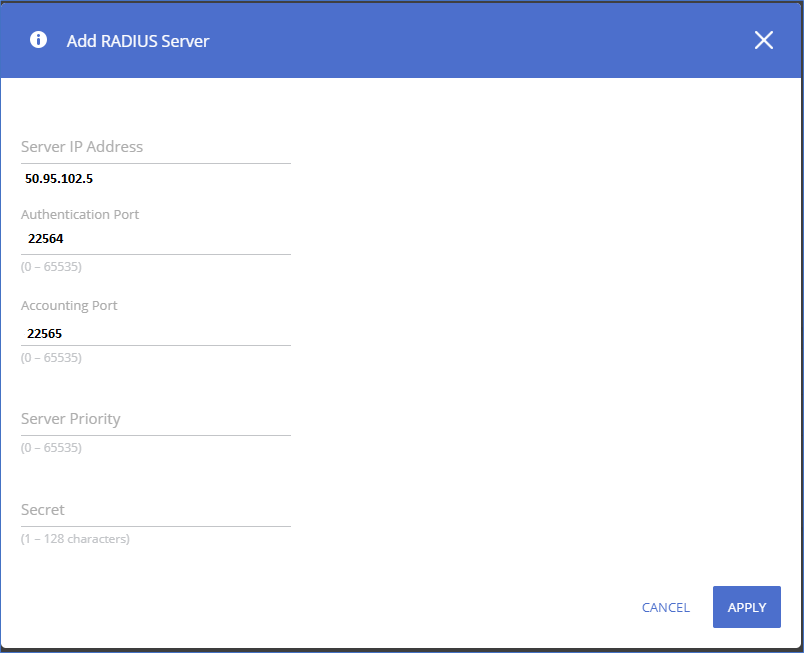
In the Add RADIUS Server pane, enter your RADIUS server information from Portnox Cloud:
Server IP Address, Authentication Port, Accounting
Port, and Secret. Then, click on the Apply
button.
Important:The IP address, port number, and key below are examples. Replace them with your individual IP address, port number, and key from your Portnox Cloud configuration.
-
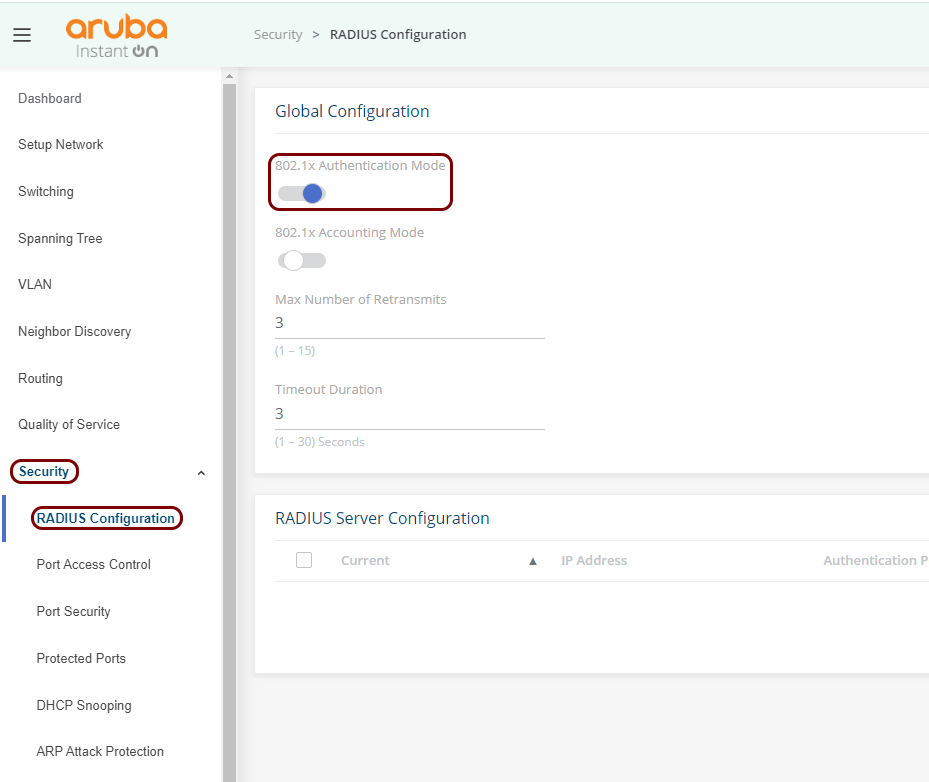
In the left-hand side menu, select the option. Then, in the Global Configuration pane, activate the 802.1x
Authentication Mode switch.
-
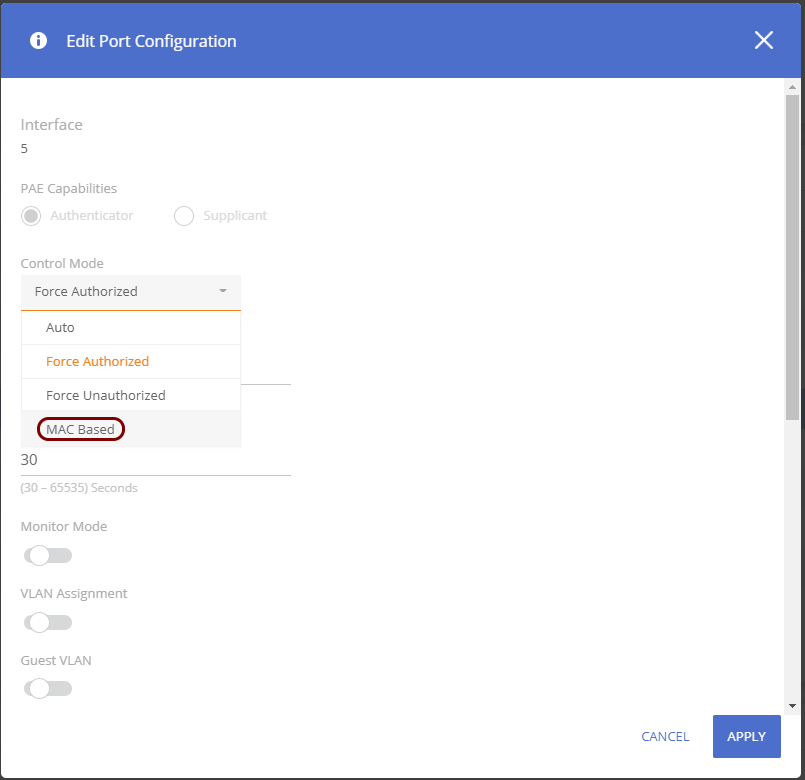
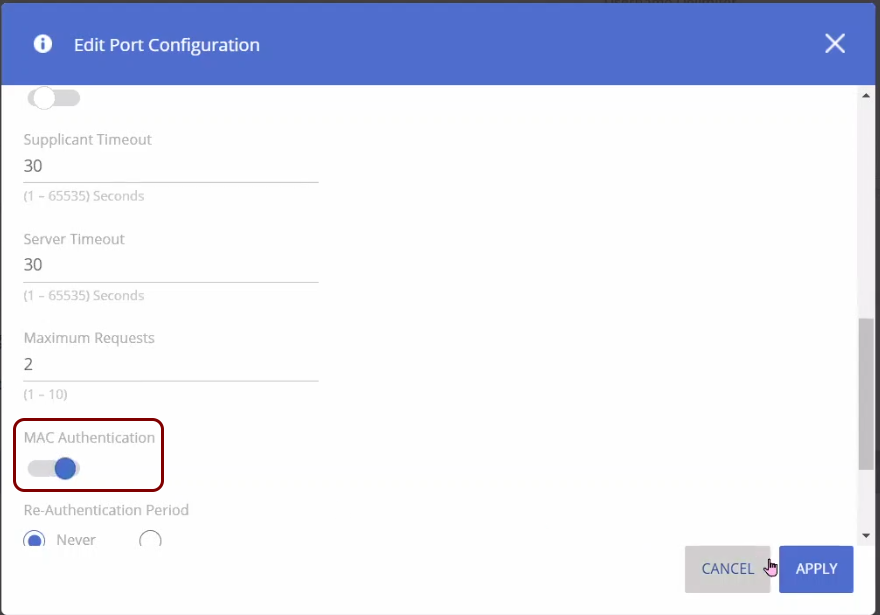
To enable MAC Address Bypass on specific ports, in the left-hand side menu, select the option, and select relevant 802.1X ports.
For each of these ports, in the Edit Port Configuration window:
-
In the Control Mode field, select the MAC Based option.
-
Activate the MAC Authentication switch.
-
In the Control Mode field, select the MAC Based option.
RadSec on Aruba 6300M
This is an example RadSec configuration, tested on an Aruba 6300M switch.
Here is the entire example configuration for your convenience:
! Upload certificates
copy sftp://admin@10.10.10.5/rootCertificate.crt flash:
copy sftp://admin@10.10.10.5/clientCertificate.crt flash:
copy sftp://admin@10.10.10.5/privateKey.pem flash:
! Install a trust anchor
crypto pki trustpoint RadSec-CA
import certificate flash:rootCertificate.crt
! Install switch client cert and key
crypto pki certificate RadSec-Client-Cert
import certificate flash:clientCertificate.crt
import private-key flash:privateKey.pem
! Tell RadSec to use this certificate
crypto pki application radsec-client
use-certificate RadSec-Client-Cert
! Configure the RadSec RADIUS server
radius-server host clear-rad.portnox.com tls auth-type pap timeout 10 port 10476 tracking enable tracking-mode any vrf default
radius-server host clear-rad.portnox.com tls port-access keep-alive
! Global timeout (optional)
radius-server tls timeout 15
! AAA config
aaa authentication port-access dot1x authenticator
aaa authentication port-access dot1x authenticator radius server-group radius