Ethernet 802.1X configuration – Ubiquiti UniFi
In this topic, you will learn how to configure Ubiquiti UniFi switch ports to work together with Portnox™ Cloud and 802.1X RADIUS authentication for wired Ethernet connections.
Create a RADIUS profile
In this section, you will create a RADIUS profile for Portnox™ Cloud RADIUS servers. You can then apply this profile to Wi-Fi configurations and Ethernet port profiles.
-
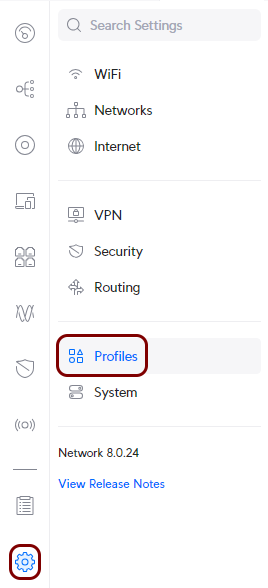
In the Ubiquiti web interface, go to the Network tab, and in the left-hand side menu, click
on the following menu options: .
-
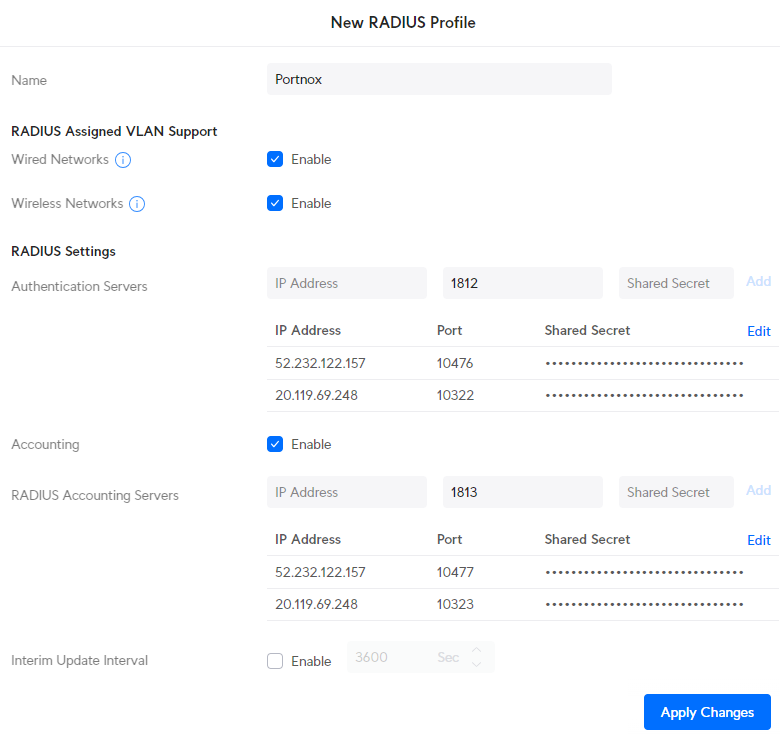
In the right-hand side pane, scroll down to the RADIUS Servers section, and then click on
the Create New link to create a new RADIUS profile.

-
In the right-hand side pane, configure the new RADIUS profile:
Create or edit a network configuration
In this section, you will create or edit a configuration for a network with 802.1X authentication and assign the RADIUS profile to this network.
-
In the Ubiquiti web interface, go to the Network tab, and in the left-hand side menu, click
on the following menu options: .

-
In the right-hand side pane, in the Global Switch Settings section, activate the
802.1X Control checkbox and select the External RADIUS Server
option. Then, in the RADIUS Profile field, select the RADIUS profile that you just created.
Optionally, activate the Fallback VLAN checkbox and in the field below, select a network (if
you have one) for devices that fail RADIUS authentication. Then, click on the Apply Changes
button.
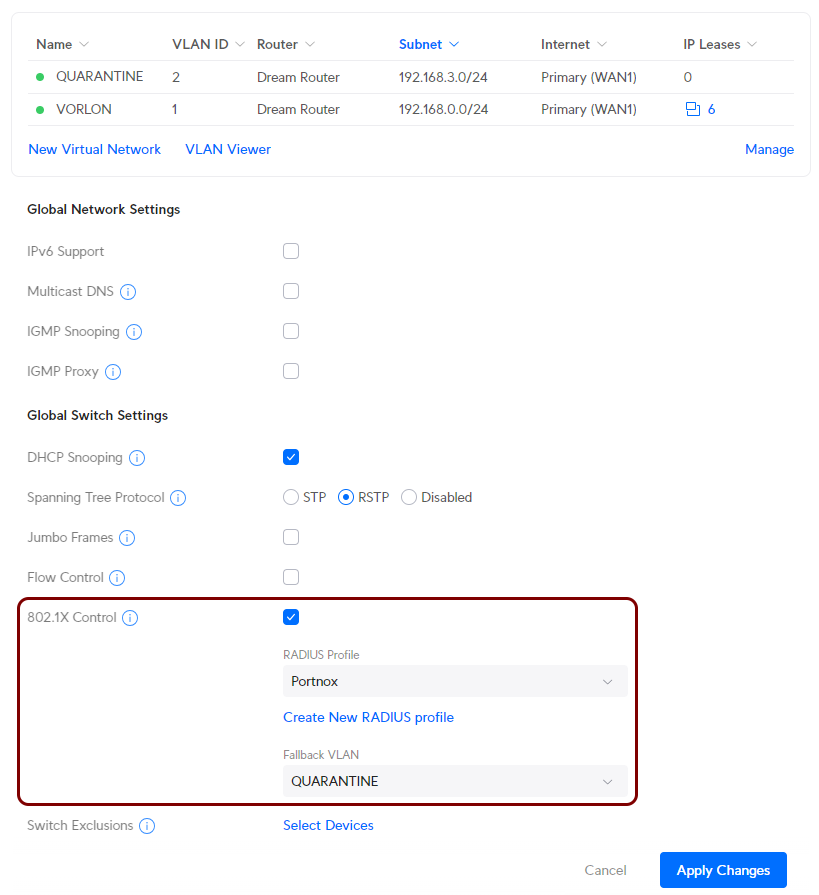
In this example, we used a QUARANTINE network for devices that fail RADIUS authentication.
Create a port profile for 802.1X authentication
In this section, you will create a profile for Ethernet ports with 802.1X authentication. You can later assign this port profile to specific switch ports.
-
In the Ubiquiti web interface, go to the Network tab, and in the left-hand side menu, click
on the following menu options: .
-
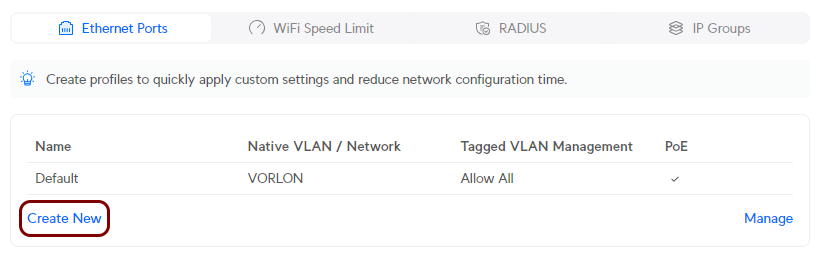
In the right-hand side pane, scroll down to the Port Profiles section, and then click on the
Create New link to create a new port profile.
-
In the Create New pane, enter the name for this port profile, then click on the
Manual option in the Advanced section to activate manual
configuration, and select the Auto option in the 802.1X Control field.
Then, configure other fields as required for your environment, and click on the Apply Changes
button.
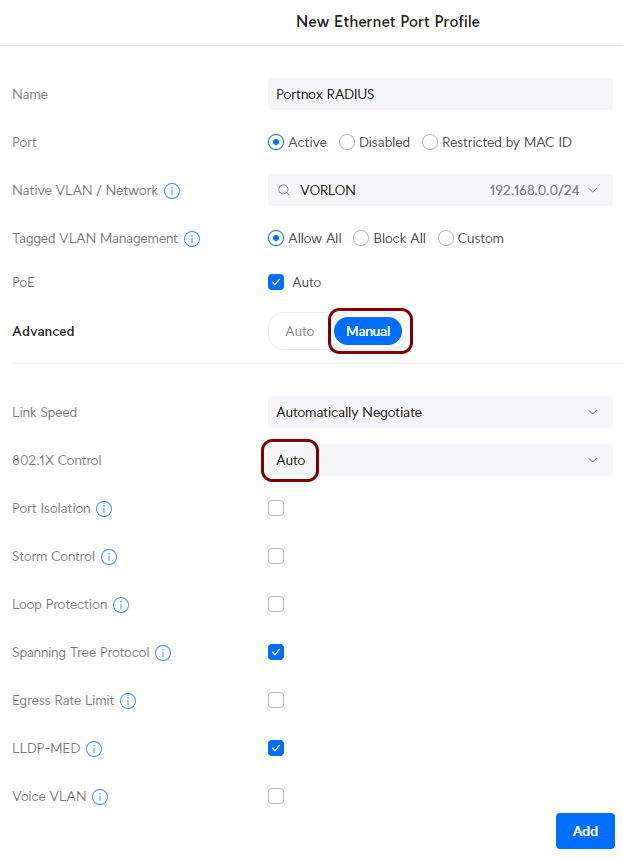 Note:Options available in the 802.1X Control field are:
-
Force Authorized: Every client is treated as authenticated. Effectively, this means no authentication at all.
-
Force Unauthorized: Every client is treated as unauthenticated. Effectively, this means that no client can connect to this port.
-
MAC-Based: The switch fakes an 802.1X challenge for clients, allowing clients without 802.1X support to connect using MAC address bypass authentication.
-
Auto: The port requires clients to authenticate using the 802.1X protocol.
-
Create a port profile for MAC address bypass (MAB) authentication
In this section, you will create a profile for Ethernet ports with MAC address bypass (MAB) authentication. You can later assign this port profile to specific switch ports.
-
In the Ubiquiti web interface, go to the Network tab, and in the left-hand side menu, click
on the following menu options: .
-
In the right-hand side pane, scroll down to the Port Profiles section, and then click on the
Create New link to create a new port profile.
-
In the Create New pane, enter the name for this port profile, then click on the
Manual option in the Advanced section to activate manual
configuration, and select the MAC-Based option in the 802.1X Control
field. Then, configure other fields as required for your environment, and click on the Apply
Changes button.

Assign a port profile to a switch port
In this section, you will assign a port profile to a specific port on your switch.
-
In the Ubiquiti web interface, go to the Network tab, and in the left-hand side menu, click
on the Ports menu option and in the top-left corner of the right-hand side pane, select the
switch that you want to configure. Then, click on the port that you want to configure.
Note:In the following screenshot, we already have port 1 connected to the router and port 5 configured for default access with no authorization.
 Important:In this example, we used the USW-Lite-8-PoE switch. However, not all Ubiquiti devices support port-based 802.1X authentication. For example, the Dream Router does not support wired 802.1X authentication for its Ethernet ports. Make sure that your selected Ubiquiti device supports port-based 802.1X authentication. If unsure, consult Ubiquiti documentation or contact your Ubiquiti sales or support representative.
 -
In the Port Settings pane, activate the Port Profile switch, and in the
field below, select the port profile that you created earlier.
 Note:In this example, we selected the profile for 802.1X authentication but you can also assign the MAC address bypass profile to a port (if you created one).