Create an account
In this topic, you will learn how to create an account in Portnox™ Cloud. You can create accounts manually for IoT devices, external contractors, and more.
To understand what are accounts in Portnox Cloud and how they work together with groups and policies, read the following topic: What are accounts in Portnox Cloud?.
-
In the Cloud portal top menu, click on the Devices option.

-
In the top bar, click on the Add button and select the type of account to add:
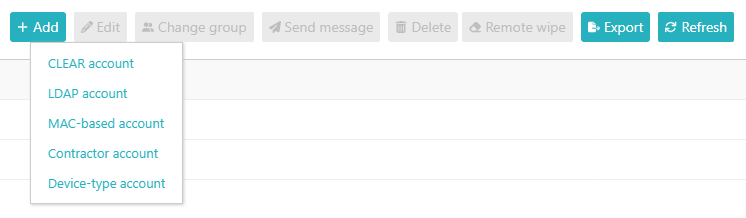
- Portnox Account: Use this type of account if you want to use Portnox Cloud as your user repository.
- LDAP Account: Use this type of account if you want to add individual users from an authentication repository that you configured earlier.
- MAC-based Account: Use this type of account if you want to give network access to devices that do not work with the 802.1X protocol.
- Contractor Account: Use this type of account if you want to give network access to users that do not belong to the organization.
- Device-type Account: Use this type of account if you want to give network access to a large number of similar devices that do not work with the 802.1X protocol.
Create a Portnox account
Use this type of account if you want to use Portnox Cloud as your user repository.
![]()
-
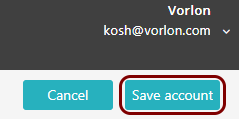
To save your account settings, click on the Save button in the top right corner.
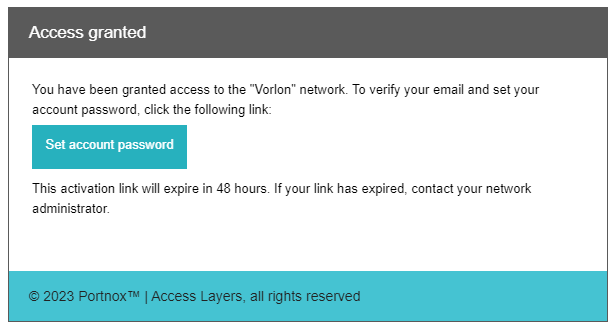
Portnox Cloud will send a request to create a password to the email address.
-
Click on the Set account password button to set the password.
 Note:You can set password complexity for Portnox and contractor accounts by accessing:
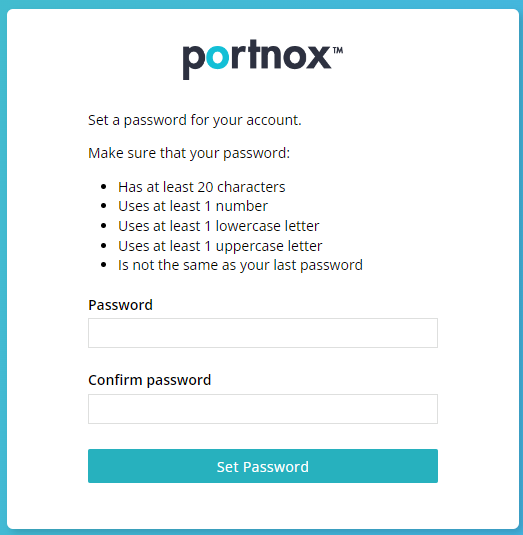
Result: The user will be able to access Portnox Cloud using their email address and the password that they set.
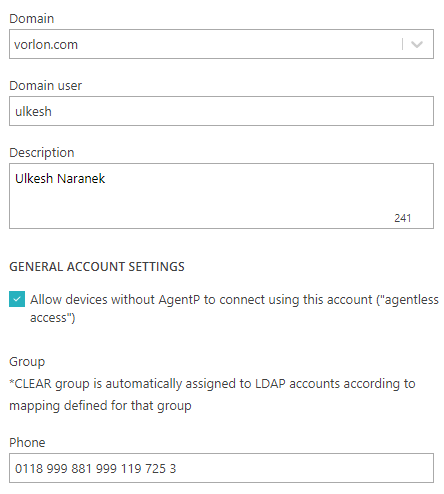
Create a LDAP account
Use this type of account if you want to add individual users from an authentication repository that you configured earlier.
-
To save your account settings, click on the Save button in the top right corner.

Result: The user will be able to access Portnox Cloud using their credentials from the external authentication repository.
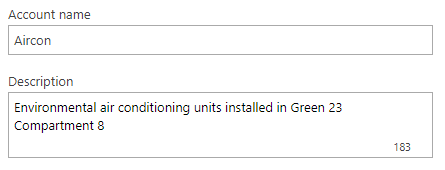
Create a MAC-based account
Use this type of account if you want to give network access to devices that do not work with the 802.1X protocol.
A MAC-based account can represent a single device or a group of devices. For better security and control, we recommend creating accounts for individual devices or small groups of closely related devices.
-
In the Account name field, enter the name that identifies the device or group of devices
represented by this account.
-
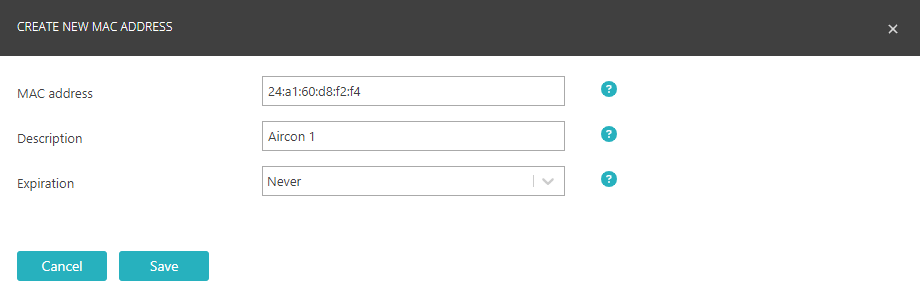
In the Allowed MAC Addresses section, click on the Add new MAC
address link to add a new device MAC address to this account.
Your browser will open the CREATE NEW MAC ADDRESS window.
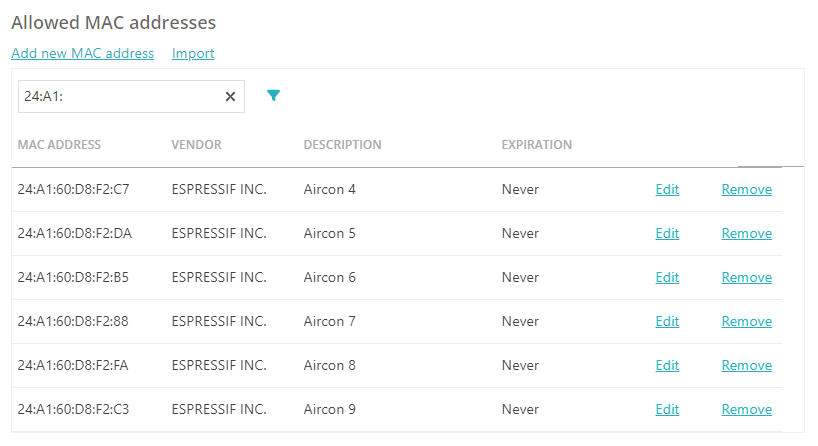
The added MAC addresses will be shown as a list with options to Edit or Remove each as well as a search box. Start typing into the search box to show only MAC addresses that match the typed characters.
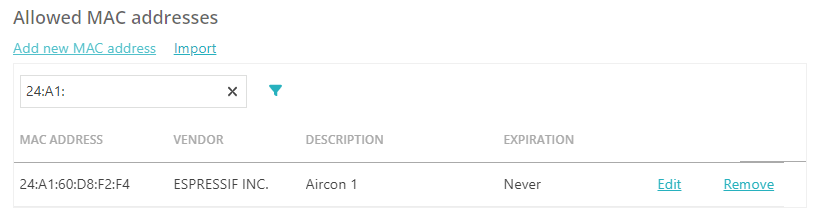
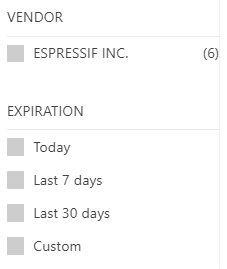
You can also click on the filter icon ( ▼ ) to show only MAC addresses from selected vendors or MAC addresses with specific expiration.
-
Alternatively, In the Allowed MAC Vendors section, click on the
Import link to import lists of MAC addresses from files.
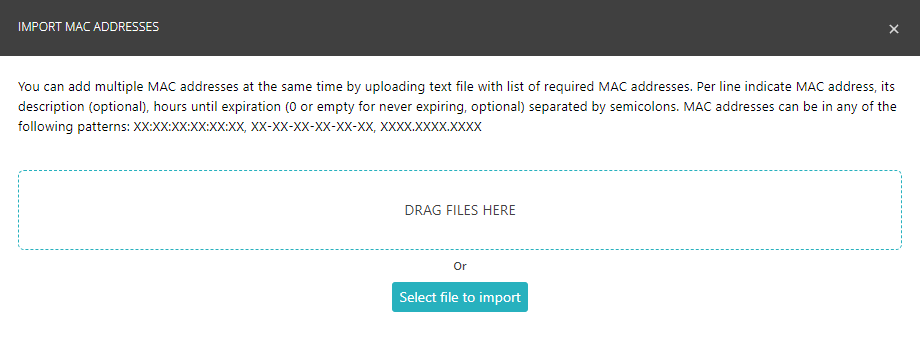
Your browser will open the IMPORT MAC ADDRESSES window.
-
Drag the file containing MAC addresses from a file explorer window to the IMPORT MAC ADDRESSES window and drop it in the indicated area.
-
Alternatively, click on the Select file to import button to select the file from your local file system.
The format of the text file is as follows, for each line, separating each field with semicolons:
-
MAC address
-
Description (optional)
-
Hours until expiration (optional, enter 0 or leave empty for no expiration date)
MAC addresses can be in any of the following formats:
-
XX:XX:XX:XX:XX:XX
-
XX-XX-XX-XX-XX-XX
-
XXXX.XXXX.XXXX
The imported MAC addresses will be shown as a list.
-
To show only selected MAC addresses, start typing in the search field ( 🔍 ).
-
To sort the list, click on the column heading.
-
To edit a MAC address, click on the edit icon ( ✎ ) in the row with the MAC address.
-
To delete MAC addresses, activate checkboxes in the leftmost column, and then click on the Delete button.
-
Click on the filter icon ( ▼ ) to show only MAC addresses from selected vendors, MAC addresses with specific expiration, or MAC addresses last seen.
-
-
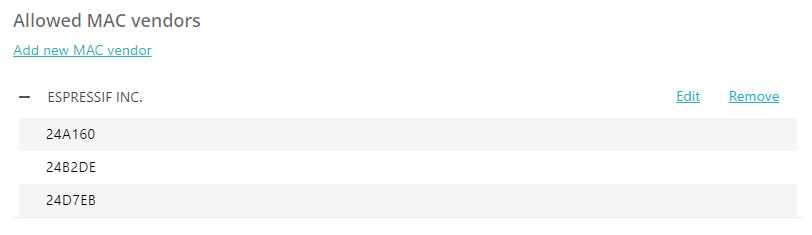
In the Allowed MAC Vendors section, click on the Add new MAC vendor
link to add a group of devices from a specific vendor.
Note:You can add both individual MAC addresses and vendor MAC address ranges to the same account at the same time. If a device matches both an individual MAC address in one account and a vendor MAC address range in another account, Portnox Cloud uses the account with the individual MAC address.
Your browser will open the IMPORT MAC ADDRESSES window.
-
In the MAC vendor field, start typing the name of the vendor you want to add.
Portnox Cloud will find it in its list of known vendors and display related MAC address ranges below.
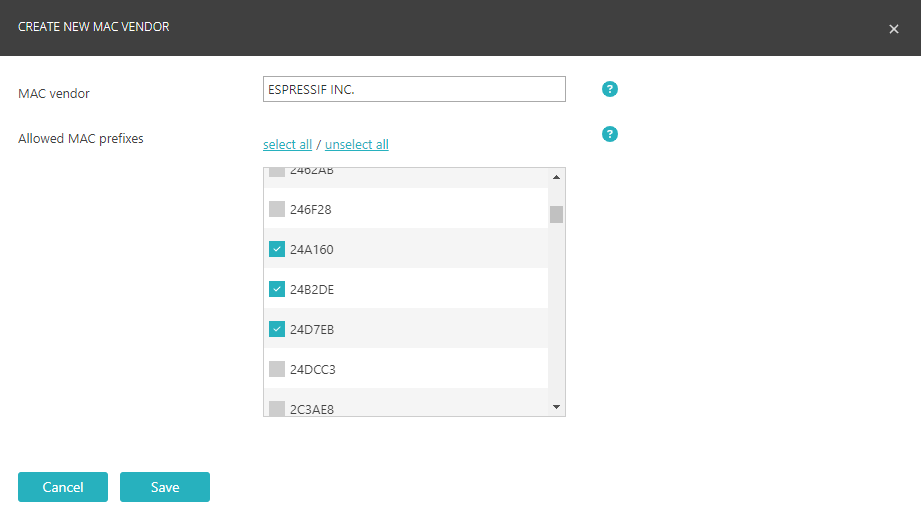
The added MAC vendors and MAC ranges will be shown as a list with options to Edit or Remove each.
-
In the MAC vendor field, start typing the name of the vendor you want to add.
-
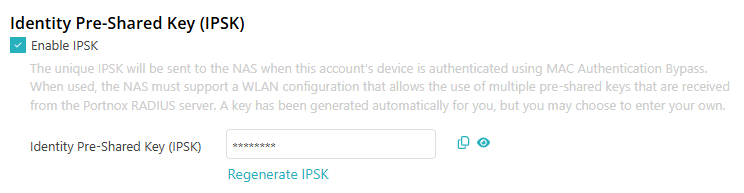
In the Identity Pre-Shared Key (IPSK) section, activate the Enable
IPSK checkbox if your access points support IPSK and if you want to secure your Wi-Fi connections
using identity pre-shared keys for this account.
Portnox Cloud will generate an identity PSK for this account. You can view it using the 👁 icon or copy it using the ⧉ icon. You can click on the Regenerate IPSK link to regenerate it.
-
To save your account settings, click on the Save button in the top right corner.
- You add a MAC address to a MAB account – the day when you do this counts as day 1.
- The day counter increases every day at midnight tenant-time,
- Any time the device with the MAC address authenticates, the counter resets to 1.
- The moment that the counter reaches the configured limit, the MAC address is removed from the MAB account.
- The device with the MAC address is no longer in the MAB account so it cannot authenticate.
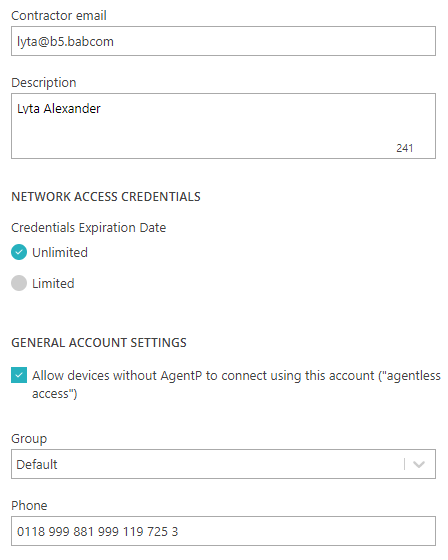
Create a contractor account
Use this type of account if you want to give network access to users that do not belong to the organization.
-
To save your account settings, click on the Save button in the top right corner.
Portnox Cloud will send a request to create a password to the contractor’s email address.
-
The contractor must then click on the Set account password button to set their
password.
Note:You can set password complexity for Portnox and contractor accounts by accessing:
Result: The contractor will be able to access Portnox Cloud using their email address and the password that they set.
Create a device-type account
Use this type of account if you want to give network access to a large number of similar devices that do not work with the 802.1X protocol.
Device-type accounts let you define rules based on device properties such as type, vendor, model, and operating system. Similar to MAC-based addresses, they are meant for devices that cannot authenticate using the 802.1X protocol, such as IoT devices.
-
In the Account name field, enter the name that identifies the device or group of devices
represented by this account.
-
Under the Allow devices where heading, build the logical tree of conditions to allow device
access:

Click on the AND/OR button in a logical branch to change the logical condition.
Click on the + button in a logical branch and select Add rule to add another condition to the current logical branch.
Click on the + button in a logical branch and select Add And/Or block to add a sub-branch to the current logical branch.
In the first column of a logical rule, select Type, Vendor, Model, or OsName to set the parameter to be tested in the condition.
In the second column of a logical rule, select Contains, Equals, or NotEquals to set the comparison operator.
In the third column of a logical rule, select from the list of available values for the comparison.
-
Click on the Refresh matches button to show the PREVIEW MATCHING
DEVICE(S) section.
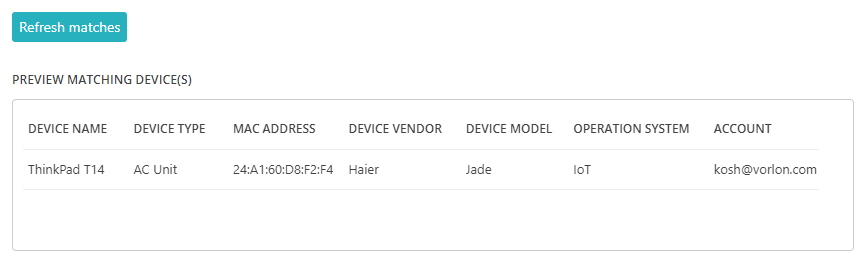 Note:The Refresh matches button becomes active only after you select the group in the next step.
 -
In the Identity Pre-Shared Key (IPSK) section, activate the Enable
IPSK checkbox if your access points support IPSK and if you want to secure your Wi-Fi connections
using identity pre-shared keys for this account.
Portnox Cloud will generate an identity PSK for this account. You can view it using the 👁 icon or copy it using the ⧉ icon. You can click on the Regenerate IPSK link to regenerate it.
-
To save your account settings, click on the Save button in the top right corner.