Create a group
In this topic, you will learn how to create a group in Portnox™ Cloud and configure network access layers.
To understand what are groups in Portnox Cloud and how they work together with accounts and policies, read the following topic: What are groups in Portnox Cloud?.
-
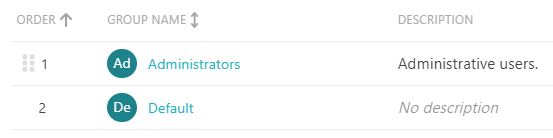
In the Cloud portal top menu, click on the Groups option.

-
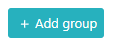
Click on the Add group button to begin the process of creating a new group.
-
In the Group Name and Group Description fields, enter a name for the new
group and its optional description.
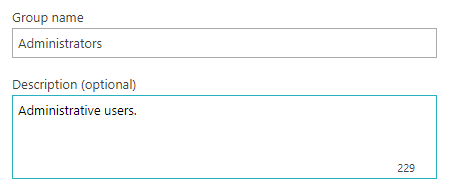
You can use any name and description.
-
Set up Wi-Fi network access in the 802.1X Wireless network access section.
Note:In this step, you are configuring your existing Wi-Fi network to be recognized by Portnox Cloud.
-
Click on the Add Wi-Fi network link.

-
In the Network name field, enter the SSID of the network.
 Warning:We recommend using SSIDs without any special characters. Special characters in SSIDs may cause issues when using AgentP. The SSID names are case-sensitive and must match exactly in the group settings and on the NAS device.
 -
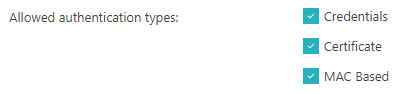
In the Allowed authentication types section, select the relevant checkboxes.
-
Credentials: Users connecting to this network will be able to authenticate using a login and password.
-
Certificate: Users connecting to this network will be able to authenticate their devices using a user/device certificate.
-
MAC Based: You will be able to connect IoT devices to this network just on the basis of their MAC addresses.
-
-
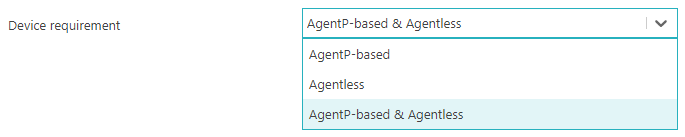
In the Device requirement field, select the relevant option.
-
AgentP-based: To connect to this network, you will need to install and configure Portnox AgentP on the device.
-
Agentless: To connect to this network, you do not need AgentP.
-
AgentP-based & Agentless: When you connect to this network, you will be able to optionally use Portnox AgentP, for example, for risk assessment, but you will not need AgentP to connect.
-
-
To save the Wi-Fi network settings for the newly added network, click on the Save button
in the ADD WI-FI NETWORK section.

Result: Your Wi-Fi network is added to Portnox Cloud but you cannot access the Wi-Fi network yet using Cloud authentication. You also need to reconfigure all the Wi-Fi access points for this network. See this topic for details: Configure wireless devices to work with Portnox Cloud.
You can repeat the above process to add more Wi-Fi networks.
-
Click on the Add Wi-Fi network link.
-
Set up wired network access in the 802.1X Wired network access section.
Note:In this step, you are configuring your existing wired network to be recognized by Portnox Cloud.
-
In the Allowed authentication types section, select the relevant checkboxes.
-
Credentials: Users connecting to this network will be able to authenticate using a login and password.
-
Certificate: Users connecting to this network will be able to authenticate their devices using a user/device certificate.
-
MAC Based: You will be able to connect IoT devices to this network just on the basis of their MAC addresses.
-
-
In the Device requirement field, select the relevant option.
-
AgentP-based: To connect to this network, you will need to install and configure Portnox AgentP on the device.
-
Agentless: To connect to this network, you do not need AgentP.
-
AgentP-based & Agentless: When you connect to this network, you will be able to optionally use Portnox AgentP, for example, for risk assessment, but you will not need AgentP to connect.
-
Result: Your wired network is added to Portnox Cloud but Cloud authentication will not be enforced yet when you connect using an Ethernet cable to your switch. You also need to reconfigure all the switches in this network. See this topic for details: Configure Ethernet devices to work with Portnox Cloud.
-
In the Allowed authentication types section, select the relevant checkboxes.
-
Set up VPN access in the VPN Access section.
Note:In this step, you are configuring your existing VPN to be recognized by Portnox Cloud.
-
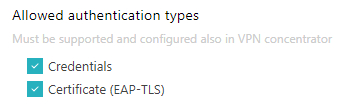
In the Allowed authentication types section, select the relevant checkboxes.
-
Credentials: Users connecting to this VPN will be able to authenticate using a login and password.
-
Certificate (EAP-TLS): Users connecting to this VPN will be able to authenticate their devices using a user/device certificate.
-
-
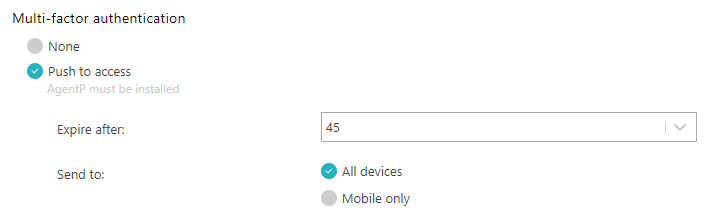
In the Multi-factor authentication section, select the relevant option.
-
None: No multi-factor authentication will be enforced when connecting to this VPN.
-
Push to access: Users connecting to this VPN will need to use a button on their device to confirm their authentication. This option requires that users have devices with Portnox AgentP installed because the button is displayed using this software.
If you select the Push to access option, select the Expire after value (time after which the MFA push button expires) and in the Send to section, select whether the button will be available in AgentP on All devices or on Mobile only.
-
Result:Your VPN is added to Portnox Cloud but Cloud authentication will not be enforced yet when you connect to the VPN. You also need to reconfigure the VPN software/hardware. See this topic for details: Configure VPNs and other devices to work with Portnox Cloud.
-
In the Allowed authentication types section, select the relevant checkboxes.
-
To save your group settings, click on the Save button on the bottom right of the page.
Result: You completed the setup of network access layers for a new group. Accounts assigned to this group will be able to connect to your networks using these access layers, if you also configure the NAS devices (see: Configure wireless devices to work with Portnox Cloud, Configure Ethernet devices to work with Portnox Cloud, Configure VPNs and other devices to work with Portnox Cloud).
To edit your group and/or configure advanced settings, see the following topic: Edit and configure a group.
To add members to your group, see the following topic: Manage members of a group.