Manage members of a group
In this topic, you will learn how to automatically manage members of a group in Portnox™ Cloud based on groups and/or organizational units in Portnox Cloud and/or authentication repositories.
Before you begin, you must create a group in Portnox Cloud. To create a group and configure its basic settings, read the following topic: Create a group.
To understand what are groups in Portnox Cloud and how they work together with accounts and policies, read the following topic: What are groups in Portnox Cloud?.
There are two ways in which you can manage the relationships between accounts and groups in Portnox Cloud:
-
By assigning individual accounts to groups.
-
By mapping directory groups and/or organizational units to groups in Portnox Cloud.
-
In the Cloud portal top menu, click on the Groups option.

-
Click on the ⋮ icon on the right-hand side of the selected group name and
select the Group members option from the pop-up menu to begin the process of managing members of
the selected group.

-
In the right-hand side pane, click on the heading that represents the repository you want to work with.
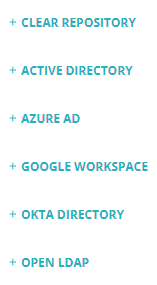
- PORTNOX REPOSITORY: Assign accounts created in Portnox Cloud to this group. If you select this option, you will be working with individual accounts, not groups. For example, contractor accounts that represent external contractors or MAC-based accounts that represent IoT devices.
- ACTIVE DIRECTORY: Map Active Directory groups, accounts, and/or organizational units to this group. To do this, first, you need to integrate Portnox Cloud with a local AD instance (see: Integrate with Active Directory).
- ENTRA ID: Map Entra ID groups, accounts, and/or organizational units to this group. To do this, first, you need to integrate Portnox Cloud with Entra ID (see: Integrate with Microsoft Entra ID).
- GOOGLE WORKSPACE: Map Google Workspace groups and/or accounts to this group. To do this, first, you need to integrate Portnox Cloud with Google Workspace (see: Integrate with Google Workspace).
- OKTA DIRECTORY: Map Okta Workforce Identity groups and/or accounts to this group. To do this, first, you need to integrate Portnox Cloud with Okta Workforce Identity (see: Integrate with Okta Wokforce Identity).
- OPEN LDAP: Map OpenLDAP groups, accounts, and/or organizational units to this group. To do this, first, you need to integrate Portnox Cloud with a local OpenLDAP instance (see: Integrate with OpenLDAP).
Note:The list will contain only those external repositories that you integrated Portnox Cloud with. -
Select the groups to map between the directory and this group.

The left pane shows directory groups available for mapping to this group. The right pane shows directory groups that are mapped to this group.
- Optional:
Click on the Switch view option and select View OUs or View
accounts to map organizational units or individual accounts between the directory and this group.

In addition to mapping by groups, you can also map individual user accounts or organizational units (OUs) to groups in Portnox Cloud.
Organizational units are available only if you selected the Use OU-based mapping option when configuring your integration, and only for Entra ID, local Active Directory, and OpenLDAP. Sub OUs are mapped along with primary OUs but in a flat structure, so we recommend using the search box to find a specific OU.
If you did not turn on mapping based on organizational units or your directory does not allow mapping based on organizational units, instead of the Switch view option, you will see a View accounts option to switch directly to the accounts view.
Important:If you select entries both from groups and organizational units, and some users are in both the selected groups and organizational units, when onboarding the user, Portnox Cloud will prioritize the authorization details of the group over those of the organizational unit. If you select individual accounts in addition to groups and/or organizational units, Cloud will prioritize individual accounts.
Result: You mapped selected directory groups and/or organizational units to this group. The first time that each user from a mapped group or organizational unit authenticates with Portnox Cloud, Cloud will make an account representing this user.