Configure RADIUS forwarding rules
In this topic, you will learn how to configure forwarding rules for Cloud RADIUS servers.
Before you begin, you must have an active Cloud RADIUS server in Portnox Cloud. To create a Cloud RADIUS server, read the following topic: Create Cloud RADIUS servers.
RADIUS forwarding rules let you use the Cloud RADIUS servers as your main servers, but forward selected RADIUS requests to another server. This may be useful, for example, if you want selected networks or selected domains to be handled by an independent local RADIUS server or another Cloud RADIUS server. One of the main applications of this functionality is eduroam
-
In the Cloud portal top menu, click on the Settings option.

-
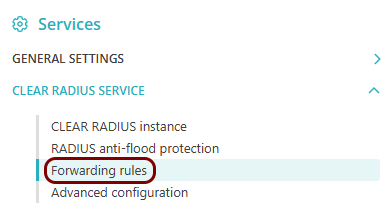
In the Cloud portal left-hand side menu, click on the option.
-
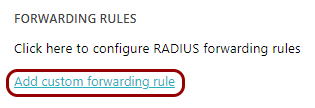
Click on the Add custom forwarding rule to add a forwarding rule.
Each forwarding rule has two conditions (Domain name and Network name) and an action (RADIUS Server Provider). Conditions are evaluated as a logical OR – if just one of them is true, the server takes the action. The action can be either to process the request using the cloud RADIUS server that received the request originally, or to forward the request to another external RADIUS server.
Cloud RADIUS servers process the rules each time that they receive a RADIUS request from a NAS. If the request matches the first rule, Portnox Cloud follows the action that is set for that rule. If not, the process continues with the next rule. If no rule matches, the request is processed by the Cloud RADIUS server that received the request.
-
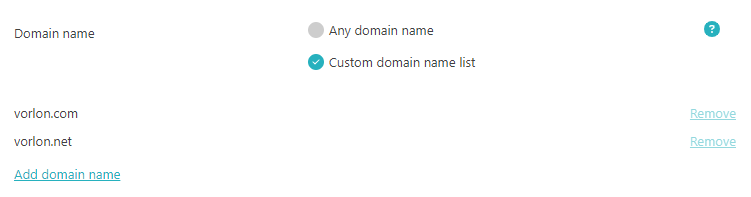
Select the condition in the Domain name field:
-
If you want this rule to apply to all domain names, select Any domain name.
-
If you want this rule to apply to specific domains only, select Custom domain name list.
-
Click on the Add domain name link below. In the field that appears, enter a domain name. Click on the Add button below the field.
-
If you want this rule to apply to more domains, repeat this process by clicking on Add domain name again. If you made a mistake, click on the Remove link to the right of the domain name to remove the domain name.
-
Note:The forwarding rules search for domain names in RADIUS User-Name attributes of the requests sent by the NAS to the Cloud RADIUS server. -
-
Select the condition in the Network name field:
-
If you want this rule to apply to all network names, select Any network name.
-
If you want this rule to apply to specific networks names only, select Custom network name list.
Click on the Add network name link below. In the field that appears, enter a network name. Click on the Add button below the field.
If you want this rule to apply to more networks, repeat this process by clicking on Add network name again. If you made a mistake, click on the Remove link to the right of the network name to remove the network name.

Note:The forwarding rules search for network names in the Called-Station-Id attributes of the request sent by the NAS to the Cloud RADIUS server. Network names can be, for example, SSIDs. -
-
Select the action in the RADIUS Server Provider field:
-
If you want this rule to keep the request for processing in the Cloud RADIUS server that originally received the request, select This Portnox Cloud tenant will service these requests.
-
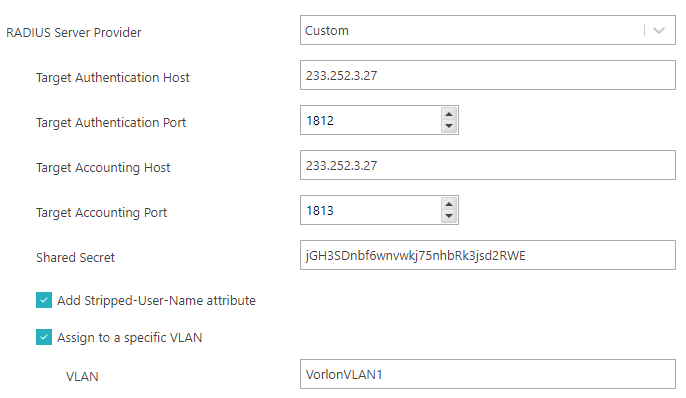
If you want this rule to forward the request to another RADIUS server, select Forward RADIUS authentication requests to another Portnox Cloud tenant or to an external RADIUS server.
Click on the Add another RADIUS server button to add a server definition.
Enter relevant parameters for the RADIUS server to forward the requests to: Target Host, Target Authentication Port, Target Accounting Port, and the Shared Secret.
Note:Each rule can define a different external RADIUS server, but all these servers must be available on a public interface. You cannot forward the request to one of the two Cloud RADIUS servers or you risk creating an endless loop if the same server originally receives the request.Add more servers if needed (up to three).
Note:You can have up to three defined target servers. Authentication requests are forwarded to the first server in priority order. If there is no response for 30 seconds from a server, that server is marked as dead, and then the next server is used for subsequent authentication attempts. If all servers are marked as dead, then the last server will be used. A server is marked live again after 2 minutes automatically. There are no retries unless configured on the NAS device.
-
-
Click on the Save button to save your changes or click on the
Cancel button to abandon all changes.

After you click on one of the buttons, Portnox Cloud will exit the edit mode.
-
To add more rules, repeat the above process by clicking on the Add custom forwarding rule
link.
