Run the local RADIUS server in Oracle VirtualBox
In this topic, you will learn how to install and configure the Portnox™ Cloud local RADIUS proxy in the Oracle VirtualBox hypervisor.
To configure the local RADIUS proxy in the Oracle VirtualBox hypervisor, you must first:
- Download the local RADIUS server virtual machine file for Hyper-V (VHD format)
- Configure the settings for the local RADIUS server and download the configuration for the virtual machine file.
To do these steps, go to the following topic: Set up a local RADIUS server using a virtual machine.
Warning:
The performance of a local RADIUS server depends on how many RADIUS authentication and
accounting packets it processes, which cannot be predicted in advance. At a minimum, a local RADIUS server needs 1 CPU and 4
GB of RAM. This is enough for most customers, but actual results may vary. Customers should monitor the server’s performance and add more resources if needed to
avoid overloading it. For very large setups, it’s recommended to use up to 8 CPUs with a combined PassMark score above
14,000, 32 GB of RAM, and SSD storage. This setup is similar to a higher-end laptop.
-
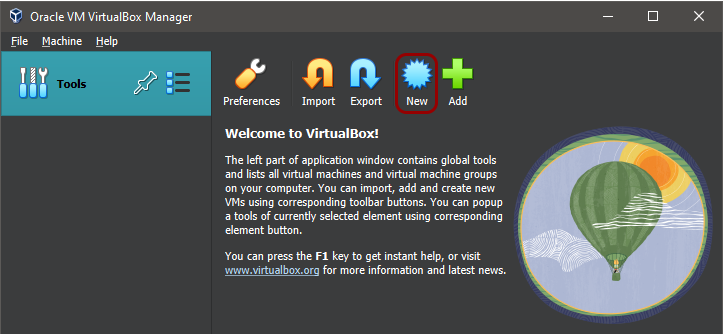
In the Oracle VM VirtualBox Manager window, click on the Tools icon on the
left-hand side and then click on the New icon on the right-hand side.
 The Create Virtual Machine window opens.
 -
Create the virtual machine using the Create Virtual Machine window:
-
On the bottom of the Create Virtual Machine window, click on the Expert
Mode button to show more options in the window.

-
In the Type field, select Linux and in the
Version field, scroll all the way down and select Other Linux
(64-bit).

-
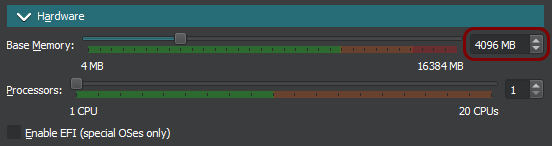
In the text field next to the Base Memory slider, enter 4096
MB.
-
Select the Use an Existing Virtual Hard Disk File option and then click on the file icon
to the right of the Use an Existing Virtual Hard Disk File option.

-
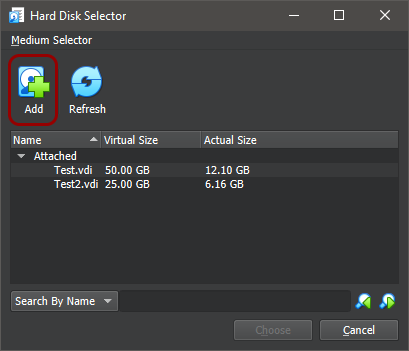
In the Hard Disk Selector window, click on the Add icon.
-
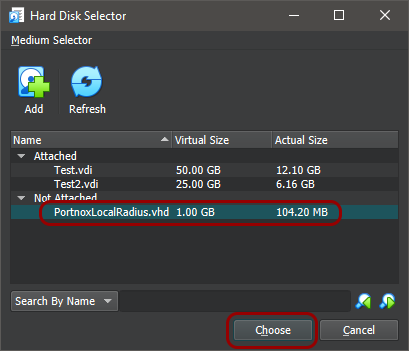
Click on the PortnoxLocalRadius entry in the Hard Disk Selector,
and click on the Choose button.
-
Make sure that the PortnoxLocalRadius.vhd disk is selected in the Create
Virtual Machine window, and click on the Finish button.

-
On the bottom of the Create Virtual Machine window, click on the Expert
Mode button to show more options in the window.
-
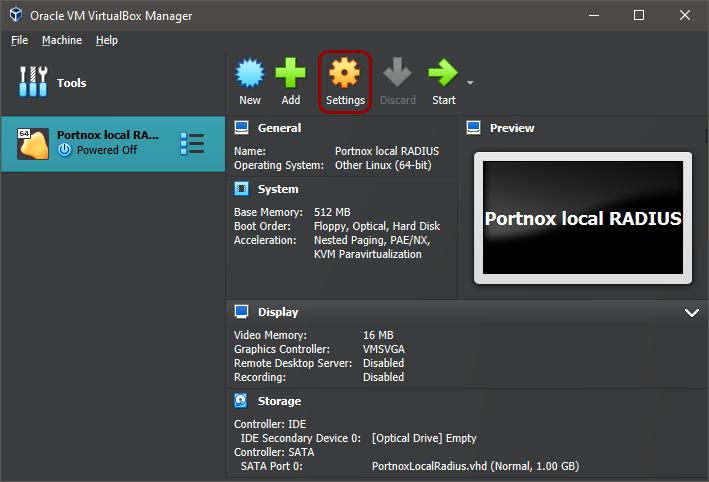
In the Oracle VM VirtualBox Manager window, click on the Portnox local
RADIUS icon on the left-hand side, and then click on the Settings icon on the
right-hand side.
-
In the Settings window, click on the Storage icon on the left-hand side,
then click on the Empty CD icon under Controller: IDE, then click on the
CD icon to the right of the Optical Drive field on the right-hand
side, and select the Choose a disk file option from the pop-up menu.

-
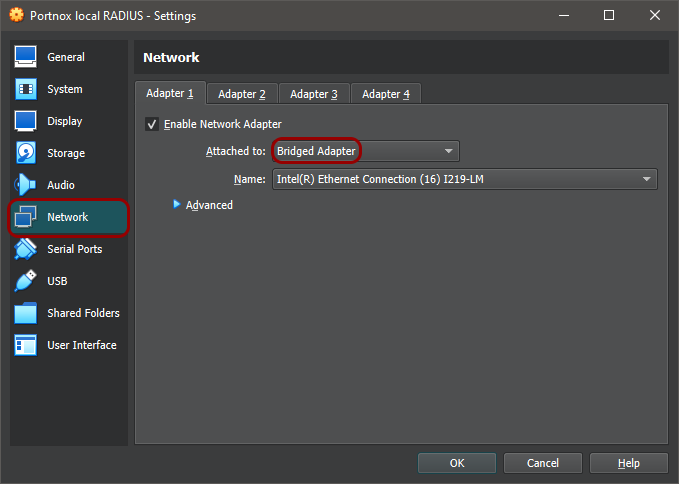
In the Settings window, click on the Network icon on the left-hand side. On
the right-hand side, make sure that the Enable Network Adapter checkbox is active. Then, in the
Attached to field, select the Bridged Adapter option, and in the
Name field, select your host machine’s Ethernet adapter that is connected to the primary
network.
-
In the Oracle VM VirtualBox Manager window, click on the Portnox local
RADIUS icon on the left-hand side, and then click on the Start icon on the
right-hand side.
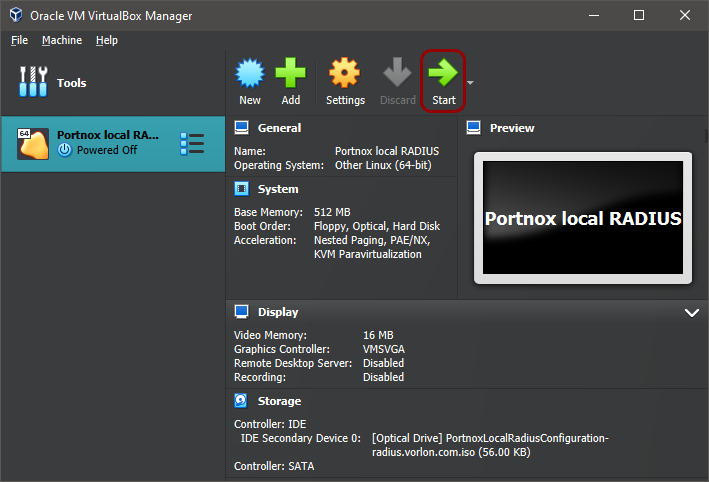
Result: Your local RADIUS server is active.

You can check its status in Portnox Cloud, in the section.

Note:
If you have connectivity issues with your local RADIUS server, check the following topic: How to set up the firewall for the local RADIUS instance to connect to Portnox Cloud.