Run the local RADIUS server in VMware vSphere (ESXi)
In this topic, you will learn how to install and configure the Portnox™ Cloud local RADIUS server in the VMware vSphere ESXi hypervisor.
To configure the local RADIUS server in the vSphere ESXi hypervisor, you must first:
- Download the local RADIUS server virtual machine file for VMware (OVA format).
- Configure the settings for the local RADIUS server and download the configuration for the virtual machine file (ISO format).
To do these steps, go to the following topic: Set up a local RADIUS server using a virtual machine.
Warning:
The performance of a local RADIUS server depends on how many RADIUS authentication and
accounting packets it processes, which cannot be predicted in advance. At a minimum, a local RADIUS server needs 1 CPU and 4
GB of RAM. This is enough for most customers, but actual results may vary. Customers should monitor the server’s performance and add more resources if needed to
avoid overloading it. For very large setups, it’s recommended to use up to 8 CPUs with a combined PassMark score above
14,000, 32 GB of RAM, and SSD storage. This setup is similar to a higher-end laptop.
Note:
In this guide, we assume that you already have a configured vSphere ESXi
environment.
-
In the left-hand side menu, click on the Virtual Machines icon.

-
In the top menu, click on the Create / Register VM button.

-
In the New virtual machine creator window:
-
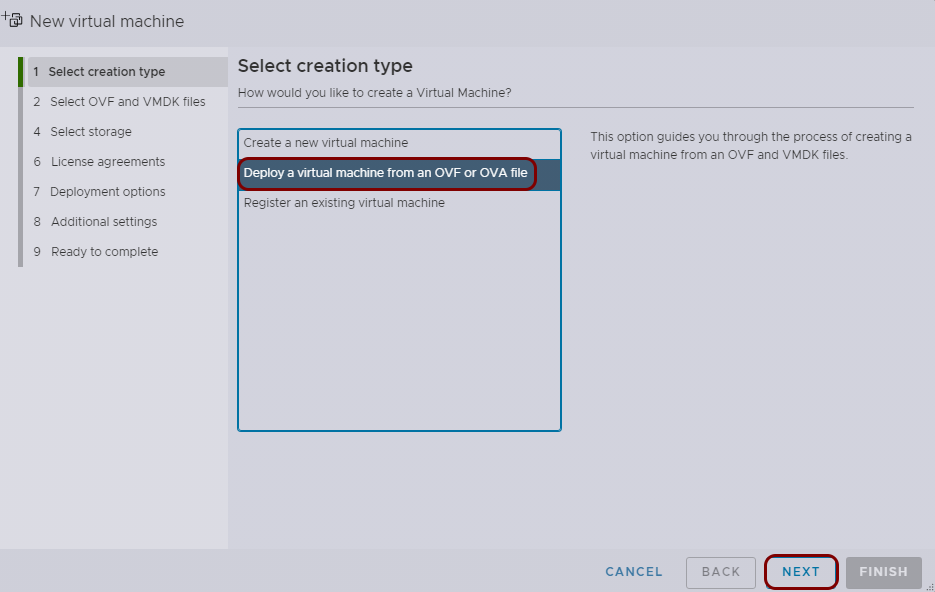
In the Select creation type step, select the Deploy a virtual machine from an
OVF or OVA file option, and then click on the Next button.
-
In the Select OVF and VMDK files step, enter the name for your virtual machine, and then
click on the Click to select files or drag/drop area. In the operating system file
selector, find the PortnoxLocalRadius.ova file that you downloaded earlier. Then, click on
the Next button.
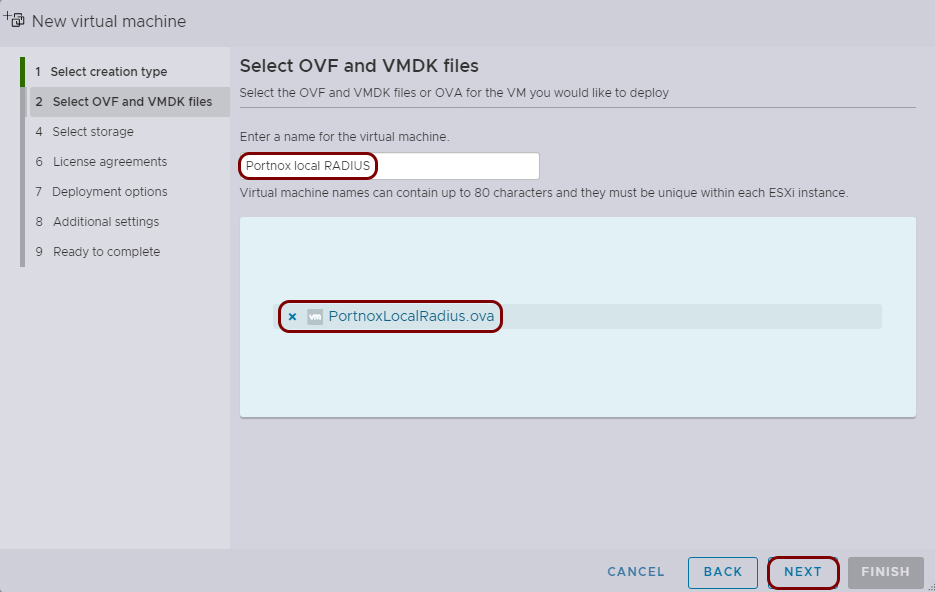
In this example, we used the name Portnox local RADIUS, but you can use any name you like.
-
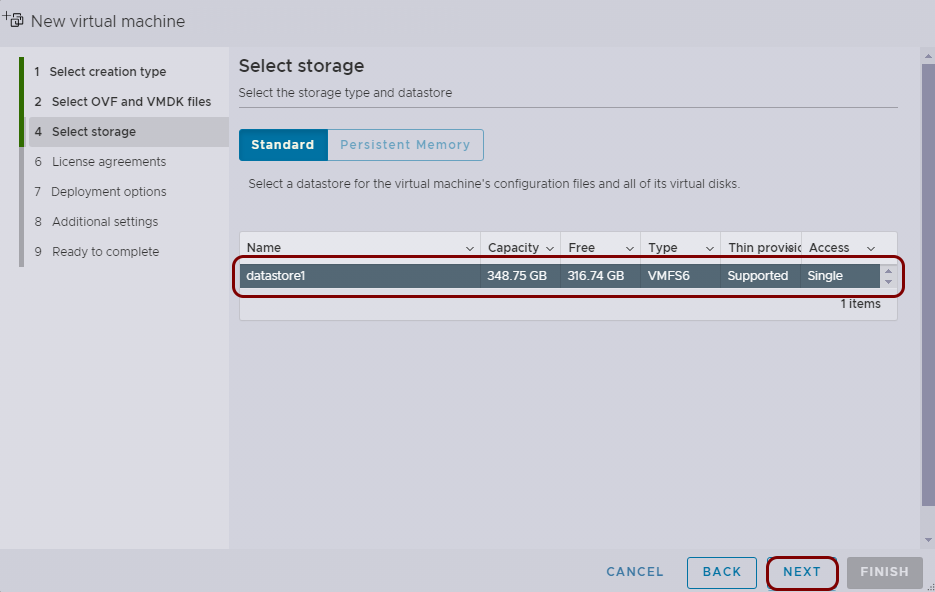
In the Select storage step, select the storage that you want to use for your virtual
machine, and then click on the Next button.
-
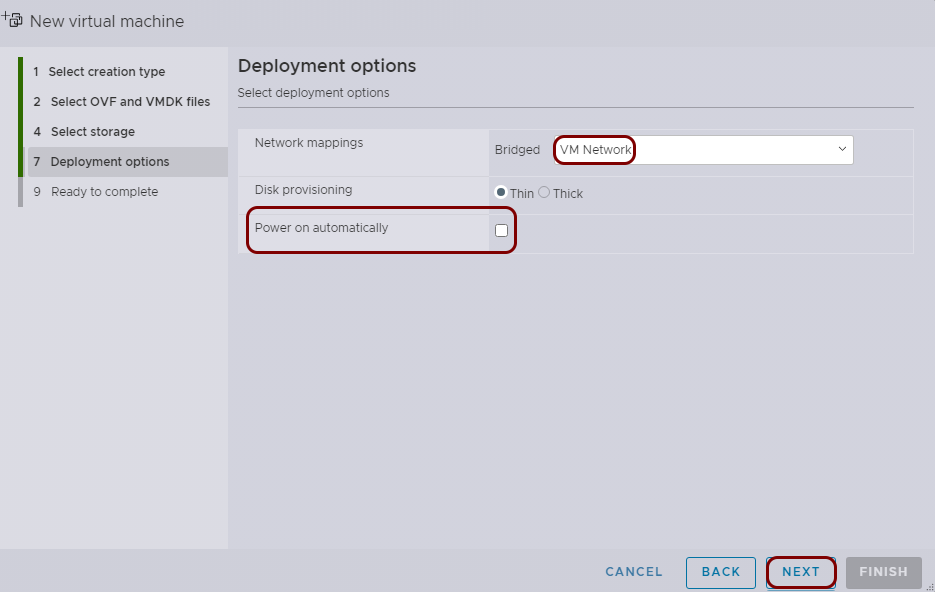
In the Deployment options step, select the network that you want to use, deactivate the
Power on automatically checkbox, and then click on the Next
button.
Important:It is imperative that you deactivate the Power on automatically checkbox. Otherwise, the virtual machine will start without initial configuration, and you will likely have to delete it and start the deployment from scratch. This is caused by the design of vSphere, where you cannot select a virtual CD image when creating a virtual machine from an OVA file.
-
In the Select creation type step, select the Deploy a virtual machine from an
OVF or OVA file option, and then click on the Next button.
-
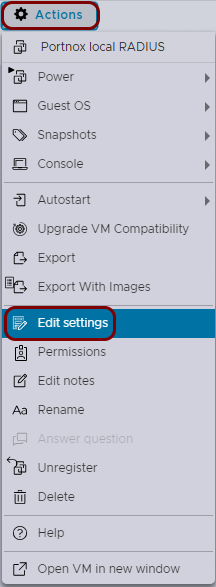
Select the newly created virtual machine from the list, click on the Actions button in the top
menu, and then select the Edit settings option.
-
In the Edit settings window, in the Virtual
Hardware tab:
-
In the CD/DVD Drive 1 row, activate the Connect checkbox and
select the Datastore ISO file option.

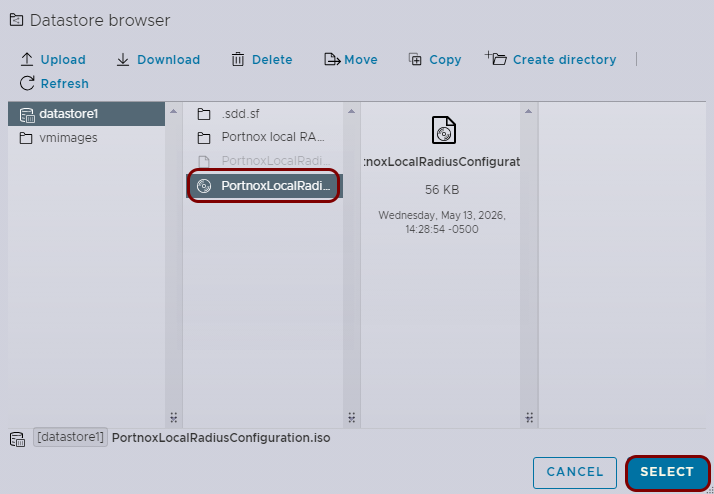
-
Select the uploaded file and click on the Select button.
-
In the CD/DVD Drive 1 row, activate the Connect checkbox and
select the Datastore ISO file option.
Result: Your local RADIUS server is active.
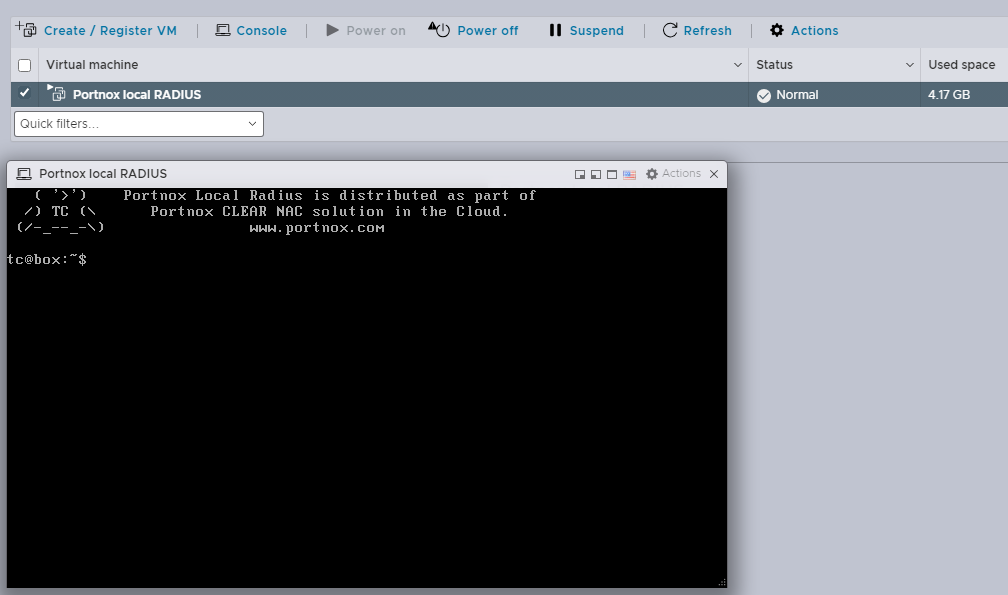
You can check its status in Portnox Cloud, in the section.

Note:
If you have connectivity issues with your local RADIUS server, check the following topic: How to set up the firewall for the local RADIUS instance to connect to Portnox Cloud.