Integrate Figma with Zero Trust Network Access
In this topic, you will find general instructions on how to integrate Figma with Portnox™ Zero Trust Network Access.
Create a Portnox Cloud application configuration
In this step, you will create a configuration in Portnox Cloud that will contain all the information necessary to integrate with Figma.
-
In the Cloud portal top menu, click on the Zero Trust Resources option.

-
On the Resources screen, click on the Create resource button.

-
In the Authentication protocol section, select the SAML
option.
-
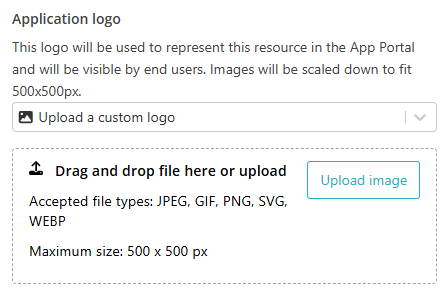
In the Application logo section, select one of the logos from the list, or select
the Upload a custom logo option and then click on the Upload
image button to upload a logo for the application.
The logo is used in the Secure Access Portal.
-
In the Authentication protocol section, select the SAML
option.
-
In the Resource details section, enter a Resource
name and optionally a Description.

In this example, we used the name Figma for the new application configuration but you can use any name you like.
Open your Figma SAML SSO setup
In this section, you will access the Figma administrative interface and find the settings for SAML single sign-on (SSO) setup.
-
In the left-hand side menu, in the section representing your organization, click on the
Admin option.

-
In the right-hand side pane, click on the Settings tab.

-
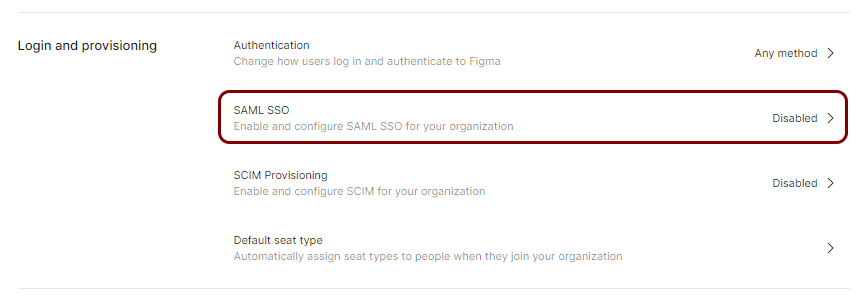
In the Settings pane, in the Login and provisioning section, click on
the SAML SSO row.
-
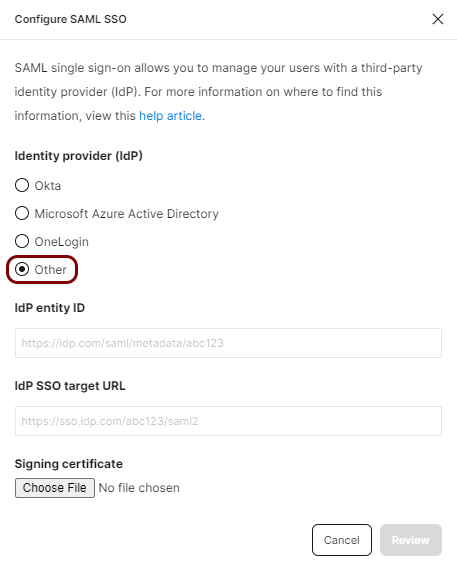
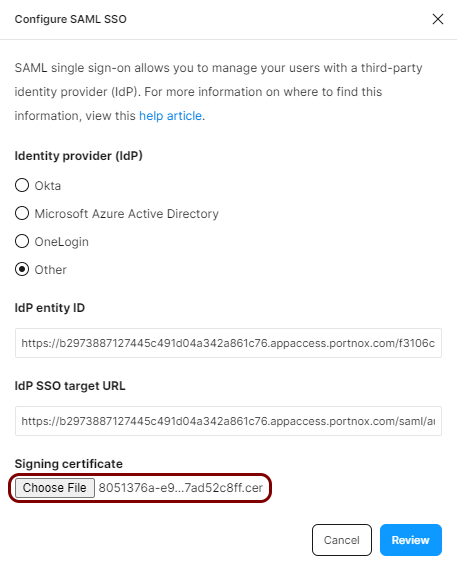
In the Configure SAML SSO dialog, in the Identity provider (IdP) field,
select the Other option.
Copy configuration values from the Portnox tab to the Figma tab
In this section, you will copy the values displayed by Portnox Cloud and paste them in the relevant fields in the Figma SAML SSO setup section.
-
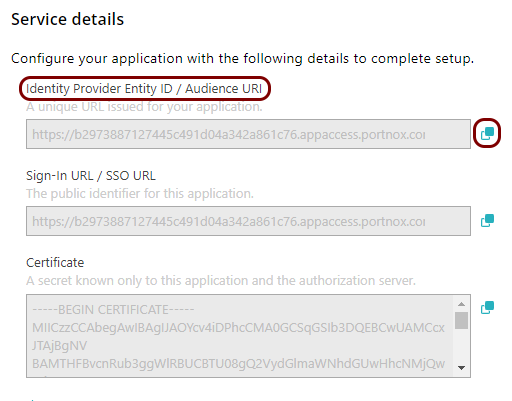
In the Portnox tab, in the Service details section, click on the ⧉ icon next to the Identity Provider Entity ID / Audience
URI field to copy the value.
-
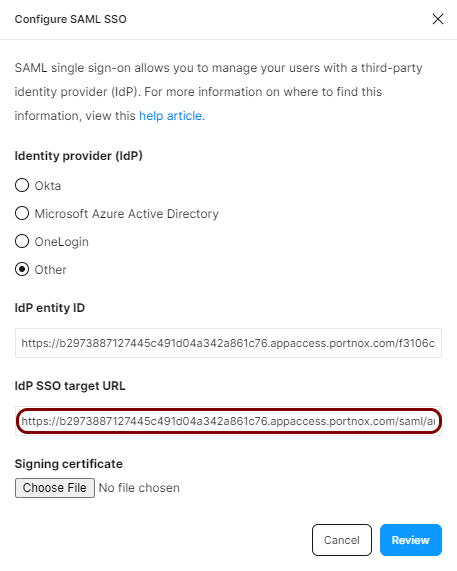
In the Figma tab, click on the empty field next to the IdP entity ID label and paste the
value copied from Portnox Cloud.

-
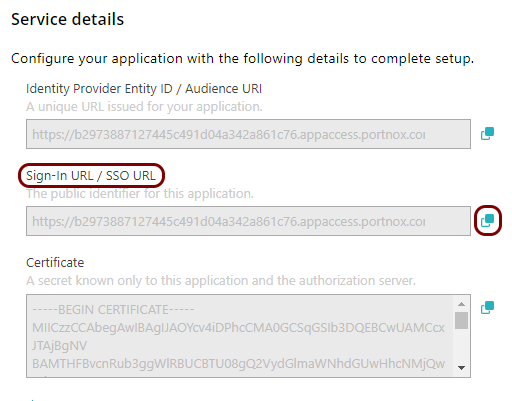
In the Portnox tab, in the Service details section, click on the ⧉ icon next to the Sign-In URL / SSO URL field to copy the
value.
-
In the Figma tab, click on the empty field next to the IdP SSO target URL label and paste
the value copied from Portnox Cloud.
-
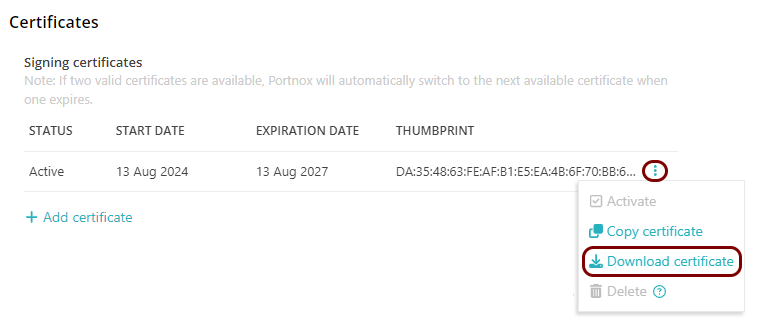
In the Portnox tab, in the section, click on the ⋮ icon next to the
Active certificate and select the Download certificate option to
download the certificate to the local drive.
-
In the Figma tab, click on the Choose File button under the Signing
certificate label and select the file downloaded to the local drive from Portnox Cloud.
-
Click on the Review button. Then, activate the This information is
correct checkbox, and click on the Configure SAML SSO button.

Copy configuration values from the Figma tab to the Portnox tab
In this section, you will copy the values displayed in the Figma SAML SSO setup section, and paste them in the relevant fields in Portnox Cloud.
-
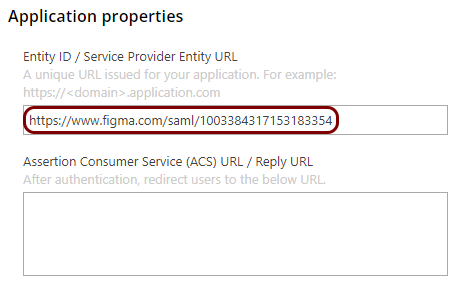
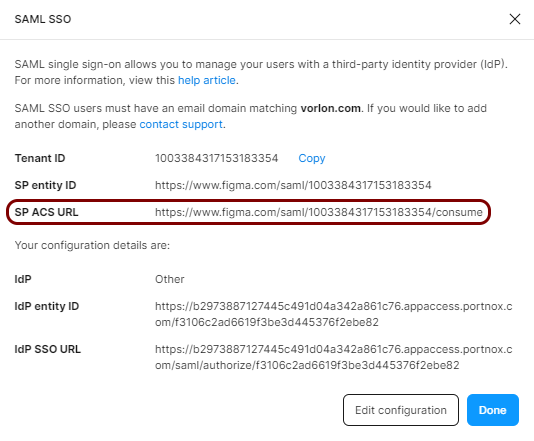
In the Figma tab, select the value next to the SP entity ID field and use your operating
system’s copy shortcut to copy the value to the clipboard.

-
In the Portnox tab, in the Resource properties section, click on the empty field under the
Entity ID / Service Provider Entity URL heading and paste the value copied from
Figma.
-
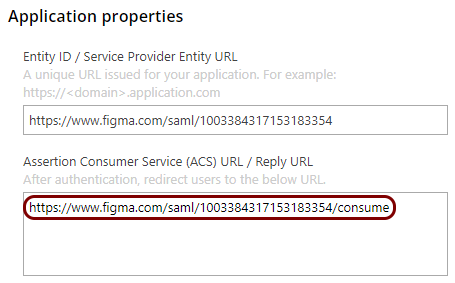
In the Figma tab, select the value next to the SP ACS URL field and use your operating
system’s copy shortcut to copy the value to the clipboard.
-
In the Portnox tab, in the Resource properties section, click on the empty field under the
Assertion Consumer Service (ACS) URL / Reply URL heading and paste the value copied from
Figma.
Finalize the configuration
In this section, you will finalize the configuration in Portnox Cloud and Figma.
-
Finalize the configuration in the Portnox tab
-
Click on the OPTIONAL SETTINGS link to show
additional fields, and then in the Application Login URI field, enter the
following value: https://www.figma.com/login.
Note:This step is required if you want to show this application in the ZTNA Secure Access Portal.

-
Scroll all the way down to the end of the page, and then click on the Add resource
button.
-
Click on the OPTIONAL SETTINGS link to show
additional fields, and then in the Application Login URI field, enter the
following value: https://www.figma.com/login.
-
Finalize the configuration in the Figma tab
- Optional:
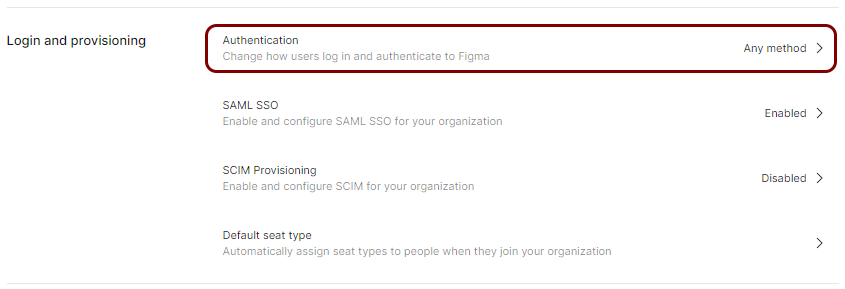
In the Settings pane, in the Login and provisioning section,
click on the Authentication row to select your authentication methods.
- Optional:
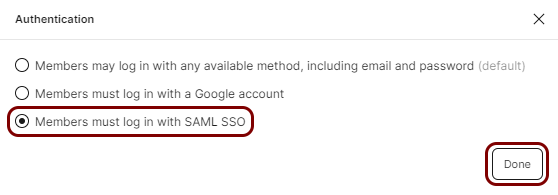
After testing your configuration, in the Authentication dialog, you can select the
Members must log in with SAML SSO option and click on the
Done button to enforce Zero Trust Network Access as the only login method for all
users.
Warning:Proceed with caution. If SSO is not configured properly, Figma users will not be able to log in to the application. We recommend taking this step only after testing SSO.
- Optional:
In the Settings pane, in the Login and provisioning section,
click on the Authentication row to select your authentication methods.
Result: You have configured Figma to be accessible using Portnox Zero Trust Network Access.