Provision administrator accounts from Entra ID using SCIM
In this topic, you will learn how to create and manage Portnox™ Cloud administrator accounts in Microsoft Entra ID using SCIM.
SCIM (System for Cross-domain Identity Management) is an open standard protocol for managing user identities across applications. With SCIM, you create and manage Portnox Cloud administrator accounts in Entra ID. When you assign Entra ID users to the SCIM application, Portnox Cloud creates administrator accounts for these users. When you change the attributes of these users in Entra ID, Portnox Cloud updates their administrator accounts.
Create an application API integration in Portnox Cloud
In this section, you will create a SCIM application API integration in Portnox Cloud.
-
In the Cloud portal top menu, click on the Settings option.

-
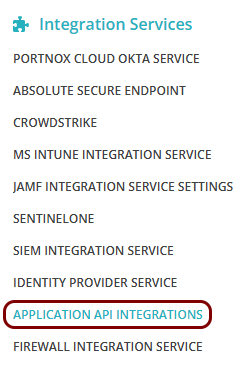
In the Cloud portal left-hand side menu, click on the option.
-
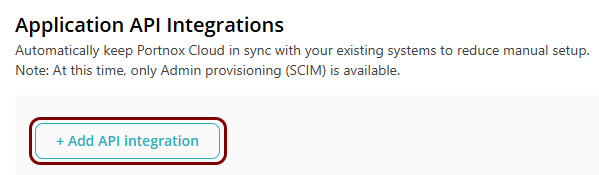
Click on the Add API integration button.
-
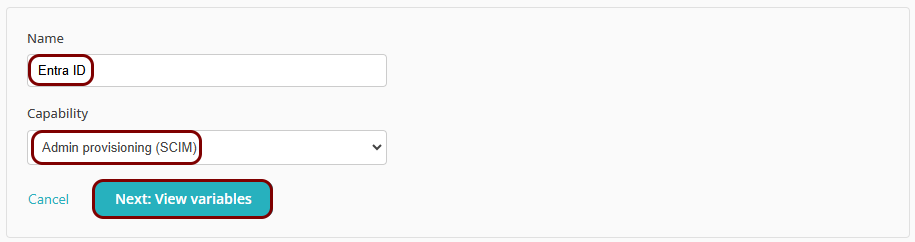
Enter a Name for the integration and in the
Capability field, select the Admin provisioning (SCIM) option.
Then, click on the Next: View variables button.
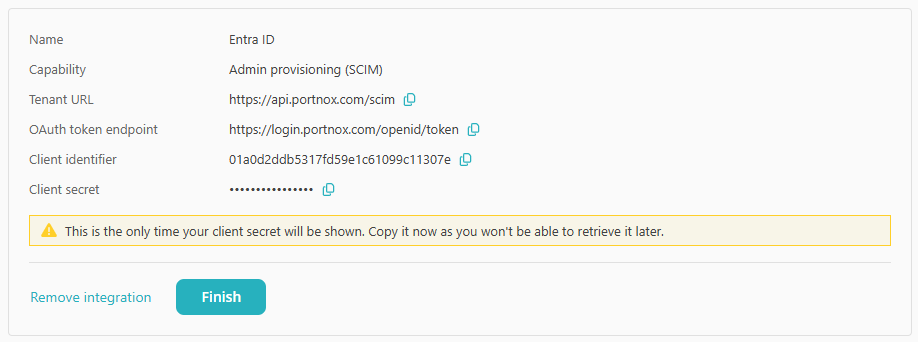
Portnox Cloud displays the values that you need for the Entra ID application: Tenant URL, OAuth token endpoint, Client identifier, and Client secret.
Create a new Entra ID enterprise application
In this section, you will access the Microsoft Azure administrative interface and use it to create a new Entra ID enterprise application for SCIM provisioning.
-
In the Azure Portal main menu, click on the Microsoft Entra
ID option.
-
In the left-hand side menu, click on the option.
-
In the top menu of the Enterprise applications screen, click on the New
application button.

-
In the top menu of the Browse Microsoft Entra Gallery screen, click on the Create
your own application button.

-
In the Create your own application pane, enter a name for the new application in the
What is the name of your app field, select the Integrate any other application
you don’t find in the gallery (Non-gallery) option, and then click on the
Create button.
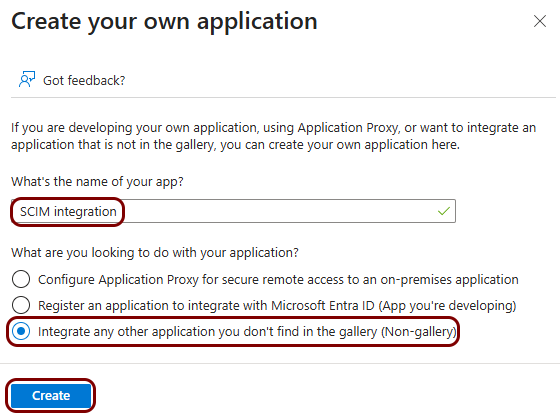
In this example, we used the name Portnox SCIM integration for the new application but you can use any name you like.
-
In the left-hand side menu of the application pane, click on the option.
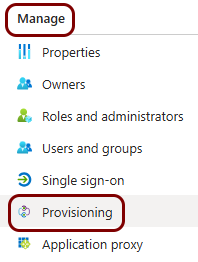
Connect the Entra ID application to Portnox Cloud
In this section, you will copy the values displayed by Portnox Cloud and paste them in the connectivity settings of the Entra ID application.
-
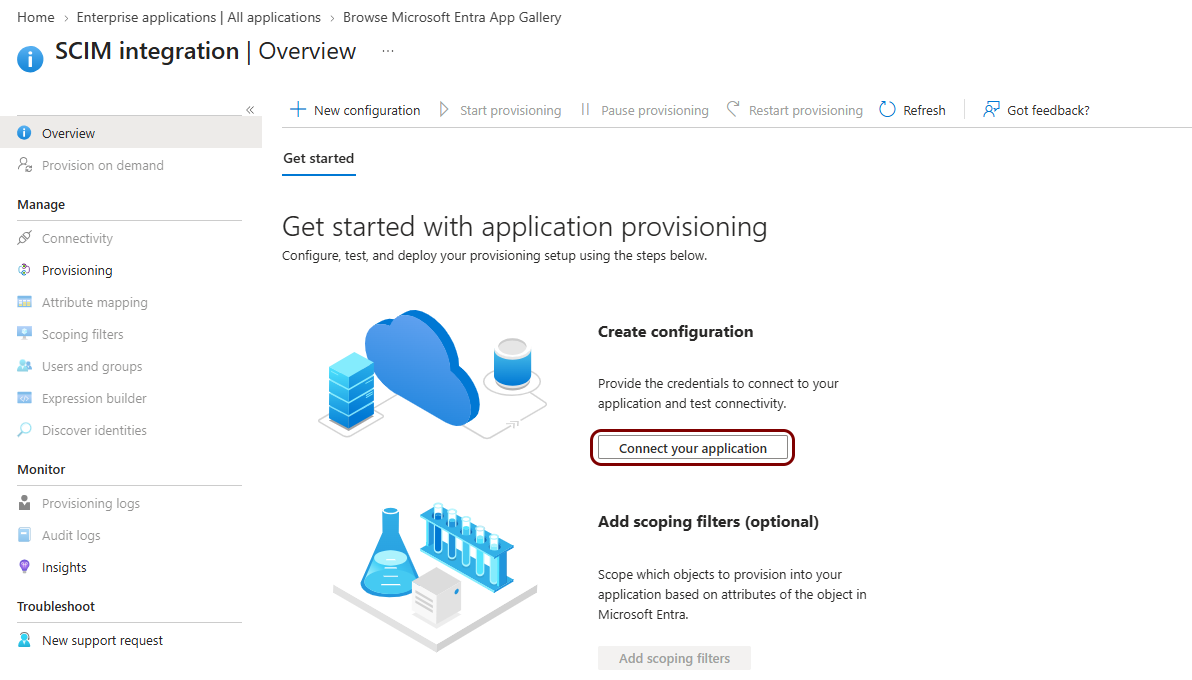
In the Azure tab, in the Create configuration section, click on the Connect your
application button.
-
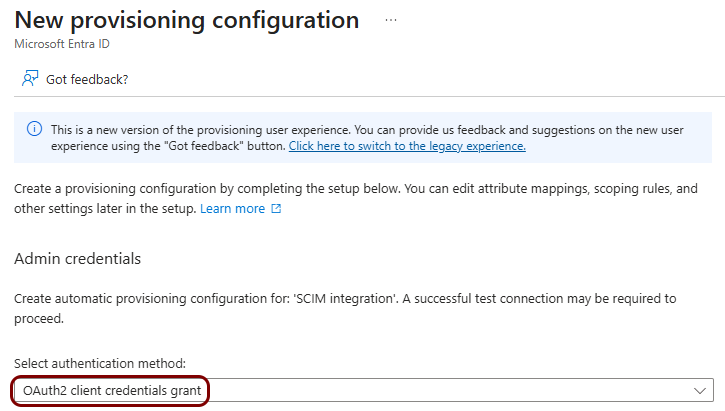
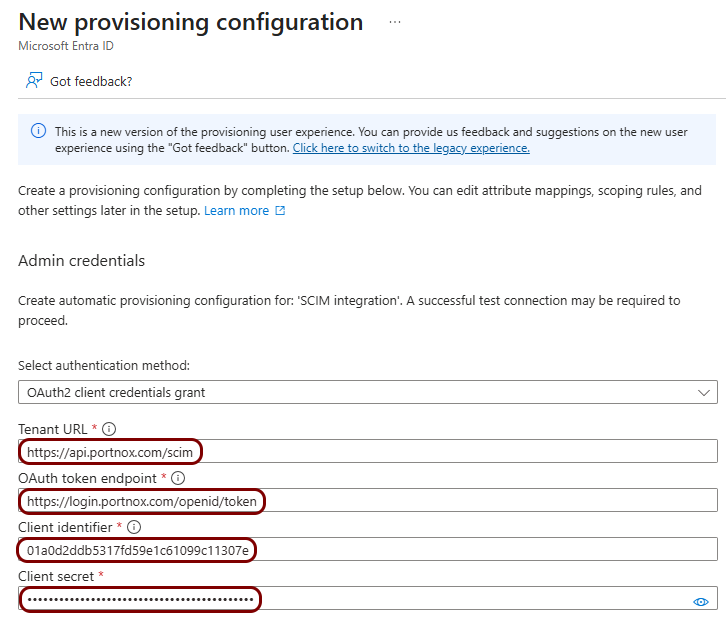
In the New provisioning configuration pane, in the Select authentication
method field, select the OAuth2 client credentials grant option.
-
Copy the connection values from the Portnox tab to the Azure tab.
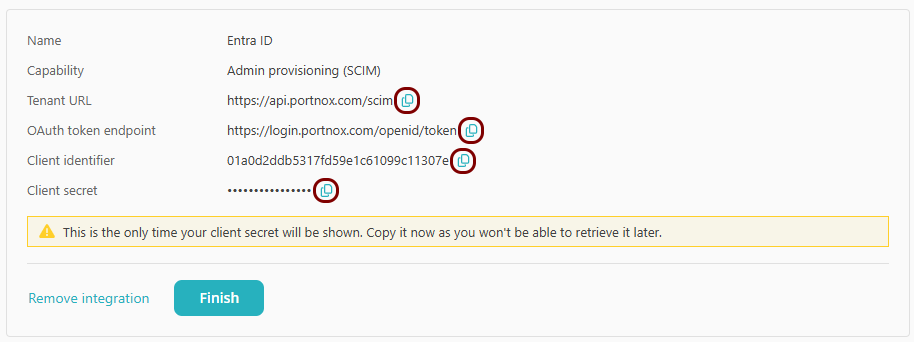
- In the Portnox tab, click on the ⧉ icon next to the Tenant URL field. In the Azure tab, paste the value into the Tenant URL field.
- In the Portnox tab, click on the ⧉ icon next to the OAuth token endpoint field. In the Azure tab, paste the value into the OAuth token endpoint field.
- In the Portnox tab, click on the ⧉ icon next to the Client identifier field. In the Azure tab, paste the value into the Client identifier field.
- In the Portnox tab, click on the ⧉ icon next to the Client secret field. In the Azure tab, paste the value into the Client secret field.
Disable the group provisioning
In this section, you will disable the group provisioning in the Entra ID application. Portnox Cloud provisions administrator accounts, not groups.
-
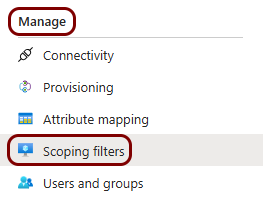
In the Azure tab, in the left-hand side menu of the application pane, click on the option.
-
In the top menu, click on the Edit button.

-
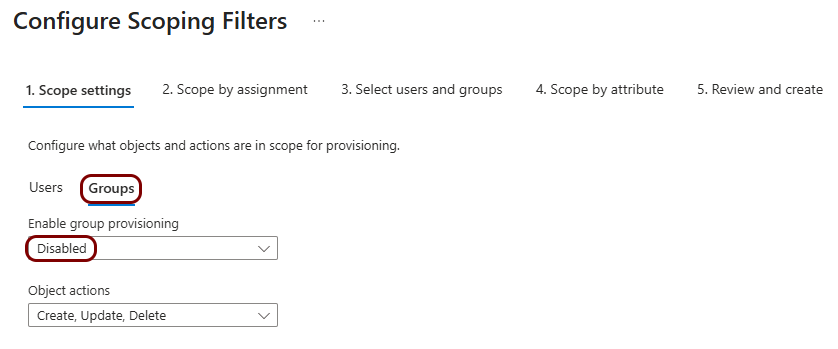
In the Scope settings step, click on the Groups tab, and then set the
Enabled option to Disabled.
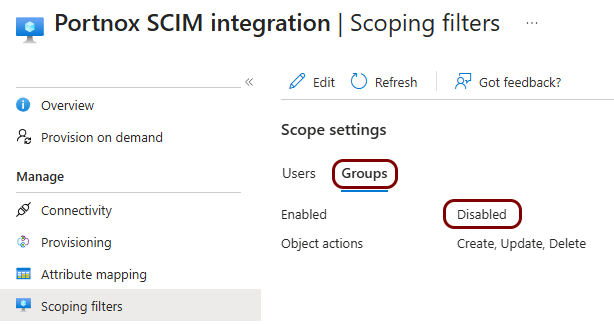
The Groups tab in the Scope settings section shows the Disabled value next to the Enabled field.
Map the administrator attributes
In this section, you will map the Entra ID attributes that set the repository and the administrator type of each Portnox Cloud administrator account.
Portnox Cloud uses the following SCIM attributes:
| Target attribute | Purpose | Value | Result |
|---|---|---|---|
| userType | Sets the identity repository of the administrator account. Portnox Cloud uses this repository to authenticate the administrator at login. | Clear | Portnox Cloud repository |
| EntraId | Entra ID repository | ||
| Google Workspace repository | |||
| Okta | Okta repository | ||
| roles[primary eq "True"].value | Sets the administrator type. | FullAdmin | Administrator |
| ReadOnlyAdmin | Read-only Administrator | ||
| GuestAdmin | Guest Administrator | ||
| ReadOnlyGuestAdmin | Guest Administrator + Read-only |
We recommend that you use EntraId for the userType attribute.
-
In the Azure tab, in the left-hand side menu of the application pane, click on the option.
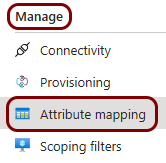
-
In the Users tab, in the top menu, click on the Add attribute mapping
button.

-
Add the mapping for the repository.
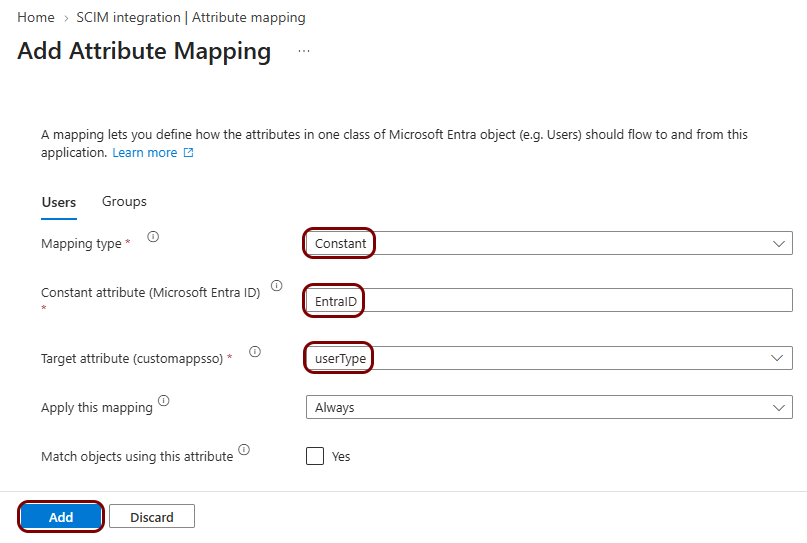
- In the Mapping type field, select the Constant option.
- In the Constant attribute (Microsoft Entra ID) field, enter EntraId.
- In the Target attribute (customappsso) field, select the userType option.
- Click on the Add button at the bottom of the Add Attribute Mapping pane.
Then, map the administrator type using one of the two approaches described in the following sections.
Map administrator types using an expression
In this section, you will map the administrator type of each Portnox Cloud administrator account using an expression based on Entra ID user attributes.
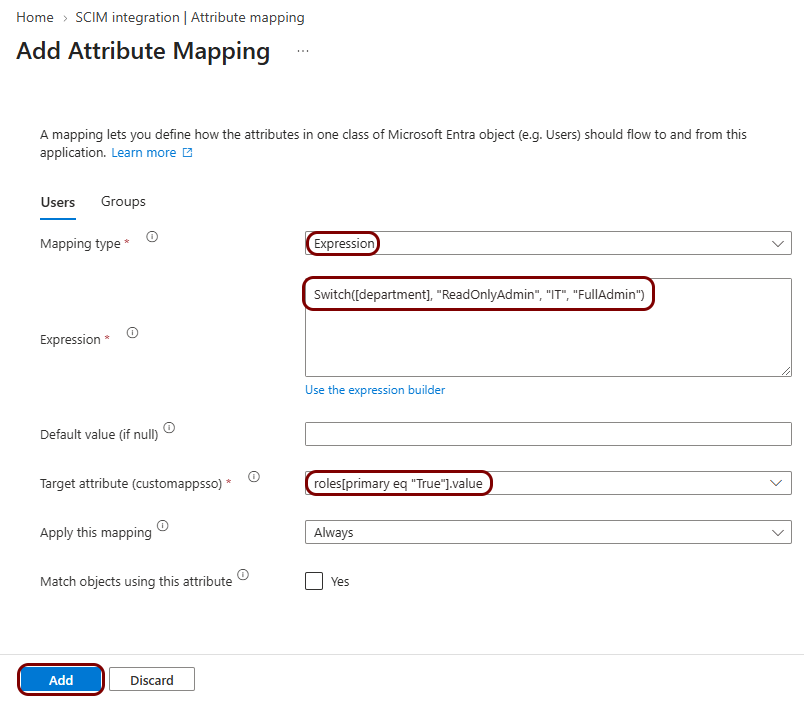
In this approach, an expression sets the administrator type of each user based on their Entra ID attributes, for example their department or job title.
Advantages:
-
You can assign many users to the application at once. Entra ID sets the administrator type of each user based on their attributes.
-
When users move to a different department or job, Entra ID updates their administrator type. You only change the application assignments to add or remove Portnox Cloud administrators.
-
You don’t need to choose an administrator type when you assign users. Their department or job title decides it.
Disadvantages:
-
Less granular control. All users with the same attribute value get the same administrator type.
-
You must remember which attribute values give which administrator type.
-
In the Users tab, in the top menu, click on the Add attribute mapping
button.
-
Add the mapping for the administrator type.
Note:You can also use the Constant mapping type to give all assigned users the same administrator type. The following procedure uses the Expression mapping type, which lets you choose the administrator type for each user based on their Entra ID attributes.
Map administrator types using app roles
In this section, you will map the administrator type of each Portnox Cloud administrator account using app roles, and create an app role for each administrator type. You will select the app role for each user when you assign them to the application.
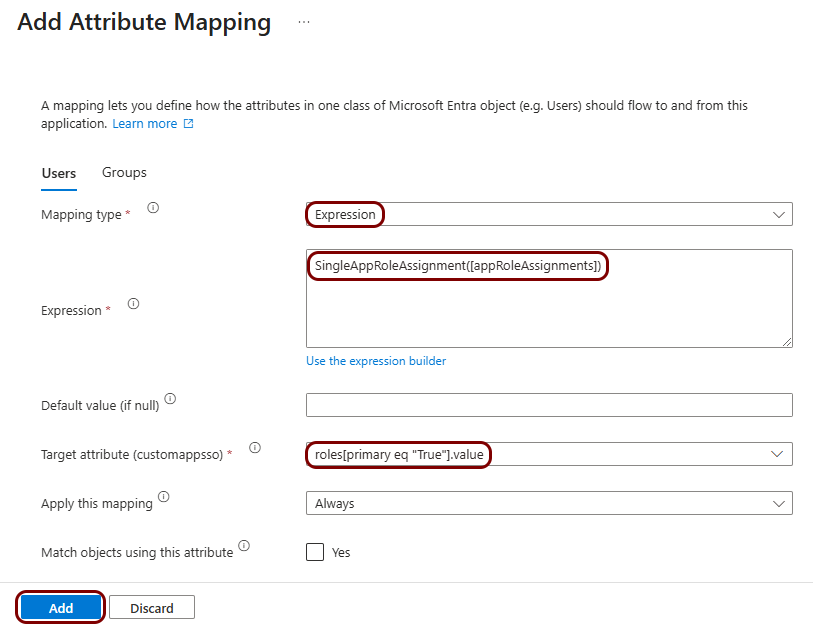
In this approach, you create an app role for each administrator type. When you assign users to the application, you select the app role for them.
Advantages:
-
Granular control. You choose the administrator type for each user, regardless of their department or job title. For example, if two network administrators work in the IT department, you can give full access to one and read-only access to the other.
Disadvantages:
-
More work when assigning users. You must assign users in separate batches, one for each administrator type.
-
More work when managing users. To change the administrator type of a user, you must change their assignment in the application. Changes in the directory don’t affect it.
-
In the Users tab, in the top menu, click on the Add attribute mapping
button.
-
Add the mapping for the administrator type.
-
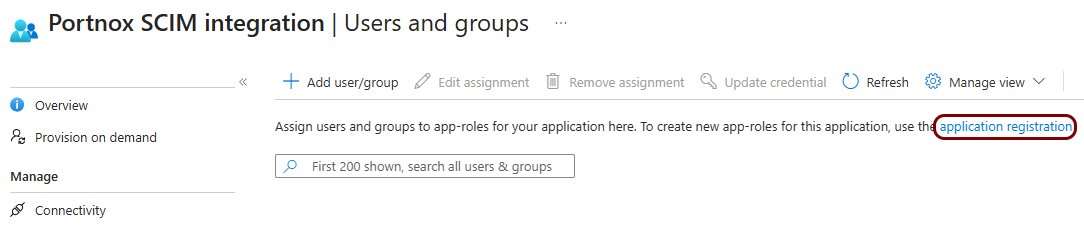
In the left-hand side menu of the application pane, click on the option. Then, click on the application registration link in the
description at the top of the pane.
-
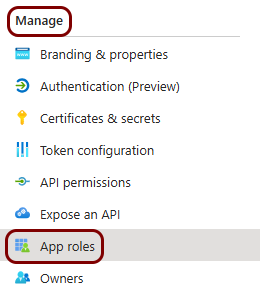
In the left-hand side menu of the app registration pane, click on the option.
-
Create an app role for an administrator type.
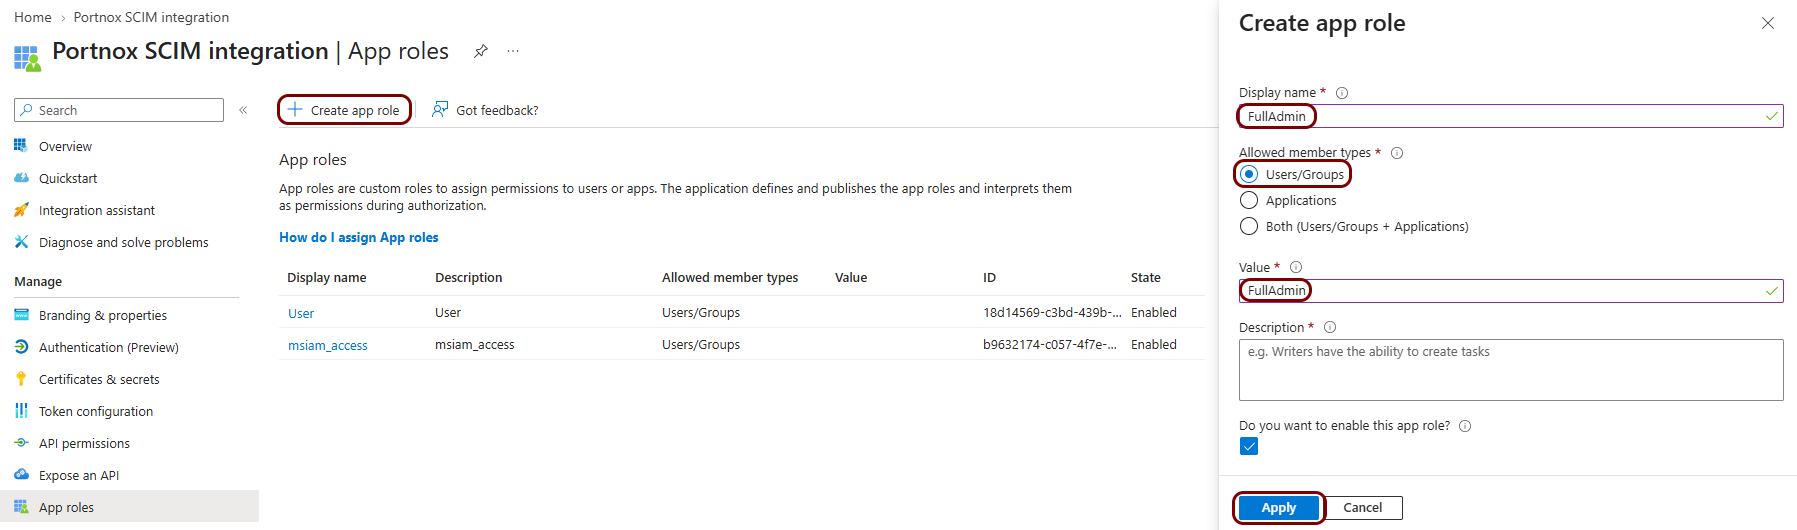 Note:Repeat this step to create an app role for each of the four administrator types.
Result: You can see the new app roles in the App roles list.
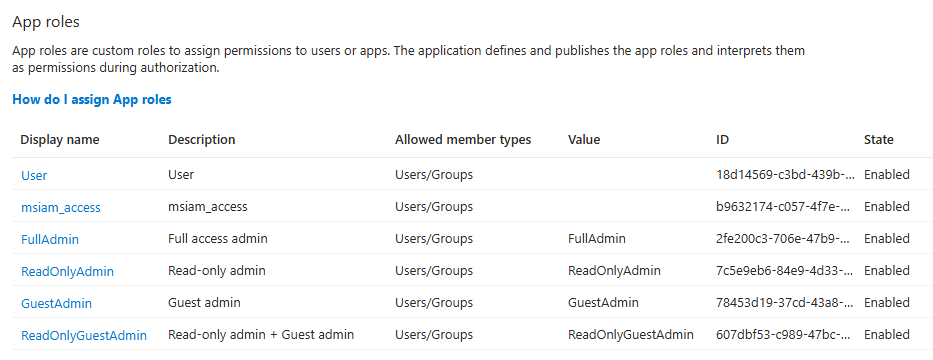 Note:The list also contains the default User and msiam_access app roles. These roles are not valid administrator types. Do not assign them to users of this application.
Assign users and start provisioning
In this section, you will select the Entra ID users that become Portnox Cloud administrators and start the provisioning process.
-
In the Azure tab, in the left-hand side menu, click on the option.
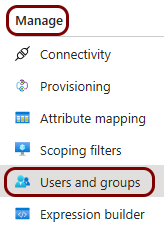
-
In the top menu, click on the Add user/group button.

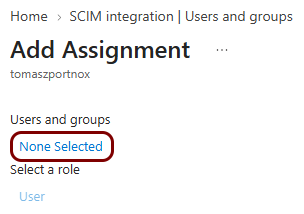
The browser displays the Add Assignment pane.
-
In the Users and groups section, click on the None Selected
link.
-
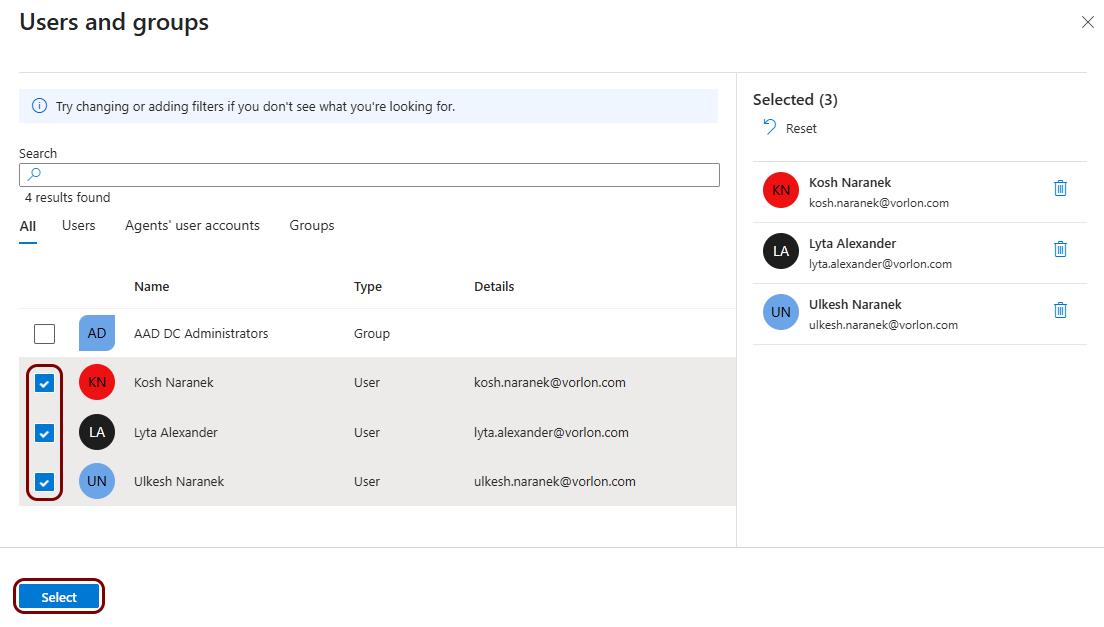
In the Users and groups pane, click on the checkboxes next to the users or groups that should
have Portnox Cloud administrator accounts. Then, click on the Select button.
- Optional:
If you mapped administrator types using app roles, in the Select a role section, click on
the None Selected link. In the Select a role pane, click on the app role
for the administrator type, and then click on the Select button.
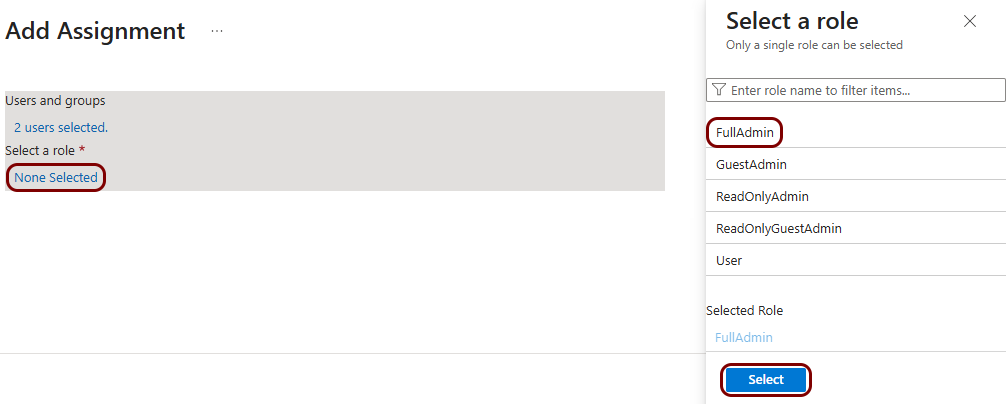 Note:The selected app role applies to all users and groups in this assignment. To give different administrator types to different users, repeat the assignment for each administrator type.
 -
Click on the Assign button at the bottom of the Add Assignment
pane.
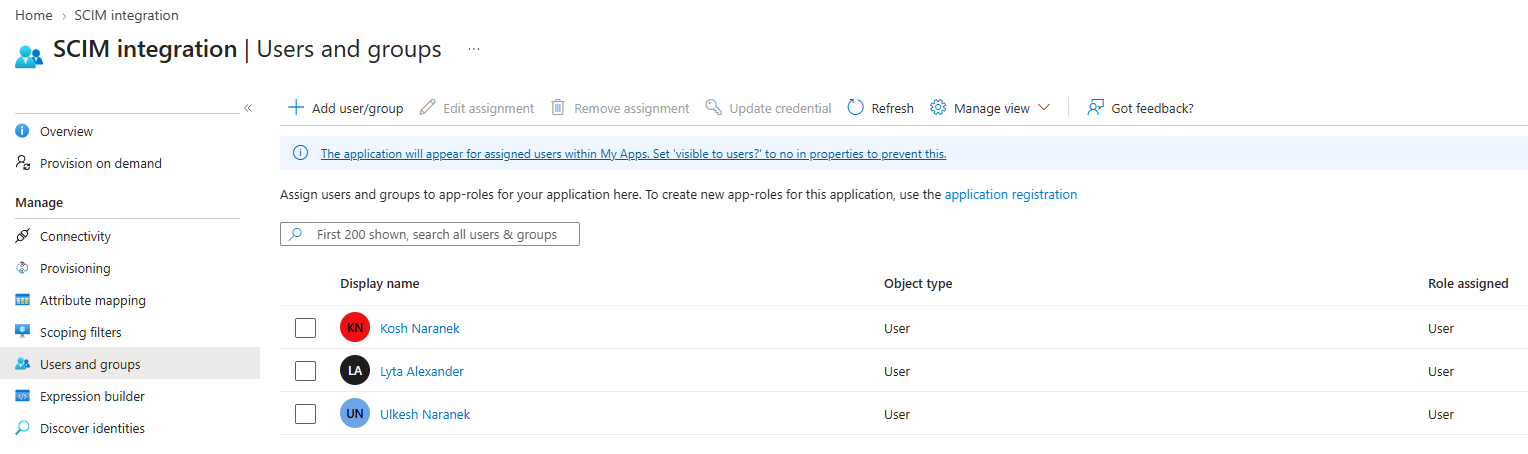
The selected users and groups show in the Users and groups list.
-
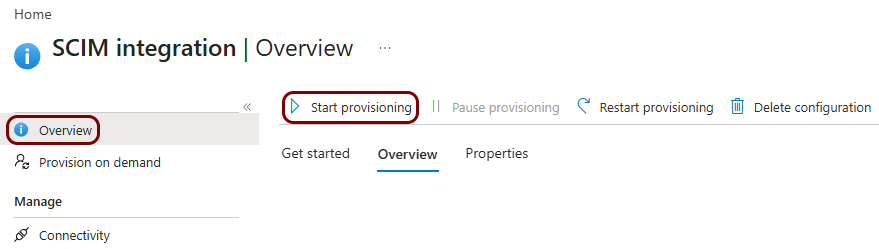
In the left-hand side menu, click on the Overview option. Then, in the top menu, click on
the Start provisioning button and click on the Yes button in the
confirmation dialog.
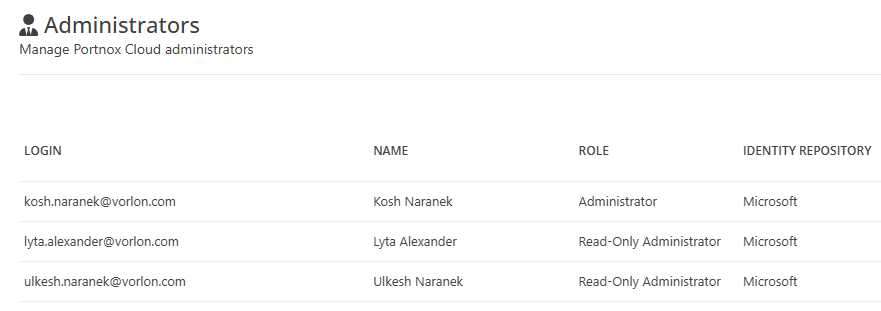
Result: Portnox Cloud creates administrator accounts for the assigned users during the next provisioning cycle. The accounts show in the list.
Entra ID runs automatic provisioning cycles about every 40 minutes. New assignments and attribute changes reach Portnox Cloud during the next cycle. The first cycle after you start provisioning can take longer.
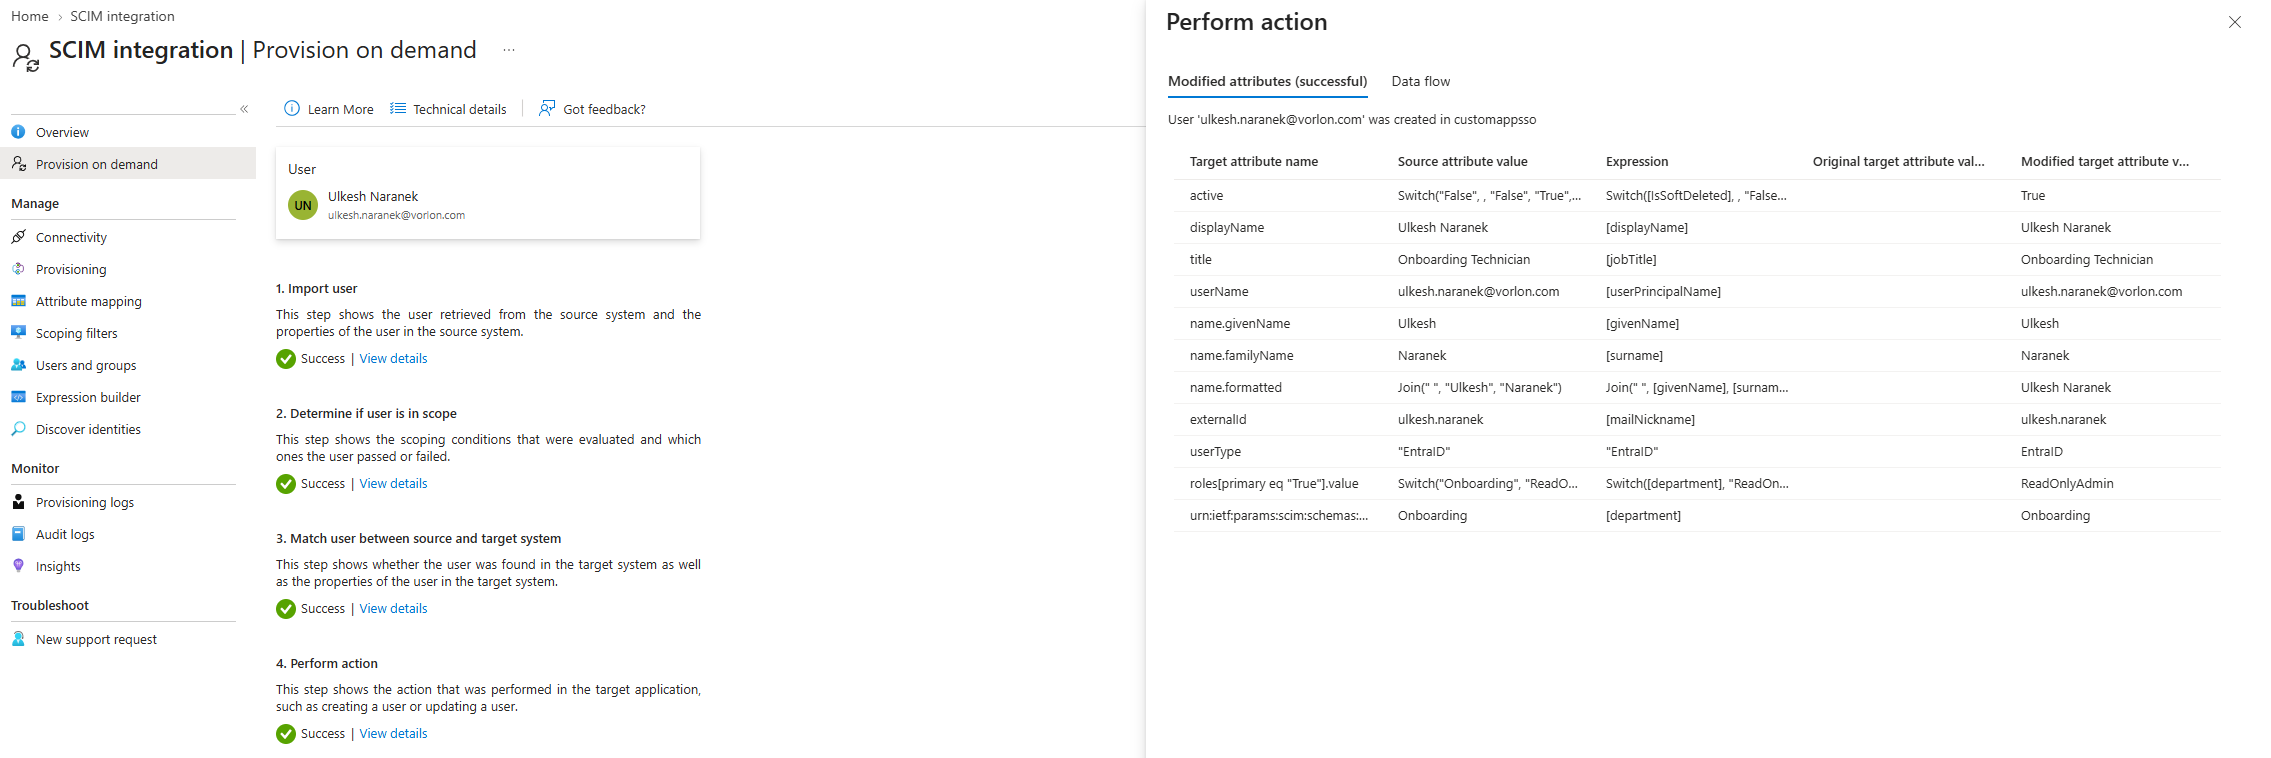
To provision a single user immediately, in the Azure tab, in the left-hand side menu of the application pane, click on the Provision on demand option. Then, select the user and click on the Provision button.