Integrate Zendesk with Conditional Access
In this topic, you will find general instructions on how to integrate Zendesk with Portnox™ Conditional Access for Applications.
Create a Portnox Cloud application configuration
In this step, you will create a configuration in Portnox Cloud that will contain all the information necessary to integrate with Zendesk.
-
In a new tab of your browser, open your Portnox Cloud account by accessing the following URL: https://clear.portnox.com/
From now on, we will call this tab the Portnox tab.
-
In the Cloud portal top menu, click on the Applications option.

-
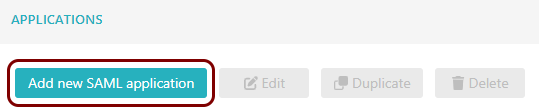
On the Applications screen, click on the Add application button, and
select the Add new SAML application option.
- Optional: If you have more than one SAML identity provider configured, select the identity provider in the Select an identity provider to use for this application section.
-
In the Application details section, enter an Application
name and optionally a Description.

In this example, we used the name Zendesk for the new application configuration but you can use any name you like.
- Keep this browser tab open. You will need it later.
Open your Zendesk SAML SSO settings
In this section, you will access your Zendesk administrative interface and find the SAML single sign-on (SSO) settings.
-
In another tab of your browser, open your Zendesk web interface by accessing the following URL:
https://your_tenant.zendesk.com/, substituting
your_tenant with your Zendesk tenant name.
From now on, we will call this tab the Zendesk tab.
-
In the left-hand side menu, click on the ⚙ icon to access the settings
pane.

-
In the settings pane, click on the Go to Admin Center link in the notification displayed in
the top part of the page.
 Note: A new browser tab will open showing the Admin Center
 -
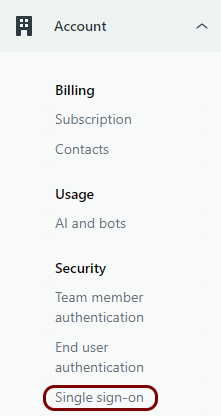
In the left-hand side menu, click on the Account option to expand the section, and then
click on the option.
-
In the Single sign-on pane, click on the Create SSO configuration
button and then select the SAML option.

-
In the Create SAML configuration pane, in the Configuration name field,
enter the name for this configuration.

In this example, we used the name Portnox Conditional Access but you can use any name you like.
Copy configuration values from the Portnox tab to the Zendesk tab
In this section, you will copy the values displayed by Portnox Cloud and paste them in the relevant fields in the Zendesk SAML SSO setup section.
-
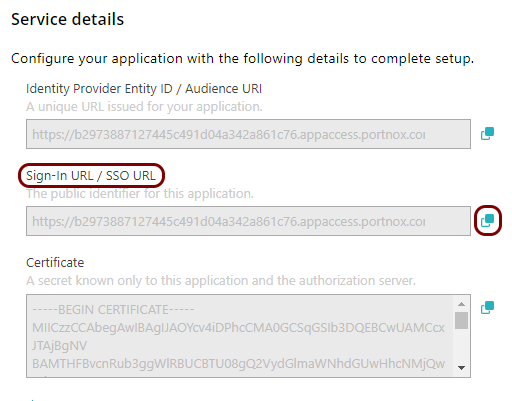
In the Portnox tab, in the Service details section, click on the ⧉ icon next to the Sign-In URL / SSO URL field to copy the
value.
-
In the Zendesk tab, click on the empty field next to the SAML SSO URL label and paste the
value copied from Portnox Cloud.

-
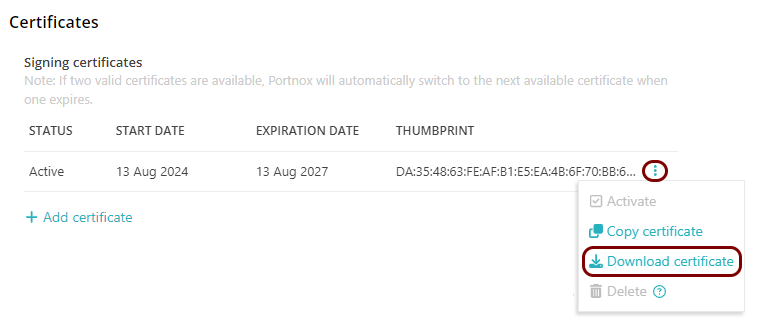
In the Portnox tab, in the section, click on the ⋮ icon next to the
Active certificate and select the Download certificate option to
download the certificate to the local drive.
-
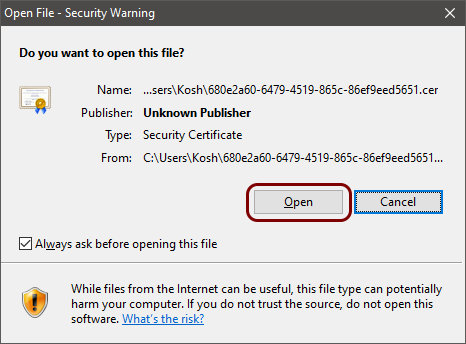
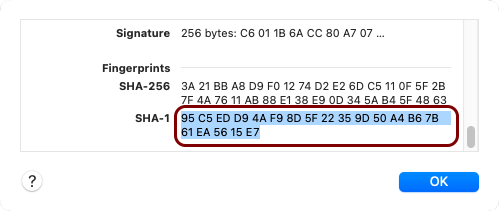
Open the certificate in your operating system. Then, find and copy its thumbprint value.
For example:
- In Windows:
-
Double-click on the downloaded certificate file and click on the Open button.
-
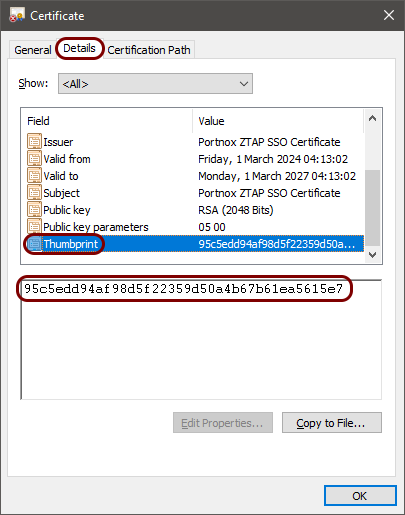
In the Certificate window, go to the Details tab, scroll down the list to see the Thumbprint entry, click on it, and then double-click on the value in the field below and press the key combination CTRL + C to copy the value to the clipboard.
-
- In macOS:
-
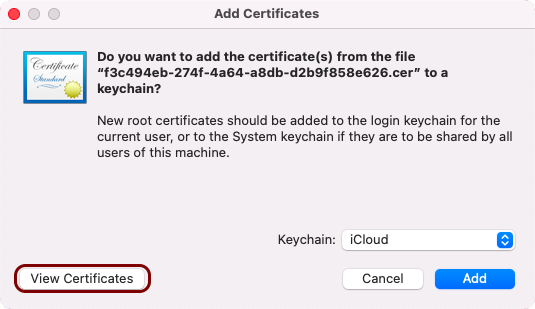
Double-click on the downloaded certificate file and click on the View Certificates button.
-
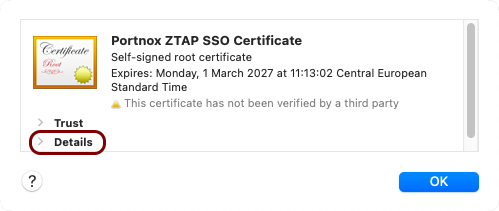
Click on the Details label to show certificate details.
-
Scroll down to the Fingerprints section, mark the value of the SHA-1 field, and press the key combination Command + C to copy the value to the clipboard.
-
- In Windows:
-
In the Zendesk tab, click on the empty field next to the Certificate fingerprint label and
paste the value copied from the operating system.

Set up configuration values in the Portnox tab
In this section, you will enter standard Zendesk SSO identifiers in the relevant fields in Portnox Cloud.
-
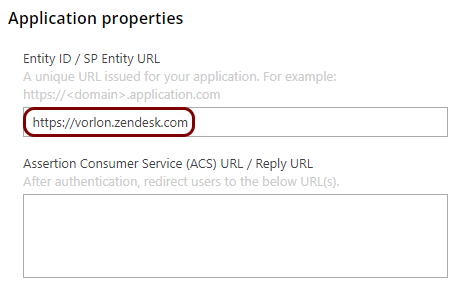
In the Portnox tab, in the Application properties section, click on the empty field under
the Entity ID / Service Provider Entity URL heading and paste the following value:
https://your_company.zendesk.com, where
your_company is your tenant name.
-
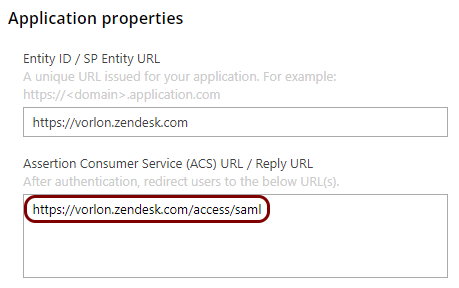
In the Portnox tab, in the Application properties section, click on the empty field under
the Assertion Consumer Service (ACS) URL / Reply URL heading and paste the following value:
https://your_company.zendesk.com/access/saml, where
your_company is your tenant name.
Finalize the configuration
In this section, you will finalize the configuration in Portnox Cloud and Zendesk.
-
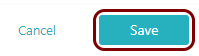
Finalize the configuration in the Portnox tab.
-
Scroll all the way down to the end of the page, and then click on the Save
button.
-
Scroll all the way down to the end of the page, and then click on the Save
button.
-
Finalize the configuration in the Zendesk tab.
- Optional:
Activate the Show button when users sign in checkbox, and in the Button
name field, enter the text to appear on the login button.
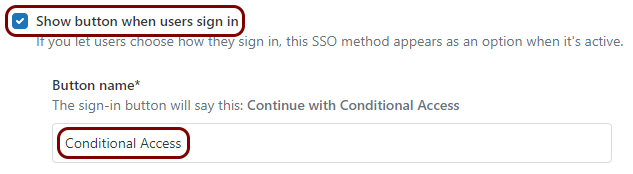 In this example, we used the name Conditional Access but you can use any name that will be best for your users, for example, your organization name.
 -
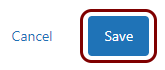
Click on the Save button.
-
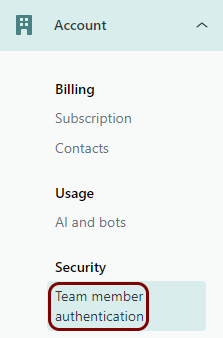
In the left-hand side menu, in the expanded Account section, click on the option.
-
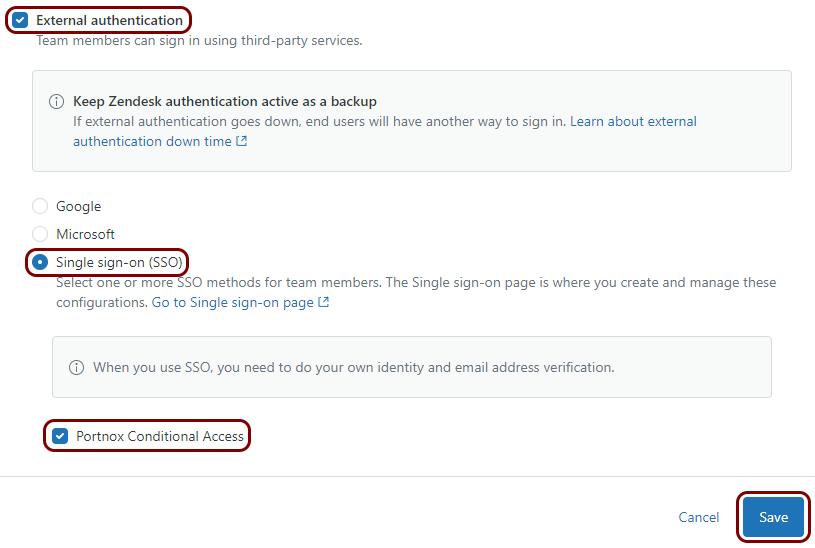
In the Team member authentication pane, activate the External
authentication checkbox, select the Single sign-on (SSO) option, and
then activate the checkbox next to the name of your SSO configuration. Then, click on the
Save button below.
- Optional:
Activate the Show button when users sign in checkbox, and in the Button
name field, enter the text to appear on the login button.
Result: You have configured Zendesk to be accessible using Portnox Conditional Access for Applications.