Guest access – Cisco Meraki
In this topic, you will learn how to configure a Cisco Meraki access point to work together with the Portnox™ Cloud captive portal for guest user authentication.
Before you begin configuring your access point, you must configure the guest network in Portnox Cloud and note down the values of the fields: IP (for walled garden) and Captive Portal URL.
Important:
This guide gives general instructions for integrating Portnox Cloud with
specific third-party devices. We try to provide useful examples for common models, but settings can differ between
manufacturers, models, and environments. Because of this, we cannot guarantee these steps will work in every case.
For questions or problems with RADIUS setup – which is an industry standard and not specific to Portnox – or with
device-specific settings and troubleshooting, we recommend checking the device manufacturer’s documentation and contacting
their support team. Portnox Support can help when possible, but detailed setup of third-party devices is usually best
handled by the manufacturer. We also recommend updating your NAS device firmware to the latest version, as old
firmware can cause issues.
Important:
All values in this configuration are examples. Make sure to adjust the
configuration to your individual profile names, RADIUS server addresses, ports, and keys by replacing the values that are
presented as underlined italics.
-
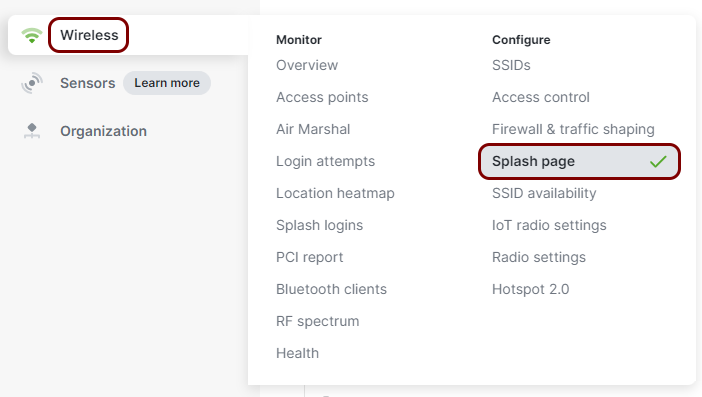
In the Meraki web interface, select your network, and then click on the menu option.
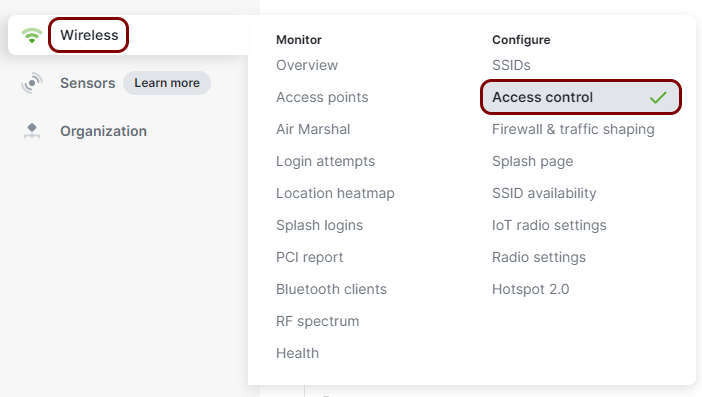
-
In the Access control pane, select the SSID that you want to edit.
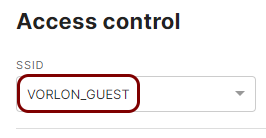 Note:You can choose an existing SSID to reconfigure it or one of the unconfigured SSIDs.
 -
In the Basic info section, enter the SSID for your network if you are configuring an
unconfigured SSID or keep/modify your current SSID as needed. Also, make sure that the SSID
status is set to Enabled.
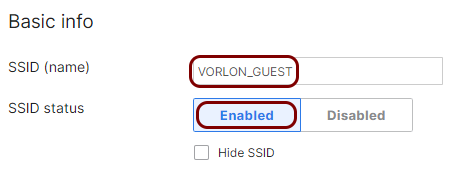
In this example, we used the SSID VORLON_GUEST, but you can use any SSID you like.
-
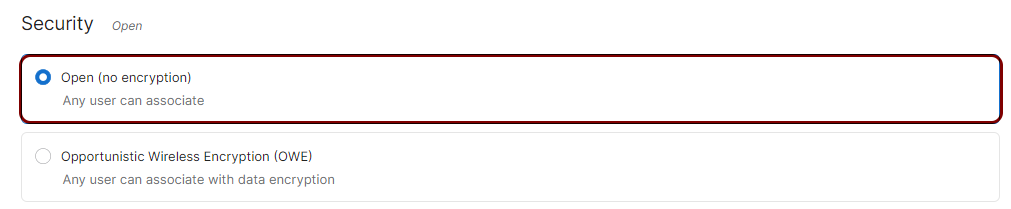
In the Security section, select the Open (no encryption) option.
-
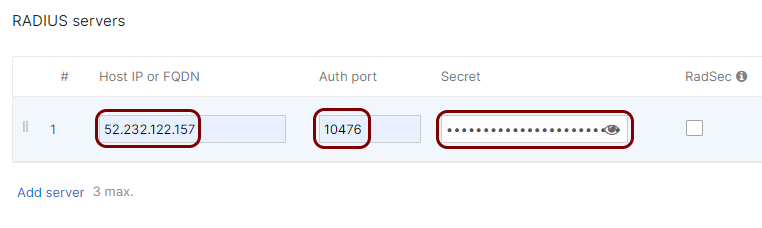
Scroll down to the RADIUS section and click on the heading to expand this section. In the
RADIUS servers subsection, click on the Add server link to add the
Portnox Cloud RADIUS server.

-
In the Host IP or FQDN field, enter the IP address of the Portnox Cloud RADIUS server that you created earlier, in the Auth port field, enter
the authentication port for this RADIUS server, and in the Secret field, enter the shared secret
for this server.
 Important:If you limit access to your Cloud RADIUS servers based on the source IP address (), then you must add the following Meraki IP address ranges to Permitted IP addresses: 209.206.48.0/20, 158.115.128.0/19, 216.157.128.0/20. Otherwise, the captive portal will not work, and the following error will be shown when attempting connection: Cannot proceed due to next errors: Access denied.
- Optional:
Test the connectivity to the server. Enter the credentials of a Portnox account in the
Username and Password fields, and then click on the
Begin test button.
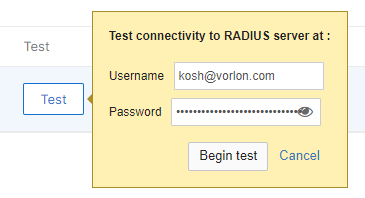 Note:We strongly recommend creating a temporary Portnox account for this purpose because the password is sent via MSCHAPv2 without a secure tunnel. Alternatively, you can use any account with an incorrect password and monitor Alerts for authentication failures. If an authentication failure appears in Alerts, it confirms that the RADIUS server is configured correctly.
 -
Click on the Done button to add the Cloud RADIUS server.

- Optional:
Test the connectivity to the server. Enter the credentials of a Portnox account in the
Username and Password fields, and then click on the
Begin test button.
-
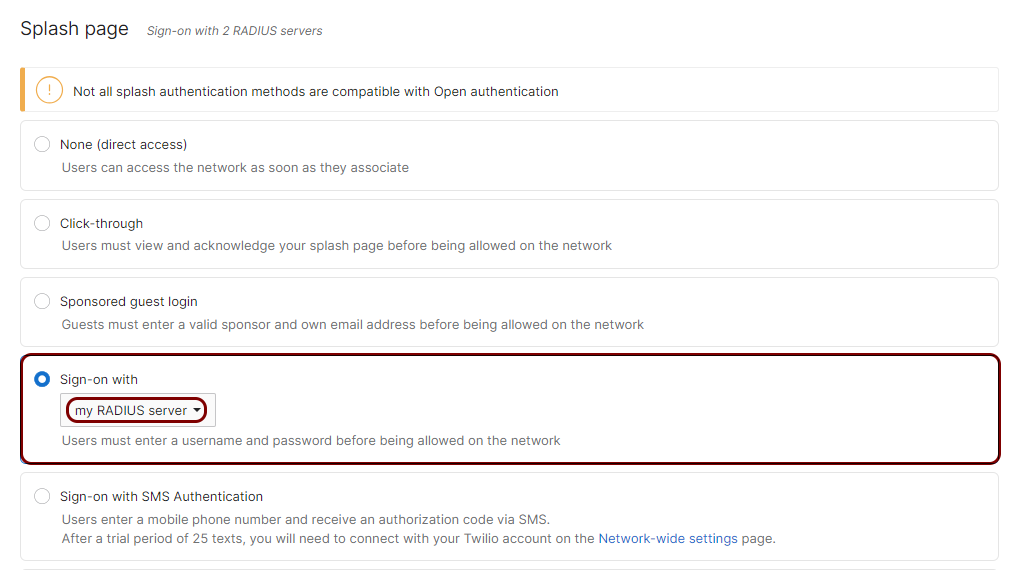
Scroll back up to the Splash page section and select the Sign-on with
option. In the Sign-on with field, select the my RADIUS server
option.
-
In the Advanced splash settings subsection, select the Block all access until sign-on
is complete option, set the Walled garden switch to
Enabled, and in the Walled garden ranges field, enter the IP addresses
for walled garden that you obtained when you
configured the guest network in Portnox Cloud.
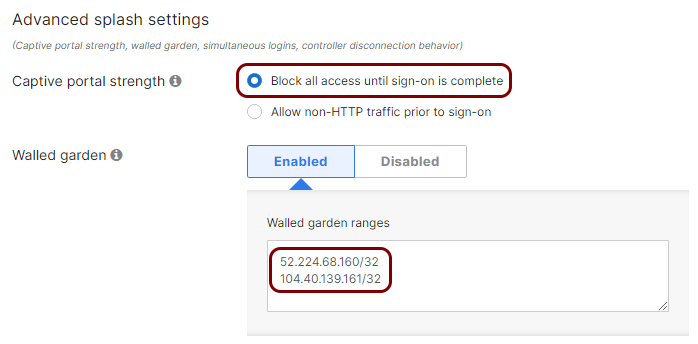 Note:If you select the option Allow non-HTTP traffic prior to sign-in, users will be able to access all HTTPS (secure) websites on the Internet without the need to sign in to the guest network.Warning:The NAS device must be able to communicate with the walled garden IP addresses at all times. If this communication is blocked in any way, the captive portal will not work, and guest devices will be unable to connect to the network. Before you proceed, verify that all firewalls, ACLs, and any other security measures that could interfere with this communication are configured to explicitly allow the walled garden IP addresses.
 -
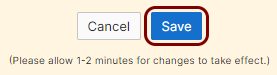
Click on the Save button to save your configuration.
-
In the left-hand side menu, select the option.
-
In the Custom splash URL section, enter the Captive Portal URL that you
obtained when you configured the guest network in
Portnox Cloud.
 Note:If using a custom splash URL, other settings in this section, such as the Splash frequency, do not apply to the custom captive portal (in this case, the Portnox Cloud captive portal). The Portnox Cloud guest network configuration has the Session Expiration parameter instead, and sends it in the response to the NAS device, but it is up to the NAS device if it applies the received value.
 -
Click on the Save button to save your configuration.
Result: Your guest users can now access the guest Wi-Fi network, using the Portnox Cloud guest network management functionality.