
Guest access – WatchGuard Firebox
In this topic, you will learn how to configure the built-in wireless interface of a locally managed WatchGuard™ Firebox to work together with the Portnox™ Cloud captive portal for guest user authentication.
Before you begin configuring your guest SSID, you must configure the guest network in Portnox Cloud and note down the values of the fields: IP (for walled garden) and Captive Portal URL. In the Shared secret field, enter a value of 1 to 32 characters. You will enter the same value on the Firebox.
Create the guest SSID
In this section, you will enable a wireless access point for guests, configure a network for it, and configure an open SSID.
-
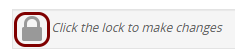
If the screen is locked, click on the lock icon at the top of the screen (Click the lock to make
changes).
The screens stay unlocked until you lock them again.
-
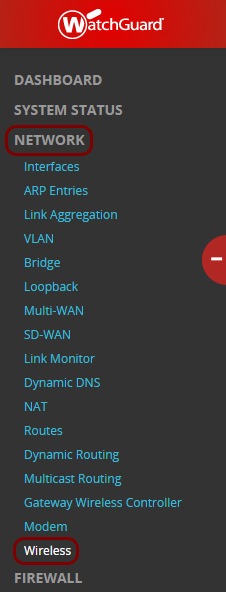
In the left-hand side menu, select the option.
-
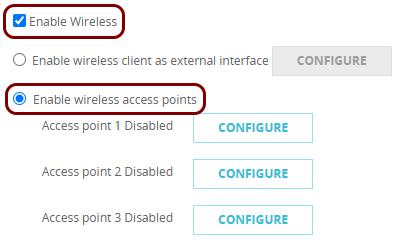
On the Wireless screen, activate the Enable Wireless checkbox and
select the Enable wireless access points option.
-
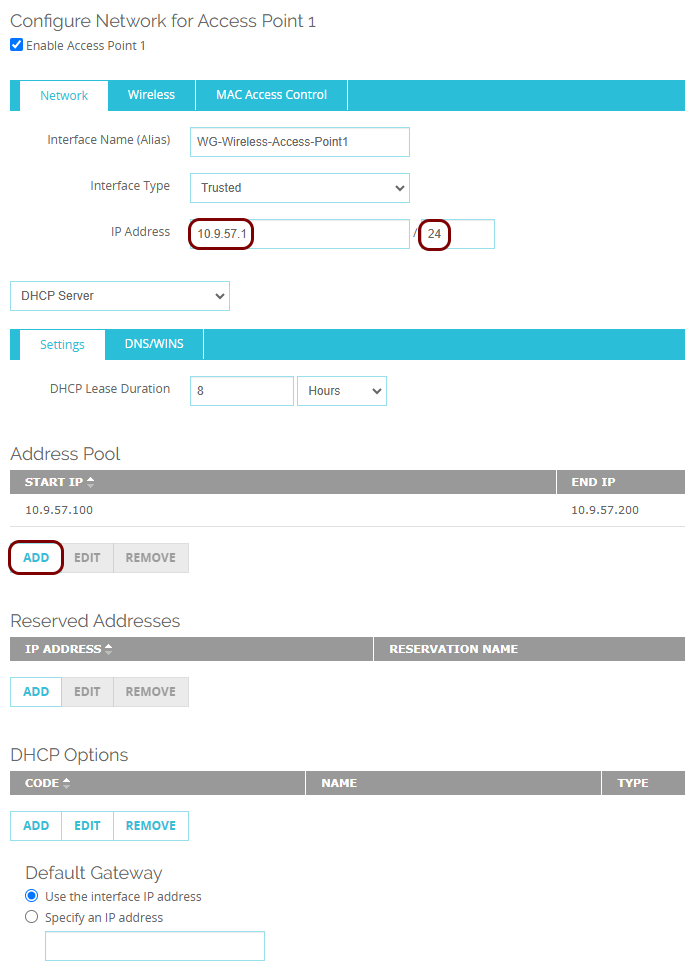
On the Configure Network for Access Point screen, activate the Enable Access
Point checkbox. Then, on the Network tab, configure the network:
-
Configure the SSID:
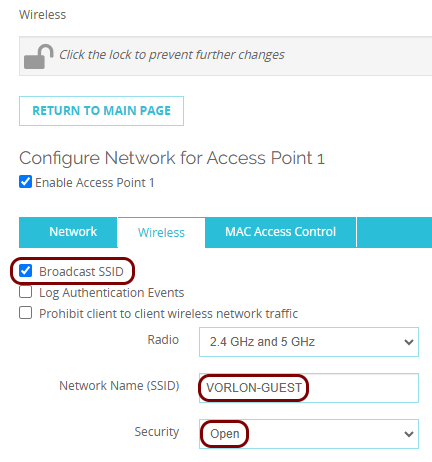
- Activate the Broadcast SSID checkbox.
- In the Radio field, select the bands that broadcast this SSID, as required.
- In the Network Name (SSID) field, enter the network name that guests see when they search for Wi-Fi networks.
- In the Security field, select the Open option.
Result: You created an open guest SSID. Until you assign the hotspot to it, guests can connect to it without authentication.
Configure the external guest authentication hotspot
In this section, you will configure the Firebox to redirect guests to the Portnox™ Cloud captive portal.
-
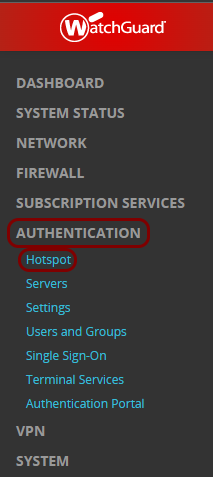
In the left-hand side menu, select the option.
-
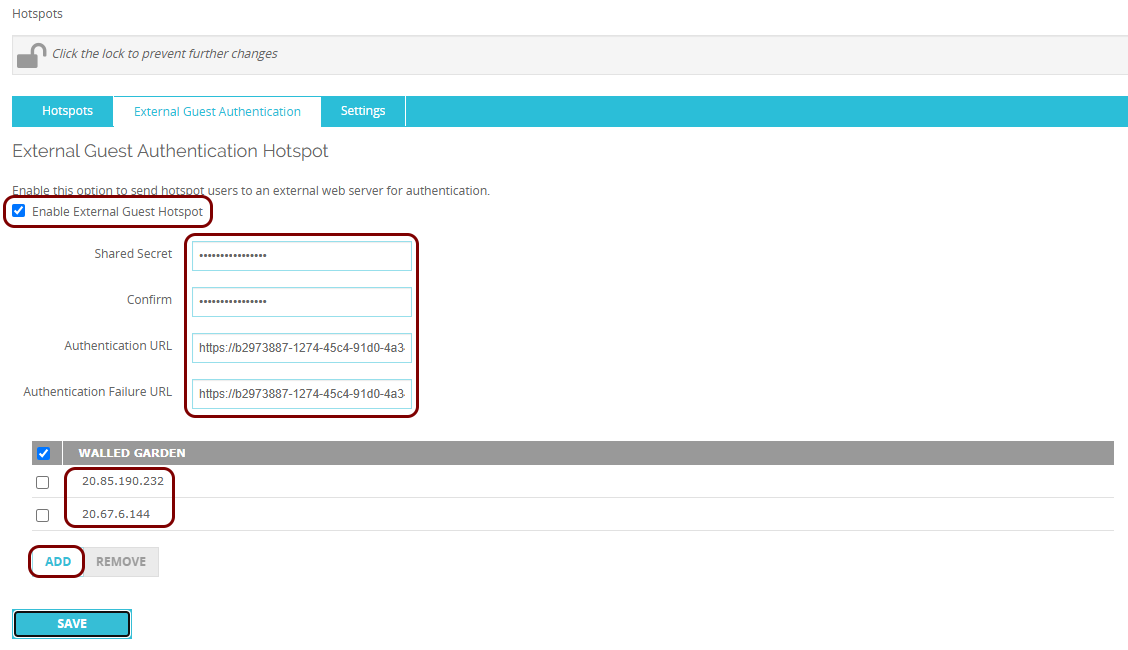
Click on the External Guest Authentication tab, and configure the hotspot:
-
In the Walled Garden section, add every address from the IP (for walled
garden) field that you obtained when you configured the guest network in Portnox Cloud. For
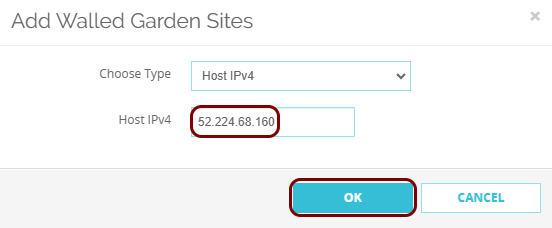
each address, click on the ADD button, in the Add Walled Garden
Sites dialog, leave the Host IPv4 option selected in the
Choose Type field, enter the address in the Host IPv4
field, and click on the OK button.
 Warning:The NAS device must be able to communicate with the walled garden IP addresses at all times. If this communication is blocked in any way, the captive portal will not work, and guest devices will be unable to connect to the network. Before you proceed, verify that all firewalls, ACLs, and any other security measures that could interfere with this communication are configured to explicitly allow the walled garden IP addresses.
-
In the Walled Garden section, add every address from the IP (for walled
garden) field that you obtained when you configured the guest network in Portnox Cloud. For
each address, click on the ADD button, in the Add Walled Garden
Sites dialog, leave the Host IPv4 option selected in the
Choose Type field, enter the address in the Host IPv4
field, and click on the OK button.
Result: You configured the external guest authentication hotspot. Do not click on the SAVE button yet. Fireware Web UI does not save the hotspot until you assign it to an interface.
Assign the hotspot to the guest SSID
In this section, you will assign the external guest authentication hotspot to the access point of the guest SSID, and save the hotspot configuration.
-
Click on the SELECT HOTSPOT button, and select the External Guest
Authentication option. Then, click on the SAVE button.
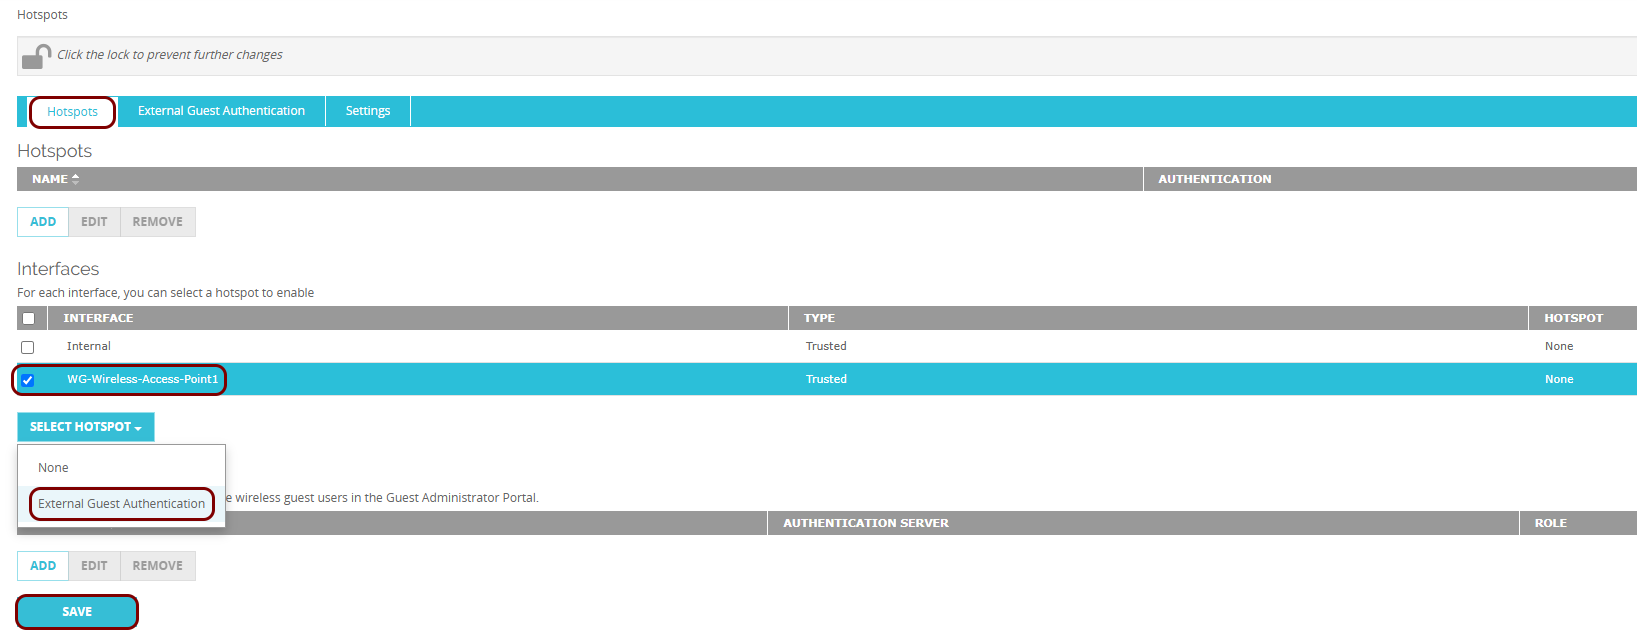
Result: The HOTSPOT column of the access point shows External Guest Authentication.
Result: You configured an open SSID that redirects guests to the Portnox Cloud captive portal for authentication.