
Guest access for Zyxel Nebula
In this topic, you will learn how to configure access points managed by Zyxel Nebula Control Center to work together with the Portnox™ Cloud captive portal for guest user authentication.
Before you begin configuring your guest SSID, you must configure the guest network in Portnox Cloud and note down the values of the fields: IP (for walled garden) and Captive Portal URL.
Create the guest SSID
In this section, you will create a new open SSID for guest access, and configure it to authenticate guests using the Portnox™ Cloud RADIUS servers.
-
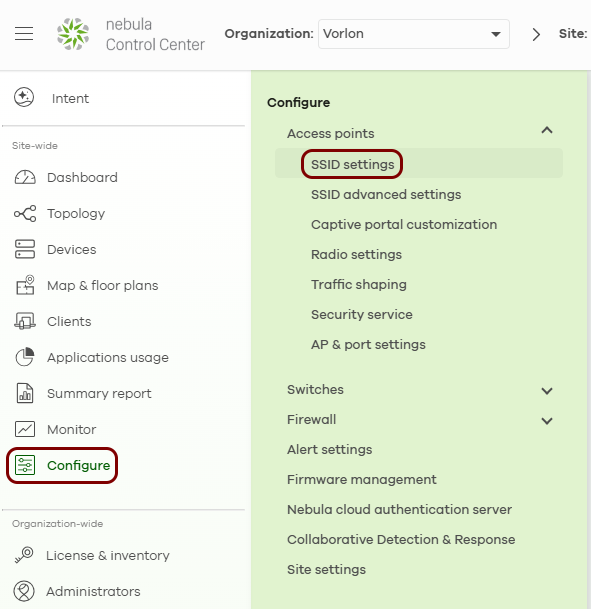
In Nebula Control Center, in the left-hand side menu, click on the following menu options: .
-
In the SSID settings pane, activate the Advanced mode switch, and then
click on the Add SSID network button.
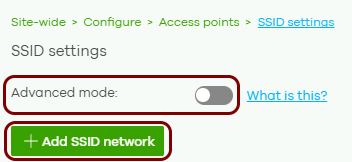 Note:Without advanced mode, the pane shows a simplified view with only the Open and Password security options. Advanced mode changes only which fields are visible. It does not change your configuration.
Result: A new SSID column appears to the right of the existing SSIDs.
-
In the new SSID column, click on the Edit link in the SSID settings
row.
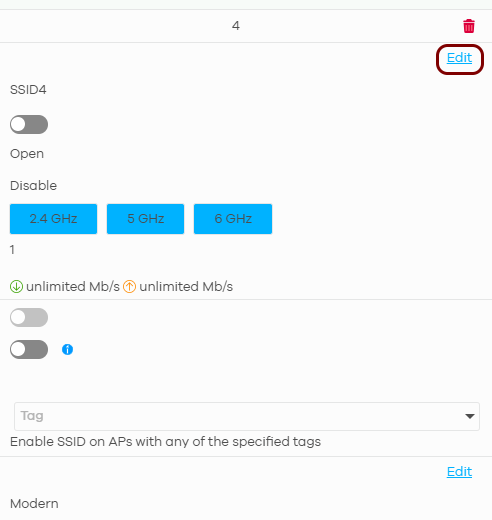
Result: The SSID advanced settings screen opens.
-
In the Basic Info section, in the SSID name field, enter the network
name that guests see when they search for Wi-Fi networks, and activate the Enabled
switch.

-
In the Sign-in method section, select the Sign-on with option, and in
the field next to it, select the My RADIUS server option. Leave the MAC
authentication fallback switch deactivated.
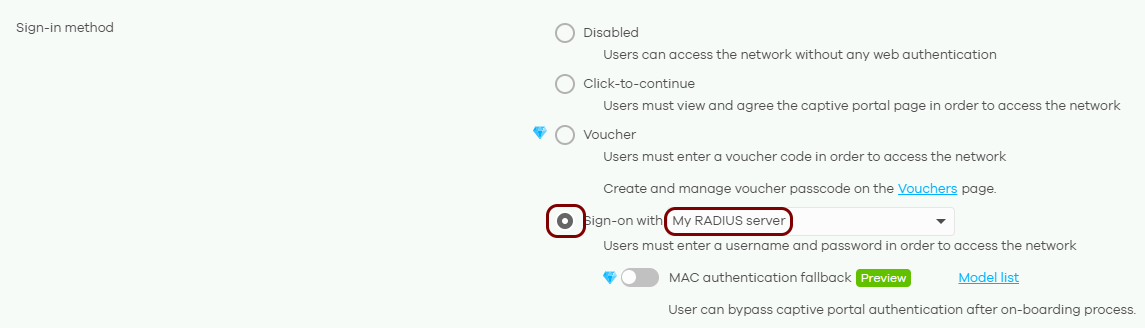
Result: The RADIUS server and Captive portal advanced setting sections appear below.
-
In the RADIUS server section, enter the details of the Portnox Cloud RADIUS server that you created earlier:

-
In the Captive portal advanced setting section, activate the Walled
garden switch. Then, in the Walled garden ranges field, enter the addresses
from the IP (for walled garden) field that you obtained when you configured the guest network
in Portnox Cloud, one address per line.
 Warning:The NAS device must be able to communicate with the walled garden IP addresses at all times. If this communication is blocked in any way, the captive portal will not work, and guest devices will be unable to connect to the network. Before you proceed, verify that all firewalls, ACLs, and any other security measures that could interfere with this communication are configured to explicitly allow the walled garden IP addresses.
 -
In the SSID settings pane, click on the Save button.
 Important:If you leave the SSID settings pane without clicking on the Save button, you lose all changes made on the SSID advanced settings screen.
The access points receive the new configuration within 1 to 2 minutes.
Result: You created an open guest SSID that authenticates guests using the Portnox Cloud RADIUS servers.
Redirect guests to the Portnox Cloud captive portal
In this section, you will configure the guest SSID to redirect guests to the Portnox™ Cloud captive portal.
-
In Nebula Control Center, in the left-hand side menu, click on the following menu options: .
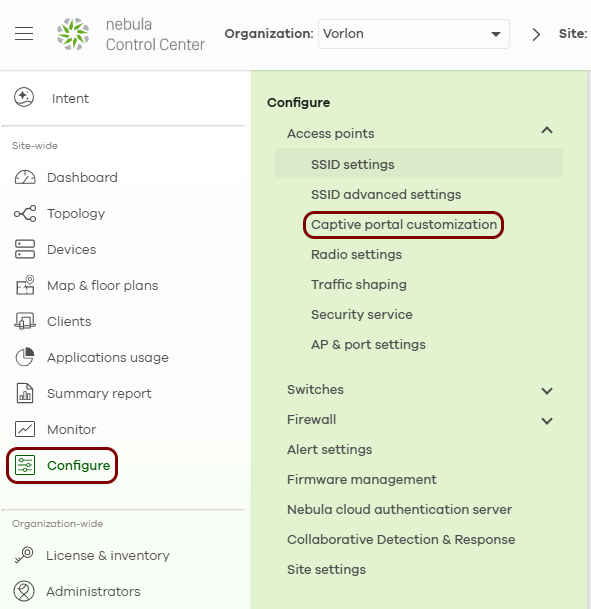
-
In the SSID field, select the guest SSID that you created earlier.

-
In the External captive portal URL section, activate the Use URL
switch, and in the URL field, paste the Captive Portal URL that you
obtained when you configured the guest
network in Portnox Cloud, including the leading https://.

Result: You configured an open SSID that redirects guests to the Portnox Cloud captive portal for authentication.