
Integrate with a Palo Alto firewall
In this topic, you will learn how to set up Portnox™ Cloud to send user-to-IP mappings to a Palo Alto Networks firewall.
This integration lets the Palo Alto firewall apply policies and log activity by user identity instead of IP address. Portnox Cloud sends the mappings through the firewall identity mapper Docker container, which uses the Palo Alto User-ID XML API.
Configure the Palo Alto firewall
In this section, you will create an administrator account on the Palo Alto firewall and generate an API key for it.
-
Create an admin role for the integration.
-
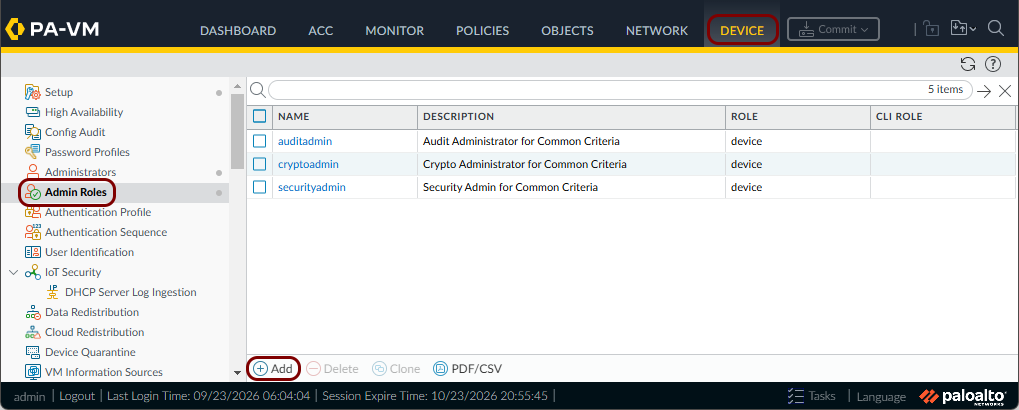
In the Palo Alto web console, click on the Device option in the top menu, then click
on the Admin Roles option in the left-hand side menu, then click on the
Add button in the bottom toolbar.
-
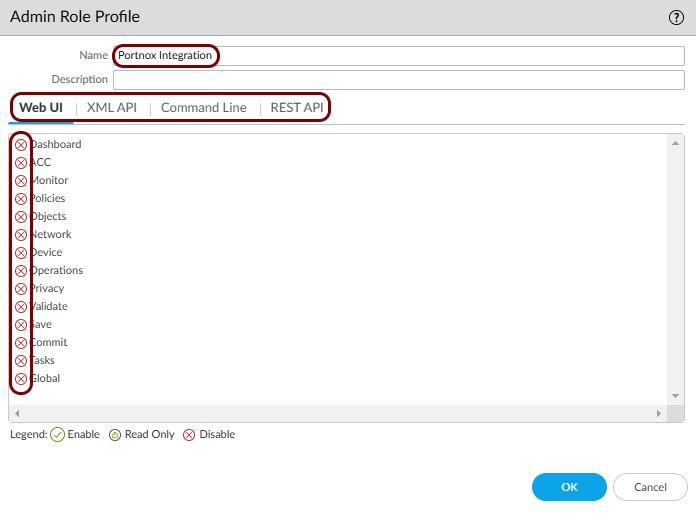
Enter a name for the role, and turn off all permissions in every tab.
In this example, we used the name Portnox Integration, but you can use any name you like.
-
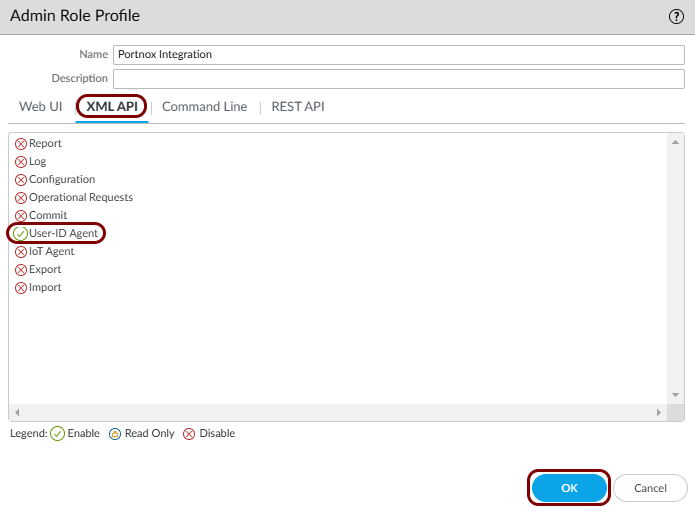
In the XML API tab, turn on the User-ID Agent permission.
Then, click on the OK button.
-
In the Palo Alto web console, click on the Device option in the top menu, then click
on the Admin Roles option in the left-hand side menu, then click on the
Add button in the bottom toolbar.
-
Create an administrator account that uses this role.
-
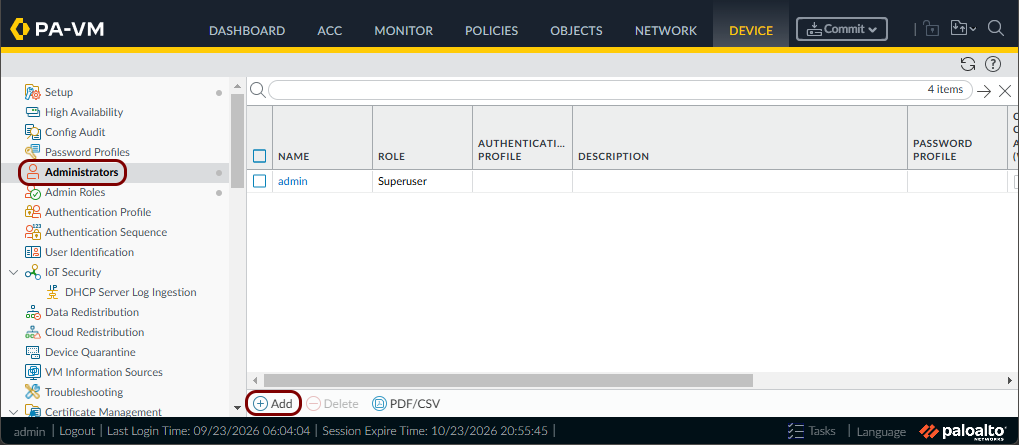
Click on the Administrators option in the left-hand side menu, then click on the
Add button in the bottom toolbar.
-
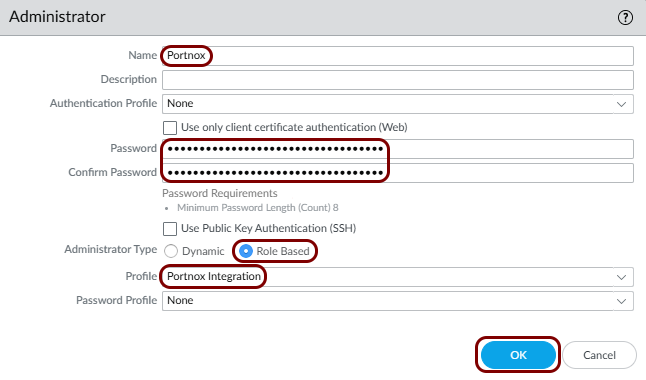
Enter a Name, a Password, and Confirm
Password for the account. Then, in the Administrator Type field,
select the Role Based option, and in the Profile field, select
the role that you created. Leave other fields as they are, then click the OK
button.
In this example, we used the username Portnox, but you can use any name you like.
-
Click on the Administrators option in the left-hand side menu, then click on the
Add button in the bottom toolbar.
-
Commit the configuration changes.
-
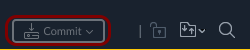
Click on the Commit button in the top-right corner.
-
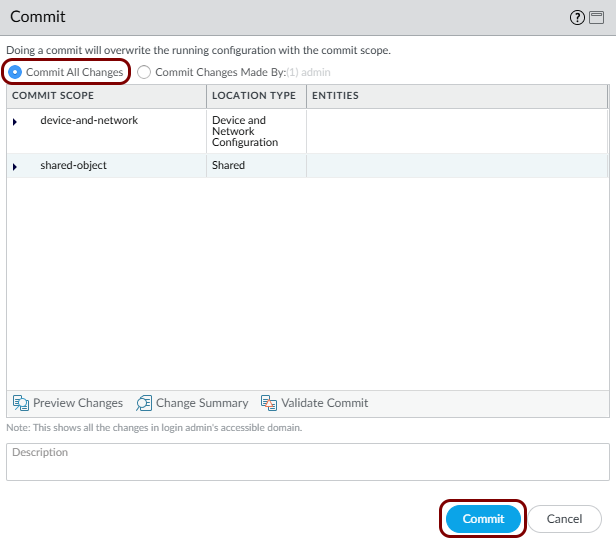
In the Commit window, leave the Commit All Changes option
selected, and click on the Commit button.
-
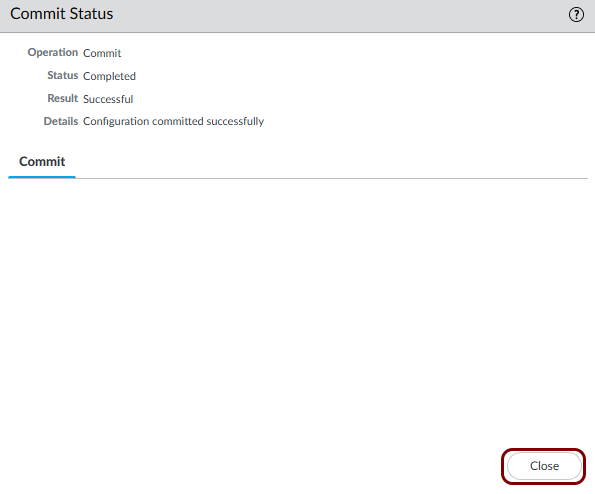
Wait for the Commit Status window to show Completed and
Successful, then click on the Close button.
-
Click on the Commit button in the top-right corner.
-
Generate an API key for the account by opening the following URL in a browser:
https://firewall_IP_or_FQDN:Port/api/?type=keygen&user=username&password=password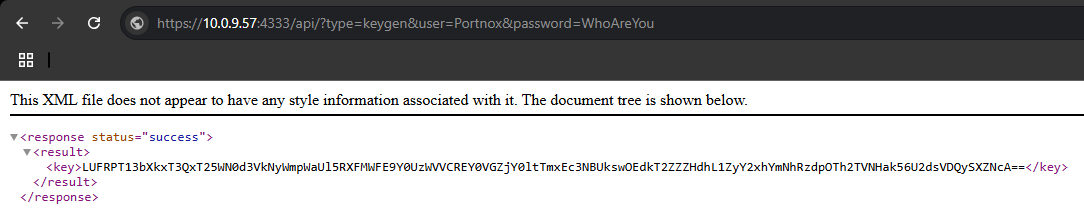
Add and deploy a Docker container
In this section, you will add a firewall identity mapper container in Portnox Cloud and run it on your Docker host.
-
In the Cloud portal top menu, click on the Settings option.

-
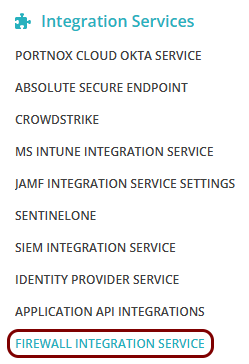
In the Cloud portal left-hand side menu, click on the option.
-
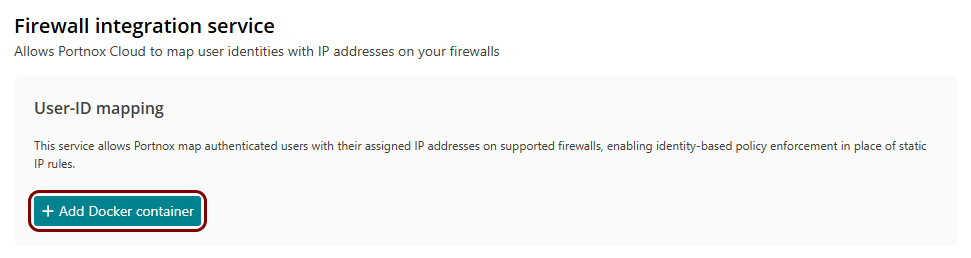
In the Firewall integration service section, click on the Add Docker
container button.
-
In the Add Docker container window:
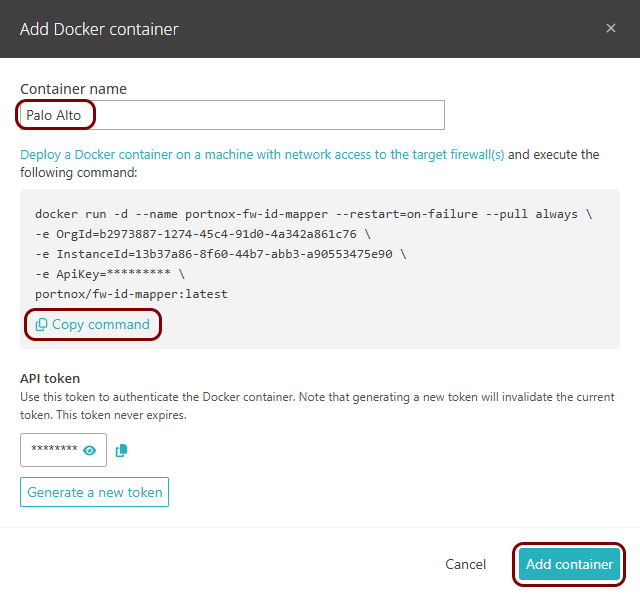
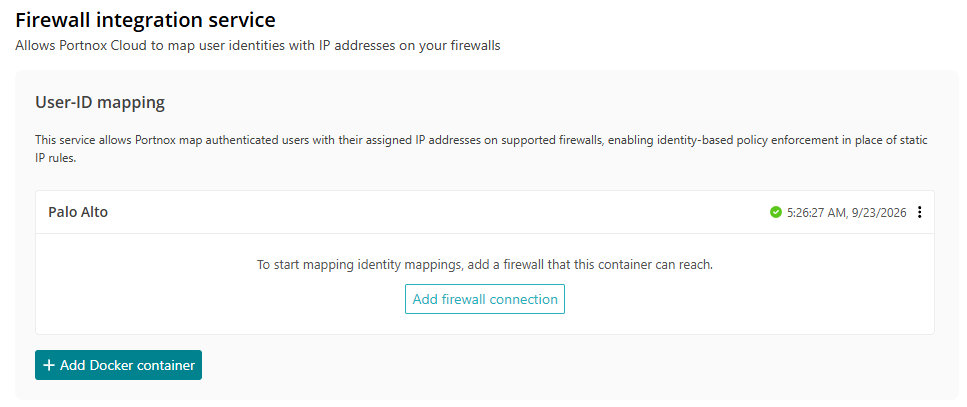
Result: The container appears in the User-ID mapping section.
Add the firewall connection
In this section, you will connect the container to your Palo Alto firewall.
-
In the User-ID mapping section, find your container and click on the Add firewall
connection button.

-
Enter the connection details:
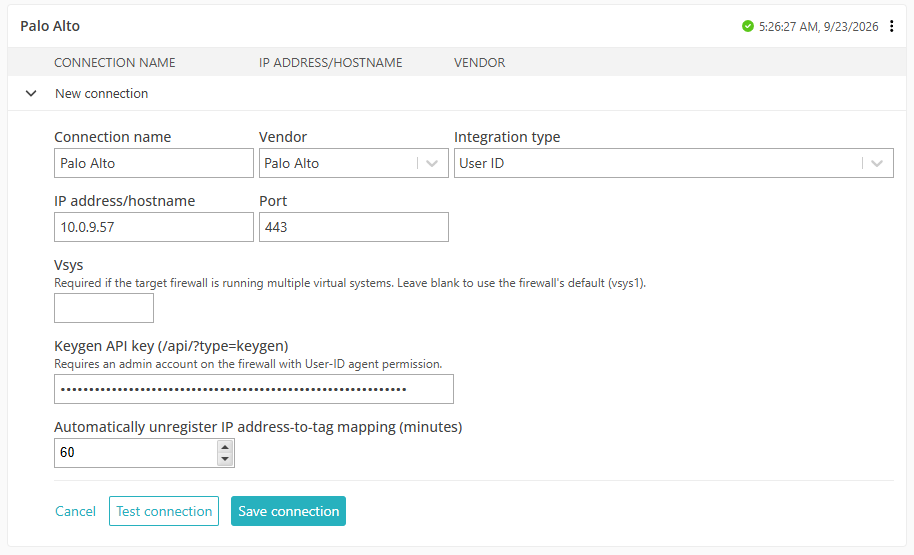
Result: Portnox Cloud sends user-to-IP mappings to the Palo Alto firewall when users authenticate.
