
Guest access – ExtremeCloud IQ
In this topic, you will learn how to configure ExtremeCloud IQ to work together with the Portnox™ Cloud captive portal for guest user authentication.
Before you begin configuring your guest SSID, you must configure the guest network in Portnox Cloud and note down the values of the fields: IP (for walled garden) and Captive Portal URL.
Create IP objects for the Portnox Cloud RADIUS servers
In this section, you will create IP objects for the Portnox™ Cloud RADIUS servers. ExtremeCloud IQ uses these IP objects to reference IP addresses in external RADIUS server entries, which you will create in the next section.
-
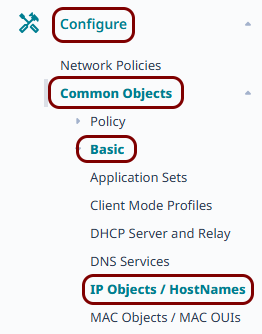
In the left-hand side menu of the ExtremeCloud IQ web interface, click on the following menu options: or go to https://va.extremecloudiq.com/#/common/ipobjectmanage.
-
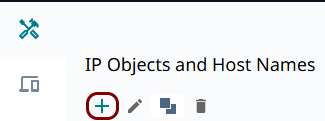
In the IP Objects and Host Names pane, click on the +
icon in the toolbar to create a new IP object.
-
In the New IP Object or Host Name pane, configure the new IP object:
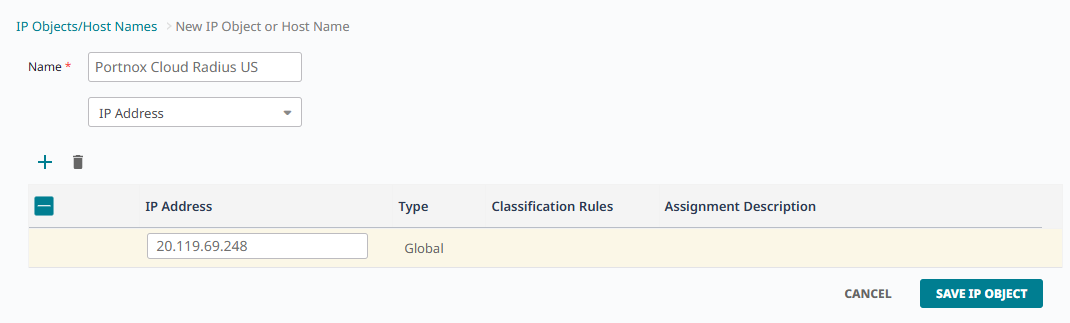
- In the Name field, enter a display name for this object, for example, the name of the corresponding Portnox Cloud RADIUS server.
- Leave the type field set to IP Address.
- In the IP Address field of the only row in the table, enter the Cloud RADIUS IP value from Portnox Cloud.
- Click on the SAVE IP OBJECT button.
-
If you use two Cloud RADIUS servers in both regions, repeat the above steps for the second RADIUS server.
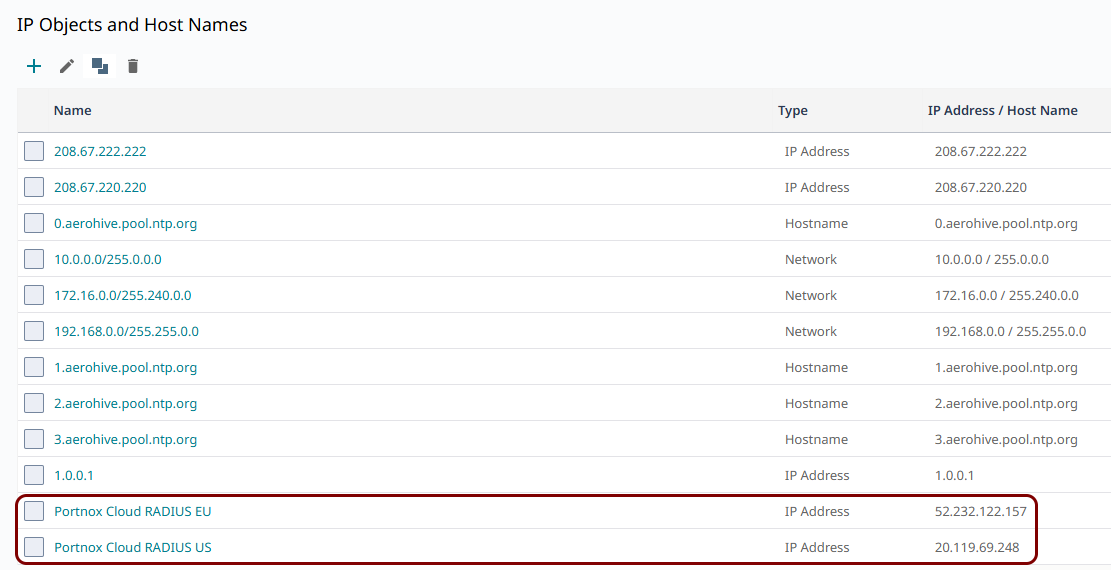
The above screenshot shows an example configuration with two added IP objects, one for each Cloud RADIUS region. Adjust the names and IP addresses to your tenant configuration.
Create the external RADIUS servers
In this section, you will create external RADIUS server entries for the Portnox™ Cloud RADIUS servers, using the IP objects that you created earlier. You will use these servers later when you configure your SSIDs.
-
In the left-hand side menu of the ExtremeCloud IQ web interface, click on the following menu options: or go to https://va.extremecloudiq.com/#/common/extservers.
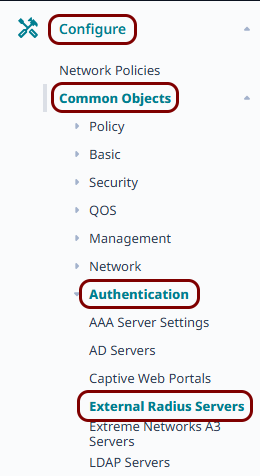
-
In the External RADIUS Servers pane, click on the +
icon in the toolbar to create a new external RADIUS server.
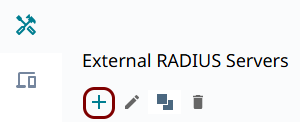
-
In the External RADIUS Server pane, enter the details of the Portnox Cloud RADIUS server that you created earlier:
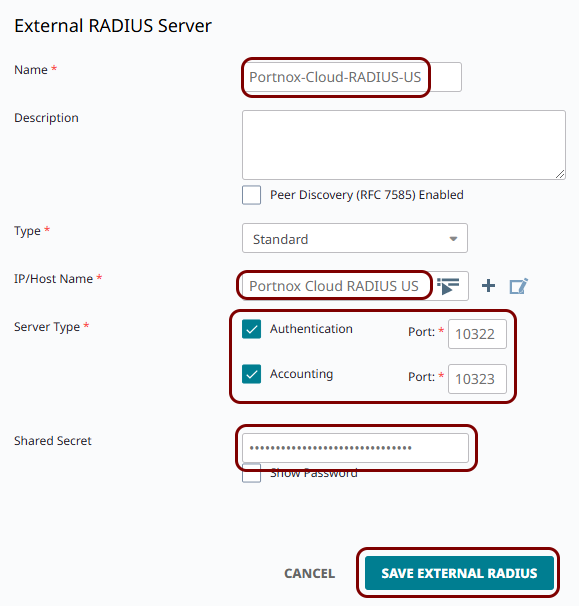
-
If you use two Cloud RADIUS servers in both regions, repeat the above steps for the second RADIUS server.
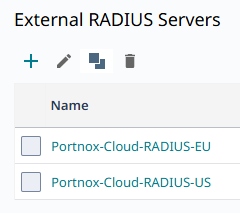
The above screenshot shows an example configuration with two external RADIUS server entries, one for each Cloud RADIUS region. Adjust the names, IP objects, and port numbers to your tenant configuration.
Create the guest SSID
In this section, you will create a new open SSID for guest access, and configure it, along with a captive web portal object, to redirect guests to the Portnox Cloud captive portal.
-
In the left-hand side menu of the ExtremeCloud IQ web interface, click on the following menu options: or go to https://va.extremecloudiq.com/#/common/ssidmanage.
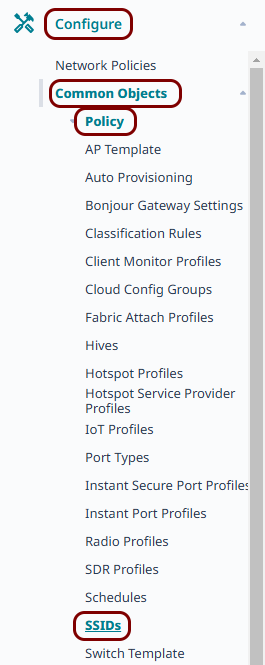
-
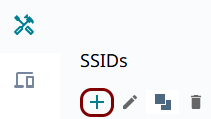
In the SSIDs pane, click on the + icon in the toolbar
to create a new SSID.
-
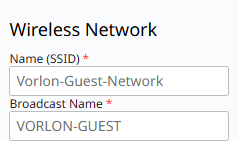
In the Wireless Network section, enter the Name (SSID) for the guest
SSID, which is the name visible in the ExtremeCloud IQ interface, and the Broadcast Name,
which is the name shown to devices when searching for a network.
-
Scroll down to the SSID Usage section, and on the SSID Authentication
tab, select the Open option.
 Note:Do not select Enterprise here. Since MAC authentication becomes the sole means of access control on an open SSID, you do not need WPA2 or WPA3 Enterprise authentication on this SSID.
 -
Set the Enable Captive Web Portal switch to ON, and select the
Captive Web Portal option.
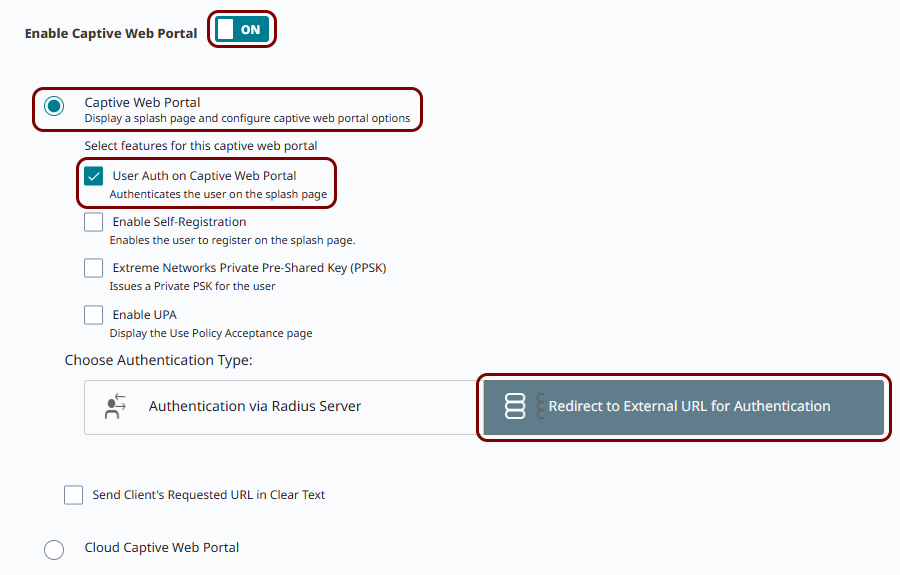
- Activate the User Auth on Captive Web Portal checkbox.
- In Choose Authentication Type, select the Redirect to External URL for Authentication option.
-
Next to the Default Captive Web Portal field, click on the ADD
button.

Result: The New Captive Web Portal window opens.
-
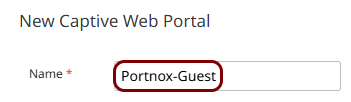
In the New Captive Web Portal window, in the Name field, enter a name
for this captive web portal, for example, Portnox-Guest.
-
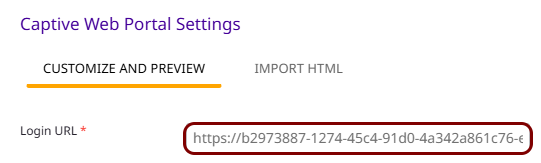
In the Captive Web Portal Settings section, on the CUSTOMIZE AND
PREVIEW tab, in the Login URL field, paste the Captive Portal
URL that you obtained when
you configured the guest network in Portnox Cloud.
-
In the Password Encryption field, select the No Encryption (Plaintext
Password) option, and leave the Authentication Method field set to its
default CHAP value.
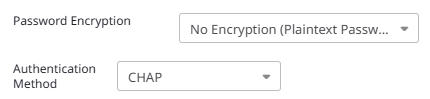 Note:Since this SSID redirects guests directly to the Portnox Cloud captive portal, ExtremeCloud IQ never uses these values. Avoid the UAM with Shared Secret option only, since it requires a Shared Secret value that you would have to enter to proceed.
 -
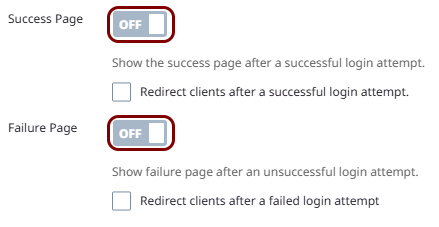
Set the Success Page and Failure Page switches to
OFF.
-
Scroll down to the Walled Garden section, click on the + icon.
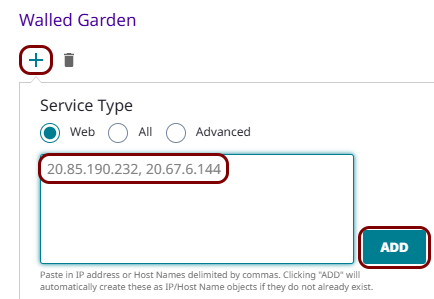 Warning:The NAS device must be able to communicate with the walled garden IP addresses at all times. If this communication is blocked in any way, the captive portal will not work, and guest devices will be unable to connect to the network. Before you proceed, verify that all firewalls, ACLs, and any other security measures that could interfere with this communication are configured to explicitly allow the walled garden IP addresses.
 -
Scroll down to the Authentication Settings section:
-
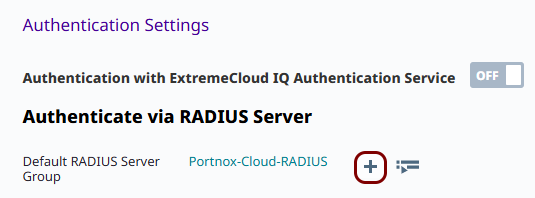
In the Authenticate via RADIUS Server subsection, click on the + icon next to the Default RADIUS Server Group
field.
-
In the Configure RADIUS Servers pane, in the RADIUS Server Group
Name field, enter a name for the RADIUS server group, then on the EXTERNAL RADIUS
SERVER tab, activate the checkboxes next to the external RADIUS servers that you
created earlier, and click on the SAVE RADIUS button.
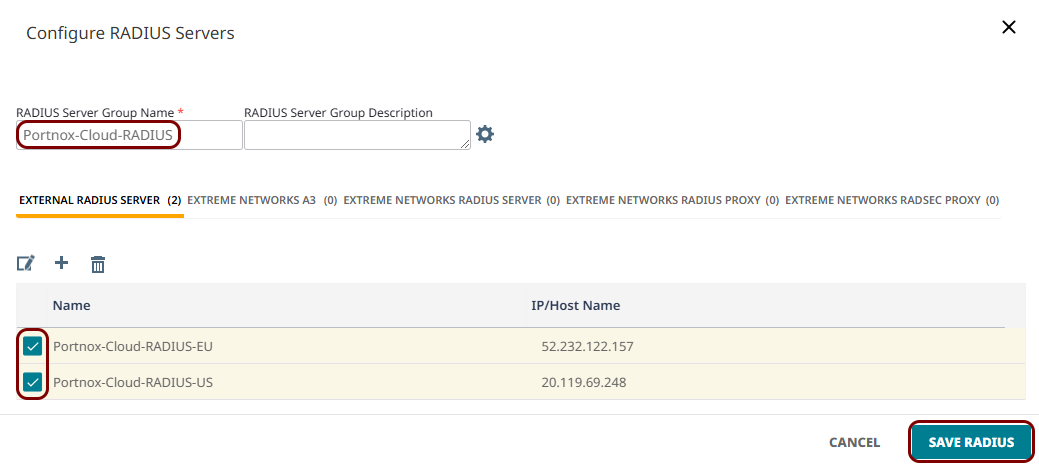 Note:The EXTERNAL RADIUS SERVER tab lists every external RADIUS server that you created, including any RADSEC-type servers. Select only the Standard-type servers for this SSID.
 -
The SSID page now shows the new RADIUS server group selected in the Default RADIUS Server
Group field, with the servers that you selected listed in the table below it.

-
In the Authenticate via RADIUS Server subsection, click on the + icon next to the Default RADIUS Server Group
field.
Result: You created an open SSID that redirects guests to the Portnox Cloud captive portal for authentication.
Assign SSIDs to a network policy and update your access points
In this section, you will add any SSIDs that you created to a network policy, and push the updated policy to your access points. Changes to your network policy do not take effect until you complete this section.
-
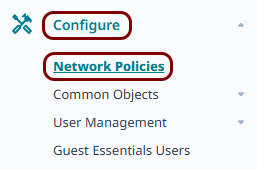
In the left-hand side menu of the ExtremeCloud IQ web interface, click on the following menu options: .
-
On the tile representing the network policy that you want to update, click on the ADD
NETWORK button.
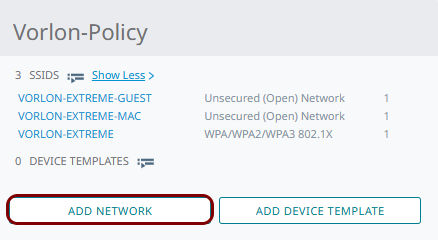
Result: The network policy wizard opens.
-
Click on the Select icon.
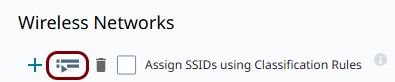
Result: The SSIDs window opens.
-
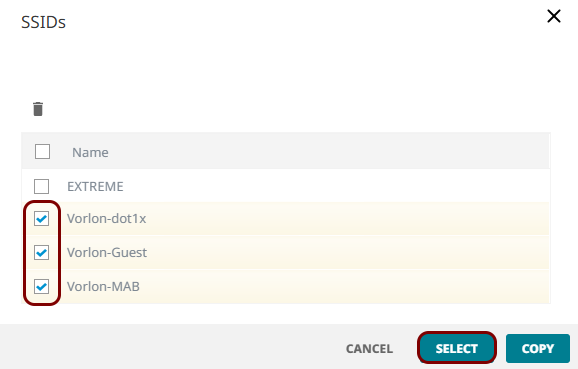
In the SSIDs window, activate the checkbox(es) next to the SSIDs that you created, and click
on the SELECT button.
-
In the wizard, click on the 6 Deploy Policy step.

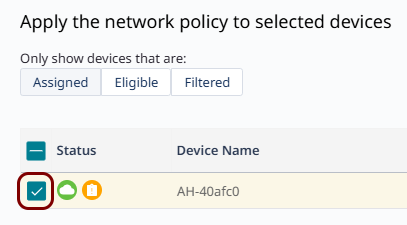
Result: The Apply the network policy to selected devices step opens.
-
Activate the checkbox(es) next to the access points that you want to update and click on the
UPLOAD button.
-
In the Device Update window, select the Complete Configuration Update
option, and click on the PERFORM UPDATE button.
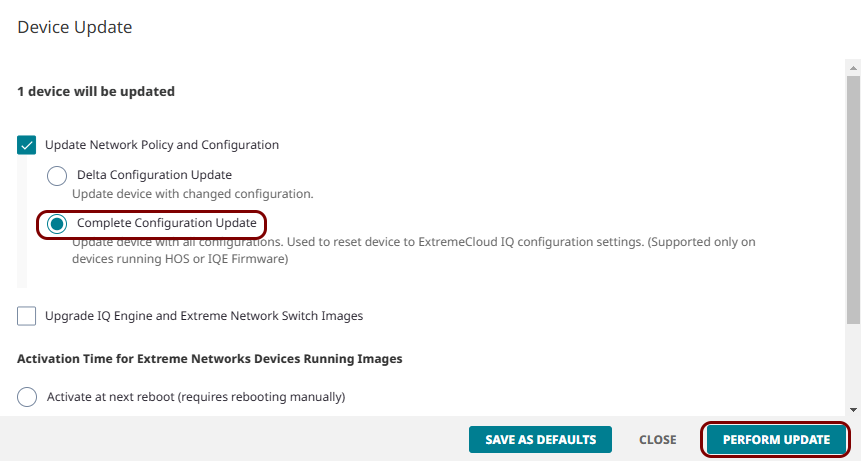 Note:We recommend a complete configuration update over a delta update, since it resets the device to match ExtremeCloud IQ's configuration exactly, rather than only applying changes. A delta update can leave stale settings on the device if earlier updates failed or were only partially applied.
Result: Your access points receive the updated network policy, and clients can now access the SSIDs that you created.