Run the local TACACS+ server in Microsoft Hyper-V
In this topic, you will learn how to install and configure the Portnox™ Cloud local TACACS+ server in the Microsoft Hyper-V hypervisor.
To configure the local TACACS+ server in the Microsoft Hyper-V hypervisor, you must first:
- Download the local TACACS+ server virtual machine file for Hyper-V, VHD format
- Configure the settings for the local TACACS+ server and download the configuration for the virtual machine file.
To do these steps, go to the following topic: Set up a local TACACS+ server using a virtual machine.
-
In the Actions menu on the right-hand side, select the Virtual Switch
Manager option.

-
In the Virtual Switch Manager window, select the External option on the
right-hand side, and click on the Create Virtual Switch button.

-
In the Virtual Switch Properties section:
-
Select the External network option and make sure that you select the host machine’s
Ethernet adapter that is connected to the primary network.

-
Select the External network option and make sure that you select the host machine’s
Ethernet adapter that is connected to the primary network.
-
Go back to the main Hyper-V Manager window. In the Actions menu on the
right-hand side, select the New option, and select the Virtual Machine
option from the pop-up menu.
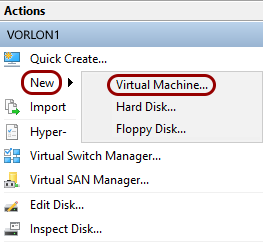
The New Virtual Machine Wizard opens.
-
Create the virtual machine using the New Virtual Machine Wizard:
-
In the Before You Begin step, click on the Next button.

-
In the Specify Name and Location step, in the Name field, enter
the name for this virtual machine, then click on the Next button.
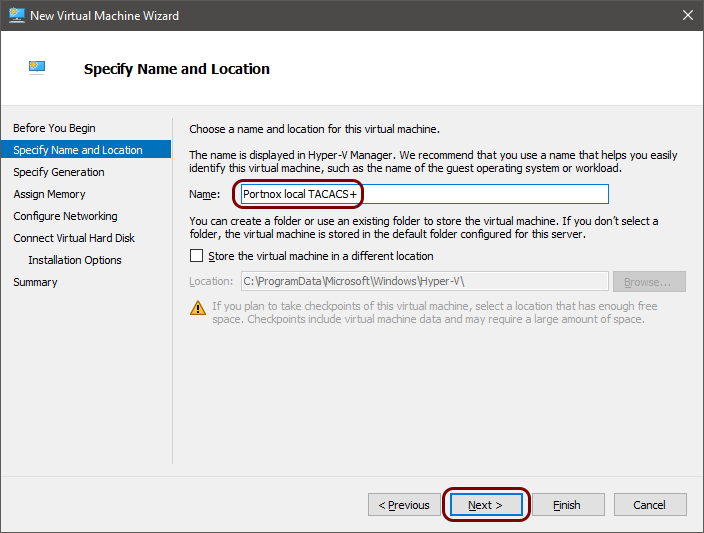
In this example, we used the name Portnox local TACACS+, but you can use any name you like.
-
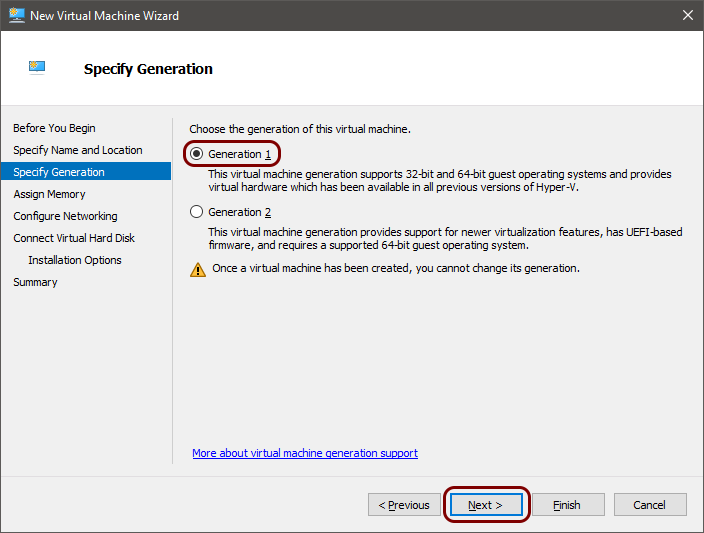
In the Specify Generation step, make sure that the Generation 1
option is selected, and click on the Next button.
-
In the Assign Memory step, enter the value 4096 and click on the
Next button.

-
In the Configure Networking step, from the Connection list,
select the virtual switch created earlier, and click on the Next button.

In our example, this is the Portnox TACACS+ Bridge virtual switch.
-
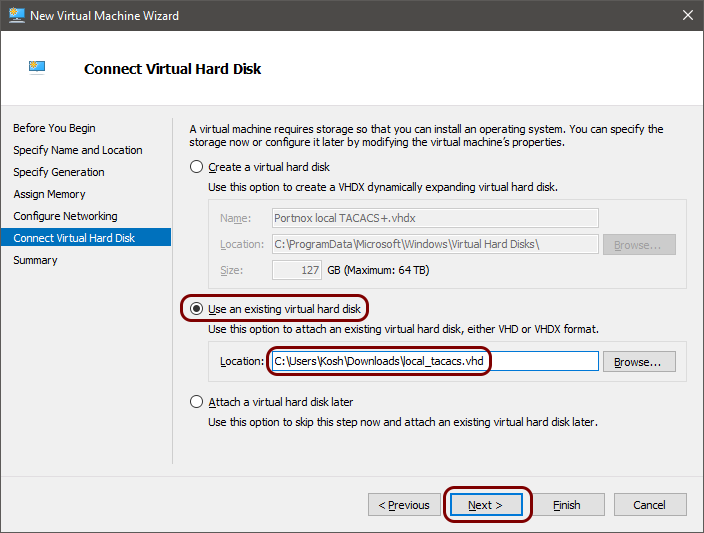
In the Connect Virtual Hard Disk step, select the Use an existing virtual
hard disk option, and click on the Browse button. In the file selector,
find the local_tacacs.vhd file that you downloaded earlier and open it. Then, click on the
Next button.
-
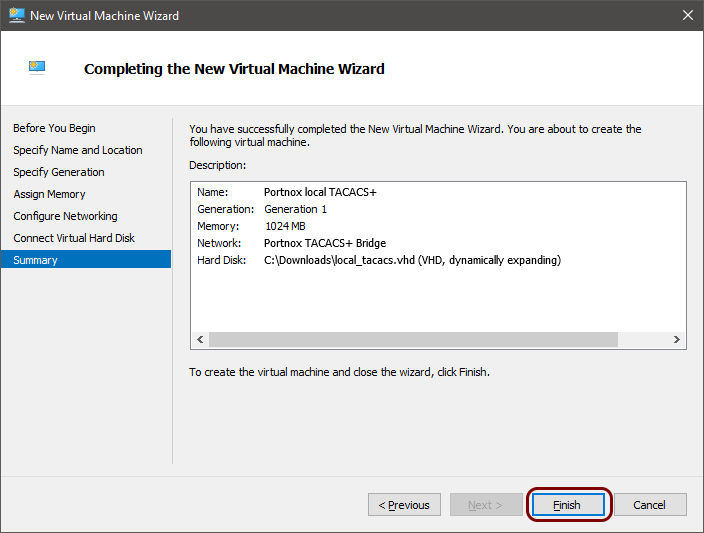
In the Summary step, click on the Finish button.
-
In the Before You Begin step, click on the Next button.
-
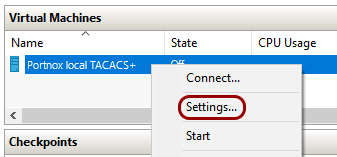
Go back to the main Hyper-V Manager window. In the Virtual Machines list,
right-click on the created virtual machine, and select the Settings option from the pop-up
menu.
The Settings window opens.
-
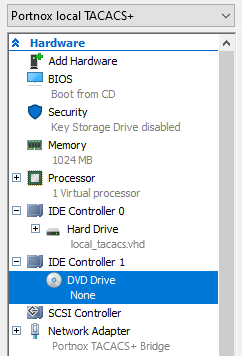
Attach the configuration image using the Settings window:
-
In the left-hand menu, click on the DVD Drive option.
-
Select the .iso file that you downloaded earlier.
 Note:The exact name of the file is NAME.iso, where NAME is the name you entered in the Name field when configuring the local TACACS+ server.
-
In the left-hand menu, click on the DVD Drive option.
-
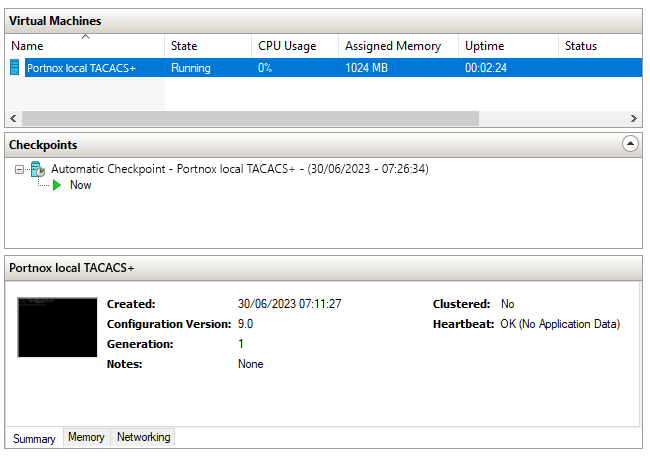
Go back to the main Hyper-V Manager window. In the Virtual Machines list,
right-click on the created virtual machine, and select the Start option from the pop-up
menu.

Result: Your local TACACS+ server is active.
You can check its status in Portnox Cloud, in the section.
