Add Okta Platform as an OIDC identity provider for Zero Trust Network Access
In this topic, you will find instructions on how to add Okta Platform as an OIDC identity provider for Portnox™ Zero Trust Network Access.
Prerequisites:
-
You must first integrate your Portnox Cloud instance with your Okta Workforce Identity repository as an authentication provider. For more information, see the following topic: Integrate with Okta Wokforce Identity.
Create a new identity provider configuration in Portnox Cloud
In this section, you will create a new OIDC identity provider configuration in Portnox Cloud
-
In the Cloud portal top menu, click on the Settings option.

-
In the Cloud portal left-hand side menu, click on the menu option.

-
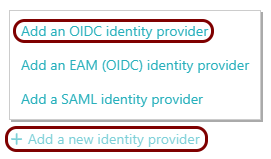
Click on the Add a new identity provider link and from the drop-down menu, select the
Add an OIDC identity provider option.
-
In the Identity provider details section, enter an Identity provider
name and optionally a Description.
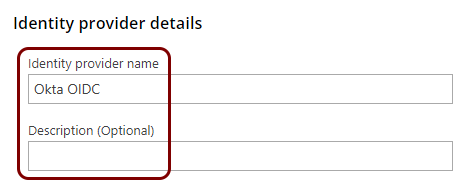
In this example, we used the name Okta OIDC for the new identity provider but you can use any name you like.
Create a new Okta application
In this section, you will create a new Okta application that will handle integration with Portnox Cloud.
-
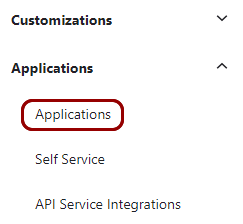
In the left-hand side menu, click on the option.
-
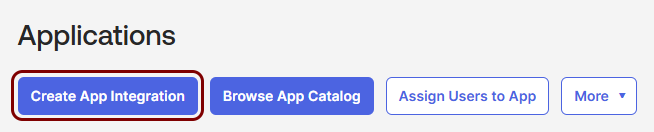
In the right-hand side pane, click on the Create App Integration button.
-
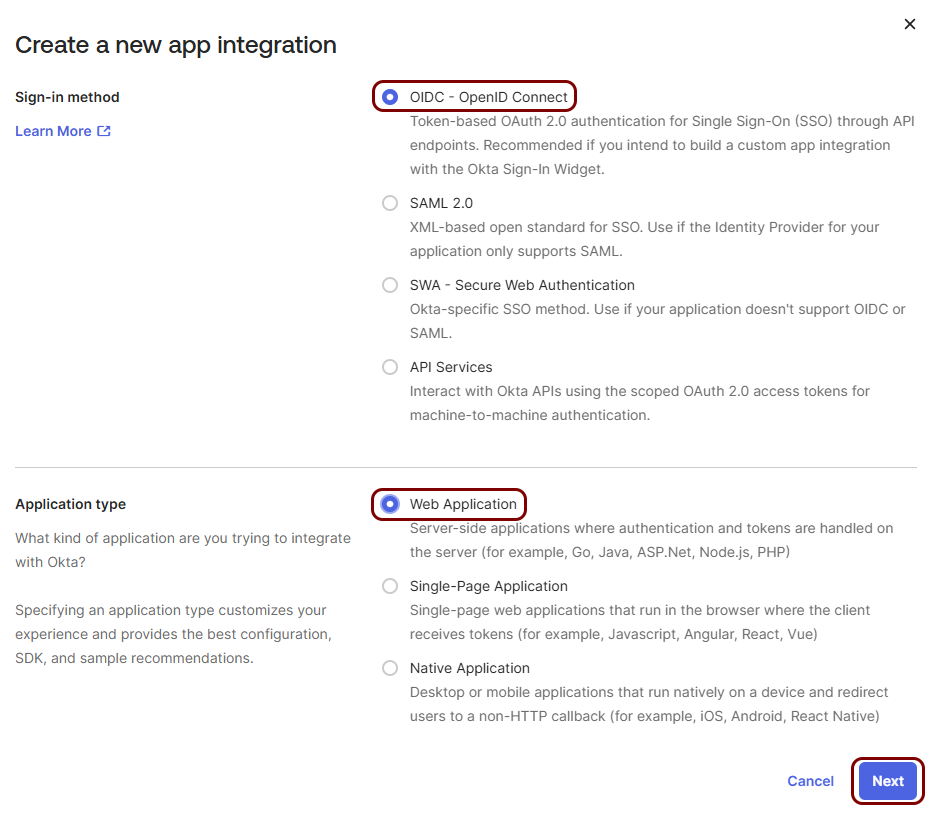
In the Create a new app integration window, in the Sign-in method
section, select the OIDC - OpenID Connect option, in the Application
type section, select the Web Application option, and then click on the
Next button.
-
In the New Web App Integration pane, enter an App name.
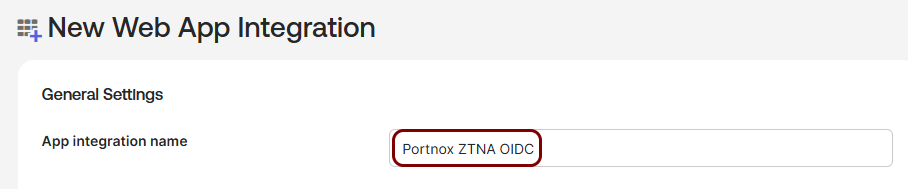
In this example, we used the name Portnox ZTNA OIDC, but you can use any name you like.
-
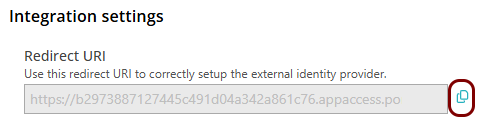
In the Portnox tab, click on the ⧉ icon next to the Redirect
URI field to copy the value to your clipboard.
-
In the Okta tab, paste the value that you just copied to your clipboard into the text field in the
Sign-in redirect URIs section, replacing the value that is already there.

-
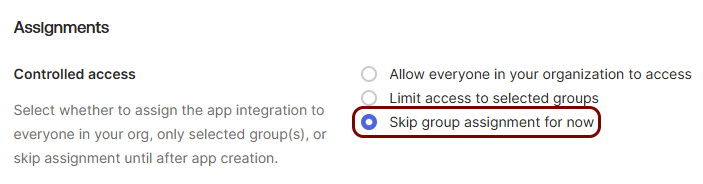
In the Assignments section, select the Skip group assignments for now
option.
Copy configuration values from the Okta tab to the Portnox tab
In this section, you will copy the values displayed by the Okta application setup section and paste them in the relevant fields in Portnox Cloud.
-
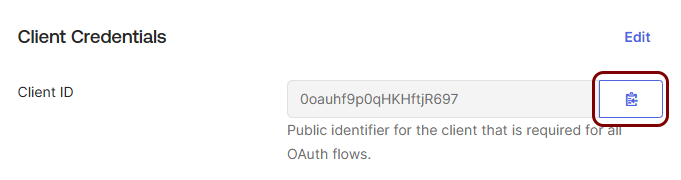
In the Okta tab, in the right-hand side pane’s General tab, in the Client
Credentials section, click on the ⧉ icon next to the
Client ID field to copy it to your clipboard.
-
In the Portnox tab, in the Identity provider properties section, click on the empty field
under the Client ID heading and paste the value copied from the Okta tab.

-
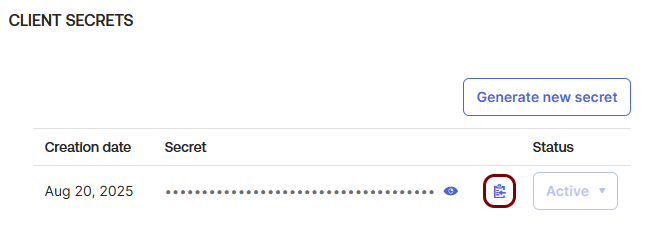
In the Okta tab, in the right-hand side pane’s General tab, in the CLIENT
SECRETS section, click on the ⧉ icon in the active secret
row to copy it to your clipboard.
-
In the Portnox tab, in the empty field under the Client secret heading, paste the value that
you copied from the Okta tab.

-
In the Portnox tab, in the Identity provider properties section, click on the empty field
under the Issuer URL heading and enter the following value:
https://your_tenant_name.okta.com.

Finalize the configuration
In this section, you will finalize the configuration in the Portnox Cloud and in Okta.
-
Finalize the configuration in the Portnox tab.
-
Click on the Save and Close button.

-
Click on the Save and Close button.
-
Finalize the configuration in the Okta tab.
-
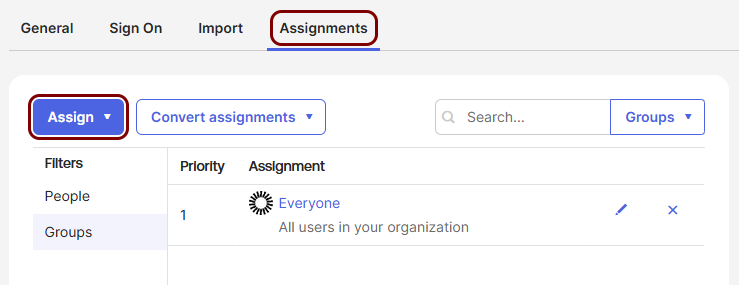
Click on the Assignments tab and assign Okta users who will be able to use this
identity provider.
-
Click on the Assignments tab and assign Okta users who will be able to use this
identity provider.
Result: You have added Okta as an identity provider for Portnox Zero Trust Network Access.