Integrate with SentinelOne
In this topic, you will learn how to set up the integration between Portnox™ Cloud and SentinelOne.
Important:
Prerequisite: Integration with SentinelOne requires one of the following conditions:
User devices have AgentP installed.
Portnox Cloud is integrated with Microsoft Intune, and user devices have SCEP certificates containing the device’s Intune ID in the SAN field.
Portnox Cloud is integrated with Jamf, and user devices have SCEP certificates containing the device’s Jamf ID in the SAN field.
If none of these conditions are met, Portnox Cloud cannot obtain device risk information from SentinelOne, and the integration will have no effect on risk assessment policies.
-
Obtain an API token from SentinelOne:
-
In the SentinelOne main menu, navigate to .
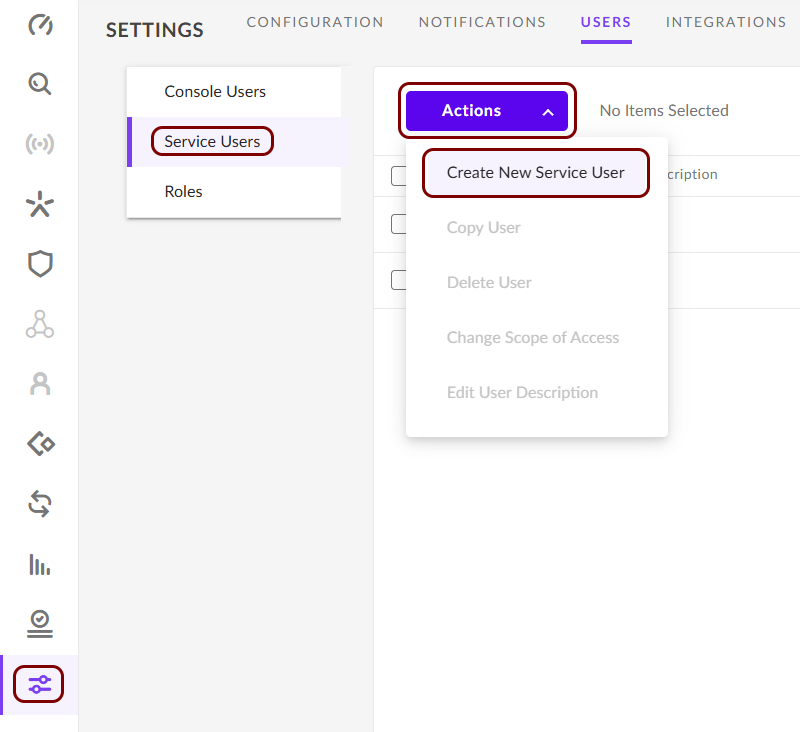
-
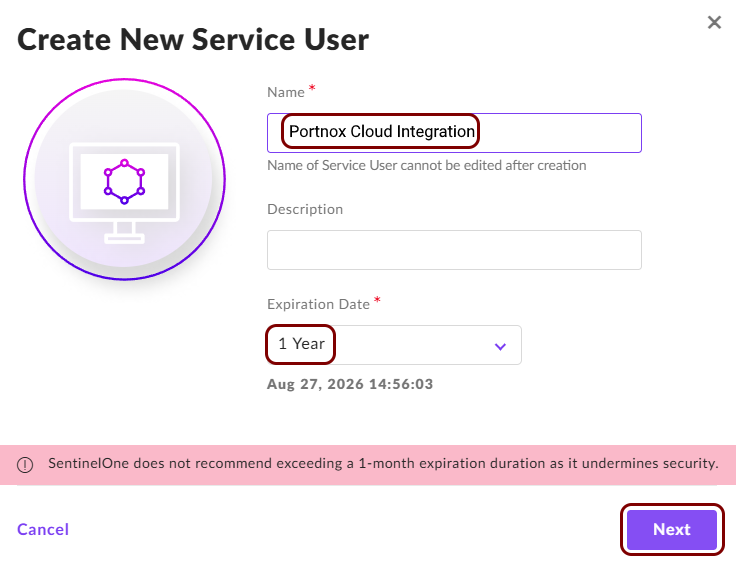
In the Create New Service User window, enter a Name for this
service user, and in the Expiration Date field, select the 1 Year
option. Then, click on the Next button.
-
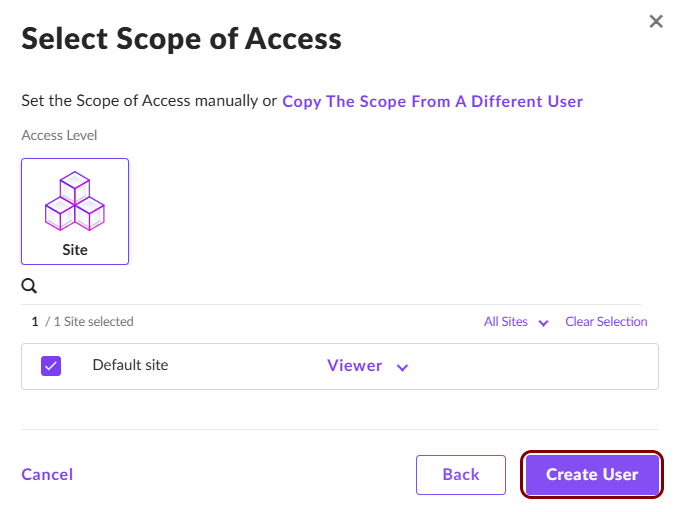
In the Select Scope of Access window, set access as Viewer for the
Default site, and then click on the Create User button.
-
In the API Token for... window, click on the Copy API Token
link.
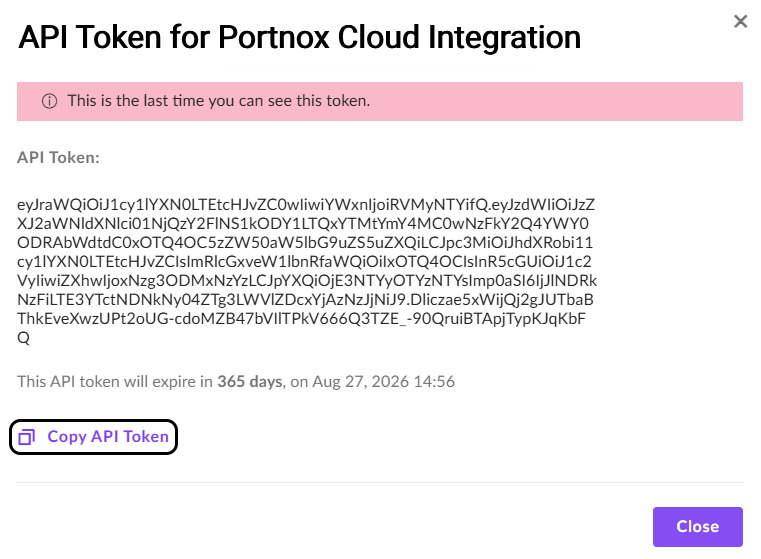 Note:Save this token in a temporary text file. You will need it later.
-
In the SentinelOne main menu, navigate to .
-
In the Cloud portal top menu, click on the Settings option.

-
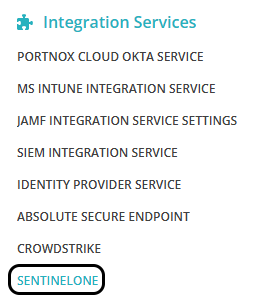
In the Cloud portal left-hand side menu, click on the option.
-
Enable SentinelOne integration
-
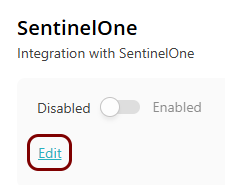
Under the SentinelOne heading and description, click on the Edit
link.
-
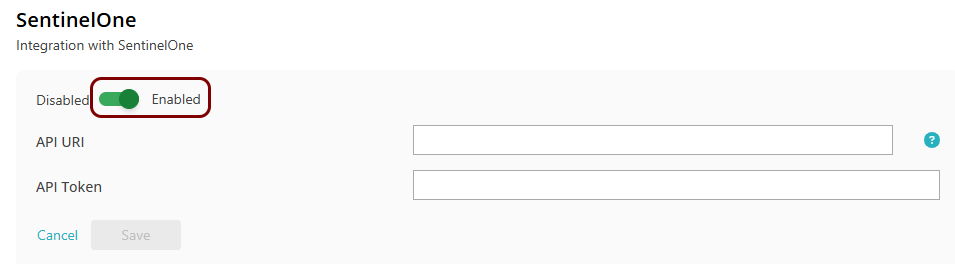
Click on the Disabled/Enabled switch to put it in the Enabled
position.
-
In the API URI field, enter the base URI for your SentinelOne tenant without the
trailing slash, for example,
https://your_organization.sentinelone.net.
-
In the API Token field, paste the token that you copied earlier from SentinelOne.

-
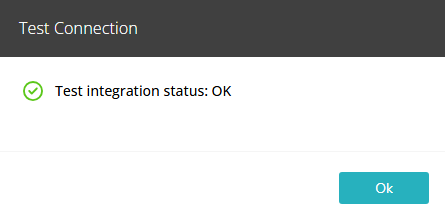
Click on the Test link to test your integration settings.
Note:We highly recommend testing this integration before using it in practice.
-
Under the SentinelOne heading and description, click on the Edit
link.
Result: Your SentinelOne integration is now active.