Onboard an IoT device by creating a MAC-based account using the registration portal
In this topic, you will learn how to activate the MAC account registration portal and onboard an IoT device to a network managed by Portnox™ Cloud by creating a new MAC-based account in this portal.
You can use this method to connect IoT devices to wired or Wi-Fi networks. The procedure is the same for both network types.
Configure a group in Portnox Cloud for MAC-based access
In this section, you will configure your Portnox™ Cloud group to allow devices to connect using MAC-based authentication.
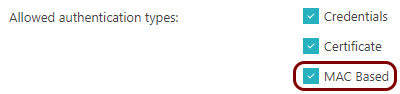
To connect to the network, the IoT device’s account must be in a group that allows MAC-based authentication for the selected network (wired or specific Wi-Fi).
Do one of the following:
- If you already have a group that you want to assign this IoT device to, check its configuration for the selected network: wired and/or a specific Wi-Fi network.
- If you don’t have a group for the IoT device, create a new group and turn on MAC-based authentication for the selected network.
For more information about creating and editing the networks in the group, see the following topic: Create a group.
Activate the MAC account registration portal
This step must be done by a Portnox Cloud administrator with full access. Then, selected Cloud administrators and groups of users will be able to use this portal to register new MAC-based accounts and edit existing ones.
-
In the Cloud portal top menu, click on the Settings option.

-
In the Cloud portal left-hand side menu, click on the option.
-
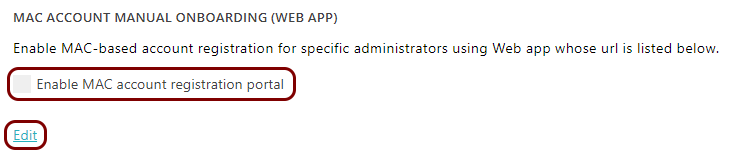
In the MAC account manual onboarding (Web app) section, click on the
Edit link below, and activate the Enable MAC account registration
portal checkbox.

More options appear under the Enable MAC account registration portal checkbox.
-
Click on the ⧉ icon to copy the URL and share it with selected
administrators.
 Note:The URL for this content doesn’t change. You can use your company’s link shortening services or redirects to create a URL that is easier for your administrators to remember and access.
 -
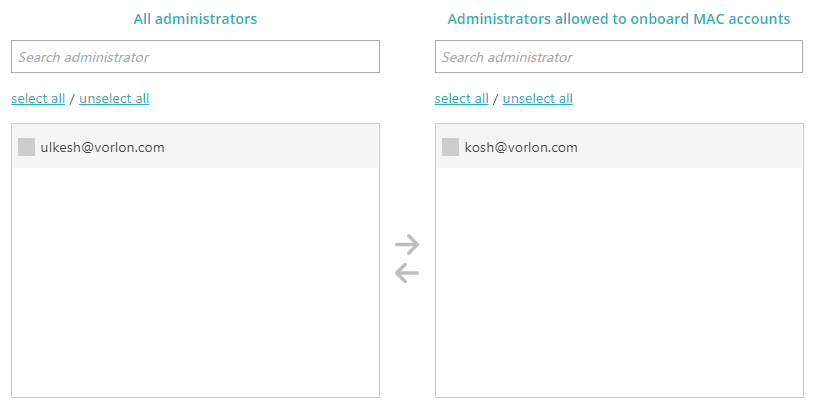
In the Administrators allowed to onboard MAC accounts section, select the Portnox Cloud
administrators that will be allowed to use the MAC account registration portal.
-
In the Assign MAB-account to the group field, select the Portnox Cloud group that all new
MAC-based accounts will be assigned to.

This should be a group that is configured earlier for MAC-based access for all relevant networks.
- Optional:
Activate the Set up expiration for all MAC addresses field and select a value in the field
on the right-hand side.

If this setting is turned on, all accounts created in the portal will have their MAC addresses set to expire after the selected period.
-
Click on the Save button to save your changes or click on the
Cancel button to abandon all changes.

After you click on one of the buttons, Portnox Cloud will exit the edit mode.
Result: Selected administrators and groups of users can now use the MAC account registration portal to create and edit MAC-based accounts.
Find the network adapter’s MAC address
In this section, you will find the MAC address of the network adapter installed in the IoT device that you want to connect to the network.
-
If you can’t find the network adapter’s MAC address, try the following:
-
Click on the Additional Info link in this alert.
Under the alert, you will see the MAC address of the IoT device.
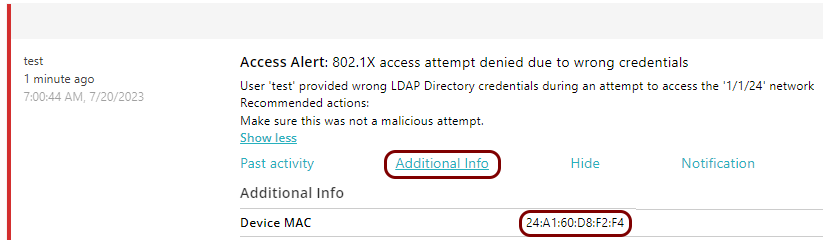
You can also look for a recent alert that says: MAC bypass denied and click on the Add MAC(s) to new or existing account link to proceed to the next task.

-
Click on the Additional Info link in this alert.
Create a new MAC-based account using the MAC account registration portal
-
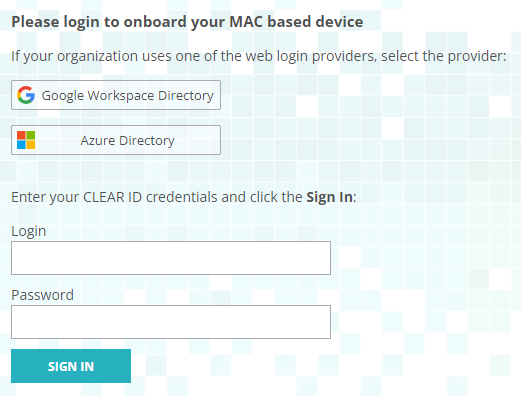
On the Please login to onboard your MAC based device page, click on the relevant tile to log
in to Portnox Cloud using one of the authentication repositories. If your user repository is managed by Cloud, enter
your Cloud credentials in the Login and Password fields and click on
the SIGN IN button.
-
On the Choose option page, select the Create new MAC-based account
option.

-
On the Onboard MAC-based device page, enter the name for the account in the
Account name field and an optional description in the Description
field, and then add new MAC addresses:
-
Enter the MAC address in the MAC address field and enter an optional description of
that MAC address in the Description field. Then, click on the
Apply link.

The value of the Expiration field is not configurable in the portal. This value is selected when activating the MAC account registration portal.
-
Enter the MAC address in the MAC address field and enter an optional description of
that MAC address in the Description field. Then, click on the
Apply link.
-
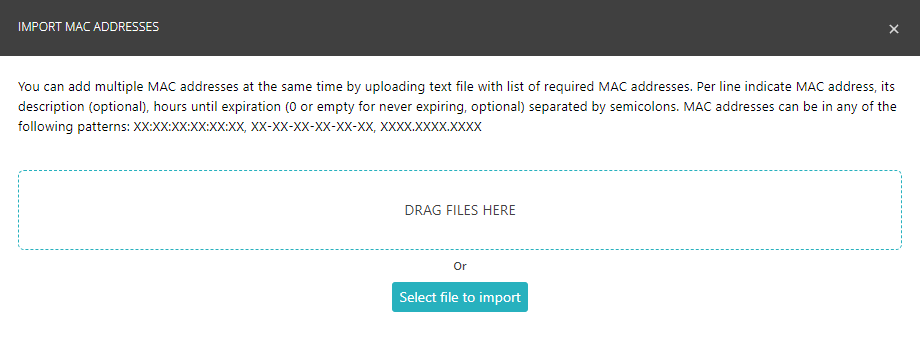
Alternatively, click on the Import link to import lists of MAC addresses from files.
Your browser will open the IMPORT MAC ADDRESSES window.
-
Drag the file containing MAC addresses from a file explorer window to the IMPORT MAC ADDRESSES window and drop it in the indicated area.
-
Alternatively, click on the Select file to import button to select the file from your local file system.
The format of the text file is as follows, for each line, separating each field with semicolons:
-
MAC address
-
Description (optional)
-
Hours until expiration (optional, enter 0 or leave empty for no expiration date)
MAC addresses can be in any of the following formats:
-
XX:XX:XX:XX:XX:XX
-
XX-XX-XX-XX-XX-XX
-
XXXX.XXXX.XXXX
-
- You add a MAC address to a MAB account – the day when you do this counts as day 1.
- The day counter increases every day at midnight tenant-time,
- Any time the device with the MAC address authenticates, the counter resets to 1.
- The moment that the counter reaches the configured limit, the MAC address is removed from the MAB account.
- The device with the MAC address is no longer in the MAB account so it cannot authenticate.
Connect the IoT device to the network managed by Portnox Cloud
In this section, you will establish the network connection between the IoT device and the network managed by Portnox™ Cloud.
-
Check the Portnox Cloud logs to make sure the connection is successful.
- In the Cloud portal top menu, click on the Alerts option.
- Find a recent alert that says: 802.1X authentication success.
Result: The IoT device is connected to the network.
