Assign policies to a group
In this topic, you will learn how to assign different types of policies to a selected group in Portnox™ Cloud.
Before you begin, you must create a group in Portnox Cloud. To create a group and configure its basic settings, read the following topic: Create a group.
To understand what are groups and policies in Portnox Cloud and how they work together with accounts, read the following topic: What are accounts, groups, policies, and sites?.
-
In the Cloud portal top menu, click on the Groups option.

-
Click on the ⋮ icon on the right-hand side of the selected group name and
select the Group policies option from the pop-up menu to begin the process of managing the
policies assigned to the selected group.

-
In the NETWORK ACCESS CONTROL POLICIES section, assign access control policies to sites:
-
Click on the Add access control policy link.

-
Click on the Save button to save the added assignment or click on the
Cancel button to abandon all changes.

Result: Access control policies are assigned to sites.
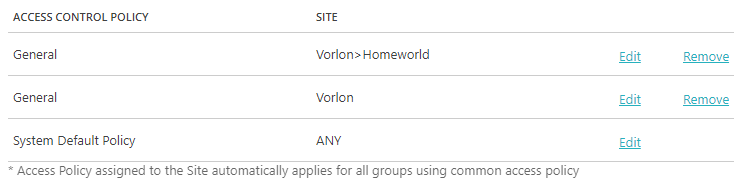
The policy that is defined for the site ANY will apply to all remaining sites.
Note:The policies on this screen apply to both the group you are editing and the site you assign them to. A policy applies when any member of the group connects to a NAS in the specific site. Some policies may appear greyed out and have an asterisk next to their names. These are assigned to the site for all groups – you configure this when configuring sites – and you cannot edit those assignments here. You can, however, change their priority order in the same way as the assignments you create for this group.Note:Site assignments do not inherit to subsites. If you assign an access control policy to a parent site, it will not automatically apply to any subsites beneath it. Each site must be mapped individually. -
Click on the Add access control policy link.
- Optional:
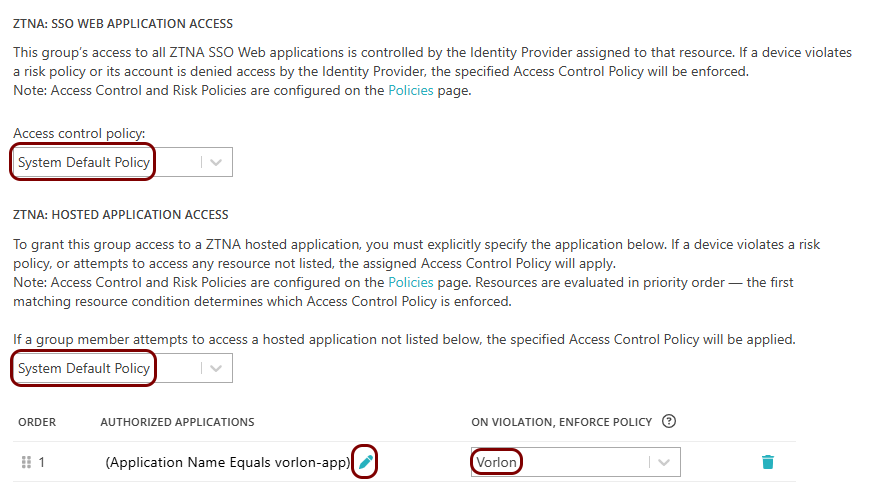
If you’re using Zero Trust Network Access, in the ZTNA:
SSO WEB RESOURCE ACCESS section, click on the SSO Web resources and
Hosted resources drop-down boxes to select the access control policies for ZTNA resource
access. Portnox Cloud will apply these access control policies when the device attempts to access web resources and
hosted resources respectively.
-
In the Device risk assessment policy section, assign a risk assessment policy to this group by
selecting it from the list of available risk assessment policies below.
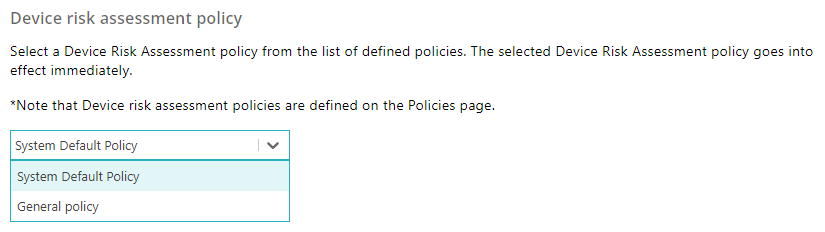
If no risk assessment policy is assigned, the System Default Policy is used.
-
In the Remediation policy section, assign a remediation policy to this group by selecting it
from the list of available risk assessment policies below.
The remediation policy is not mandatory and by default this field has a value Unassigned.
-
In the TACACS+ policies section, assign TACACS+ policies
to NAS devices.
-
Click on the Add a TACACS+ policy link.

A new row appears on the list of TACACS+ policies. Do the following actions in this row.
-
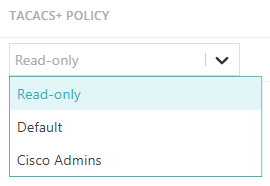
In the TACACS+ POLICY column, select an existing TACACS+ policy.
-
In the APPLY TACACS+ POLICY window, use the controls to create a logical tree of
conditions.
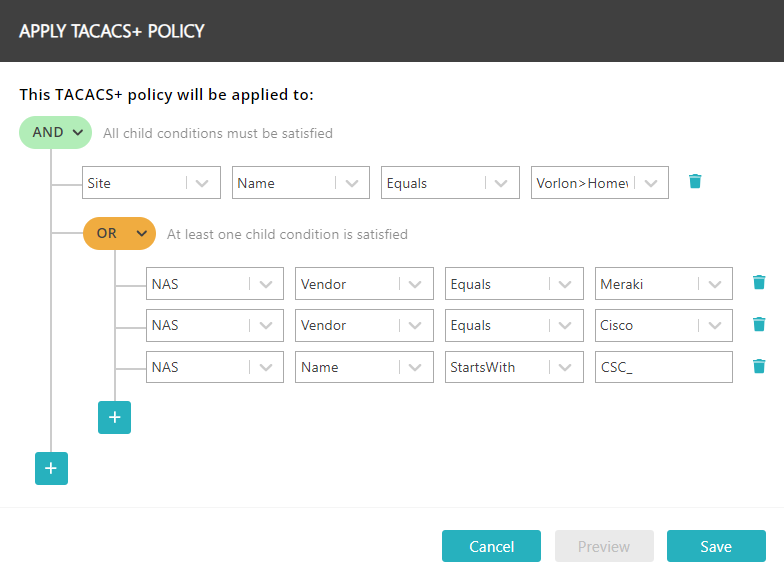
Click on the AND/OR button in a logical branch to change the logical condition.
Click on the + button in a logical branch and select Add rule to add another condition to the current logical branch.
Click on the + button in a logical branch and select Add And/Or block to add a sub-branch to the current logical branch.
In the first column of a logical rule, select Site or NAS to set the class of parameters to be tested in the condition.
In the second column of a logical rule, select a parameter applying to the site or to the NAS, such as Name (for both site and NAS) or Vendor (for NAS) to be tested in the condition.
In the third column of a logical rule, select Equals, or StartsWith to set the comparison operator.
In the fourth column of a logical rule, enter a value for comparison or select from a list of possible values (depending on the condition).
-
Repeat the above steps for other TACACS+ policies, if necessary. Use the ⠿ icons on the left-hand side of the row to drag that row up or down and
change priorities.

When a NAS device receives a TACACS+ request, Portnox Cloud first determines the group that it belongs to. Then, Cloud checks the assignment rules for TACACS+ policies in the priority order on the list (top-down), and when it finds a policy that matches the rules, it applies this policy, and ignores all lower priority policies (even if they would match).
-
Click on the Add a TACACS+ policy link.
-
In the Custom RADIUS attribute policy section, assign custom RADIUS attribute policies to NAS devices.
Note:By default, the System Default Policy is assigned to all devices and accounts in the group. After you add more policies, this becomes the fallback policy for all devices and accounts that don’t meet any of the conditions that you added. You can change the assigned policy but you cannot remove this final condition.
-
Click on the Add Custom RADIUS attribute policy link.

A new row appears on the list of custom RADIUS attribute policies. Do the following actions in this row.
-
In the CUSTOM RADIUS ATTR. POLICY column, select an existing custom RADIUS attribute
policy.

-
In the APPLY POLICY window, use the controls to create a logical tree of conditions.
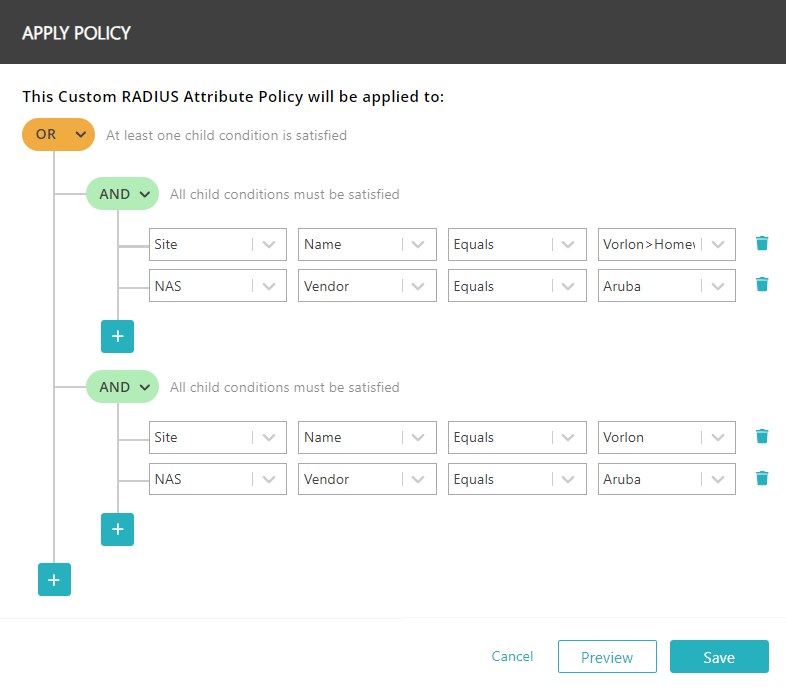
Click on the AND/OR button in a logical branch to change the logical condition.
Click on the + button in a logical branch and select Add rule to add another condition to the current logical branch.
Click on the + button in a logical branch and select Add And/Or block to add a sub-branch to the current logical branch.
In the first column of a logical rule, select Site or NAS to set the class of parameters to be tested in the condition.
In the second column of a logical rule, select a parameter applying to the site or to the NAS, such as Name (for both site and NAS) or Vendor (for NAS) to be tested in the condition.
In the third column of a logical rule, select Equals, Contains, StartsWith, or EndsWith to set the comparison operator.
In the fourth column of a logical rule, enter a value for comparison or select from a list of possible values (depending on the condition).
-
Repeat the above steps for other custom RADIUS attribute policies, if necessary. Use the ⠿ icons on the left-hand side of the row to drag that row up or down and
change priorities.
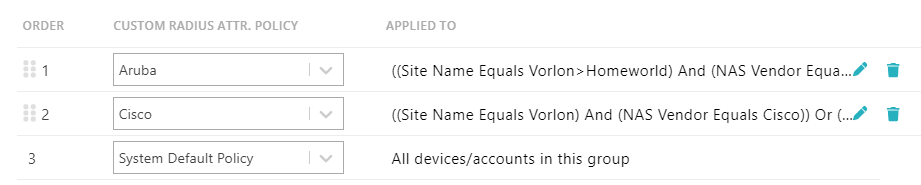
Portnox Cloud first determines the group that the device belongs to. Then, Cloud checks the assignment rules for custom RADIUS attribute policies in the priority order on the list (top-down), and when it finds a policy that matches the rules, it applies this policy, and ignores all lower priority policies (even if they would match).
-
Click on the Add Custom RADIUS attribute policy link.
-
In the SAML attribute policies section, build the logic for selecting the SAML attribute policy that will be applied by Portnox ZTNA.
-
Use the selector in the POLICY NAME column to select the policy that is to be applied if
this condition set is met.

-
Click on the ✎ icon in the APPLIED TO column
of the condition set row to open the SAML ATTRIBUTE POLICY CONDITION BUILDER window.

-
In the SAML ATTRIBUTE POLICY CONDITION BUILDER window, use the controls to create a
logical tree of conditions.
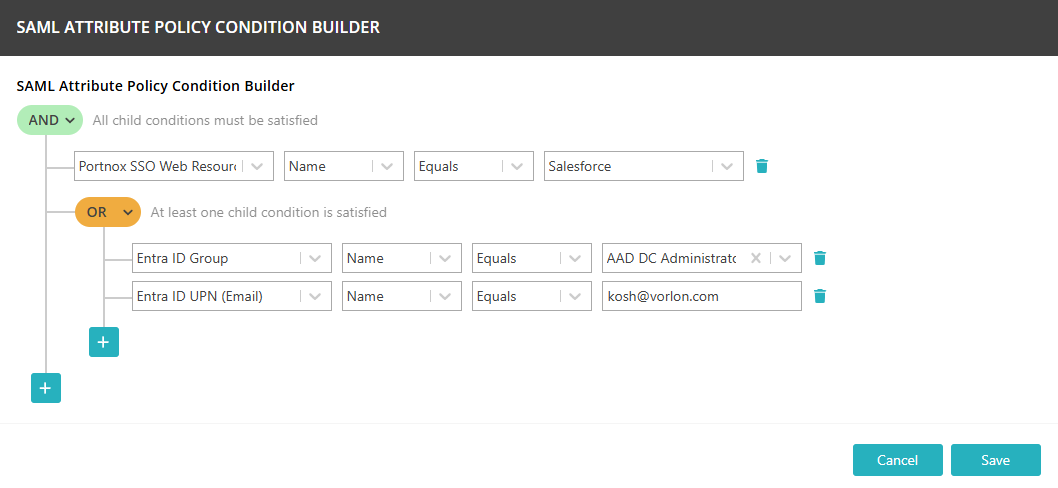
Click on the AND/OR button in a logical branch to change the logical condition.
Click on the + button in a logical branch and select Add rule to add another condition to the current logical branch.
Click on the + button in a logical branch and select Add And/Or block to add a sub-branch to the current logical branch.
In the first column of a logical rule, select Device OS, Entra ID Group, Entra ID UPN (Email) or Portnox SSO Web Resource to set the parameter to be tested in the condition.
In the third column of a logical rule, select Equals, NotEquals, Contains, StartsWith or EndsWith to set the comparison operator.
In the fourth column of a logical rule, start typing a value for auto-completion, or select it from a list of possible values (depending on the condition).
-
Use the selector in the POLICY NAME column to select the policy that is to be applied if
this condition set is met.
-
To save your group settings, click on the Save button on the bottom right of the page.