Create or edit a TACACS+ authorization policy

In this topic, you will learn how to create and assign a TACACS+ authorization policy in Portnox™ Cloud.

To understand what are policies in Portnox Cloud, what types of policies are available, and how they work together with accounts and groups, read the following topic: What are policies in Portnox Cloud?.

To understand how TACACS+ authorization works in Portnox Cloud, read the following topic: How does the Portnox Cloud TACACS+ service work?.

If you have a large network with many administrators, you may want each of them to have different privileges for configuring your NAS devices. TACACS+ authorization policies let you define specific privileges of network administrators such as the ability to access specific services or run specific commands. These policies apply only to NAS devices, not to user devices.

  1. In the Cloud portal top menu, click on the Policies option.

  2. In the Cloud portal left-hand menu, click on the TACACS+ AUTHORIZATION POLICIES tile.

  3. In the right-hand side pane, click on the Create a new Policy link to create a new policy.
    Note: You can also click on the Edit link on the right-hand side of the selected line that represents an existing policy. The creation and editing processes are almost the same.
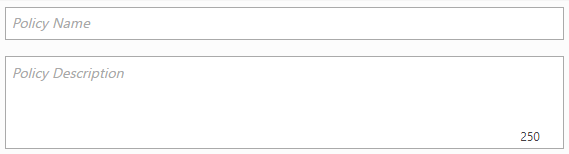
  4. In the Policy Name field, enter the name for the new policy and in the Policy Description field, enter an optional description.

  5. On the left-hand side, click on the Session-based > option, if you want to configure session-based TACACS+ authorization.

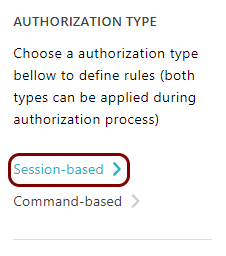
    Session-based authorization means that the NAS device will request TACACS+ authorization for the specific session. Once the session is authorized, NAS device administrator privileges depend on the authorized privilege level, configured on the NAS device.

    Note: The NAS device configuration decides whether it uses session-based or command-based authorization. You can define both session-based and command-based authorization in Portnox Cloud if you use both types in your NAS devices, but each NAS device will only use one of these two groups of settings.

    1. In the Privilege level field, select the user privilege level.

      Professional NAS devices can be configured to use 16 different privilege levels from 0 to 15. Each privilege level gives the NAS administrator access to specific commands and arguments. Privilege level 15 usually means full control of the NAS device. Many devices use three levels by default, where level 0 only allows a few commands, level 1 allows read-only access, and level 15 allows full control.

    2. In the Session timeout field, select the session timeout in minutes.

      The value 0 means no timeout. After the session timeout expires, the NAS device will either disconnect the administrator or reduce their privilege level. This behavior is configured on the NAS device.

    3. Optional: In the Autocommand field, enter the command that the NAS device will run immediately after the administrator is authorized.

      For example, show running-config.

    4. In the Allowed services section, click on the Add new link to add a new allowed service, enter the name of the service, and then click on the Add button.

      By default, only the shell service is allowed but you can let the administrator access additional services like tty-server, connection, system, or firewall. If you remove all services, the administrator will have no privileges to access the NAS device.

      Note: If this setting conflicts with the privileges in the selected privilege level, the NAS device implementation decides which has higher priority.
    5. In the Custom attributes section, click on the Add new link to add a new custom attribute as a Key and Value pair, and then click on the Add button.

      For example, you can add standard TACACS+ attributes such as idletime or nohangup, as well as any attributes specific to your NAS devices.

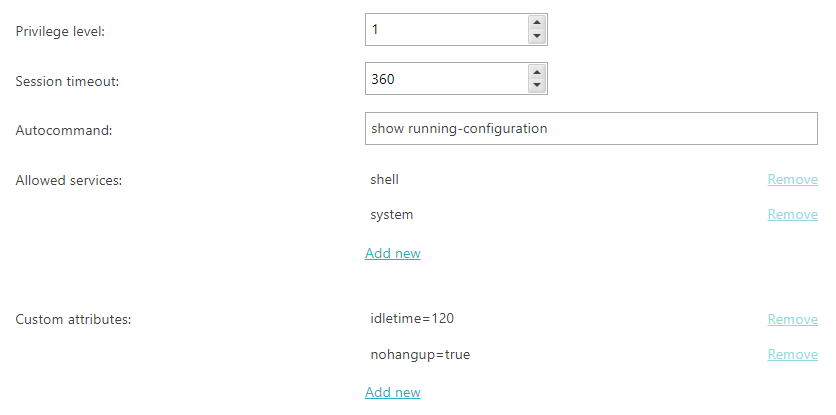
  6. On the left-hand side, click on the Command-based > option, if you want to configure command-based TACACS+ authorization.

    Command-based authorization means that the NAS device will request TACACS+ authorization for each command that the NAS administrator tries to execute.

    Note: The NAS device configuration decides whether it uses session-based or command-based authorization. You can define both session-based and command-based authorization in Portnox Cloud if you use both types in your NAS devices, but each NAS device will only use one of these two groups of settings.

    1. Activate the Deny access to all commands by default checkbox if you want to allow administrators to use only selected commands.

      You can use command-based authorization in a blacklist or whitelist mode.

      • If this setting is not activated, command-based authorization works in blacklist mode: you enter only the names of blacklisted commands.
      • If this setting is activated, command-based authorization works in whitelist mode: you enter only the names of whitelisted commands.
    2. In the Forbidden/Allowed commands section, click on the Add new link to add a new command, enter the name of the command, and then click on the Add button.

      All commands on this list will be treated as blacklisted or whitelisted, depending on the Deny access to all commands by default setting.

    3. In the Custom attributes section, click on the Add new link to add a new custom attribute as a Key and Value pair, and then click on the Add button.

      For example, you can add standard TACACS+ attributes such as idletime or nohangup, as well as any attributes specific to your NAS devices.

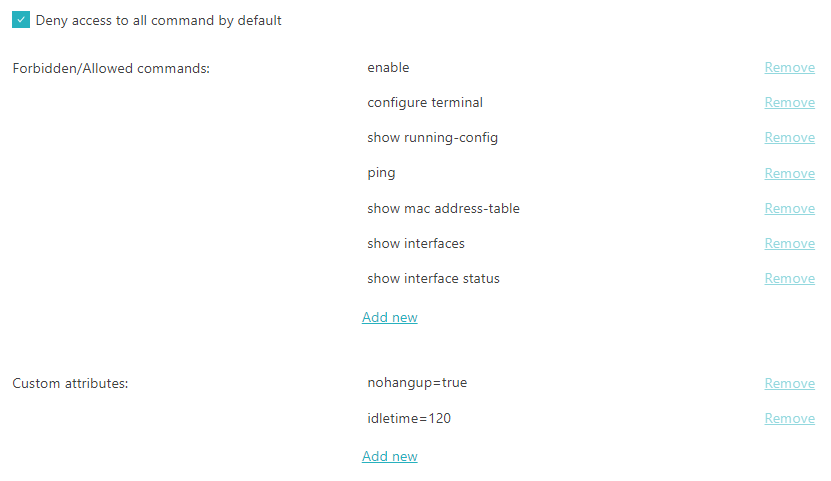
  7. To save your policy settings, click on the Save button on the bottom right of the page.

Result: You created or edited a TACACS+ authorization policy. You can now assign this policy to groups.

To assign policies to groups, see the following topic: Assign policies to a group.