Wi-Fi employee access – Sophos Central
In this topic, you will learn how to configure the Sophos Central cloud to work together with Portnox™ Cloud and 802.1X RADIUS authentication for Wi-Fi connections.
Important:
This guide gives general instructions for integrating Portnox Cloud with
specific third-party devices. We try to provide useful examples for common models, but settings can differ between
manufacturers, models, and environments. Because of this, we cannot guarantee these steps will work in every case.
For questions or problems with RADIUS setup – which is an industry standard and not specific to Portnox – or with
device-specific settings and troubleshooting, we recommend checking the device manufacturer’s documentation and contacting
their support team. Portnox Support can help when possible, but detailed setup of third-party devices is usually best
handled by the manufacturer. We also recommend updating your NAS device firmware to the latest version, as old
firmware can cause issues.
Important:
All values in this configuration are examples. Make sure to adjust the
configuration to your individual profile names, RADIUS server addresses, ports, and keys by replacing the values that are
presented as underlined italics.
Warning:
This topic contains documentation prepared by our support agents more than 12 months ago. It
may not cover the newest models or the newest interfaces of NAS devices. We’re working on bringing you updated documentation
for NAS devices in the near future. However, the methods of setting up third-party devices may still change when the
manufacturers update their firmware or release new models.
-
In the Basic Settings tab:
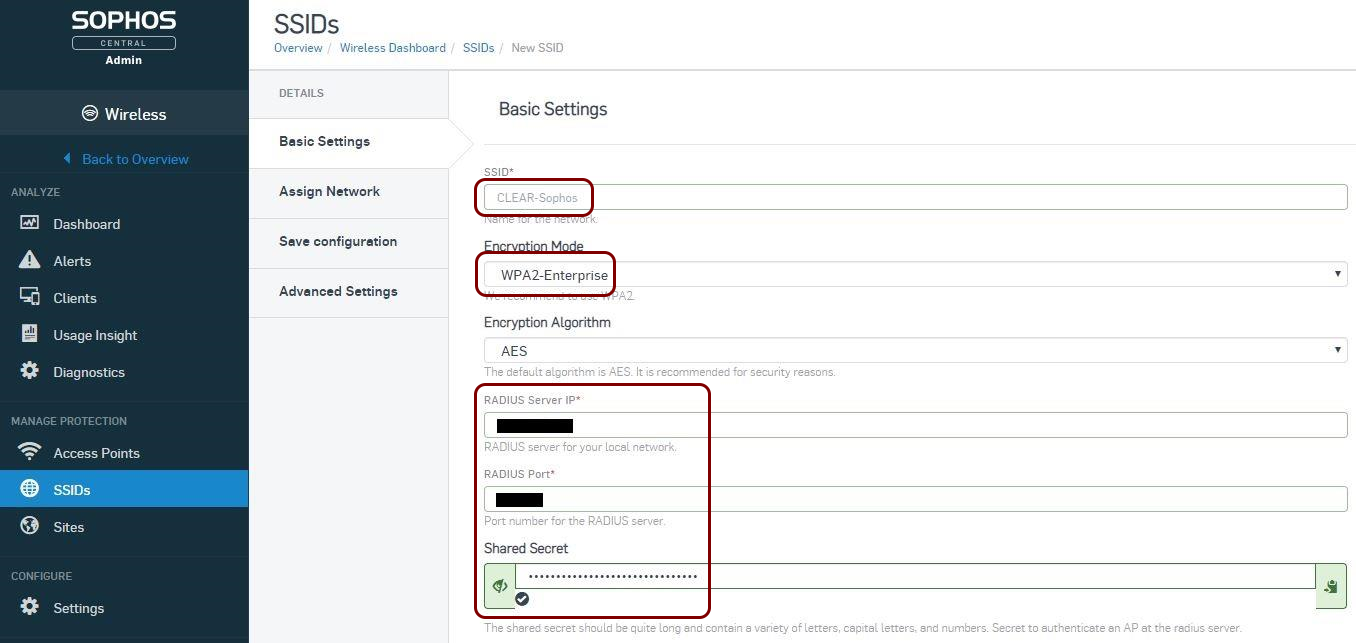
- Specify the SSID of the network.
- In the Encryption Mode field, select WPA2-Enterprise.
- Enter your Cloud RADIUS details.
- Click on Next.
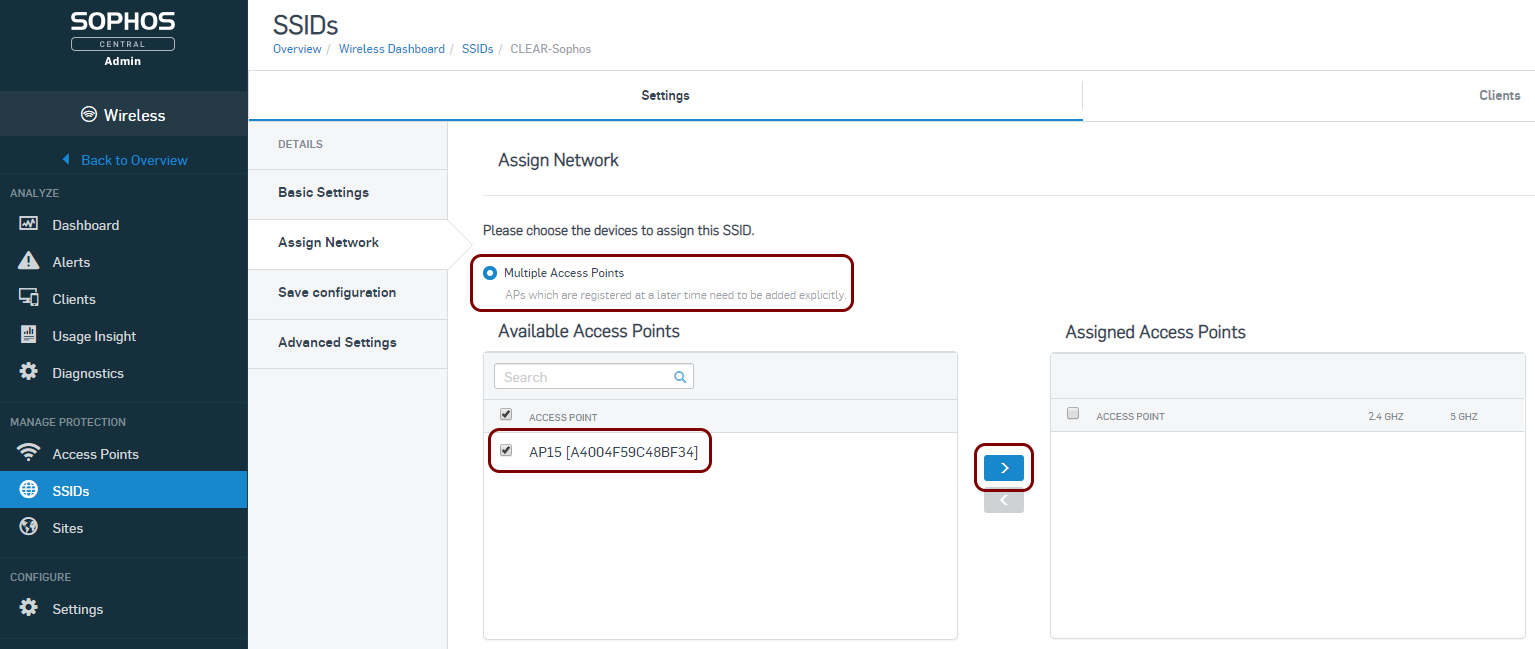
-
In the Assign Network tab, select Multiple Access Points and assign the
relevant available access points to the SSID.