Wi-Fi employee access – Aruba wireless controllers
In this topic, you will learn how to configure Aruba wireless controllers to work together with Portnox™ Cloud and 802.1X RADIUS authentication for Wi-Fi connections.
Aruba Central WPA2 Enterprise
In this section, you will learn how to configure access points managed using Aruba Central to work together with Portnox™ Cloud and 802.1X RADIUS authentication for Wi-Fi connections.
-
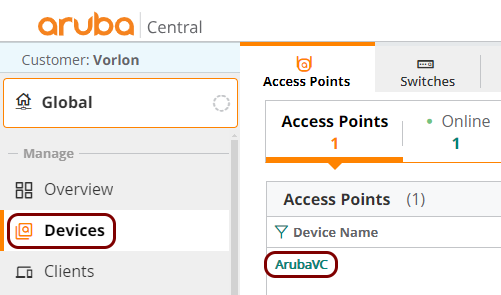
In the left-hand side main menu, click on the Devices option and then, in the right-hand
side pane, click on the name of the device that you want to configure.
-
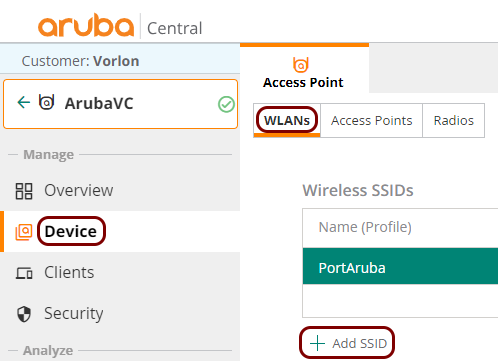
In the left-hand side menu for the selected device, click on the Device option.
Then, in the right-hand side pane, make sure that the WLANs tab is active, and under the
Wireless SSIDs list, click on the Add SSID button to add a new
SSID.
Note: You can also edit an existing SSID by clicking on its name on the Wireless SSIDs list.
- In the Create a New Network wizard, fill in the fields as required for your new SSID until you get to the Security step.
-
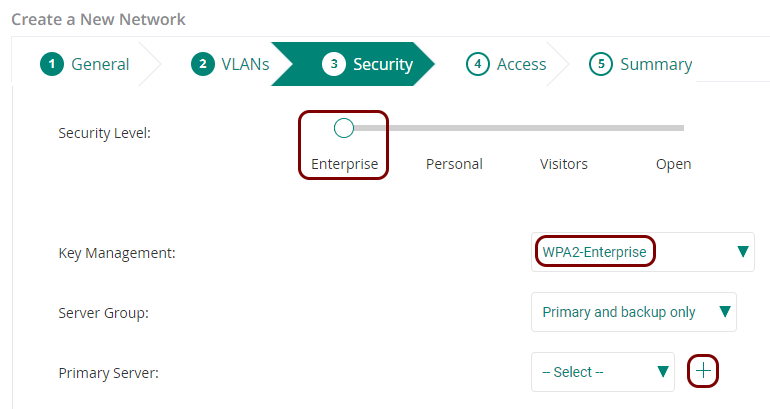
In the Security step:
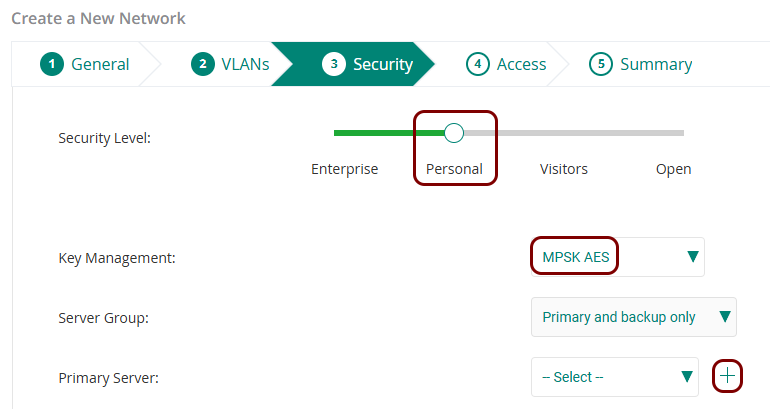
- Set the Security Level slider to the Enterprise position.
- In the Key Management field, select the preferred key management protocol.
- Click on the + icon to the right of the Primary Server label to create a RADIUS server configuration.
-
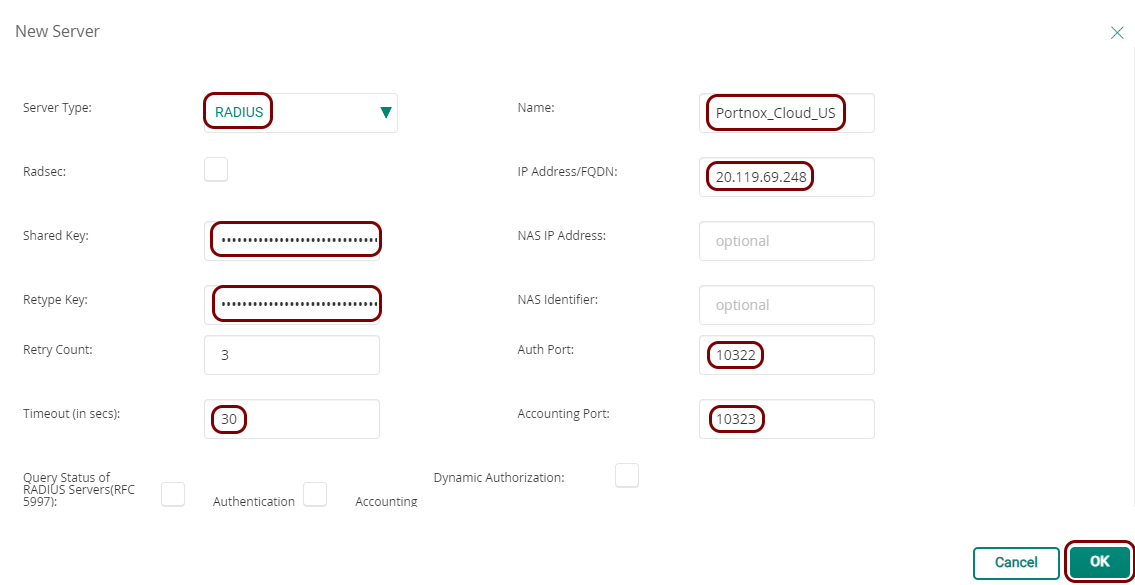
In the New Server window:
- In the Server Type field, select the RADIUS option.
- In the Name field, enter a name for this RADIUS server configuration.
- In the IP Address/FQDN field, enter your Cloud RADIUS IP, which you obtained when you created the cloud RADIUS server.
- In the Shared Key and Retype Keyfields, paste your Shared Secret, also obtained when you created the cloud RADIUS server.
- In the Auth Port field, enter your Authentication port number, also obtained when you created the cloud RADIUS server.
- In the Accounting Port field, enter your Accounting port number, also obtained when you created the cloud RADIUS server.
- In the Timeout (in secs) field, enter 30 to avoid timeouts due to any intermittent Internet connection delays.
- Click on the OK button to save your configuration.
- Optional:
Back in the Create a New Network wizard’s Security step, click on the
+ icon to the right of the Secondary Server
label to create a second RADIUS server configuration.
Note: Do this only if your Portnox Cloud tenant is configured with two cloud RADIUS servers or if you’re using a local RADIUS server in addition to the cloud RADIUS server.
- Complete the remaining steps of the Create a New Network wizard.
Aruba Central Identity PSK (IPSK)
In this section, you will learn how to configure access points managed using Aruba Central to work together with Portnox™ Cloud and RADIUS-based identity pre-shared key (IPSK) authentication for Wi-Fi connections.
-
In the left-hand side main menu, click on the Devices option and then, in the right-hand
side pane, click on the name of the device that you want to configure.
-
In the left-hand side menu for the selected device, click on the Device option.
Then, in the right-hand side pane, make sure that the WLANs tab is active, and under the
Wireless SSIDs list, click on the Add SSID button to add a new
SSID.
Important: You cannot use the same SSID for both WPA2/WPA3 Enterprise authentication and IPSK authentication, so you need to create separate SSIDs.Note: You can also edit an existing SSID by clicking on its name on the Wireless SSIDs list.
- In the Create a New Network wizard, fill in the fields as required for your new SSID until you get to the Security step.
-
In the Security step:
-
In the New Server window:
- In the Server Type field, select the RADIUS option.
- In the Name field, enter a name for this RADIUS server configuration.
- In the IP Address/FQDN field, enter your Cloud RADIUS IP, which you obtained when you created the cloud RADIUS server.
- In the Shared Key and Retype Keyfields, paste your Shared Secret, also obtained when you created the cloud RADIUS server.
- In the Auth Port field, enter your Authentication port number, also obtained when you created the cloud RADIUS server.
- In the Accounting Port field, enter your Accounting port number, also obtained when you created the cloud RADIUS server.
- In the Timeout (in secs) field, enter 30 to avoid timeouts due to any intermittent Internet connection delays.
- Click on the OK button to save your configuration.
- Optional:
Back in the Create a New Network wizard’s Security step, click on the
+ icon to the right of the Secondary Server
label to create a second RADIUS server configuration.
Note: Do this only if your Portnox Cloud tenant is configured with two cloud RADIUS servers or if you’re using a local RADIUS server in addition to the cloud RADIUS server.
- Complete the remaining steps of the Create a New Network wizard.
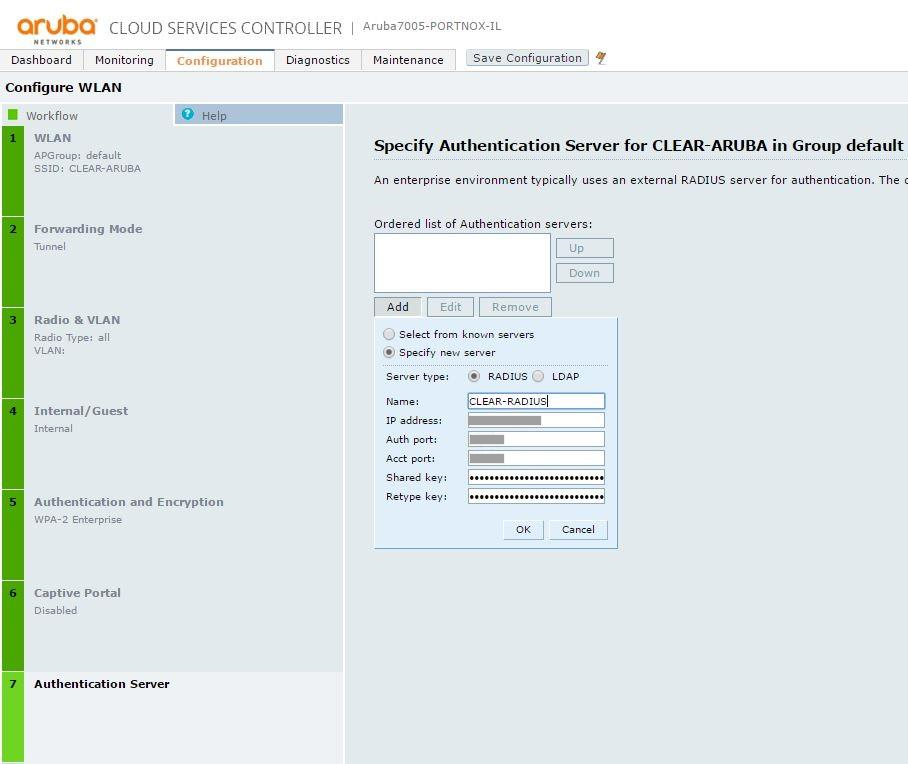
Aruba 7000 Series
In this section, you will learn how to configure Aruba 7000 series of controllers with the ArubaOS operating system to work together with Portnox™ Cloud and 802.1X RADIUS authentication for Wi-Fi connections.
-
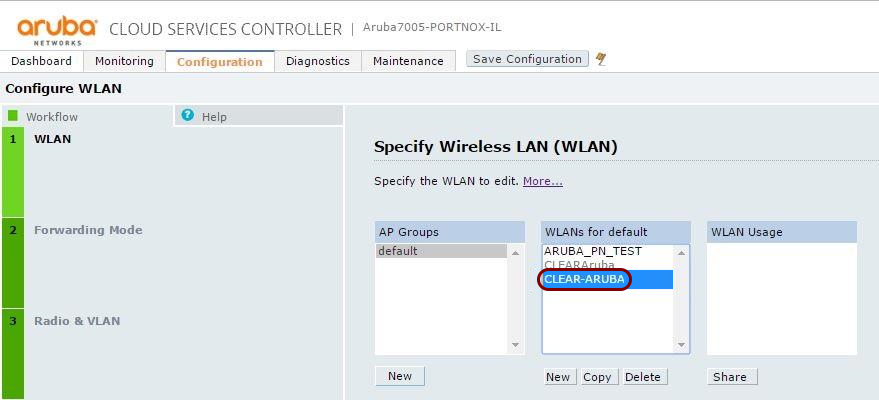
In the Aruba web interface, navigate to
, and add a new SSID or select an existing one.
-
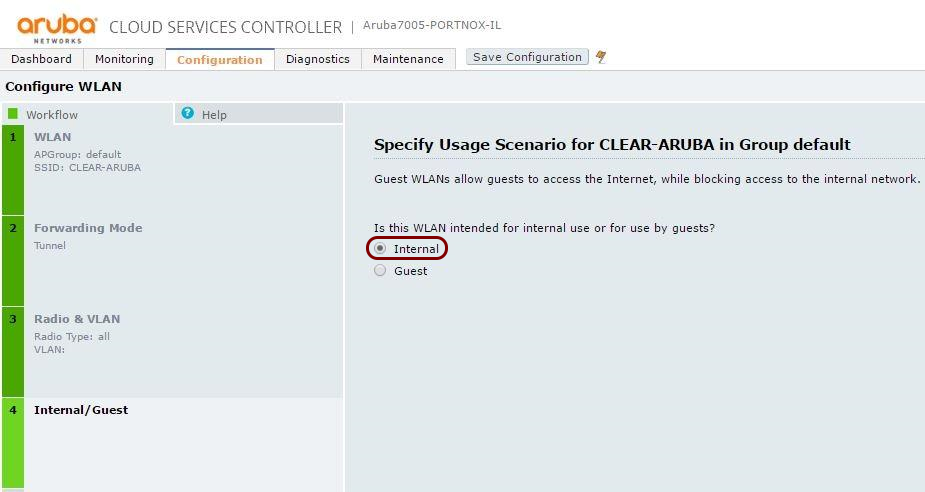
In the Internal/Guest section, select Internal.
-
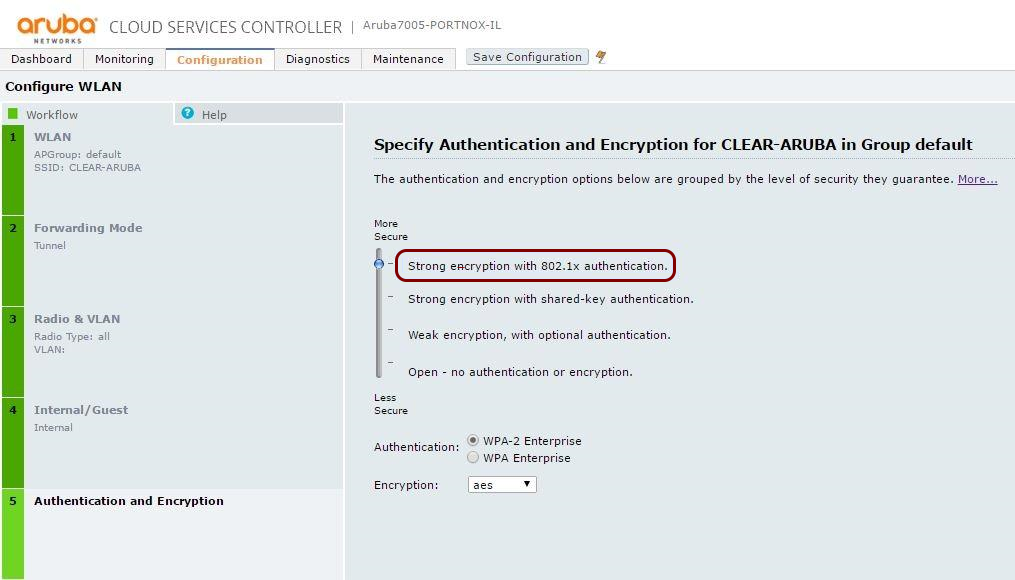
In the Authentication and Encryption section, select Strong encryption with
802.1x authentication.
-
In the Authentication Server section, add a new server.
- In Server type, select RADIUS.
- Enter your cloud RADIUS details.
-
Navigate to Timeout to 30 seconds.
, select the RADIUS server that you created in the previous step, and update the
- Click on Save Configuration.