
Wi-Fi employee access – WatchGuard Firebox
In this topic, you will learn how to configure the built-in wireless interface of a WatchGuard™ Firebox, managed by WatchGuard Cloud or locally in Fireware Web UI, to work together with Portnox™ Cloud and 802.1X RADIUS authentication for Wi-Fi connections.
Configure 802.1X authentication in WatchGuard Cloud
In this section, you will add the Portnox™ Cloud RADIUS servers to WatchGuard Cloud, create a wireless network with an SSID that uses these servers, and deploy the configuration to the Firebox.
Create an authentication domain
In this section, you will create an authentication domain that contains the Portnox™ Cloud RADIUS servers. WatchGuard Cloud uses authentication domains to store RADIUS server settings.
-
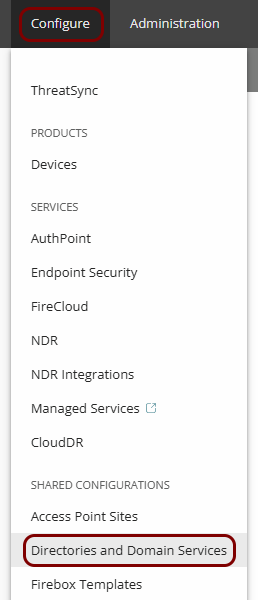
In the WatchGuard Cloud top menu, select the option.
-
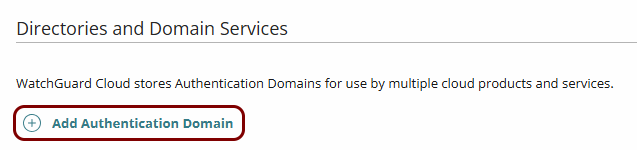
On the Directories and Domain Services screen, click on the Add Authentication
Domain link.
-
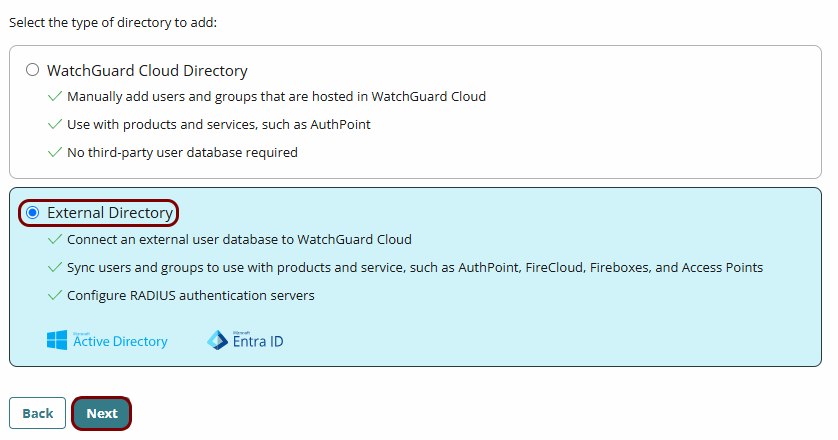
Select the External Directory option, and click on the Next
button.
-
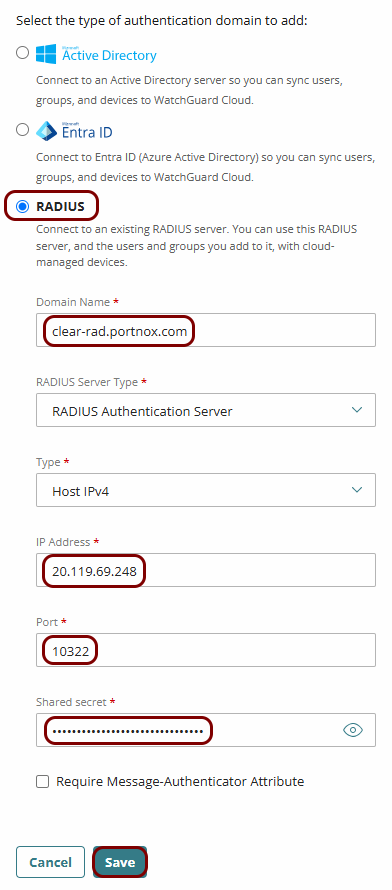
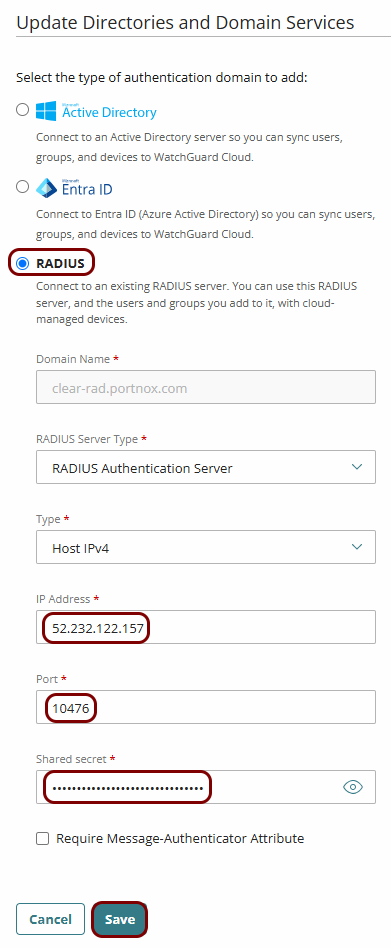
Select the RADIUS option, and configure the RADIUS server:
- Optional:
If you use Cloud RADIUS servers in both regions, add the second RADIUS server to the same authentication
domain:
-
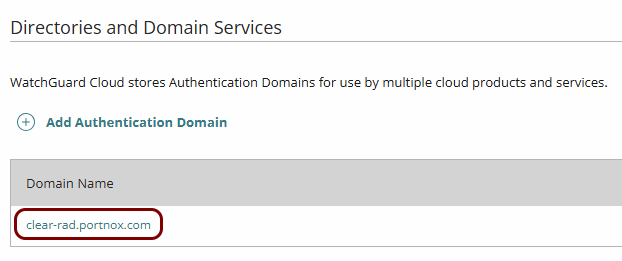
On the Directories and Domain Services screen, click on the
clear-rad.portnox.com domain name.
-
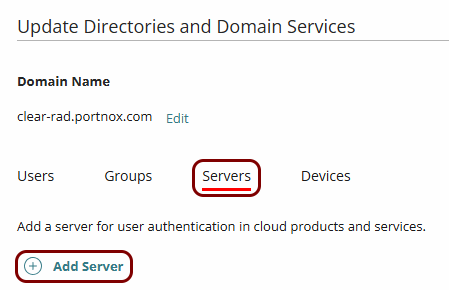
On the Servers tab, click on the Add Server link.
-
Enter the IP Address, Port, and Shared
secret values of the second Cloud RADIUS server, in the same way as for the first
server.
-
On the Directories and Domain Services screen, click on the
clear-rad.portnox.com domain name.
Result: You created an authentication domain that contains the Portnox Cloud RADIUS servers.
Add the authentication domain to the Firebox
In this section, you will add the authentication domain to the Firebox configuration. The SSID settings list only the domains that you add to the Firebox.
-
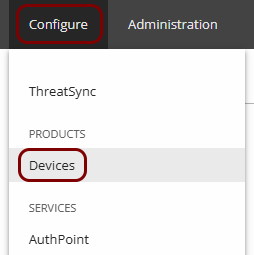
In the WatchGuard Cloud top menu, select the option.
-
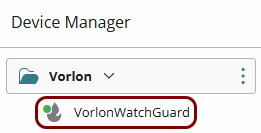
In the Device Manager pane, click on the name of your Firebox.
-
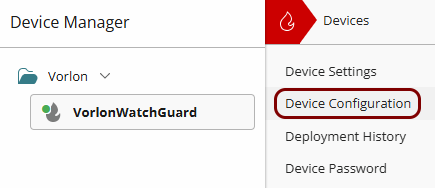
In the Devices menu, click on the Device Configuration
option.
-
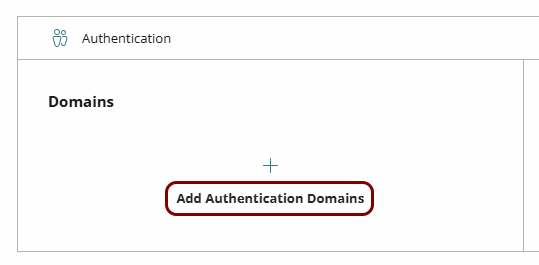
In the Authentication section, in the Domains tile, click on the
Add Authentication Domains link.
-
On the Authentication Domains screen, click on the Add Authentication
Domain link.

-
On the Add Authentication Domain screen:
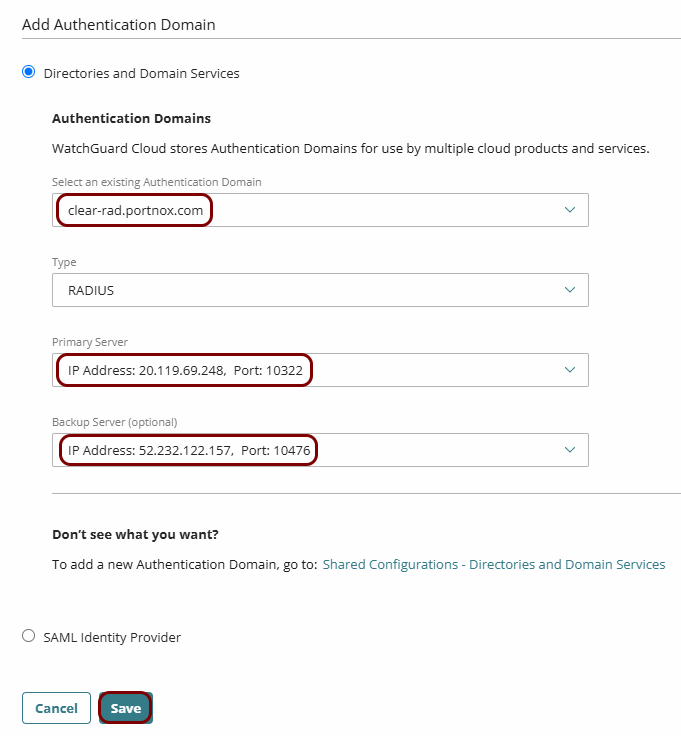
- In the Select an existing Authentication Domain field, select the authentication domain that you created earlier.
- In the Primary Server field, select the primary Cloud RADIUS server.
- Optional: If you added a second Cloud RADIUS server to the domain, select it in the Backup Server (optional) field.
- Click on the Save button.
Result: The authentication domain is available in the SSID settings of the Firebox.
Create a wireless network
In this section, you will create an internal network for the SSID and configure a DHCP server for it. Without a DHCP server, Wi-Fi clients connect but do not receive an IP address.
-
In the WatchGuard Cloud top menu, select the option.
-
In the Device Manager pane, click on the name of your Firebox.
-
In the Devices menu, click on the Device Configuration
option.
-
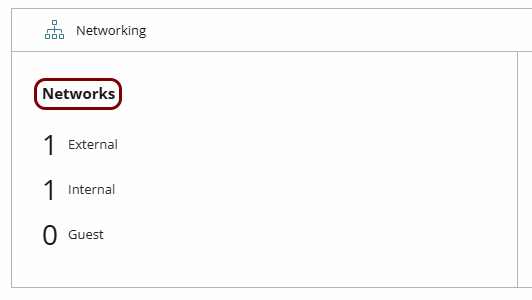
In the Networking section, click on the Networks tile.
-
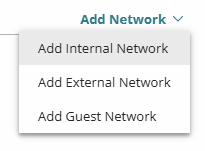
Click on the Add Network link in the top-right corner, and select the Add
Internal Network option.
-
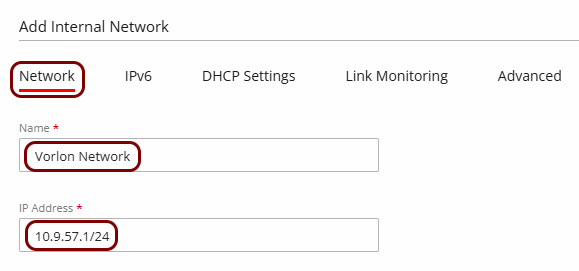
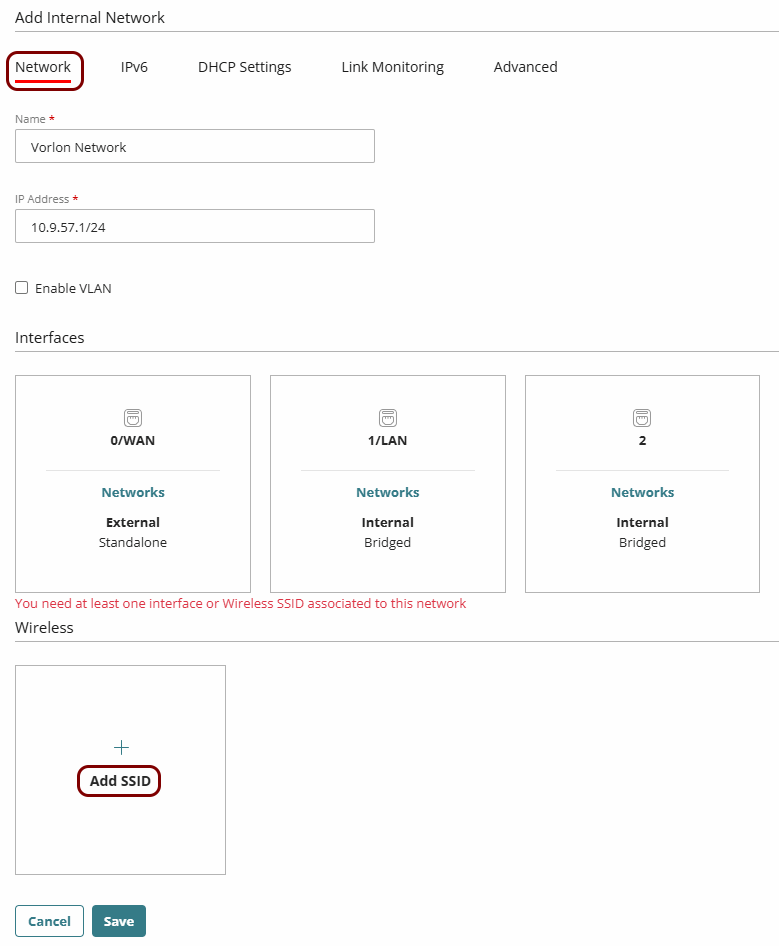
On the Add Internal Network screen, on the Network tab:
-
On the DHCP Settings tab:
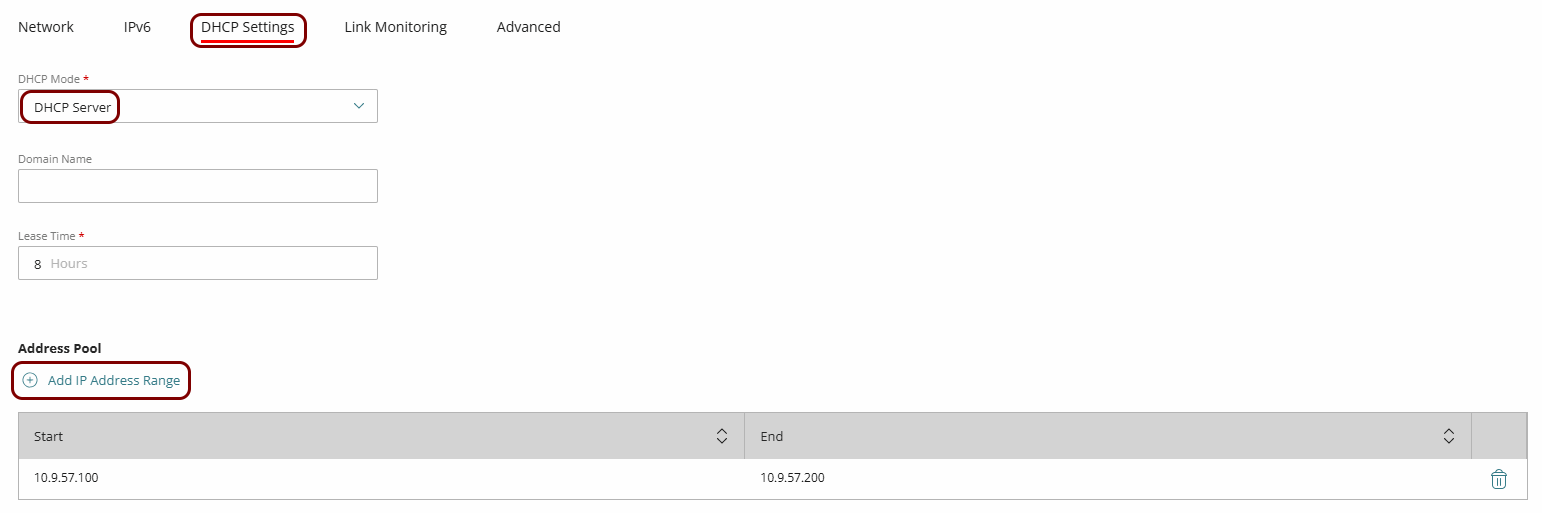
Result: You provided the basic network settings. The network is ready for you to add the SSID.
Add an SSID for 802.1X authentication
In this section, you will add an SSID to the network that you created, and configure it for WPA2 Enterprise authentication using the authentication domain.
This section continues the previous section: Create a wireless network. Continue on the same screen, without leaving the network settings.
-
Go back to the Network tab and in the Wireless section, click on
the Add SSID tile.
-
Configure the SSID:
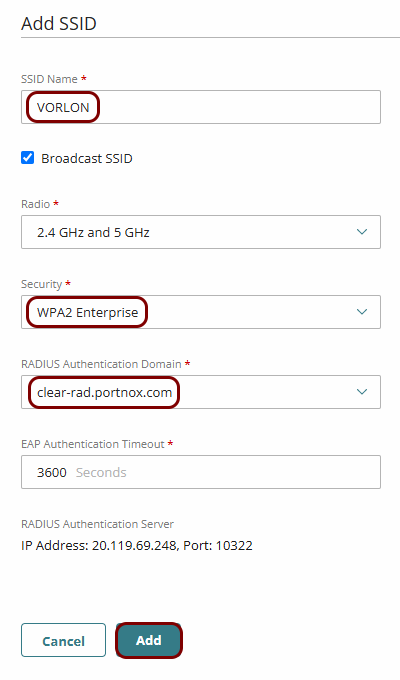
Result: You added an SSID that authenticates employee Wi-Fi devices using 802.1X and the Portnox Cloud RADIUS servers.
Deploy the configuration
In this section, you will deploy the saved configuration to the Firebox. WatchGuard Cloud stores the changes that you save, but the Firebox does not use them until you deploy them.
-
In the You have undeployed saved changes banner at the bottom of the page, click on the
Schedule Deployment link.
 Note:You can also click on the Deployment History option in the Firebox menu, and then click on the Schedule Deployment link.
 -
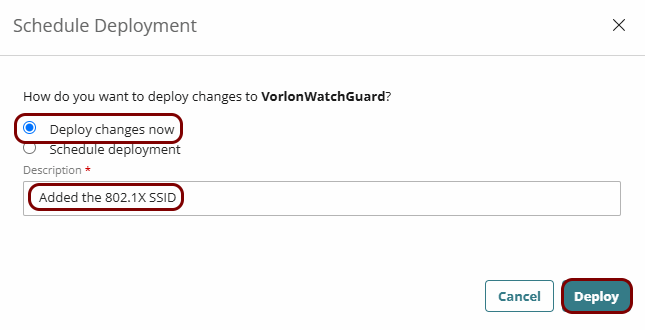
In the Schedule Deployment dialog, select the Deploy changes now
option, enter a Description, and click on the Deploy button.
 Note:You can also schedule deployment for later.
Result: The Firebox receives the new configuration and broadcasts the SSID.
Configure 802.1X authentication in Fireware Web UI
In this section, you will add the Portnox™ Cloud RADIUS servers to a locally managed Firebox, configure a wireless access point with its own network, and add an SSID that uses these servers.
Add a RADIUS domain
In this section, you will add a RADIUS domain that contains the Portnox™ Cloud RADIUS servers.
-
If the screen is locked, click on the lock icon at the top of the screen (Click the lock to make
changes).
The screens stay unlocked until you lock them again.
-
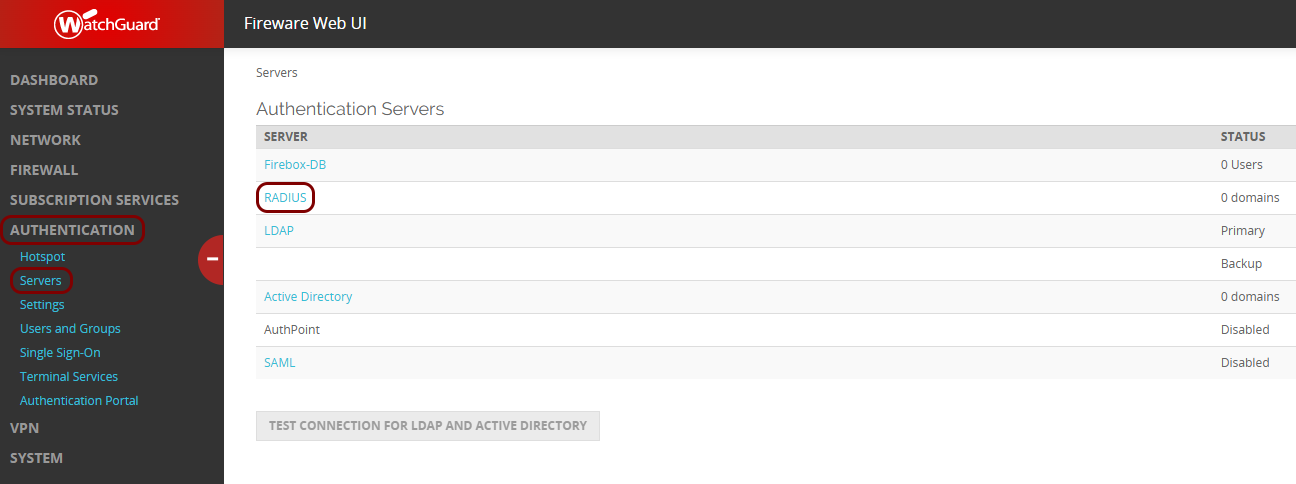
In the left-hand side menu, select the option, and then click on the RADIUS link.
-
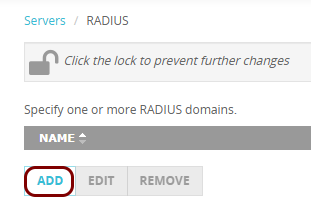
On the RADIUS screen, click on the ADD button.
-
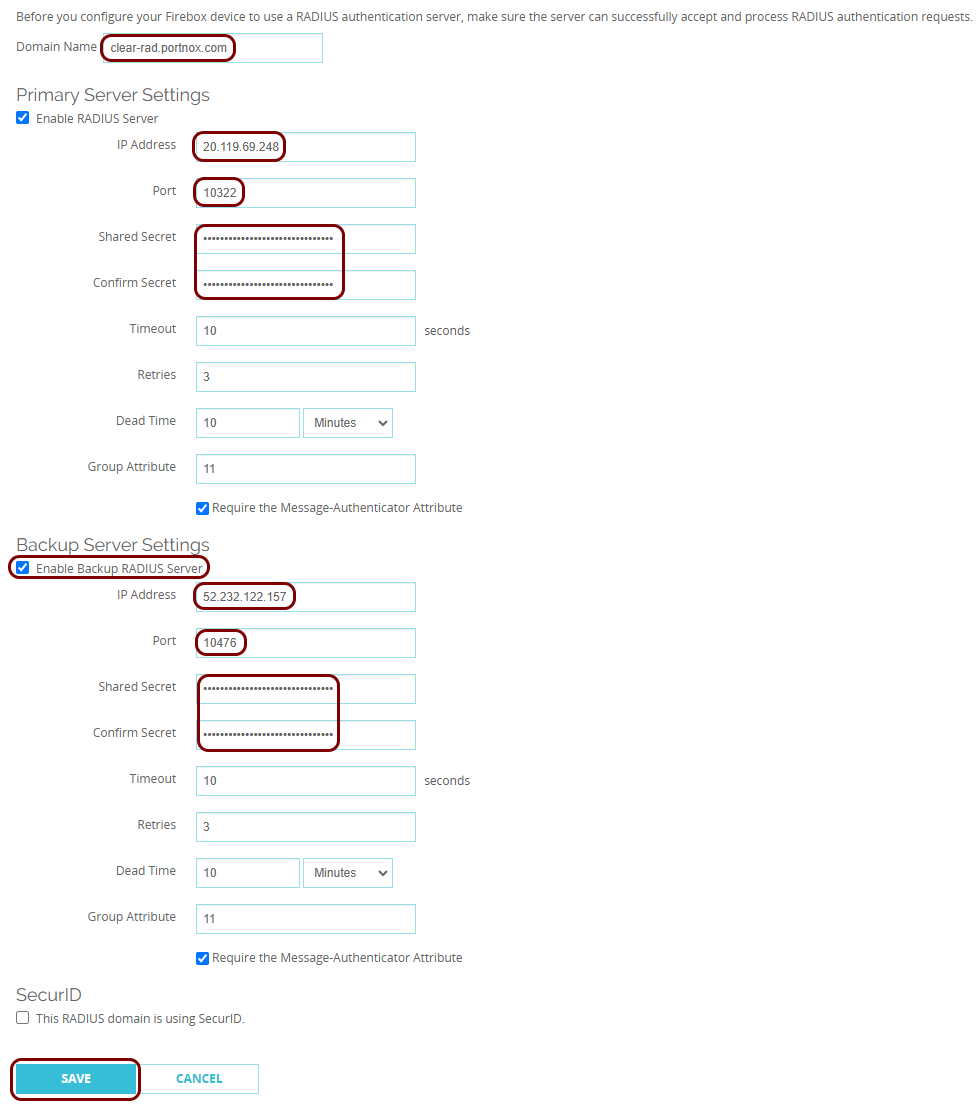
Configure the RADIUS domain:
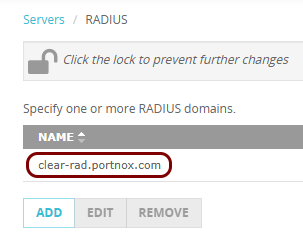
Result: The RADIUS domain appears on the RADIUS screen.
Configure the wireless network
In this section, you will enable a wireless access point on the Firebox and configure a network with a DHCP server for it.
-
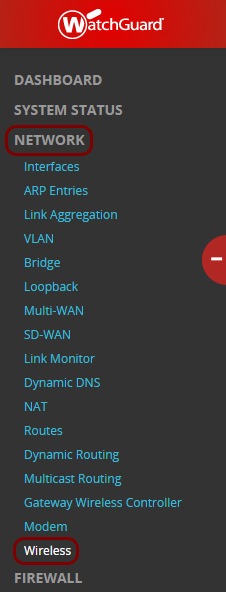
In the left-hand side menu, select the option.
-
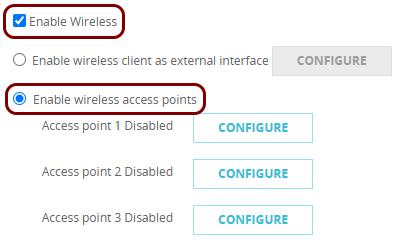
On the Wireless screen, activate the Enable Wireless checkbox and
select the Enable wireless access points option.
-
On the Configure Network for Access Point screen, activate the Enable Access
Point checkbox. Then, on the Network tab, configure the network:
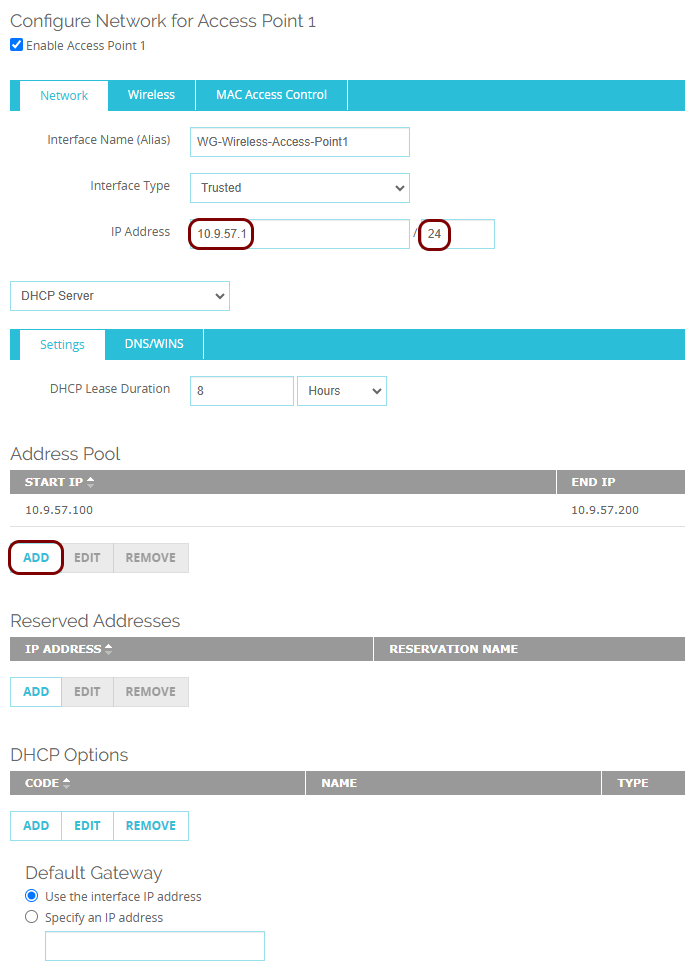
Result: You provided the basic network settings. The access point is ready for you to configure the SSID.
Configure the SSID for 802.1X authentication
In this section, you will configure the SSID of the access point for WPA2 Enterprise authentication using the RADIUS domain.
-
Configure the SSID:
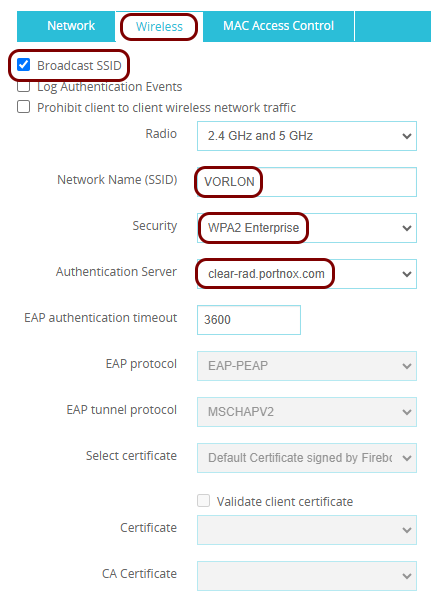
Result: You configured an SSID that authenticates employee Wi-Fi devices using 802.1X and the Portnox Cloud RADIUS servers. Fireware Web UI applies the changes immediately, and the Firebox broadcasts the SSID.