Create or edit a custom SAML attribute policy
In this topic, you will learn how to create and assign a custom SAML attribute policy in Portnox™ Cloud.
To understand what are policies in Portnox Cloud, what types of policies are available, and how they work together with accounts and groups, read the following topic: What are policies in Portnox Cloud?.
If you use Portnox Zero Trust Network Access (ZTNA) with advanced web-based applications and resources, such as Cisco ASA VPN, you may need to send custom SAML attributes to the application or resource, for example, group policy names. Tools like Cisco ASA can then use these custom SAML attributes, for example, to assign users to different virtual networks. This is exactly what custom SAML attribute policies are designed to do.
-
In the Cloud portal top menu, click on the Policies option.

-
In the Cloud portal left-hand menu, click on the CUSTOM SAML ATTRIBUTE POLICIES tile.

-
In the Custom SAML attribute policy name field, enter the name for the new policy and in the
Description (optional) field, enter an optional description.

-
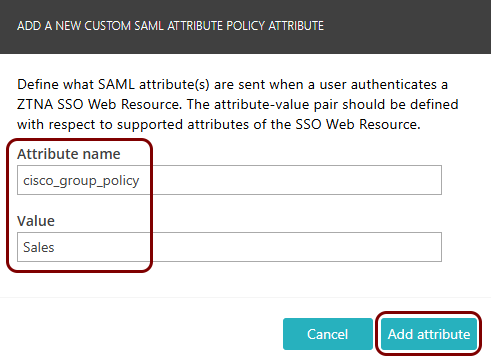
Click on the Add attribute button and then, in the ADD A NEW CUSTOM SAML ATTRIBUTE
POLICY ATTRUBITE window, enter a Name and Value for the
attribute, and then click on the Add attribute button.
-
Repeat the previous step as many times as needed to add any other attributes, and then click on the
Save button to save the policy.
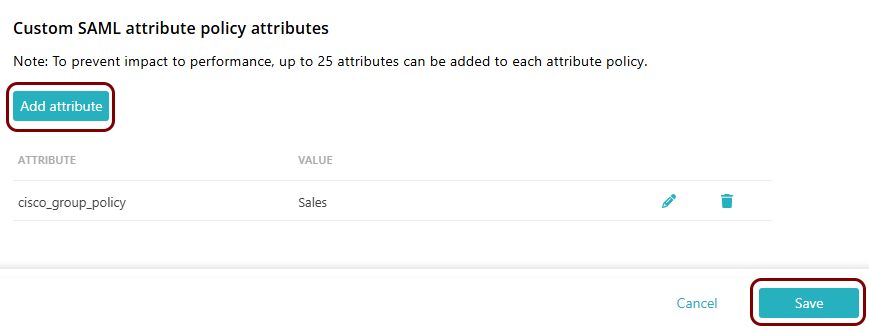
You can also edit an existing attribute using the ✎ icon or delete it using the 🗑 icon next to the attribute name and value.
Result: You created or edited a custom SAML attribute policy. You can now assign this policy to groups.

To assign policies to groups, see the following topic: Assign policies to a group.