Integrate CrowdStrike Falcon with Zero Trust Network Access

In this topic, you will find general instructions on how to integrate CrowdStrike Falcon with Portnox™ Zero Trust Network Access.

Note:
CrowdStrike does not offer self-service SAML setup. To enable SAML SSO for CrowdStrike Falcon, you send your Portnox ZTNA SAML metadata and additional information to CrowdStrike support through a support case. CrowdStrike support then enables and configures SAML for your tenant.

Create a Portnox ZTNA application configuration

In this step, you will create a ZTNA configuration in Portnox Cloud that will contain all the information necessary to integrate with CrowdStrike.

  1. In a new tab of your browser, open your Portnox Cloud account by accessing the following URL: https://cloud.portnox.com/

    From now on, we will call this tab the Portnox tab.

  2. In the Cloud portal top menu, click on the Zero Trust Resources option.

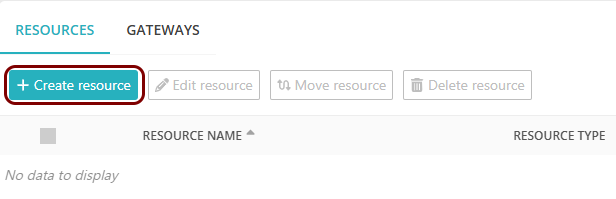
  3. On the Resources screen, click on the Create resource button.
    1. In the What type of resource is this? section, select the SSO web application option.
    2. In the Authentication protocol section, select the SAML option.
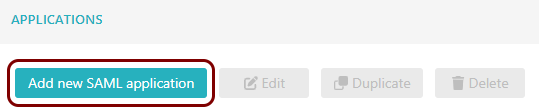
    3. Click on the Next button.
  4. Optional: If you have more than one SAML identity provider configured, select the identity provider in the Select an identity provider to use for this resource section.
  5. In the Resource details section, enter a Resource name and optionally a Description.
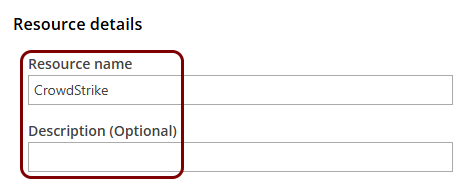
    In this example, we used the name CrowdStrike for the new application configuration but you can use any name you like.

  6. Keep this browser tab open. You will need it later.

Send SAML integration details to CrowdStrike support

In this section, you will download the Portnox ZTNA SAML metadata file and send it to CrowdStrike support in a support case along with additional information.

  1. In the Portnox tab, in the SAML metadata section, click on the Download metadata XML file link and save the file.
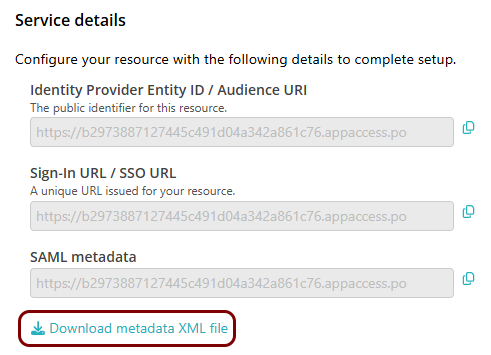
  2. Open a support case with CrowdStrike and provide the details below.
    1. In your browser, go to https://supportportal.crowdstrike.com and sign in with your Falcon credentials.

      You can also reach the support portal from inside the Falcon console. Click on the menu icon in the top left corner, then select the following item from the left-hand side menu: Support and Resources > Support Portal.

    2. In the support portal, from the left-hand side menu, select: Support > Cases, and then click on the Create Case button.

      This opens the CrowdStrike Support Digital Assistant chat window.

    3. In the chat message box, describe your SAML integration request, including the following details:
      • IdP Name: Portnox ZTNA
      • Falcon Console URL: The URL you use to sign in to the Falcon console
      • Attribute Mapping: email, firstName, and lastName (check your identity provider configuration if you need more attributes such as roles or groups, and discuss with CrowdStrike support if their integration can support them)
      • Test User Account: Provide one. CrowdStrike support may need it to inspect the SAML exchange and confirm what attributes are actually provided by your identity provider
      • Desired User Experience: State whether you want enforced SSO or Just-in-Time (JIT) provisioning (JIT provisioning creates a Falcon user account automatically the first time someone signs in through SSO, instead of you having to create the account beforehand)
    4. Click on the  📎  icon next to the message box and attach the metadata XML file you saved earlier.

      The metadata file already contains the SSO URL and the signing certificate, so you do not need to provide these separately.

    5. Send the message.

Enter CrowdStrike’s service provider details in Portnox Cloud

In this section, you will enter CrowdStrike’s fixed service provider values in Portnox Cloud.

  1. Copy the full URL you use to sign in to the Falcon console.

    For example, https://falcon.us-2.crowdstrike.com/. This is the same URL you provided to CrowdStrike support in the previous task.

  2. In the Portnox tab, in the Resource properties section, click on the empty field under the Entity ID / Service Provider Entity URL heading and enter the URL from the previous step, followed by saml/metadata.
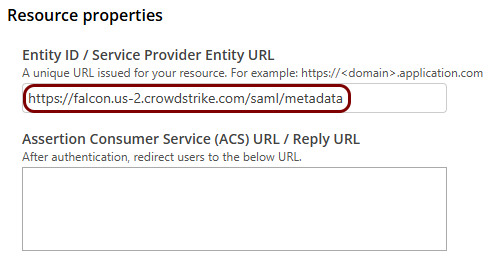
    Example: https://falcon.us-2.crowdstrike.com/saml/metadata

  3. Click on the empty field under the Assertion Consumer Service (ACS) URL / Reply URL heading and enter the same URL from two steps back, followed by saml/acs.
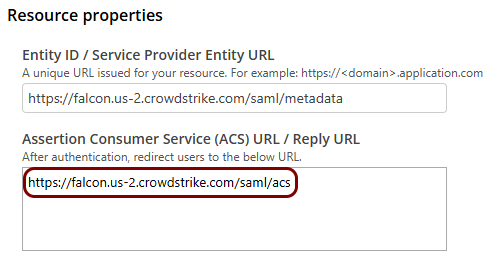
    Example: https://falcon.us-2.crowdstrike.com/saml/acs

Finalize the configuration

In this section, you will finalize the configuration in Portnox Cloud.

Finalize the configuration in the Portnox tab.
  1. Click on the OPTIONAL SETTINGS link to show additional fields, and then in the Application Login URI field, enter the following value: the URL you copied earlier (for example, https://falcon.us-2.crowdstrike.com).
    Note:
    This step is required if you want to show this application in the ZTNA Secure Access Portal.

  2. Optional: Click on the Next button, and in the Policy enforcement section, in the Device risk assessment section, change the setting to Override with custom policy and then select a risk assessment policy if you want to assess risk with this application using a custom risk assessment policy, and in the Access control section, change the setting to Override with custom policy and then select an access control policy if you want to control access to this application using a custom access control policy.
    Note:
    To configure the access control policy, follow the steps in this topic: Create or edit an access control policy. To select the default access control policy, on the Groups screen, select a group that you want to configure the default for, click on the  ⋮  icon at the end of the row that represents the group, and then select the Group policies option. Then, in the ZTNA Resources section, select the policy in the SSO Web resources drop-down menu.
  3. Scroll all the way down to the end of the page, and then click on the Add resource button.
Result: You have configured CrowdStrike Falcon to be accessible using Portnox Zero Trust Network Access.