
Integrate HPE GreenLake with Zero Trust Network Access
In this topic, you will find instructions on how to integrate HPE GreenLake with Portnox™ Zero Trust Network Access.
-
You need an HPE GreenLake workspace with an organization. The identity management options used in this topic (SSO connections, and SSO authentication policies) appear only after you create the organization. To get them, create a workspace. Then, click on the ≡ icon to the left of the HPE GreenLake logo, select the option, and create an organization for this workspace.
If your workspace already has services, such as HPE Aruba Networking Central, and you have no organization, you will not be able to create the organization. In such case, contact HPE support. In this case, HPE support must create the organization for you.
-
You must be able to add a record to the DNS configuration of your company’s email domain. HPE GreenLake asks you to add a TXT record there to prove that the domain belongs to you. If you don’t manage DNS yourself, send the TXT record to your DNS administrator when HPE GreenLake shows it. You can continue the configuration only after the record is added.
Create a Portnox Cloud resource configuration
In this step, you will create a configuration in Portnox Cloud that will contain all the information necessary to integrate with HPE GreenLake.
-
In the Cloud portal top menu, click on the Zero Trust Resources option.

-
On the Resources screen, click on the Create resource button.
-
In the Authentication protocol section, select the SAML
option.
-
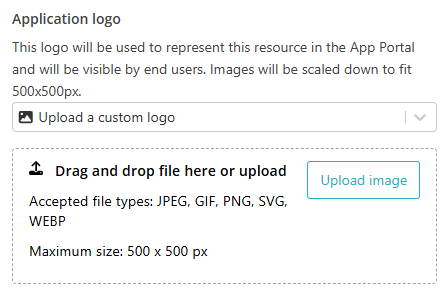
In the Application logo section, select one of the logos from the list, or select
the Upload a custom logo option and then click on the Upload
image button to upload a logo for the application.
The logo is used in the Secure Access Portal.
-
In the Authentication protocol section, select the SAML
option.
-
In the Resource details section, enter a Resource
name and optionally a Description.
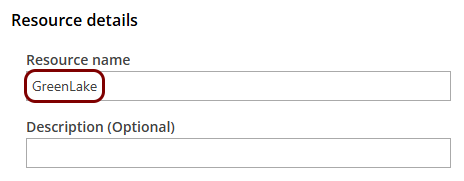
In this example, we used the name GreenLake for the new resource configuration but you can use any name you like.
Claim and verify your domain in HPE GreenLake
In this section, you will prove to HPE GreenLake that you own the email domain of your users. HPE GreenLake only redirects users to Portnox Cloud for authentication if their email domain is verified.
-
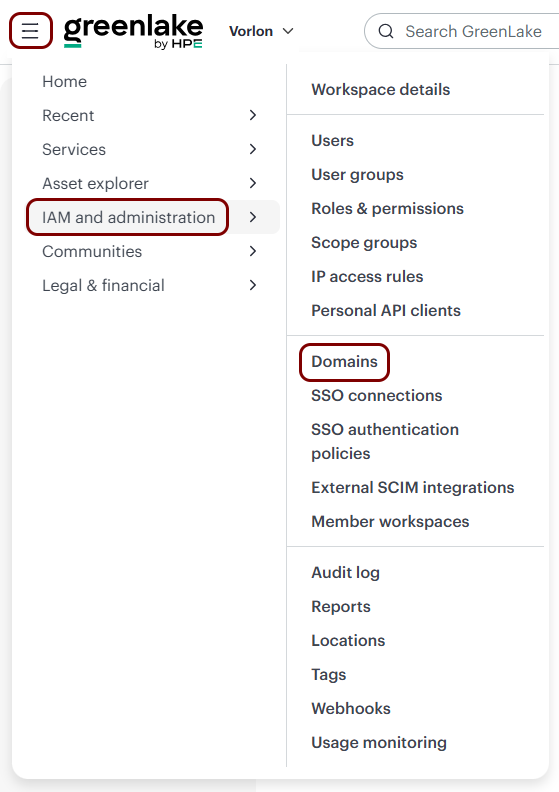
Click on the ≡ icon to the left of the HPE GreenLake logo, and
select the option.
-
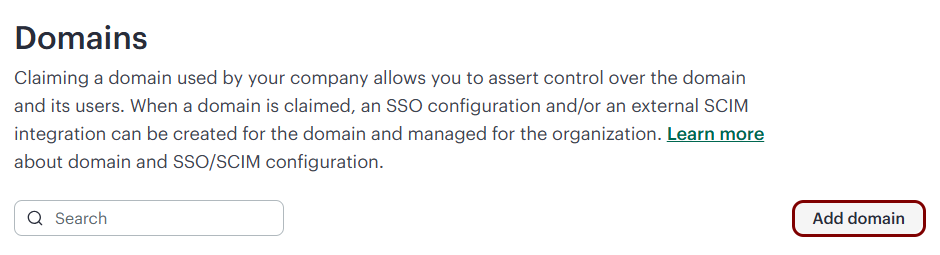
In the Domains pane, click on the Add domain button.
-
In the Identify domain step, in the Domain name field, enter the email
domain of your users, and then click on the Claim domain button.
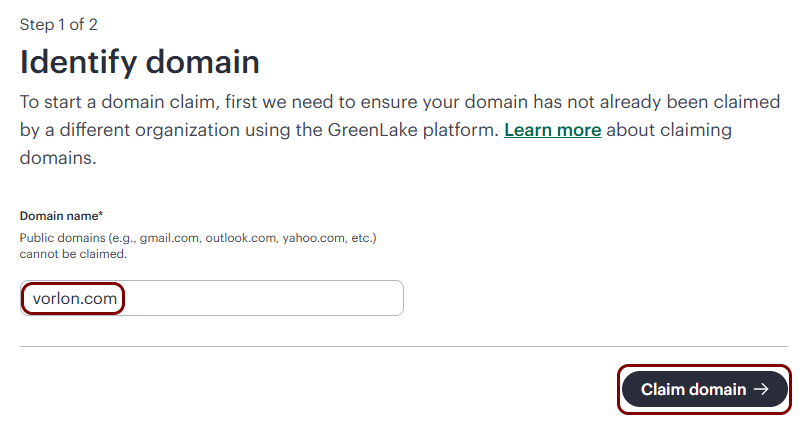
For example, if your users sign in as kosh@vorlon.com, enter vorlon.com.
-
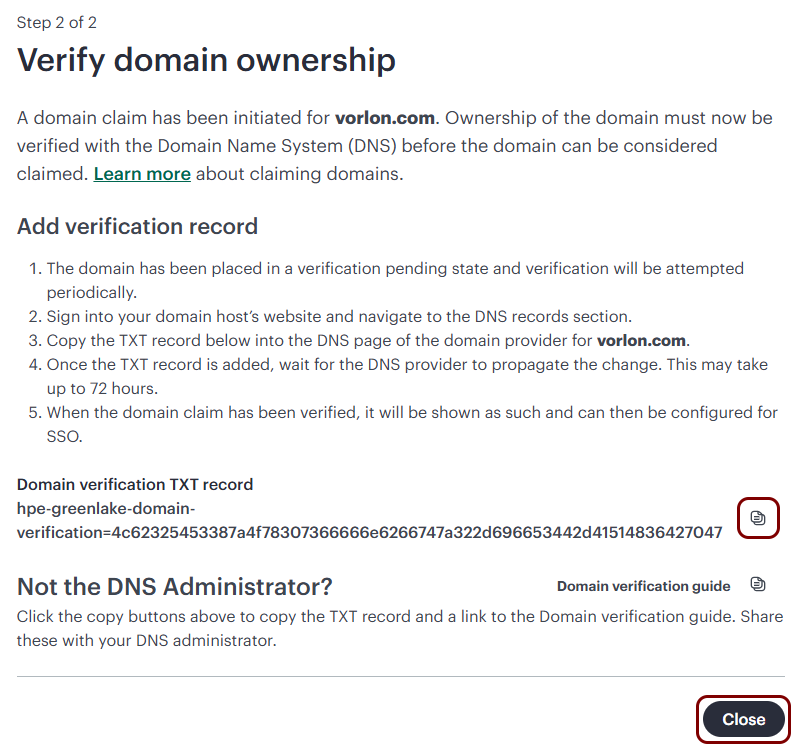
In the Verify domain ownership step, click on the ⧉
icon next to the Domain verification TXT record value to copy it and paste it in a temporary
text file. You will need it in the next step. Then, click on the Close button.
-
After the TXT record propagates, in the GreenLake tab, on the Domains screen, click on the
… icon at the end of the row that represents the domain, and select
the Verify domain now option.
Until the domain is verified, its claim status is Pending.

The claim status changes to Verified.

Open the HPE GreenLake SSO settings
In this section, you will open the page in HPE GreenLake where you can configure SAML integration settings and provide basic information for the SAML integration.
-
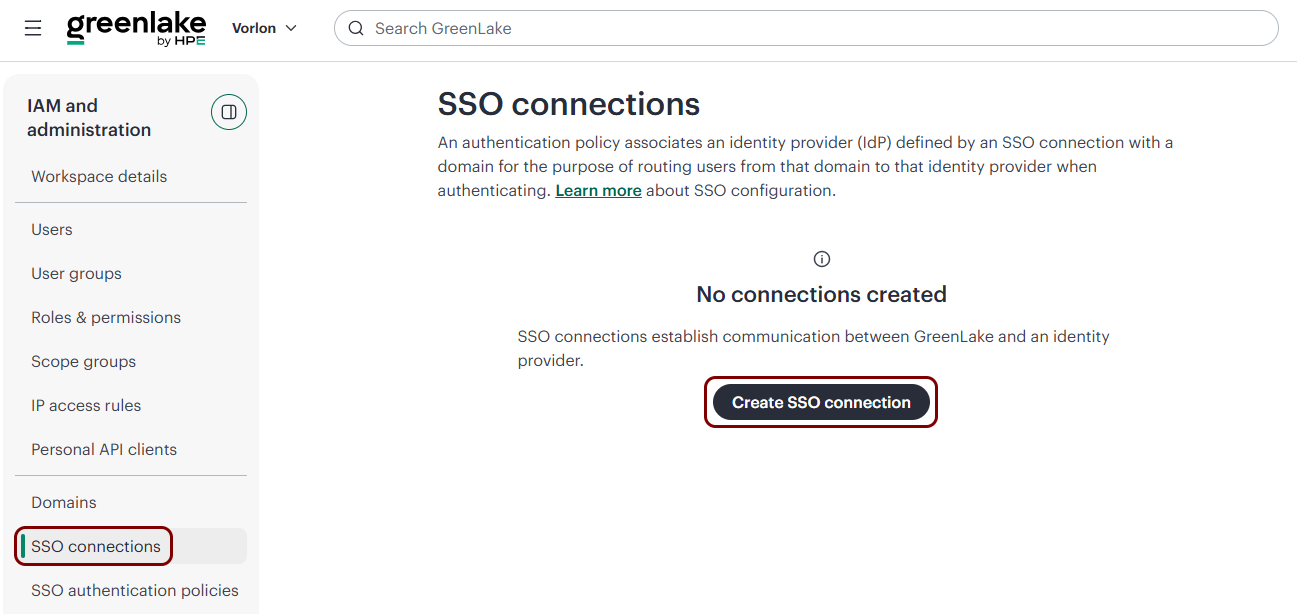
In the GreenLake tab, in the left-hand side IAM and administration menu, click on the
SSO connections option, and then click on the Create SSO
connection button.
-
In the General step, enter an SSO connection name, select the
SAML 2.0 option, and then click on the Next button.
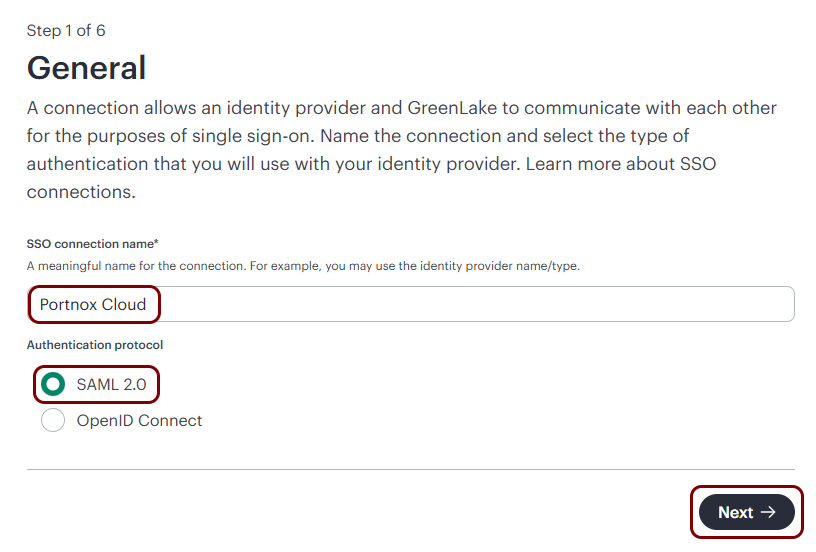
In this example, we used the name Portnox Cloud but you can use any name you like.
-
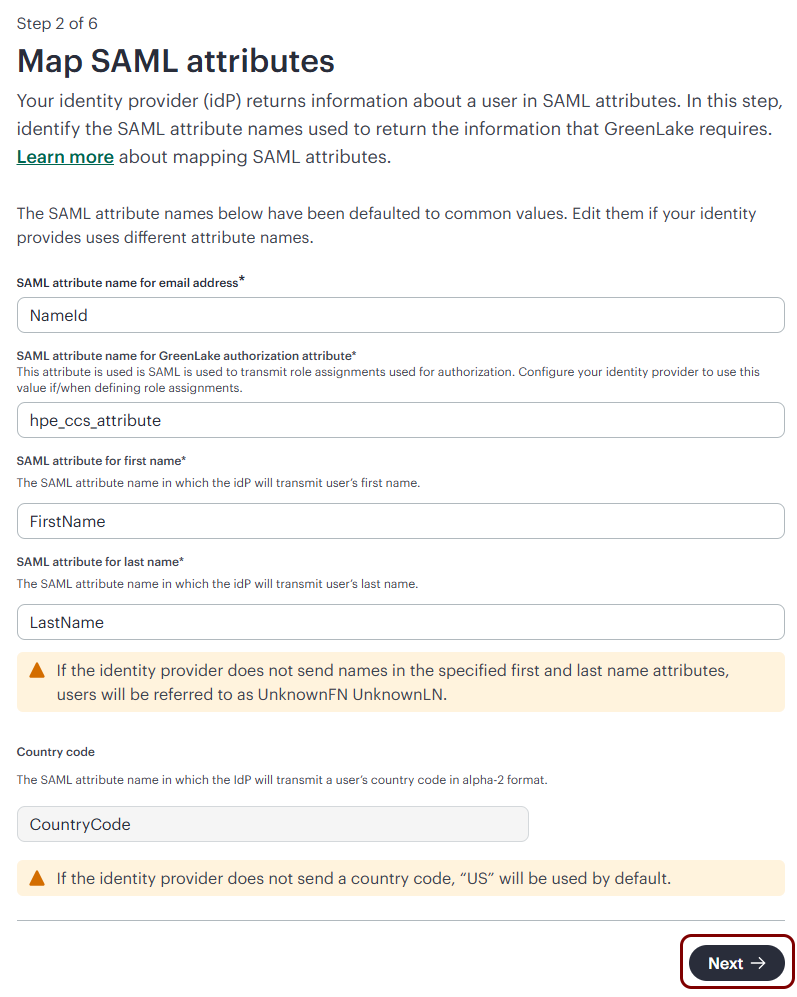
In the Map SAML attributes step, keep the default values, and click on the
Next button.
These attributes are important only for advanced user administration (see the section below: Advanced user administration).
Copy configuration values from the GreenLake tab to the Portnox tab
In this section, you will copy the values displayed by HPE GreenLake and paste them in the relevant fields in Portnox Cloud.
-
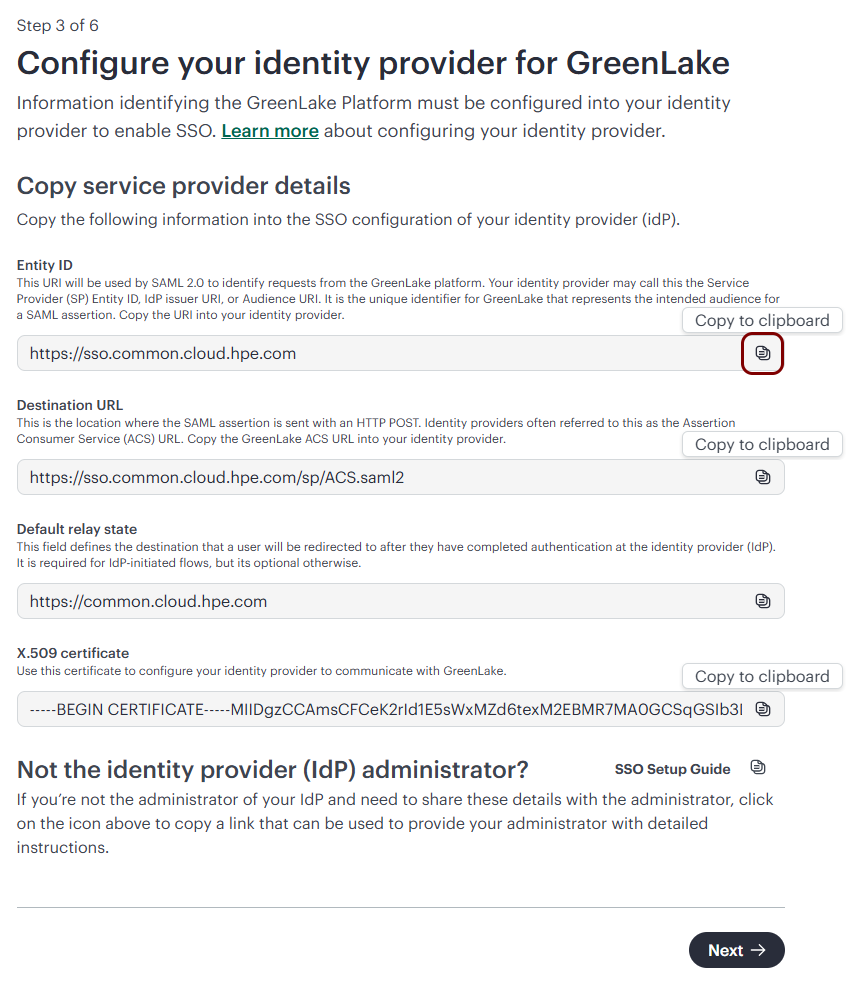
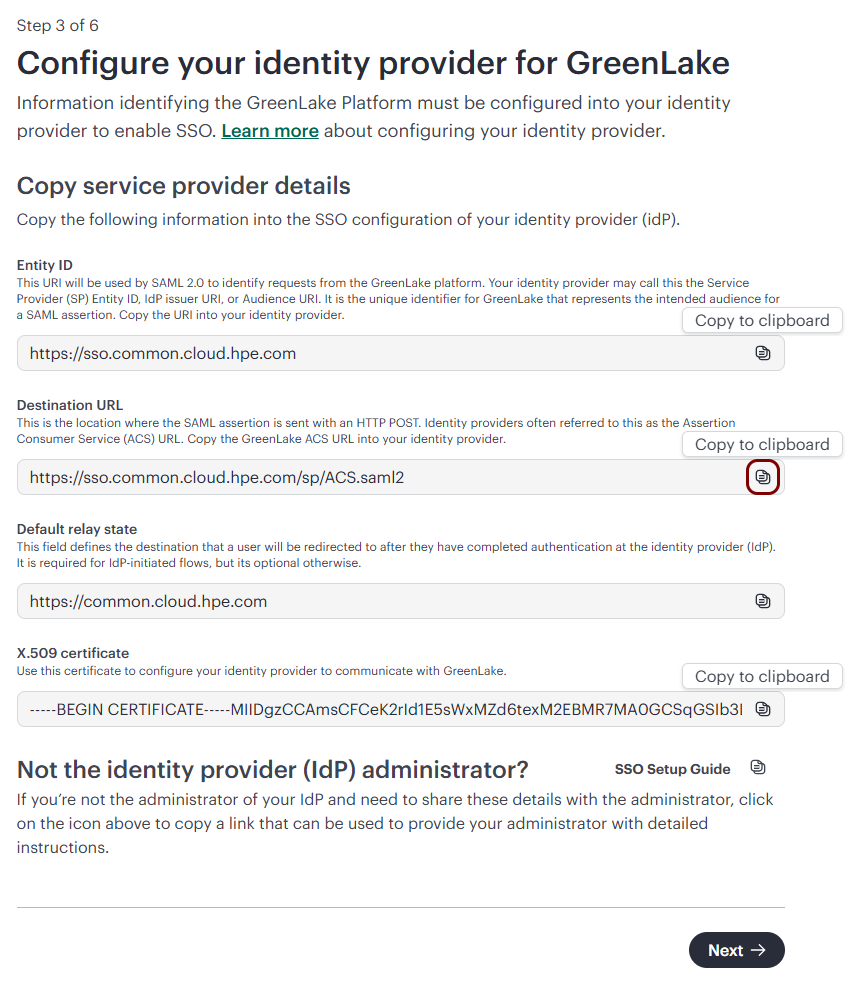
In the GreenLake tab, in the Configure your identity provider for GreenLake step, click on the
⧉ icon next to the Entity ID field to copy the
value.
-
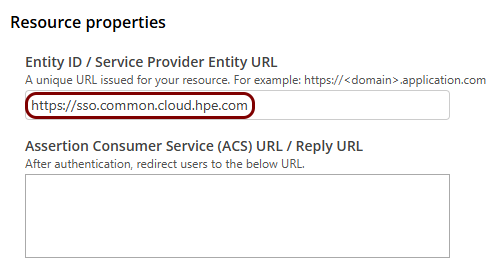
In the Portnox tab, in the Resource properties section, click on the empty field under the
Entity ID / Service Provider Entity URL heading and paste the value copied from HPE
GreenLake.
The value is https://sso.common.cloud.hpe.com.
-
In the GreenLake tab, click on the ⧉ icon next to the
Destination URL field to copy the value.
-
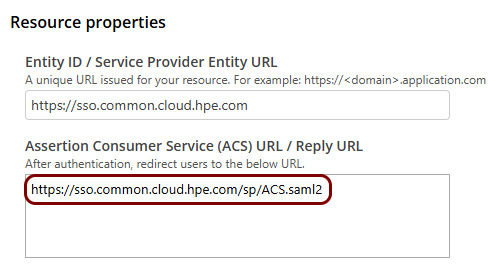
In the Portnox tab, in the Resource properties section, click on the empty field under the
Assertion Consumer Service (ACS) URL / Reply URL heading and paste the value copied from
HPE GreenLake.
The value is https://sso.common.cloud.hpe.com/sp/ACS.saml2.
- Optional:
If you want Portnox Cloud to verify the requests that it receives from HPE GreenLake, add the HPE GreenLake
certificate to Portnox Cloud.
-
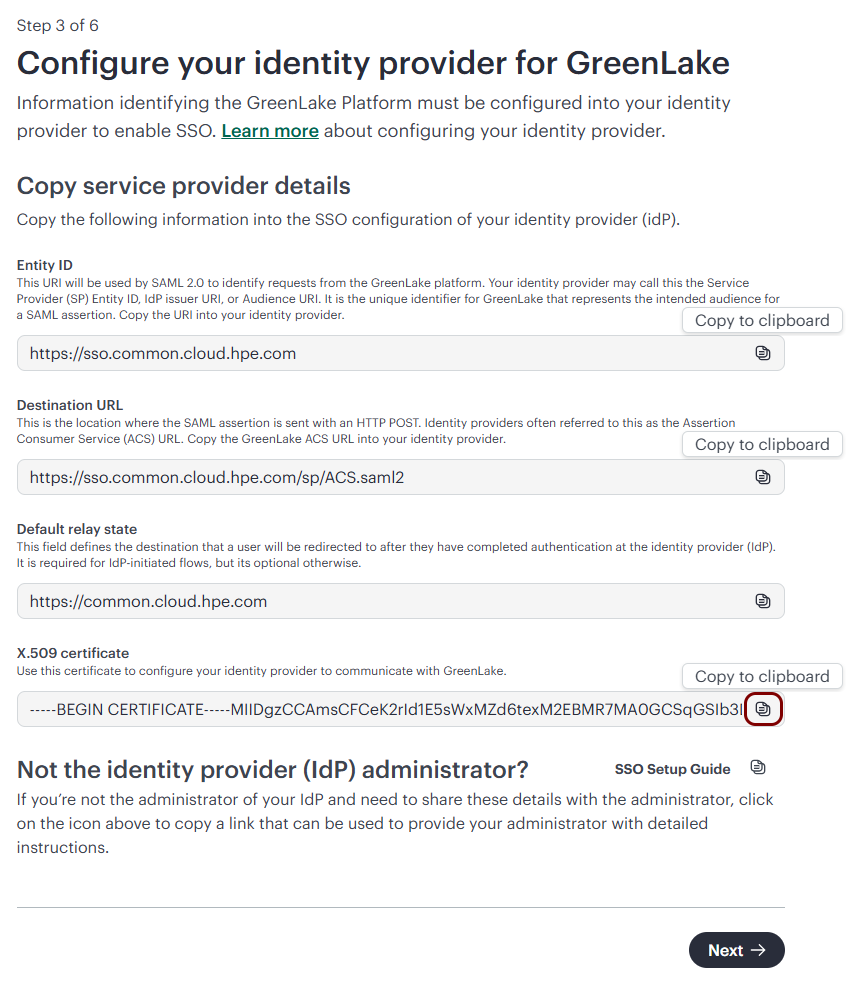
In the GreenLake tab, click on the ⧉ icon next to the
X.509 certificate field to copy the certificate.
-
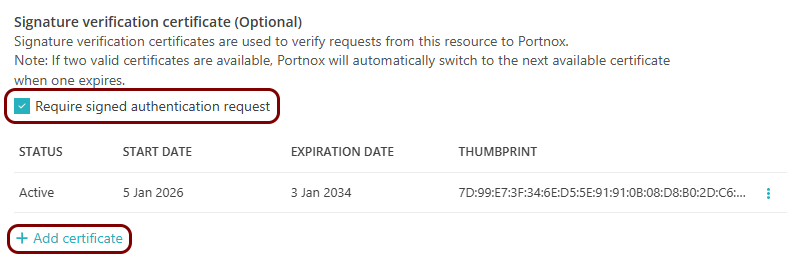
In the Portnox tab, in the section, activate the Require signed authentication request checkbox,
and click on the Add certificate link.
-
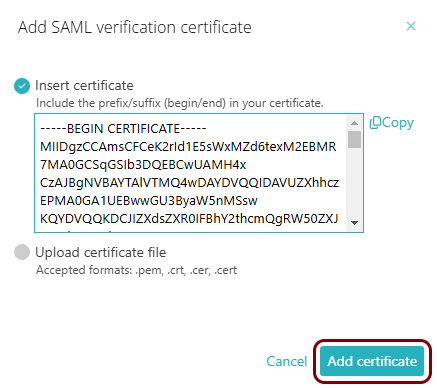
In the Add SAML verification certificate window, paste the certificate copied from HPE
GreenLake, and click on the Add certificate button.
-
In the GreenLake tab, click on the ⧉ icon next to the
X.509 certificate field to copy the certificate.
Copy configuration values from the Portnox tab to the GreenLake tab
In this section, you will copy the SAML metadata URL from Portnox Cloud to HPE GreenLake and finish creating the SSO connection.
-
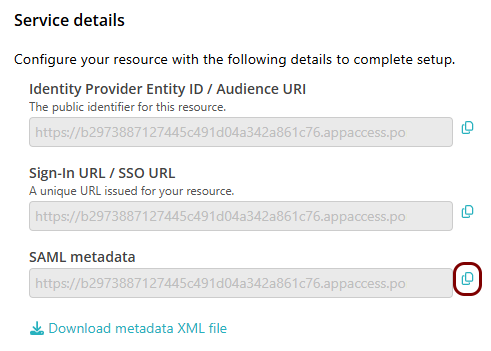
In the Portnox tab, in the Service details section, click on the ⧉ icon next to the SAML metadata field to copy the
value.
-
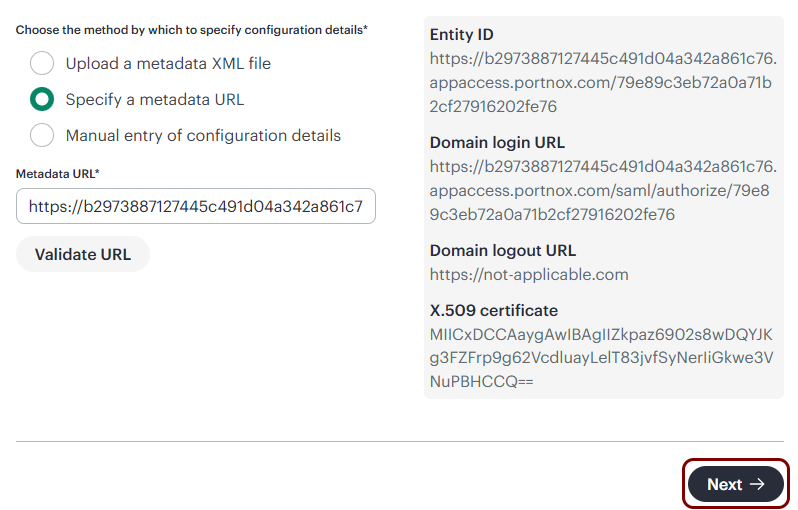
In the GreenLake tab, in the Configure GreenLake for your identity provider step, select the
Specify a metadata URL option, paste the value copied from Portnox Cloud in the
Metadata URL field, and click on the Validate URL button.
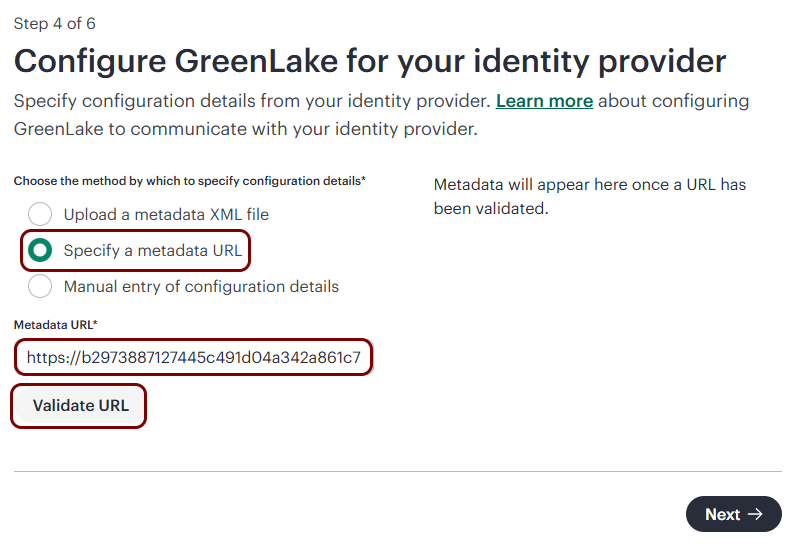
HPE GreenLake shows the Entity ID, Domain login URL, and X.509 certificate read from Portnox Cloud. Click on the Next button.
-
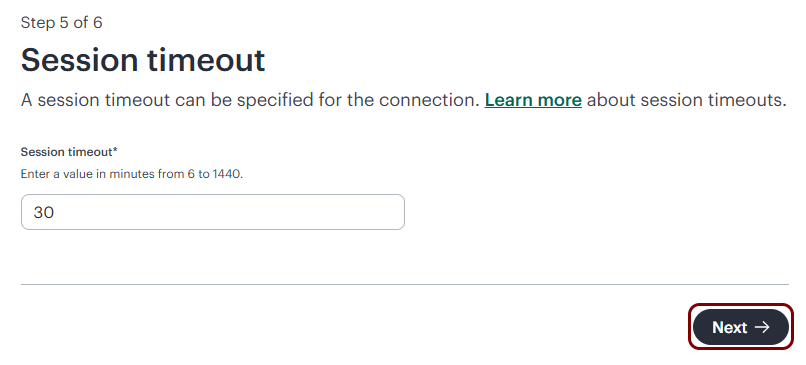
In the Session timeout step, leave the default value or enter the Session
timeout, then click on the Next button.
-
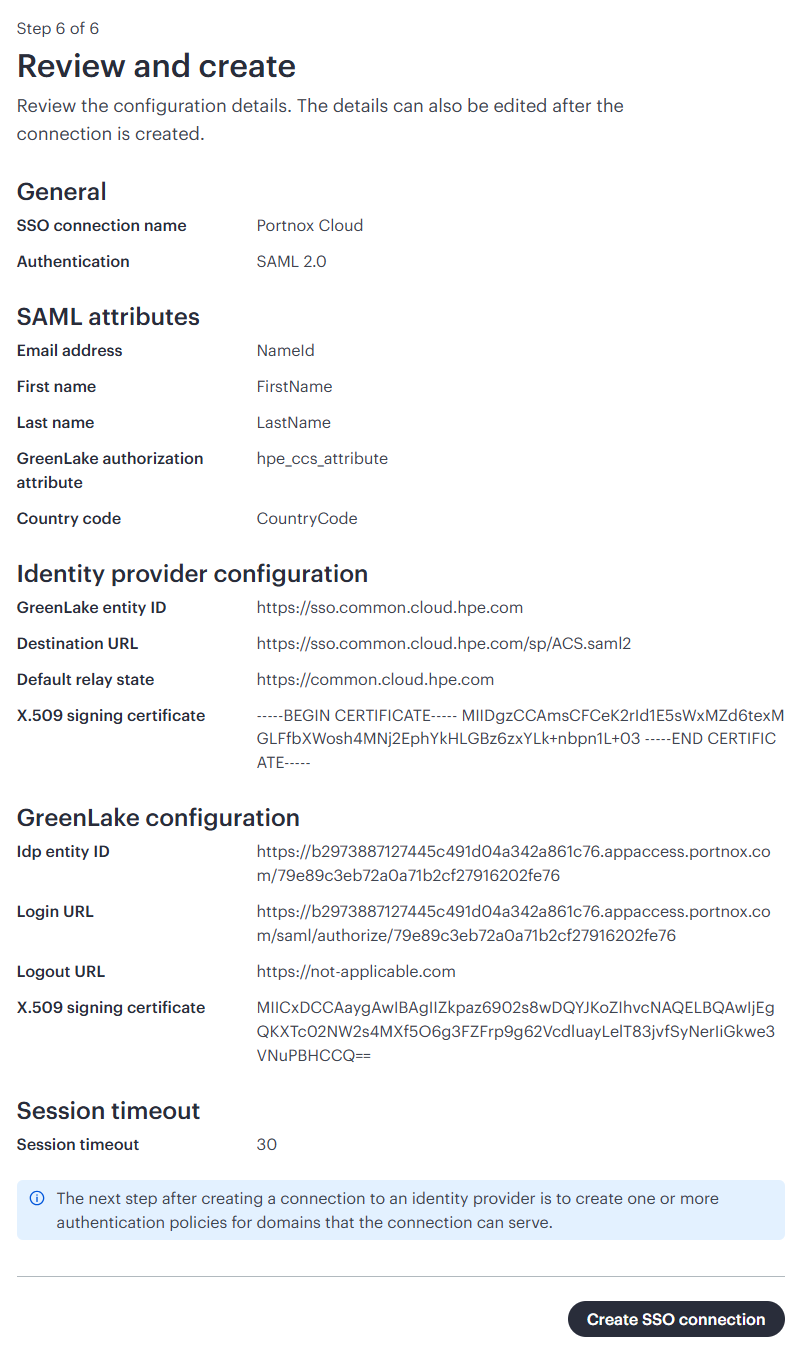
In the Review and create step, check the settings, and click on the Create SSO
connection button.
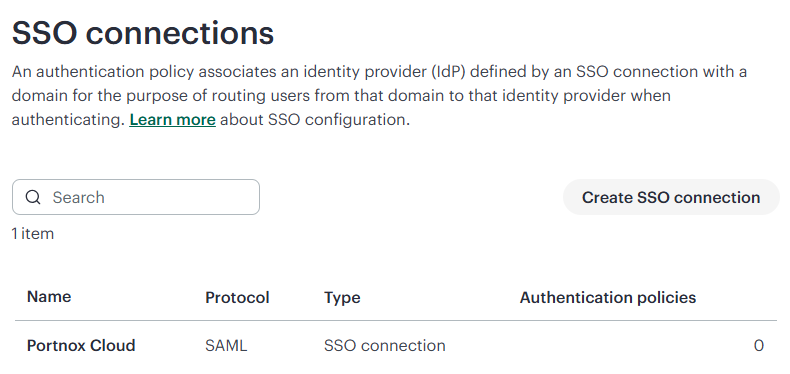
The new connection appears on the SSO connections screen.
Create an authentication policy in HPE GreenLake
In this section, you will create an authentication policy, which sends users from your verified domain to Portnox Cloud for authentication.
-
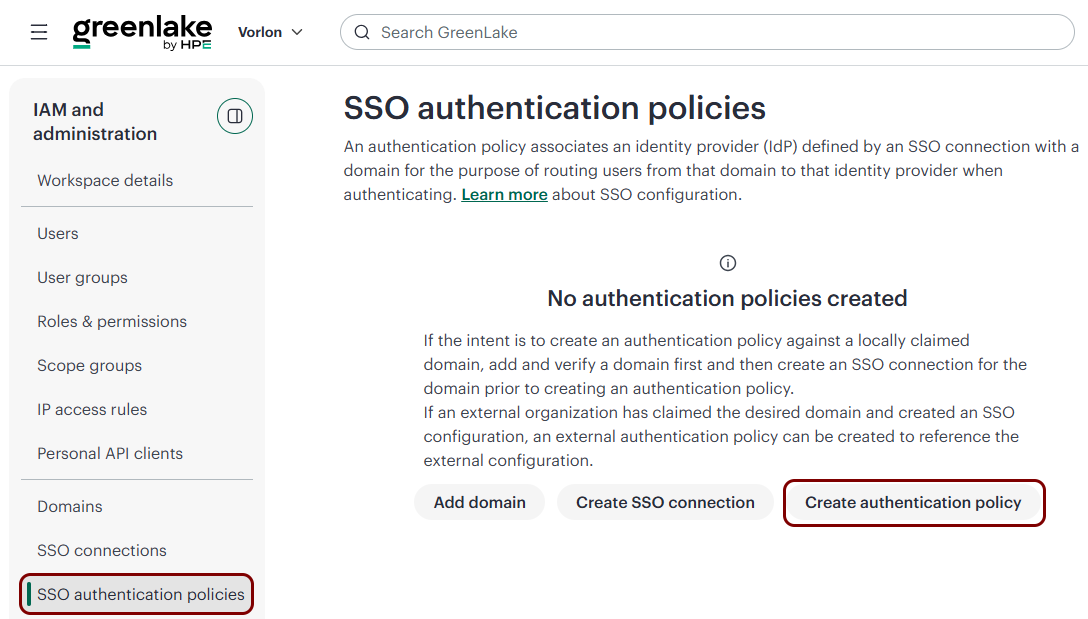
In the GreenLake tab, in the left-hand side IAM and administration menu, click on the
SSO authentication policies option, and then click on the Create
authentication policy button.
-
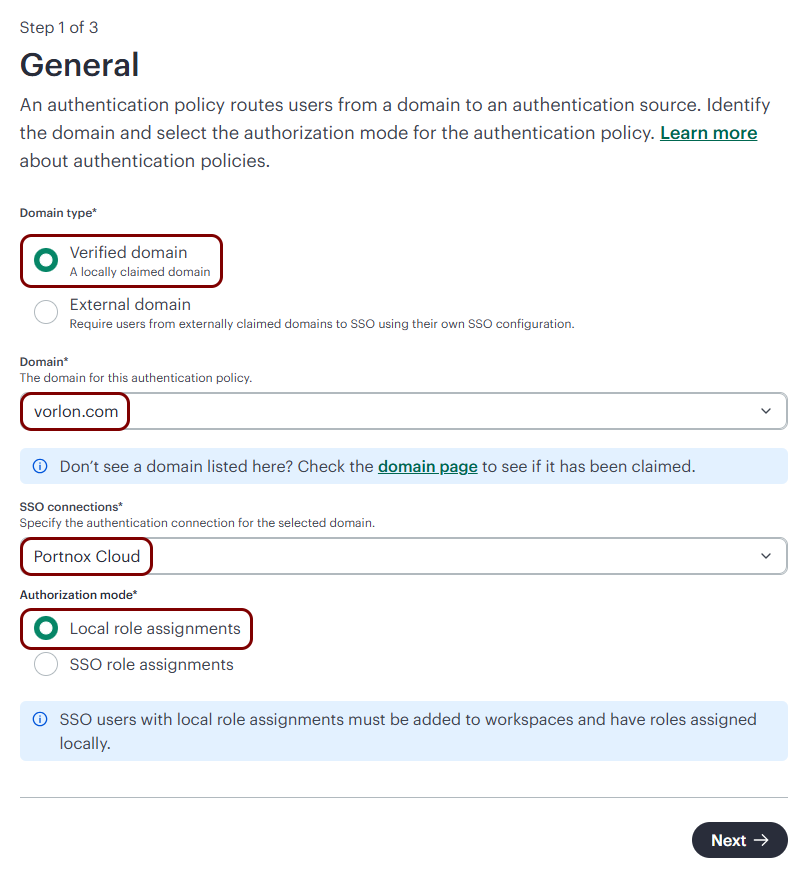
In the General step, configure the following settings, and then click on the
Next button.
-
Domain type: Verified domain
-
Domain: the domain that you verified earlier
-
SSO connections: the SSO connection that you created earlier
-
Authorization mode: Local role assignments
CAUTION:You can also select SSO role assignments to have HPE GreenLake create users automatically. However, we do not recommend this option because it requires a much more complex/advanced setup, including custom claims in your identity provider, custom attributes set for every user depending on their specific roles, and more. It is also much more error-prone. A single mistake in the claim values can lock you out of the workspace. For more information, see the following section: Advanced user administration. -
-
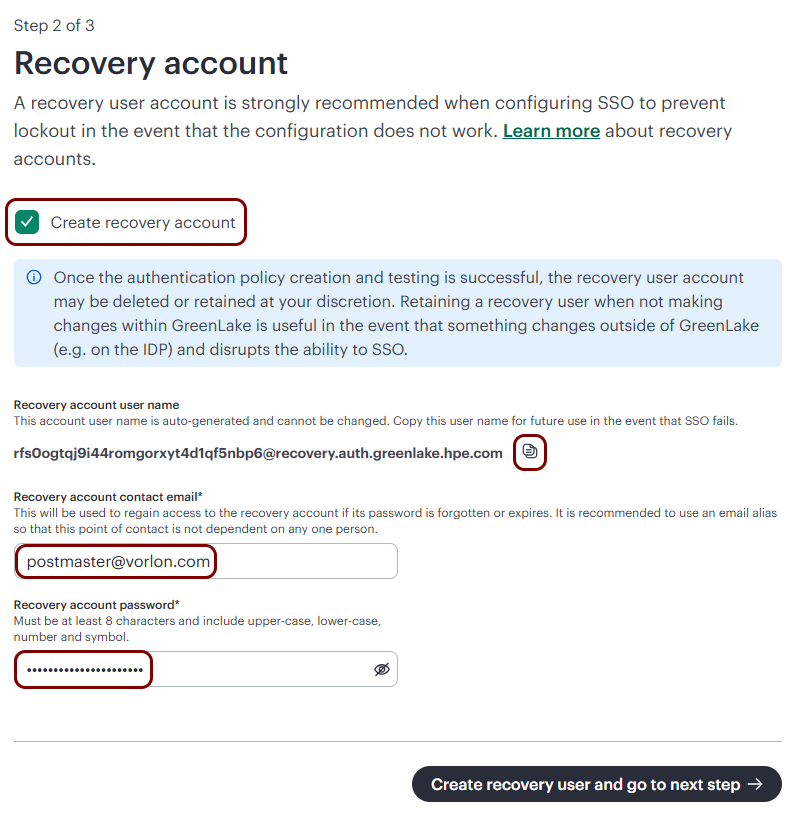
In the Recovery account step, activate the Create recovery account
checkbox, copy the generated Recovery account user name, enter a Recovery account
contact email and a Recovery account password, and then click on the
Create recovery user and go to next step button.
Store the recovery user name and password in a safe place. You need them to sign in if SSO fails.
 Warning:A mistake in the SSO configuration can lock you out of the workspace. The recovery account lets you regain access, but HPE GreenLake does not give it the Workspace Administrator role automatically. Before you test SSO, assign the Workspace Administrator role to the recovery account (), and then use a private/incognito browser window to sign in with the recovery account to confirm that it has full access. If you prefer, you can use a service account with an email address in another domain instead. The SSO policy does not apply to this domain, so the account keeps signing in with its own password. You must create this account manually, assign the Workspace Administrator role to it, and sign in with it to confirm that it has full access before you continue. If you skip these checks, a single configuration mistake can lock you out of the workspace for good. Only HPE support can restore access. You also can’t set up SSO in a new workspace instead, because your domain stays claimed in the locked workspace.
 -
In the Review and create step, check the settings, and click on the Create
authentication policy button.
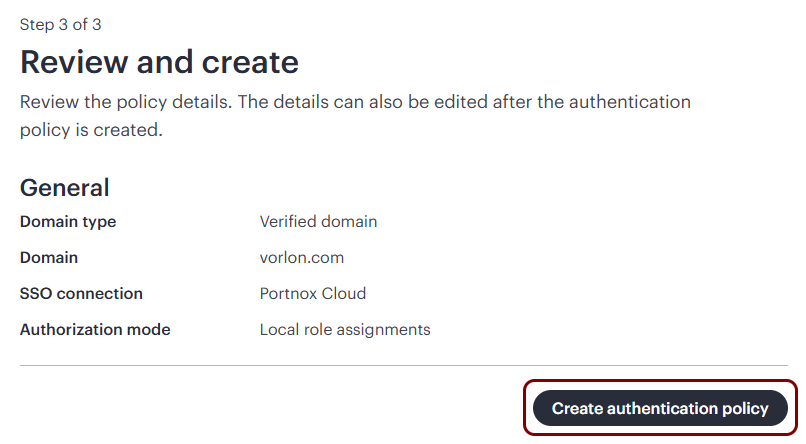
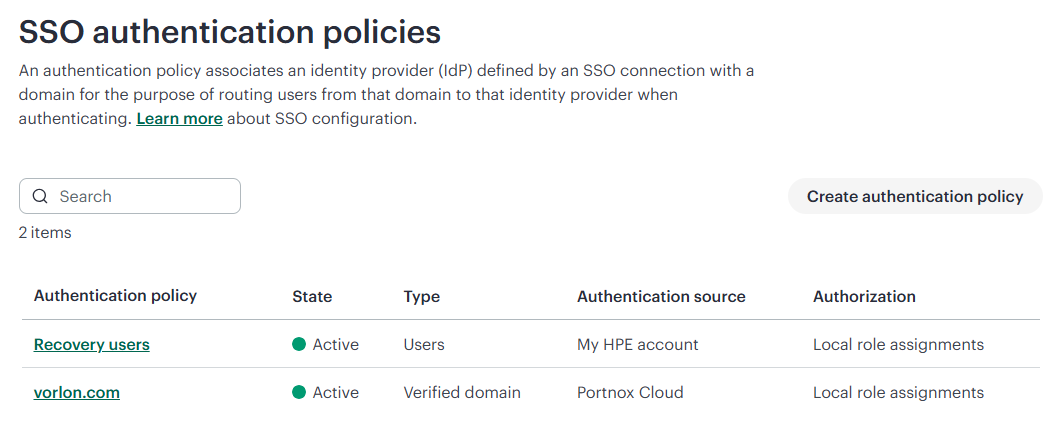
The policy appears on the SSO authentication policies screen with the Configuring state. After a few moments, the state changes to Active.
Finalize the configuration
In this section, you will finalize the configuration in Portnox Cloud and HPE GreenLake.
-
Finalize the configuration in the Portnox tab.
-
Click on the OPTIONAL SETTINGS link to show
additional fields, and then in the Application Login URI field, enter the
following value: https://common.cloud.hpe.com.
Note:This step is required if you want to show this application in the ZTNA Secure Access Portal.

-
Scroll all the way down to the end of the page, and then click on the Add resource
button.

-
Click on the OPTIONAL SETTINGS link to show
additional fields, and then in the Application Login URI field, enter the
following value: https://common.cloud.hpe.com.
-
In the GreenLake tab, make sure that every user who needs access to HPE GreenLake exists in your workspace and has
a role.
With Local role assignments, HPE GreenLake does not create users at sign-in. It matches the email address sent by Portnox Cloud to an existing user. If a user does not exist in the workspace, the sign-in itself succeeds, but the workspace is not listed for this user after sign-in. The user cannot open the workspace or any of its services, and only has an option to create another workspace for themselves.
If a user does not exist yet, add the user manually:
-
In the left-hand side menu, click on the Users option, then click on the
Add user button and add a user with the same email address that the user has in
your identity provider. Deactivate the Send welcome invitation email option, since
you do not want the user to create a password. Assign a role to the user, for example, Workspace
Observer.
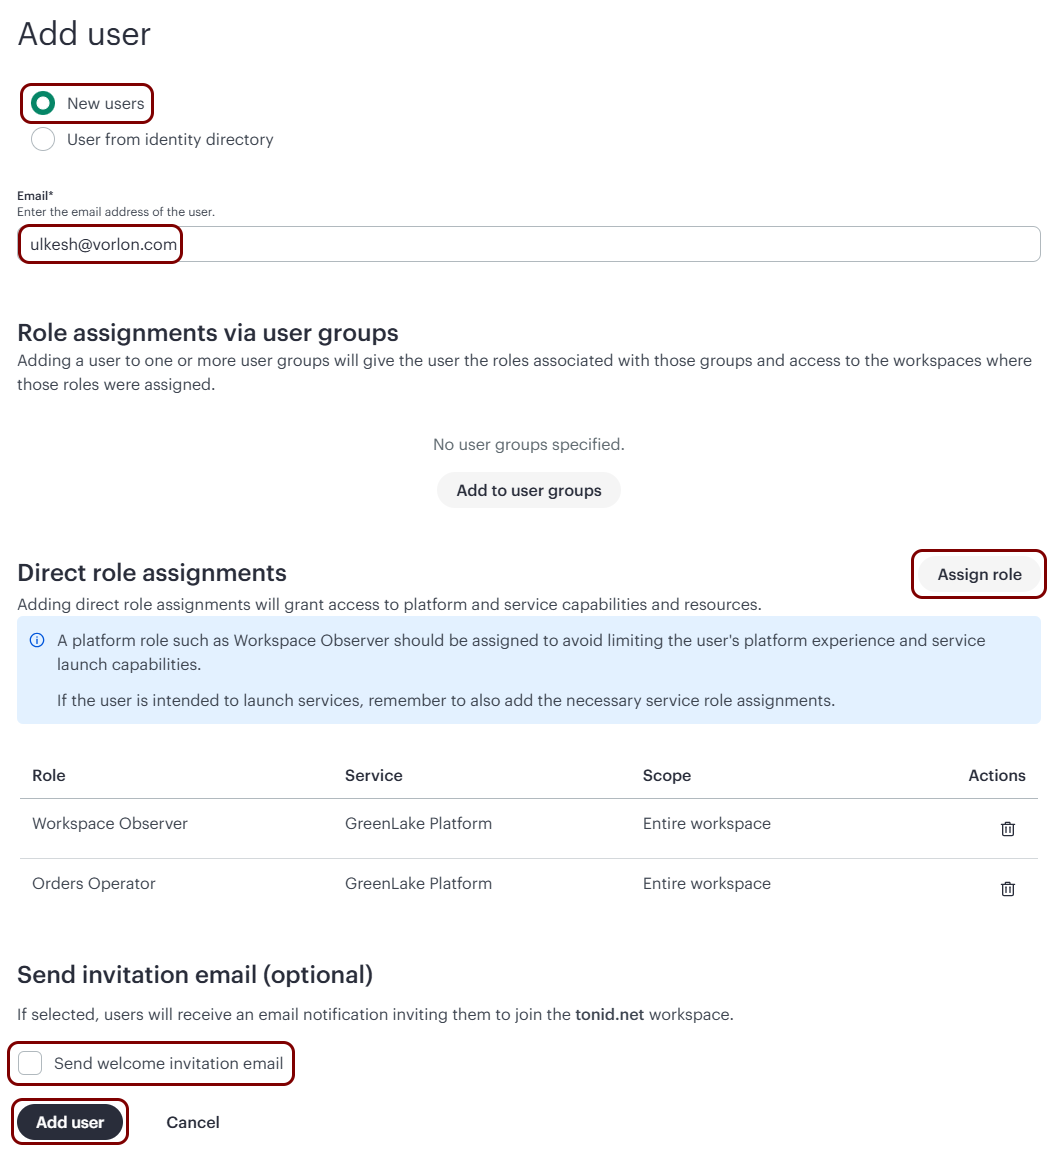
The list of available roles depends on the services in your workspace. Every workspace has the basic HPE GreenLake platform roles, such as Workspace Administrator or Workspace Member. Each service adds its own roles. For example, if your workspace has HPE Aruba Networking Central, the list also includes roles such as Aruba Central Administrator. To let the user open a service, assign a role of that service in addition to the workspace role.
Note:HPE GreenLake does not update any user details, such as the first and last name, with information from the identity provider at sign-in. The details stay as you entered them when you added the user manually. -
In the left-hand side menu, click on the Users option, then click on the
Add user button and add a user with the same email address that the user has in
your identity provider. Deactivate the Send welcome invitation email option, since
you do not want the user to create a password. Assign a role to the user, for example, Workspace
Observer.
You have configured HPE GreenLake to be accessible using Portnox Zero Trust Network Access.
Advanced user administration
HPE GreenLake can create users automatically at their first sign-in and assign their roles based on information sent by your identity provider. This requires the SSO role assignments authorization mode and an additional SAML attribute.
With Local role assignments, you manage users and roles manually in HPE GreenLake. With SSO role assignments, HPE GreenLake creates each user at the first sign-in and applies the roles received from your identity provider in every session. You do not need to add users manually.
For more information, see the following topic in HPE documentation: HPE GreenLake cloud SAML attribute for session-based authentication.