
Integrate WatchGuard Cloud with Zero Trust Network Access
In this topic, you will find general instructions on how to integrate WatchGuard Cloud with Portnox™ Zero Trust Network Access.
Create a Portnox Cloud resource configuration
In this step, you will create a configuration in Portnox Cloud that will contain all the information necessary to integrate with WatchGuard Cloud.
-
In the Cloud portal top menu, click on the Zero Trust Resources option.

-
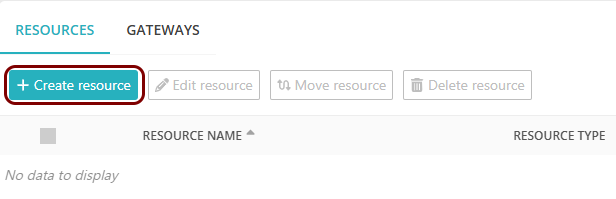
On the Resources screen, click on the Create resource button.
-
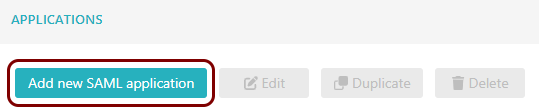
In the Authentication protocol section, select the SAML
option.
-
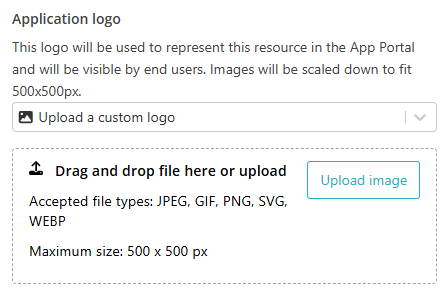
In the Application logo section, select one of the logos from the list, or select
the Upload a custom logo option and then click on the Upload
image button to upload a logo for the application.
The logo is used in the Secure Access Portal.
-
In the Authentication protocol section, select the SAML
option.
-
In the Resource details section, enter a Resource
name and optionally a Description.
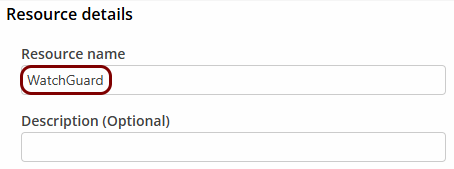
In this example, we used the name WatchGuard for the new resource configuration but you can use any name you like.
Open your WatchGuard SSO settings
In this section, you will access your WatchGuard Cloud administrative interface and open the SAML SSO configuration wizard.
-
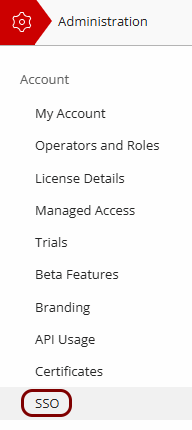
In the WatchGuard Cloud top menu, click on the Administration option, and then in the
left-hand side menu, click on the SSO option.
-
On the SAML SSO screen, click on the Configure SAML SSO link.

Result: The WatchGuard Account SSO Configuration Wizard opens in a new browser tab. You may need to log in to WatchGuard Cloud again. From now on, we will call this tab the WatchGuard SSO Configuration tab.
Upload the Portnox metadata to WatchGuard
In this section, you will export the metadata from Portnox Cloud into a file and import that file in the WatchGuard SSO Configuration tab.
-
In the Portnox tab, in the SAML metadata section, click on the Download metadata
XML file link to download the XML file and save it to your local drive.

-
In the WatchGuard SSO Configuration tab, in the Import SAML Metadata step, click on the
Select a metadata file tile, and then select the XML file that you downloaded from
Portnox Cloud.
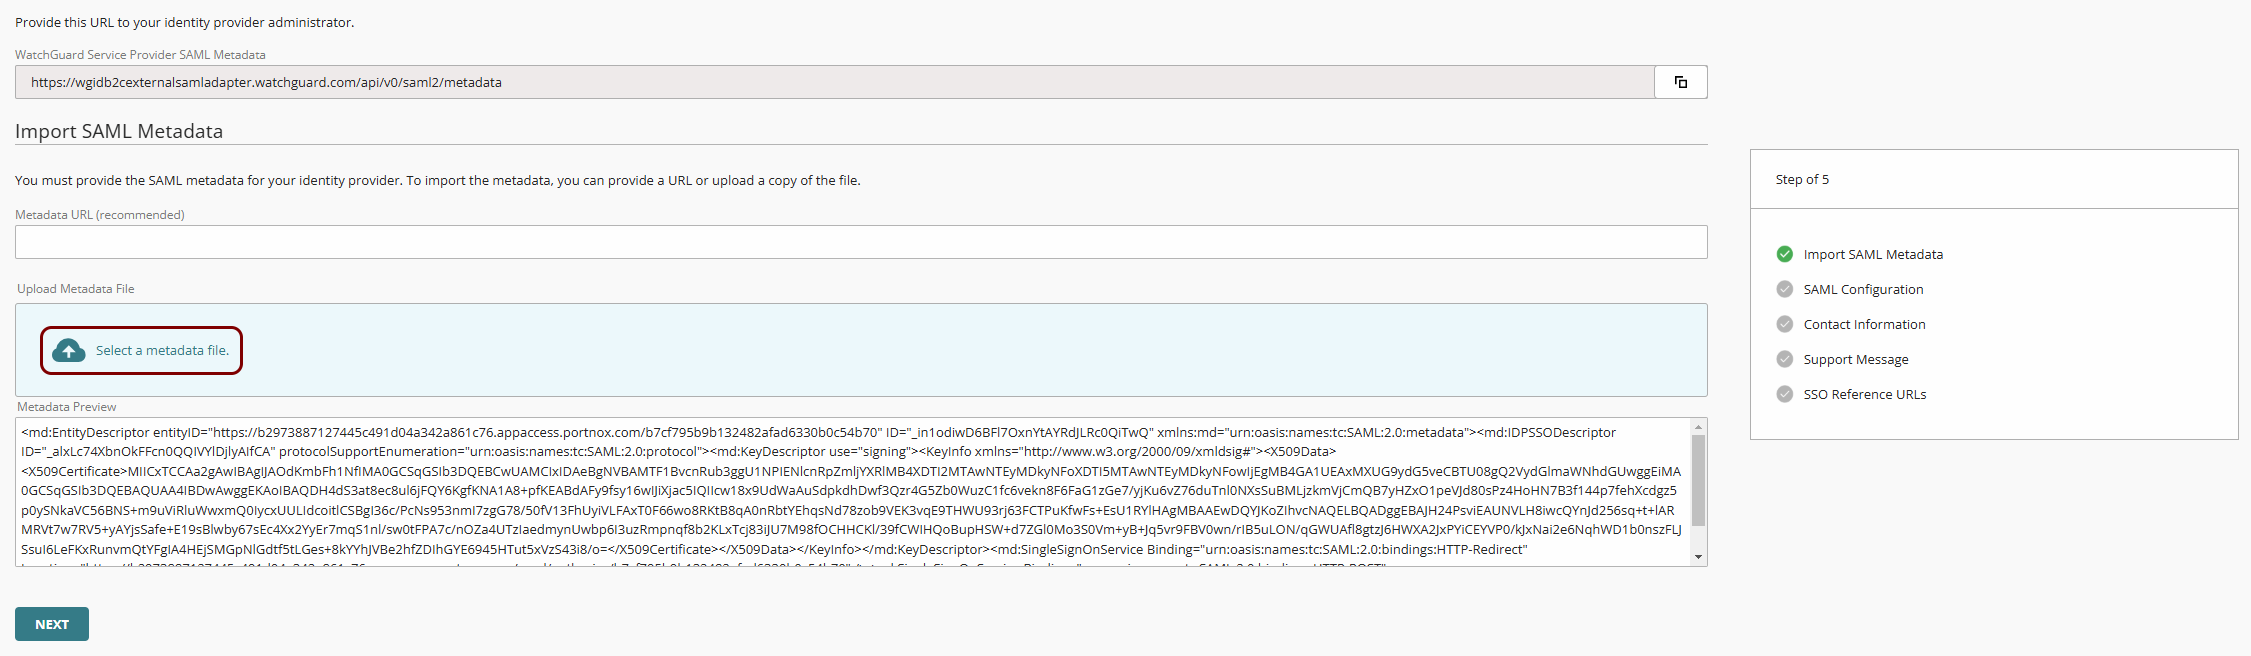 Note:Do not use the Metadata URL (recommended) field. WatchGuard does not import the Portnox Cloud metadata from a URL.
Result: The Metadata Preview field shows the content of the file.
Enter values in the Portnox tab
In this section, you will enter the WatchGuard service provider values in the relevant fields in Portnox Cloud. These values are the same for all WatchGuard accounts.
-
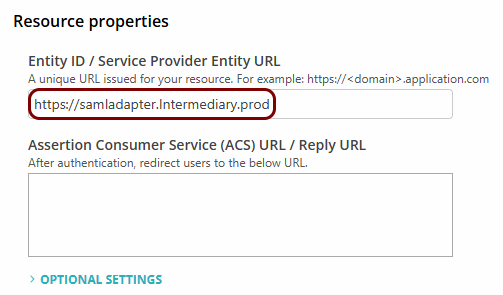
In the Portnox tab, in the Resource properties section, click on the empty field under the
Entity ID / Service Provider Entity URL heading and enter the following value:
https://samladapter.Intermediary.prod.
-
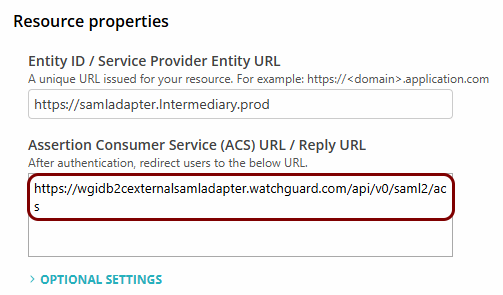
In the Portnox tab, in the Resource properties section, click on the empty field under the
Assertion Consumer Service (ACS) URL / Reply URL heading and enter the following value:
https://wgidb2cexternalsamladapter.watchguard.com/api/v0/saml2/acs.
Finalize the configuration
In this section, you will finalize the configuration in WatchGuard Cloud and Portnox Cloud, and add users as WatchGuard Cloud operators.
-
Finalize the configuration in the WatchGuard SSO Configuration tab.
-
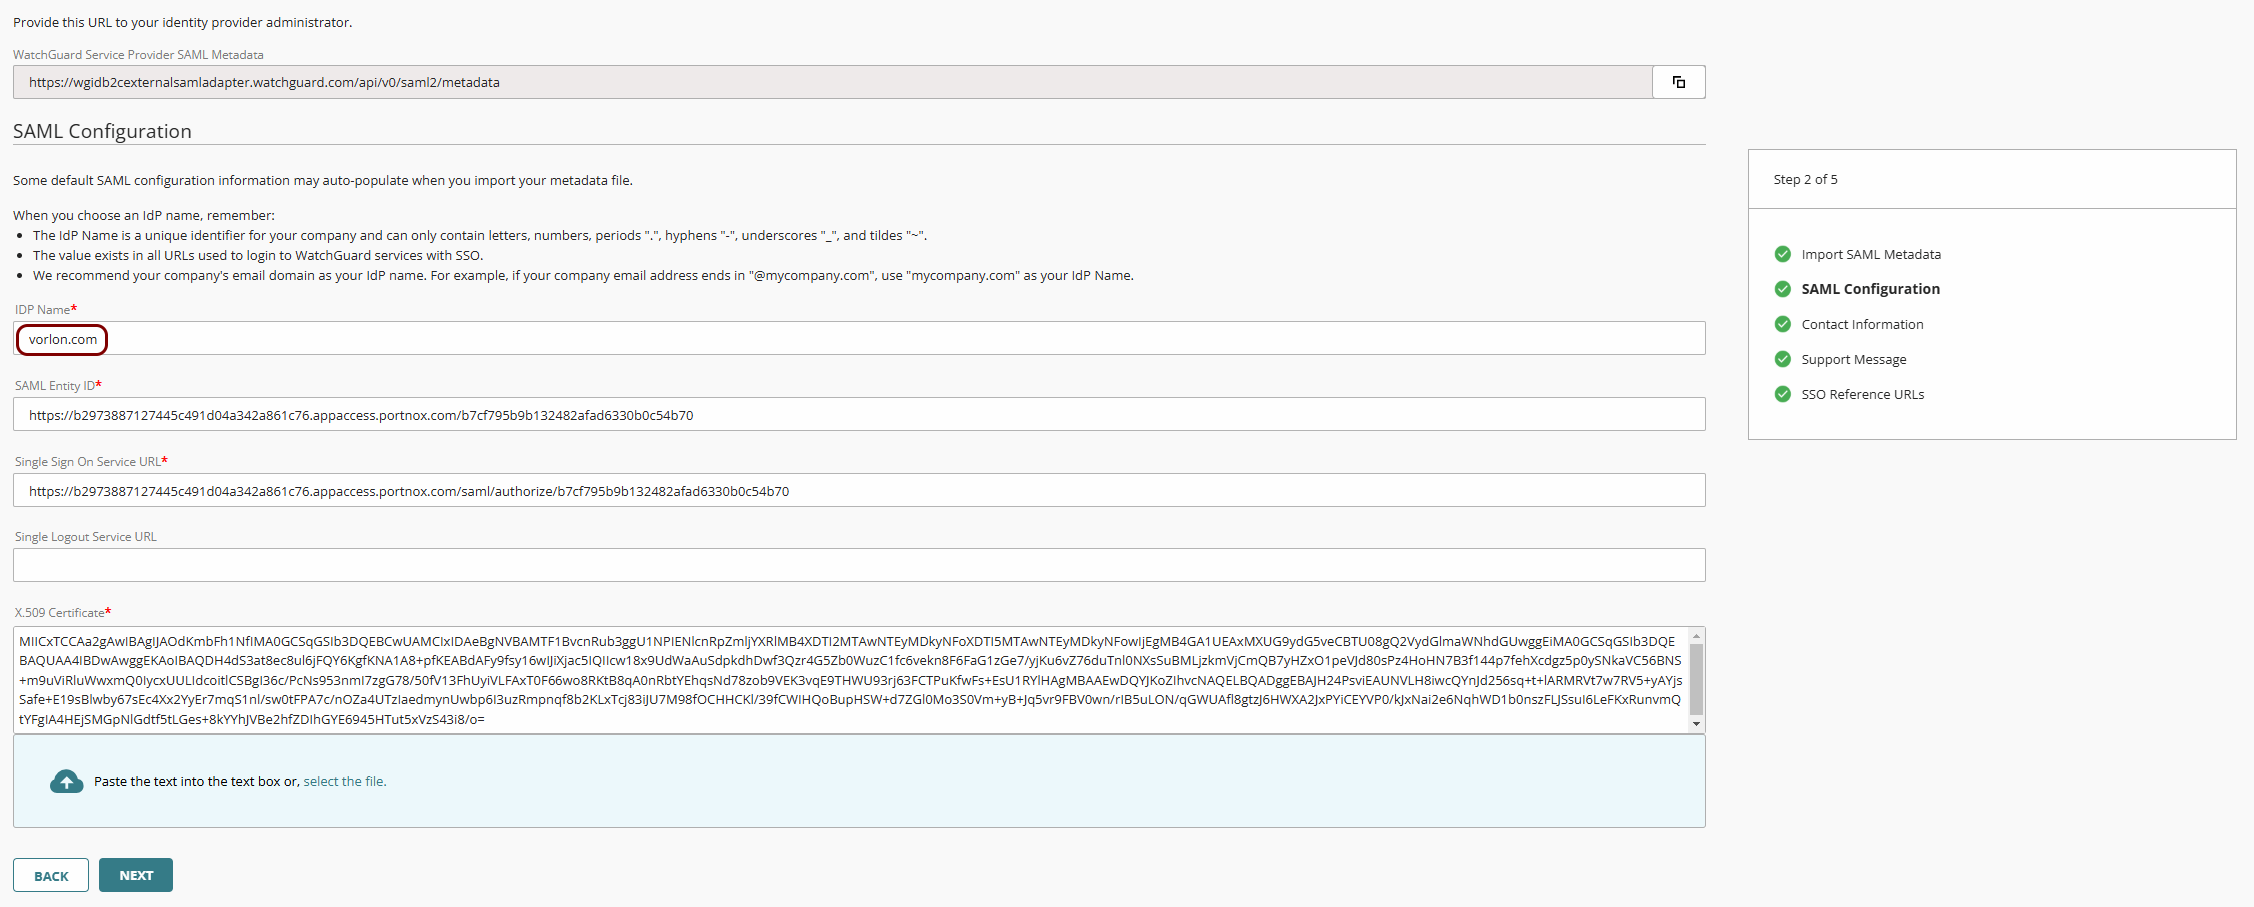
In the SAML Configuration step, in the IDP Name field, enter
a unique identifier for your organization, and click on the NEXT button.
Users enter this name on the WatchGuard login page when they log in with SSO. The name can contain only letters, numbers, periods, hyphens, underscores, and tildes. It cannot contain spaces. WatchGuard recommends your company email domain.
-
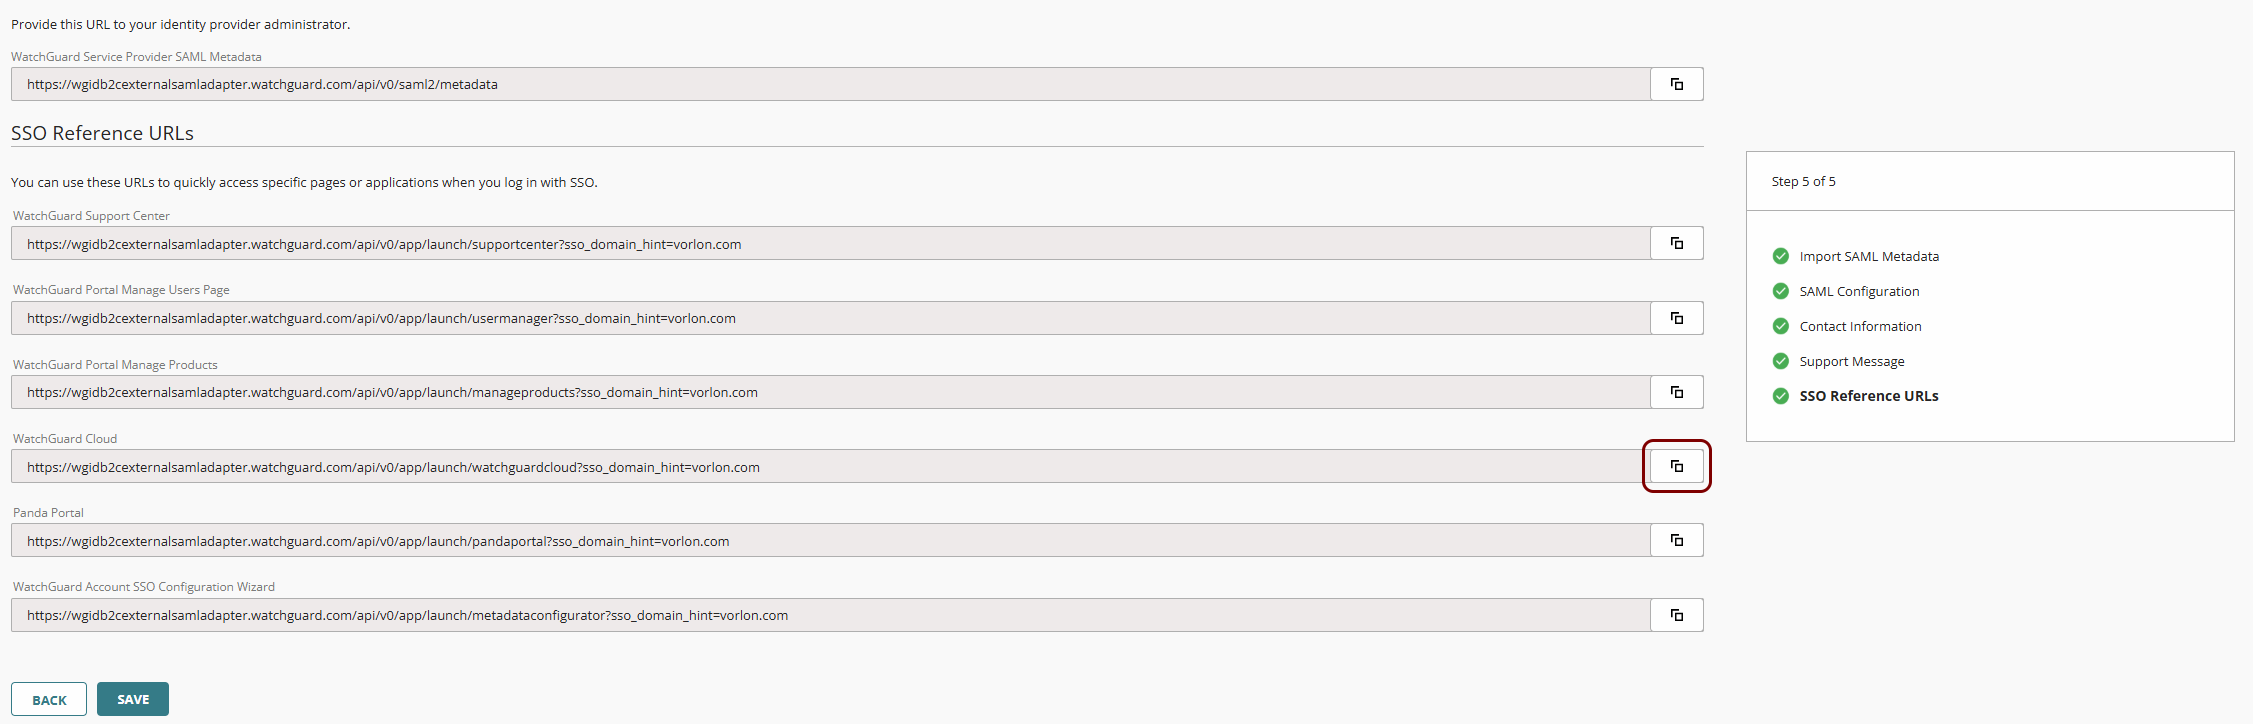
In the SSO Reference URLs step, click on the ⧉ icon next to the WatchGuard Cloud field to copy
the URL.
-
In the SAML Configuration step, in the IDP Name field, enter
a unique identifier for your organization, and click on the NEXT button.
-
Finalize the configuration in the Portnox tab.
-
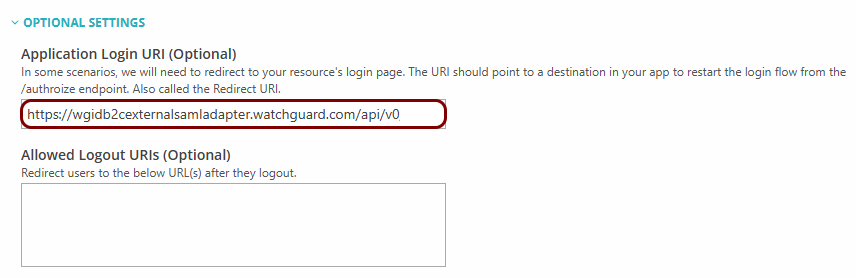
Click on the OPTIONAL SETTINGS link to show additional fields, and then in the
Application Login URI field, paste the URL that you copied in the SSO
Reference URLs step.
Note:This step is required if you want to show this application in the ZTNA Secure Access Portal.
-
Scroll all the way down to the end of the page, and then click on the Add resource
button.
-
Click on the OPTIONAL SETTINGS link to show additional fields, and then in the
Application Login URI field, paste the URL that you copied in the SSO
Reference URLs step.
-
Finalize the configuration in the WatchGuard tab.
-
On the SAML SSO screen, activate the Enable SAML SSO
switch.

-
On the SAML SSO screen, activate the Enable SAML SSO
switch.
- Optional:
If you want to add users who can use SSO, add them as WatchGuard Cloud operators in the WatchGuard tab.
-
In the left-hand side menu, click on the Operators and Roles option, and then on the
Operators tab, click on the Add Operator link.
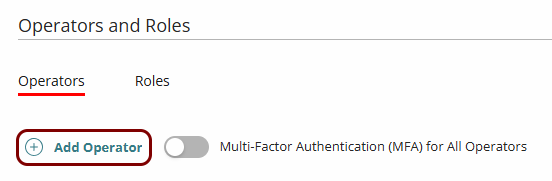 Note:The Multi-Factor Authentication (MFA) for All Operators option does not affect SSO logins. MFA applies only when operators log in with their WatchGuard credentials.
 -
On the Add Operator screen, enter the user details, select a role in the
WatchGuard Cloud Role field, and click on the Save
button.
Important:In the Email field, enter the full email address of the user’s account as used in Portnox Cloud. WatchGuard matches this field, not the user name, with the data from the identity provider.Note:We recommend that you clear the Enable multi-factor authentication (MFA) for this WatchGuard Cloud operator checkbox. SSO logins do not use WatchGuard MFA.
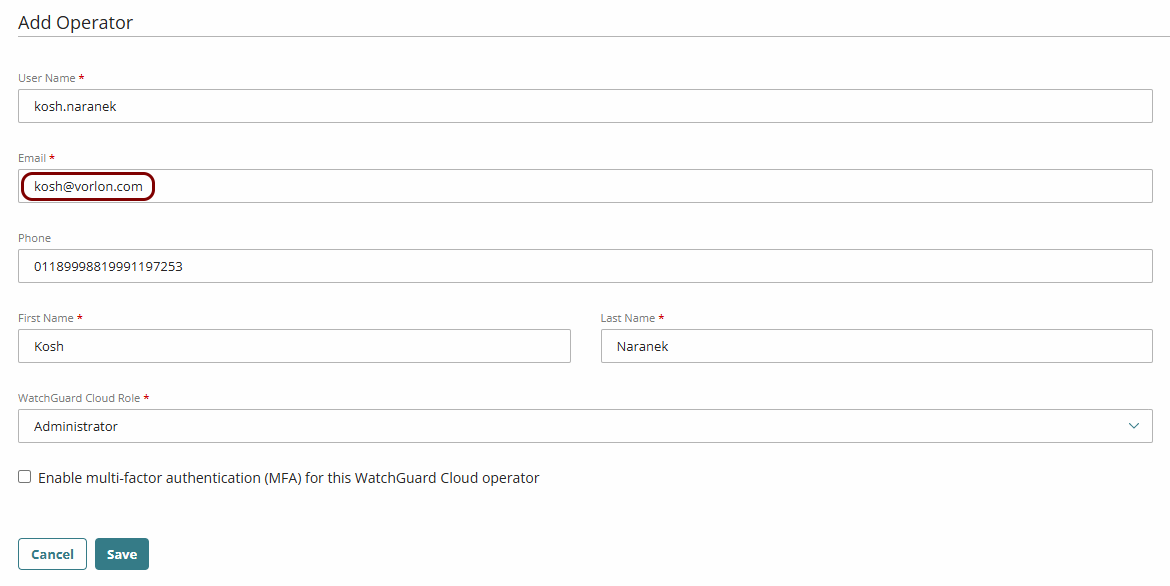
Result: WatchGuard sends the user an invitation email, and the operator status is Pending.
- Optional:
If you want an operator to log in only with SSO, wait until the operator accepts the invitation and their
status on the Operators and Roles screen changes to
Active.
 Note:WatchGuard Cloud lets you restrict an operator to SSO only after the operator becomes active. To become active, the operator must accept the invitation and set a WatchGuard password, even though they will not use it. After that, you can block logins with that password in the next step.
 - Optional:
Click on the user name of the operator on the Operators tab, clear the
Enable login with WatchGuard credentials checkbox, make sure that the
Enable login with SAML SSO checkbox is selected, and click on the
Save button.
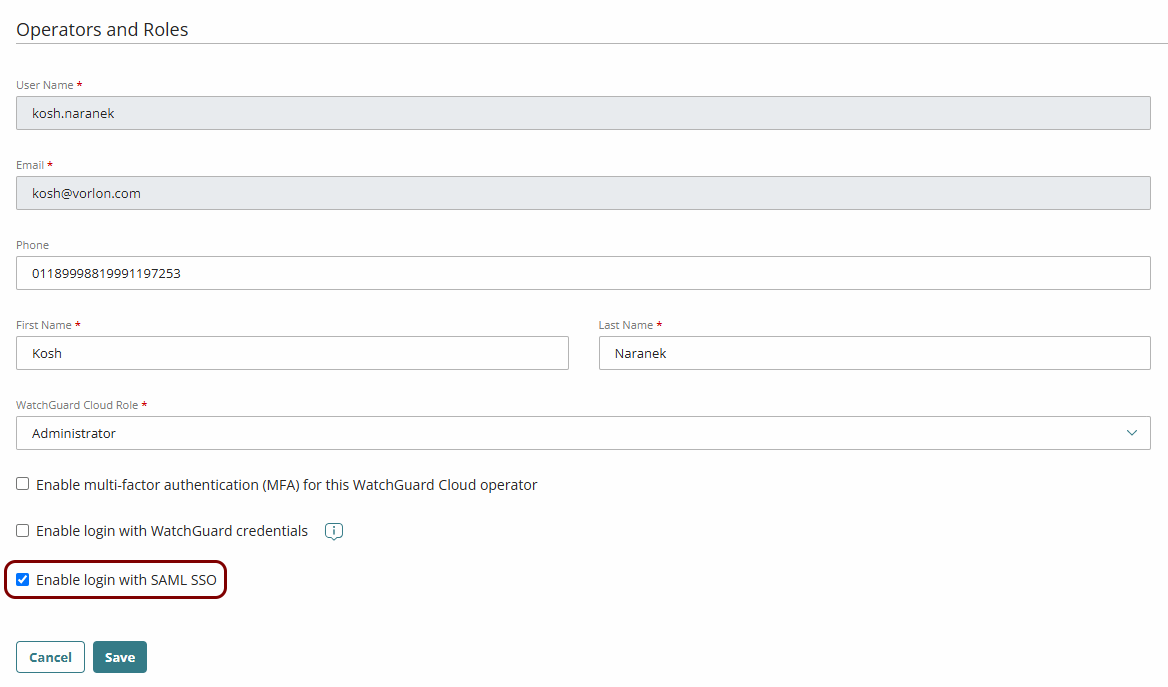
Result: The operator can log in to WatchGuard Cloud only with SSO.
Important:Keep at least one operator account that can log in with WatchGuard credentials, with MFA enabled. If the SSO configuration stops working, you can still use this account to log in to WatchGuard Cloud and fix the problem. -
In the left-hand side menu, click on the Operators and Roles option, and then on the
Operators tab, click on the Add Operator link.
Result: You have configured WatchGuard Cloud to be accessible using Portnox Zero Trust Network Access.