
Wi-Fi employee access – Synology
In this topic, you will learn how to configure the Synology Router Manager (SRM) to work together with Portnox™ Cloud and 802.1X RADIUS authentication for Wi-Fi connections.
Wi-Fi Connect only has one IP address, Port number, and Shared secret field per network. There is no field for a second, redundant RADIUS server, and no separate field for a RADIUS accounting server.
Synology routers do not support 802.1X port-based authentication on wired ports, MAC Authentication Bypass (MAB), RadSec, or Identity PSK. This applies to every current SRM router model, and to the Synology PS series switches as well.
As a result, this topic only covers Wi-Fi employee access. If you need wired 802.1X, MAB, RadSec, or Identity PSK, use a switch from another vendor in this guide behind your Synology router.
-
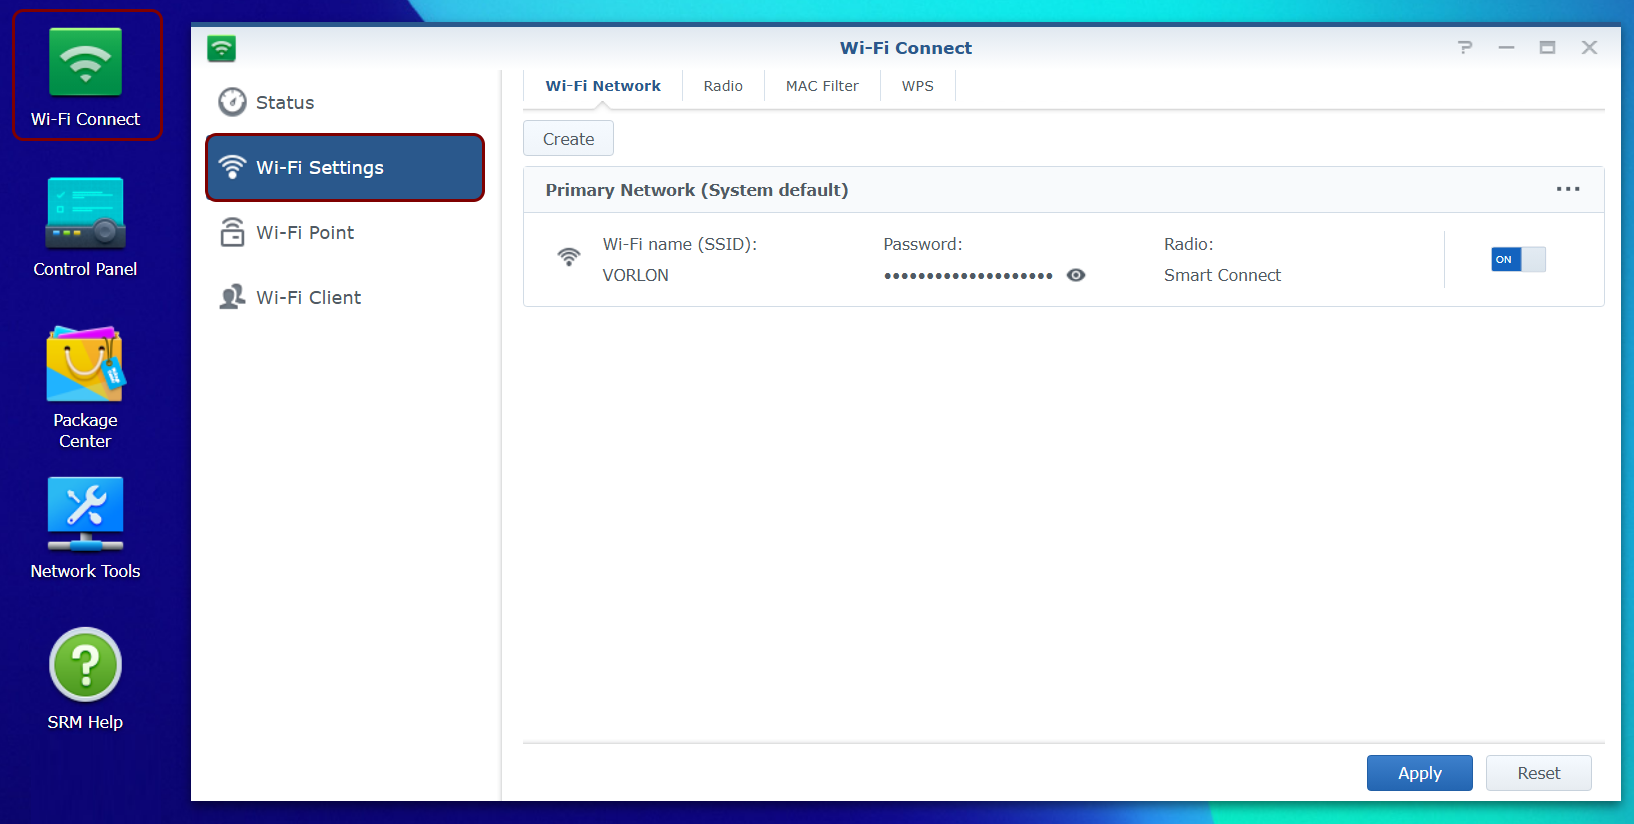
In SRM, open the Wi-Fi Connect app, and click on the Wi-Fi Settings
option in the left-hand side menu.
-
Click on the Create button to create a new Wi-Fi network.
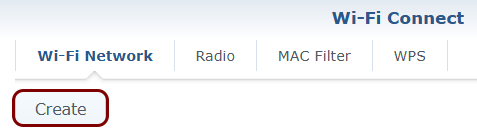 Note:You can also use an existing network (for example, your Primary Network) for this purpose. If you do, skip the creation steps, and instead click on the … icon next to that network and select the Edit option to go straight to the Edit Wi-Fi window.
 -
In the Create Wi-Fi Network window, enter a Wi-Fi name (SSID) and a
temporary Password, and then click on the Apply button.
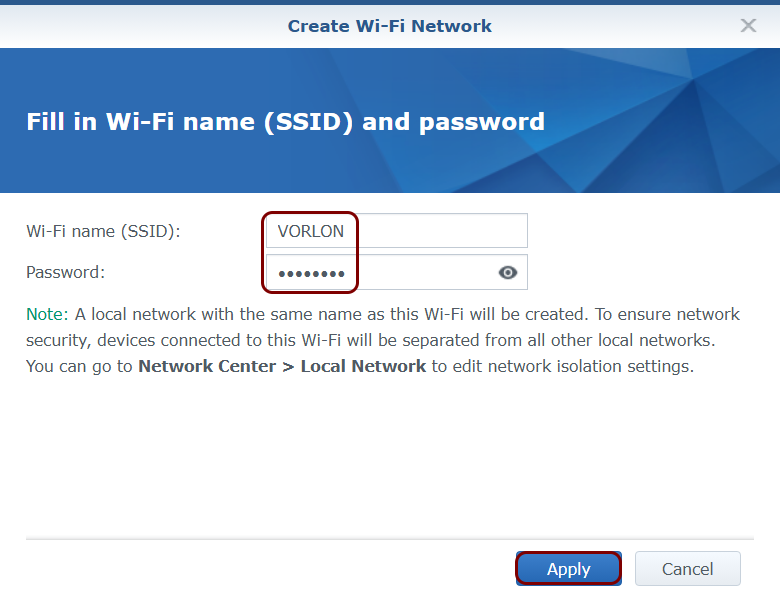 Note:Synology routers always create a new Wi-Fi network as a WPA2-Personal network first. There is no option to create a network as WPA2-Enterprise directly. Use a random temporary password only for the initial creation. You will replace WPA2-Personal with WPA2-Enterprise in the next step.
 -
Click on the … icon next to the network that you just created, and select the
Edit option.

-
In the Edit Wi-Fi window, in the Security level field, replace the
WPA2-Personal option with WPA/WPA2-Enterprise option.
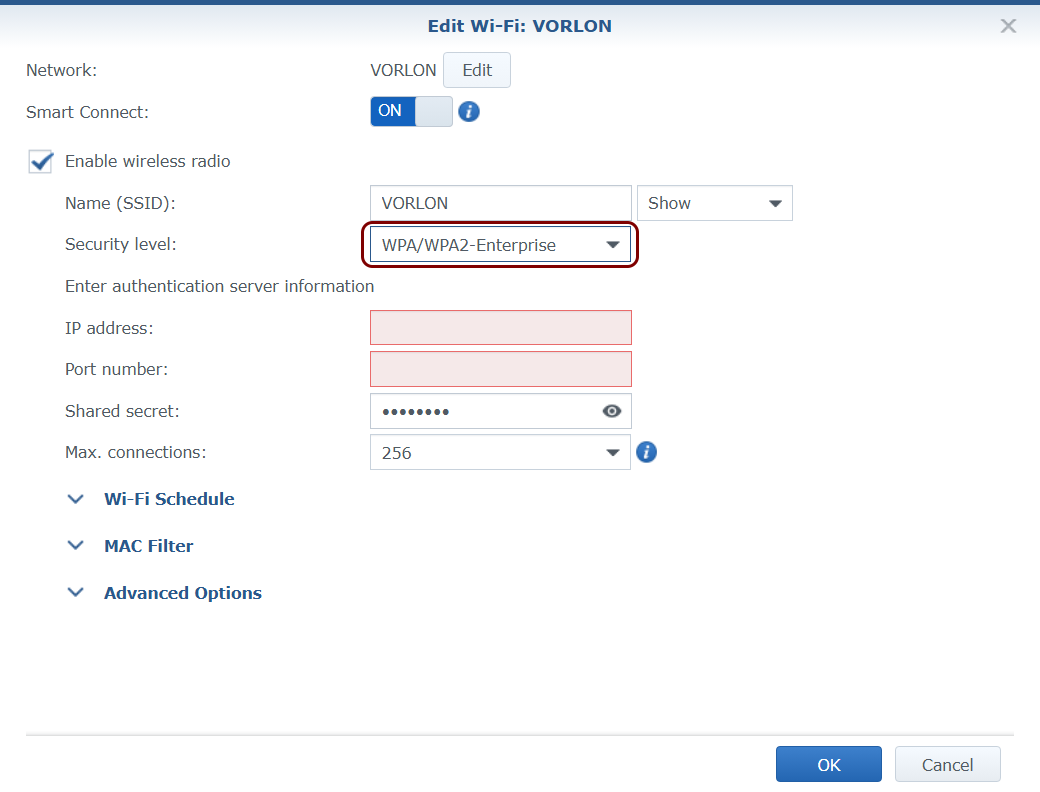 Note:You can also select WPA2-Enterprise or WPA3-Enterprise. The configuration process is identical for all three options.
Once you select any Enterprise mode, the Password field disappears, and the Enter authentication server information section appears instead.
-
In the Enter authentication server information section, enter your Cloud RADIUS details in the IP address, Port
number, and Shared secret fields.
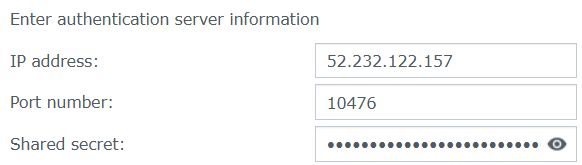 Note:Enter the authentication server details for only one region. Synology routers do not have a field for a second, redundant Cloud RADIUS server, and there is no separate accounting server configuration.
Result: Employees can now connect to this Wi-Fi network using their own credentials, authenticated through the Portnox Cloud RADIUS server.