Wi-Fi employee access – Ubiquiti UniFi
In this topic, you will learn how to configure Ubiquiti UniFi access points to work together with Portnox™ Cloud and 802.1X RADIUS authentication for Wi-Fi connections.
Create a RADIUS profile
In this section, you will create a RADIUS profile for Portnox™ Cloud RADIUS servers. You can then apply this profile to Wi-Fi configurations and Ethernet port profiles.
-
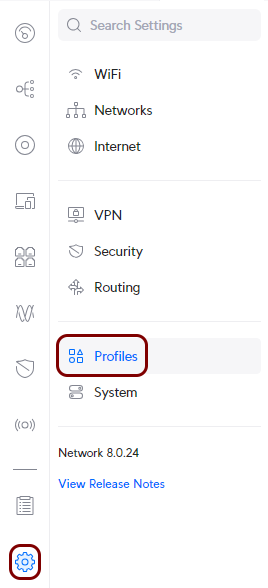
In the Ubiquiti web interface, go to the Network tab, and in the left-hand side menu, click
on the following menu options: .
-
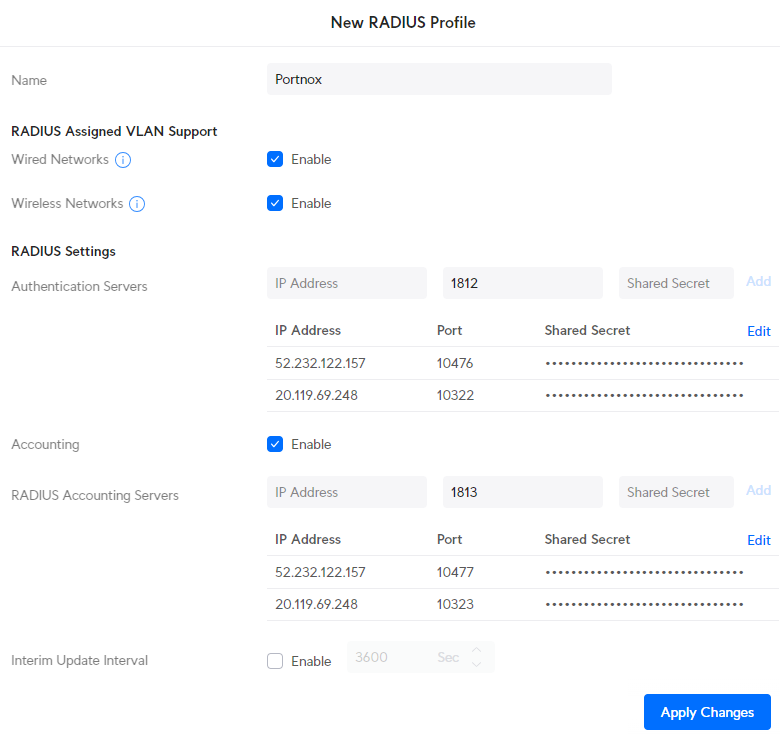
In the right-hand side pane, scroll down to the RADIUS Servers section, and then click on
the Create New link to create a new RADIUS profile.

-
In the right-hand side pane, configure the new RADIUS profile:
Optional: Create a RadSec profile
This is an optional task that modifies the previous task. Follow this task only if you want to connect to Portnox Cloud RADIUS servers using RadSec. Skip this task if you want to connect to Portnox Cloud RADIUS servers without RadSec.
-
In the Ubiquiti web interface, go to the Network tab, and in the left-hand side menu, click
on the following menu options: .
-
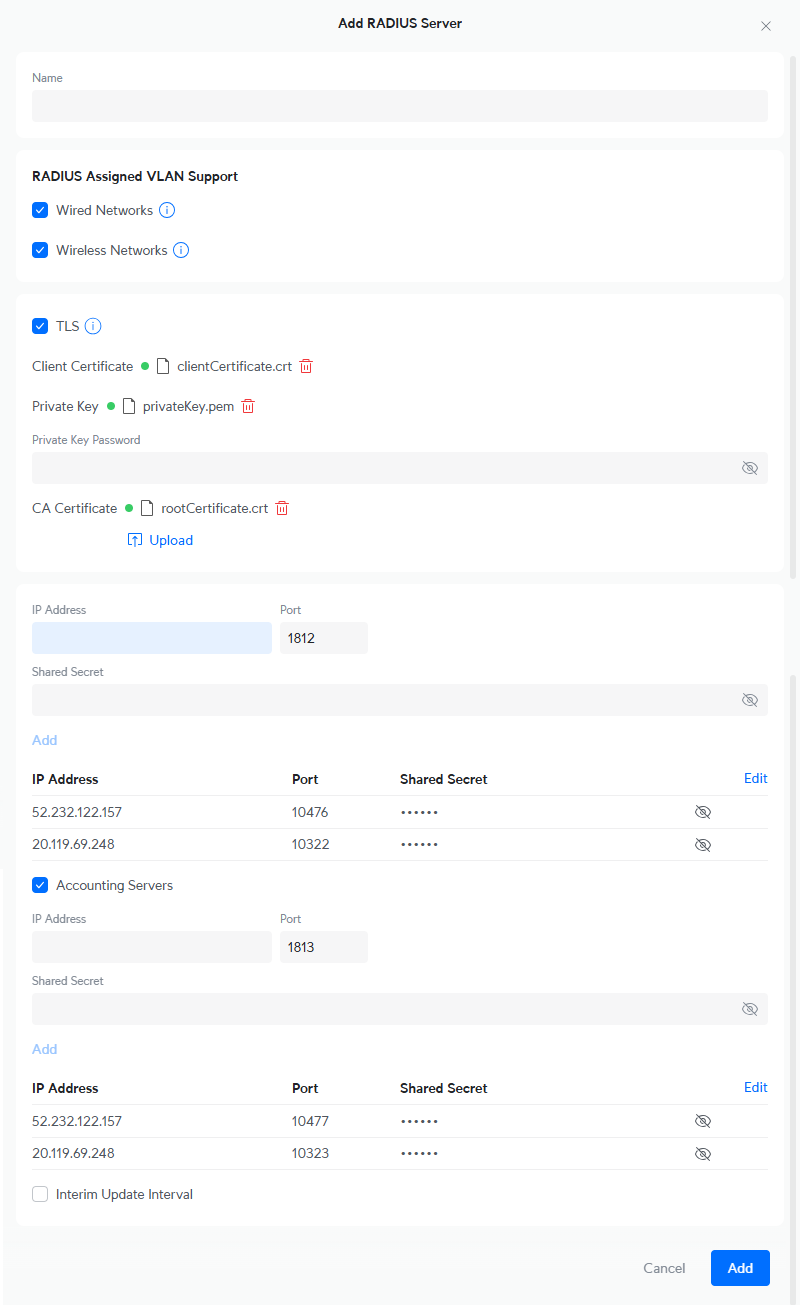
In the right-hand side pane, scroll down to the RADIUS Servers section, and then click on
the Create New link to create a new RADIUS profile.
-
Configure the new RADIUS profile:
Create a Wi-Fi configuration for the 802.1X network
In this section, you will create a configuration for a Wi-Fi network with WPA2 Enterprise authentication (802.1X) and assign the RADIUS profile to this network.
-
In the Ubiquiti web interface, go to the Network tab, and in the left-hand side menu, click
on the following menu options: .

-
In the right-hand side pane, click on the Create New link to create a new Wi-Fi
configuration.

-
Complete the new Wi-Fi configuration:
-
In the Advanced section, click on the Manual option. This
will cause some of the fields to change and other fields to become active.

-
In the Name field, enter the SSID for the new network.

-
In the Network field, select your existing network configuration.
 Note:You can use the same network that was configured for your non-secured Wi-Fi. After testing the secured Wi-Fi configuration, you can delete the non-secured Wi-Fi configuration.
 -
In the Security Protocol field, select the WPA2 Enterprise
option.

-
Above the RADIUS Profile field, select the External RADIUS
Server option, and in the RADIUS Profile field, select the name of
the RADIUS profile that you created earlier for connection to Portnox Cloud RADIUS servers.
 Note:If you want this connection to use RadSec, select the RadSec profile that you created earlier.
 -
Configure any other fields as required for your environment, and then click on the
Create button to add the new Wi-Fi configuration.
-
In the Advanced section, click on the Manual option. This
will cause some of the fields to change and other fields to become active.
Result: Your Wi-Fi devices can now access the protected Wi-Fi network, using the Portnox Cloud RADIUS servers for authentication.