Onboard a Windows device with AgentP in multi-user mode
In this topic, you will learn how to onboard using Portnox™ AgentP, a Windows 10 computer with multiple users, and a Wi-Fi or wired network managed by Portnox™ Cloud.
For more information on multi-user mode, see the following topic: AgentP and certificates.
-
Enable AgentP multi-user mode in Portnox Cloud settings:
-
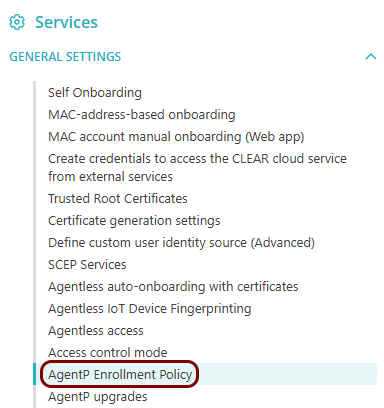
In the Cloud portal top menu, click on the Settings option.

-
-
In the AgentP Enrollment Policy section, click on the Edit link.
Then, activate the Enable AgentP Multi-User (Windows OS only) checkbox and click on the
Save button.
 Note:If you are working in a hybrid environment with Entra ID and Active Directory, by default, Portnox Cloud uses credentials from Entra ID for automatic enrollment. To use Active Directory credentials instead, activate the Prefer Active Directory over Entra ID during unattended enrollment checkbox.
-
In the Cloud portal top menu, click on the Settings option.
-
Download and install Portnox AgentP
Follow the steps in one of these topics: Onboard a Windows device to a Wi-Fi or wired network with AgentP (interactive installation) or Onboard Windows devices with AgentP in unattended or kiosk mode (unattended installation).
-
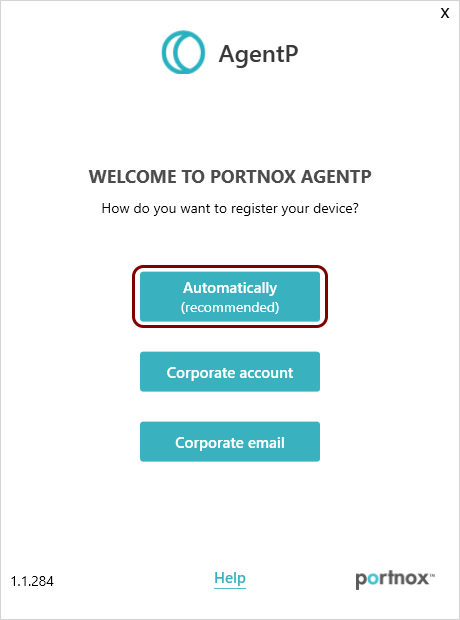
Enroll AgentP Automatically.
-
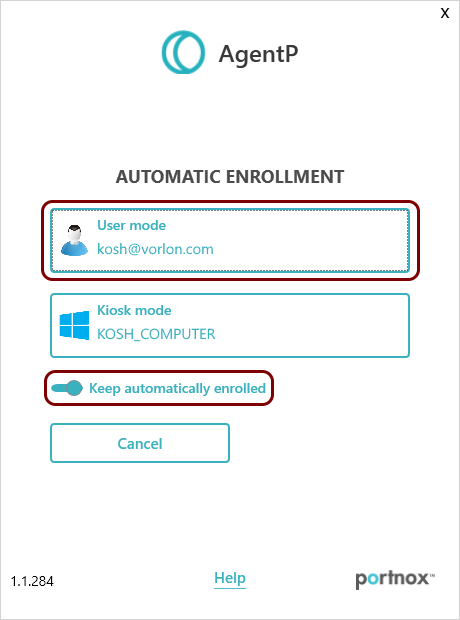
Select User mode, and activate the Keep automatically enrolled
switch
-
Enroll AgentP Automatically.
-
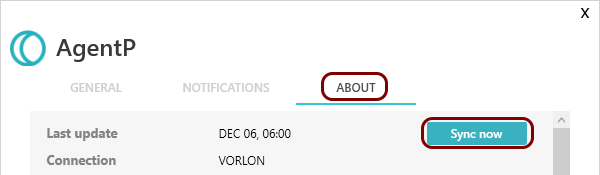
Run AgentP and switch the operating system user to test if AgentP changes to a different user.
AgentP needs a few seconds to switch to a different user. You can see the logged in user in the About tab of the AgentP user interface.
To speed up the process of switching to a new user, you can click on the Sync now button in the About tab of the AgentP interface.
 Important:If AgentP is already installed and enrolled manually, before you switch to unattended mode, you must manually unenroll it by clicking on the Deactivate button in the AgentP user interface. Otherwise, AgentP will remain enrolled with the manually onboarded user and will not automatically switch to the current Active Directory or Entra ID user.