Onboard an Android device to a Wi-Fi network with credentials
In this topic, you will learn how to onboard using credentials, an Android phone, and a Wi-Fi network managed by Portnox™ Cloud.
Note:
The user interface and the names of options may differ slightly for other Android versions and
different phone brands.
-
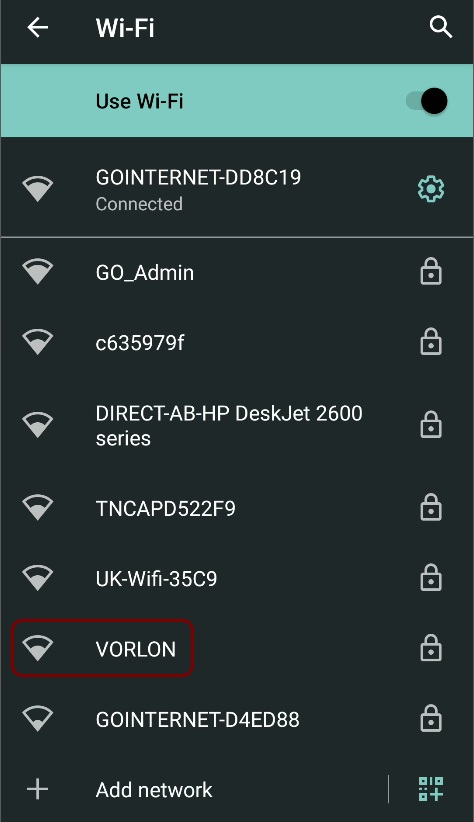
Long-press the Wi-Fi network icon in the top area of your phone to show the list of available Wi-Fi networks. Then,
press the name of the network that is managed by Portnox Cloud to connect to it.
-
In the EAP method field, select the TTLS option.

-
In the Phase 2 authentication field, select the supported option.
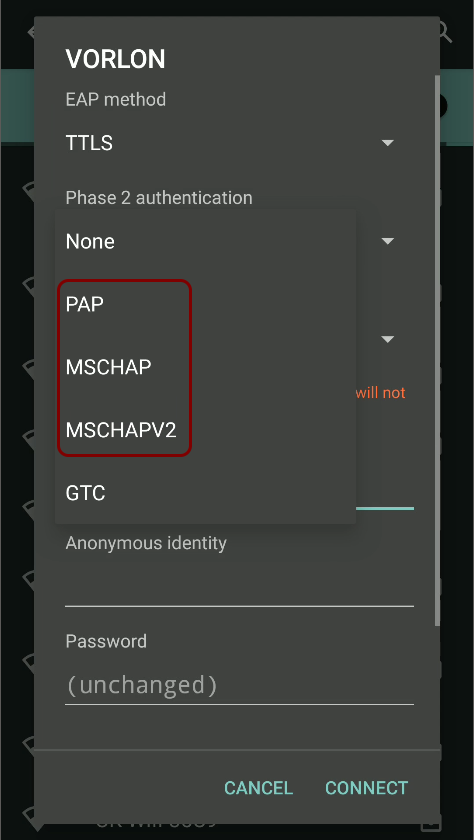 Note:The authentication method is the method used to communicate with internal or external authentication repositories. Different repositories may support different methods. For example, cloud-based repositories like Microsoft Entra ID, Google Workspace, and Okta supports PAP only, but AD supports MSCHAP. If you don’t know the correct method for your user repository, try different ones to see which one works. We also recommend that you read the following topic about the security of different authentication methods: EAP methods and their security.
 -
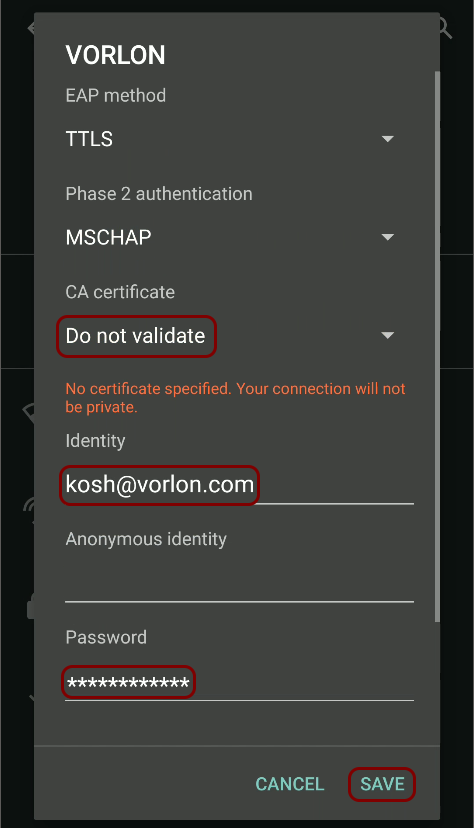
In the CA certificate field, select the Do not validate option.
In other Android versions, the value may be None instead of Do not validate.
Result: Your Android phone is connected to a Wi-Fi network managed by Portnox Cloud.

Troubleshooting information: See the following topic: How to troubleshoot typical device onboarding issues.