Integrate with Microsoft Sentinel
In this topic, you will learn how to send Portnox™ Cloud alerts to the Microsoft Sentinel SIEM solution.
Create a Linux proxy virtual machine
The Microsoft Sentinel architecture needs a script running on a Linux machine, which collects alert data from Portnox™ Cloud and sends that data to Microsoft Sentinel. In this section, you will learn how to create and configure such a virtual machine in Microsoft Azure.
- Open the Azure Portal dashboard in your browser.
-
In the Azure services menu on your dashboard, click on the Create a
Resource option.

-
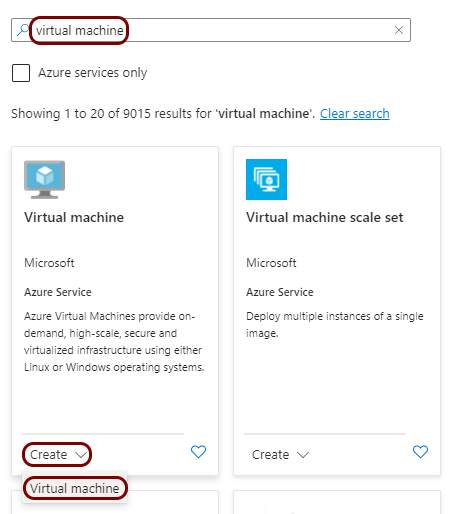
In the Marketplace pane, in the Search the Marketplace field, type
virtual machine and press the ↩ key. In the
Virtual machine tile below, click on the Create button and select
the Virtual machine option from the context menu.
-
In the Create a virtual machine pane, enter the details for your virtual machine and then
click on the Create button to create it.
Note:Select one of the available Linux images, for example, Ubuntu Server 20.04 LTS - x64 Gen2 and its parameters according to your business, access, and security needs. Since the parameters of the virtual machine greatly depend on your specific environment and needs, the guidance on these parameters is beyond the scope of this guide and you should treat the example below as a lab environment only.
-
In the virtual machine pane, note down the public IP assigned to this machine.
You will need this public IP to configure Portnox Cloud to send alerts to the virtual machine.

-
Create a port rule to open port 514.
This is the standard port number used by the Sentinel collector script running on the Linux virtual machine to collect alerts from external sources such as Portnox Cloud. The virtual machine must be able to accept information from Portnox Cloud on this port.
-
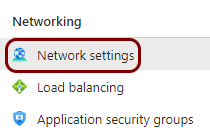
In the virtual machine pane, in the left-hand side menu, click on the Network
settings option.
-
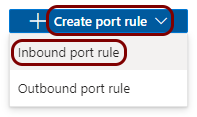
On the right-hand side, click on the Create port rule button, and then select the
Inbound port rule option from the context menu.
-
In the Add inbound security rule pane, fill in the following fields and then click on
the Add button:
- In the Source field, select IP Addresses
- In the Source IP addresses/CIDR ranges, type:
(these are the Portnox Cloud IP addresses from which information is sent to SIEM software)23.97.155.157, 52.168.164.222, 20.85.190.232/29, 20.67.6.144/29 - In the Destination field, select Any
- In the Destination port ranges field, type 514
- In the Protocol field, select TCP
- In the Action field, select Allow

-
In the virtual machine pane, in the left-hand side menu, click on the Network
settings option.
-
Prepare the virtual machine for Microsoft Sentinel.
-
In the virtual machine pane, in the left-hand side menu, click on the Connect
option.

-
In the Connect pane, select the preferred SSH connection method to connect to the
virtual machine.
Note:Since the connection method depends on your specific environment, needs, and software, the guidance on the specific method is beyond the scope of this guide. For example, you can use native SSH connection using PuTTY software on Windows and the local key downloaded while creating the virtual machine.

-
Install Python on your virtual machine.
In the SSH shell, type: sudo apt-get install python
Note:By default new Azure virtual machines do not have Python installed, but you can check before installing by typing python --version. - Leave the SSH window open. You will need it later when configuring the connection to Microsoft Sentinel.
-
In the virtual machine pane, in the left-hand side menu, click on the Connect
option.
Configure Microsoft Sentinel
In this section, you will learn how to add a connector to Microsoft Sentinel, which collects alert information from the Linux virtual machine.
-
In the Azure Portal dashboard, in the Search resources, services, and docs field, type
sentinel and then click on the Microsoft Sentinel option
below.

-
In the Microsoft Sentinel pane, select your Sentinel workspace.
 Note:We assume that you already have a Sentinel workspace that you want to integrate with Portnox Cloud. If not, please follow Microsoft documentation to create a new Sentinel workspace.
 -
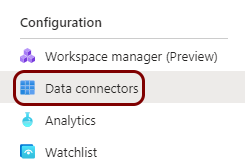
In the left-hand side menu of your Sentinel workspace pane, click on the Data connectors
option.
-
In the Data connectors pane, in the Getting started section, click on
the Go to content hub button.
 Note:If you already have other connectors in your workspace, the Getting started section is not visible. Then, click on the More content at Content hub link on the right-hand side of the top bar.
 -
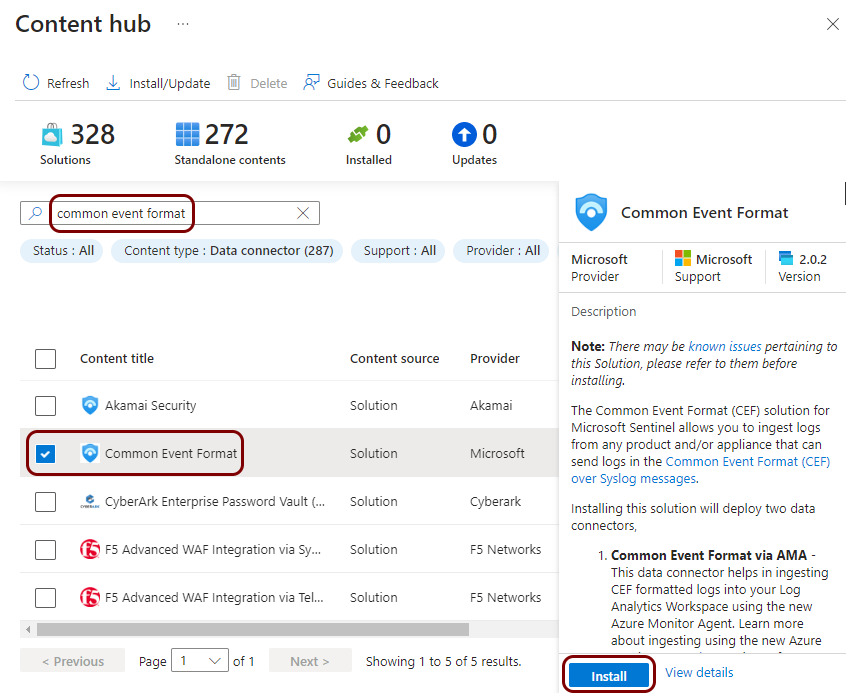
In the Content hub pane, in the Search field, type common
event format, activate the checkbox next to the Common Event Format entry,
and then click on the Install button.
-
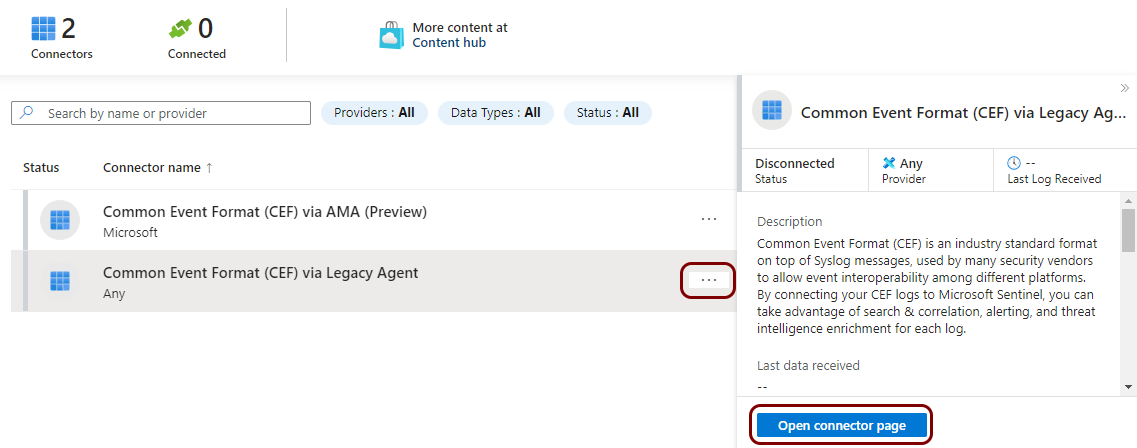
Refresh your Sentinel workspace pane, click on the ... link next to the Common
Event Format (CEF) via Legacy Agent entry, and then click on the Open connector
page button.
-
In the Common Event Format (CEF) via Legacy Agent pane, scroll down to section 1.2 of the
instructions and click on the ⧉ icon to copy the command to install the CEF
collector.

- Paste and run the command in the SSH window that you opened in the previous section of this topic.
-
In the Common Event Format (CEF) via Legacy Agent pane, scroll down to section 3.0 of the
instructions and click on the ⧉ icon to copy the command to validate the
connection between the CEF collector and Sentinel.

- Paste and run the command in the SSH window that you opened in the previous section of this topic. Then, close the SSH connection.
Configure Portnox Cloud
In this section, you will learn how to configure Portnox™ Cloud to send alert data to the Linux virtual machine so that the data can be collected by Microsoft Sentinel.
-
In the Cloud portal top menu, click on the Settings option.

-
In the Cloud portal left-hand menu, click on the Integration Services > SIEM INTEGRATION SERVICE option.

-
Create a new SIEM integration with Microsoft Sentinel via the virtual machine proxy.
-
In the SIEM integration service section, click on the Add new
SIEM link.

The NEW SIEM INTEGRATION section opens.
-
In the Type field, select the Custom option.

-
In the Name field, enter the name for the new integration.

In this example, we used the name Sentinel but you can use any name you like.
-
In the Status field, select the Enabled option.

-
In the Protocol type field, select the Syslog over TCP
option.

-
In the IP field, enter the public address of your Linux virtual machine.

If you followed this guide from the beginning and created the virtual machine in Azure, this is the IP address that you copied earlier.
-
In the Port field, type 514.

This is the port number that you opened on the virtual machine, which is the standard port number of the Sentinel connector.
-
In the Communication method field, select the Direct
option.

-
In the Data format field, select the CEF option.

-
Click on the Save button to add the integration.

- Optional:
Test the configuration by clicking on the Test button.

-
In the SIEM integration service section, click on the Add new
SIEM link.
- Optional:
To configure the types of alerts sent to your SIEM solution, see the following topic: Portnox Cloud alerts.
Note:To learn more about the content and format of alert messages sent to SIEM solutions, see the following topic: Format and content of alert information for SIEM.
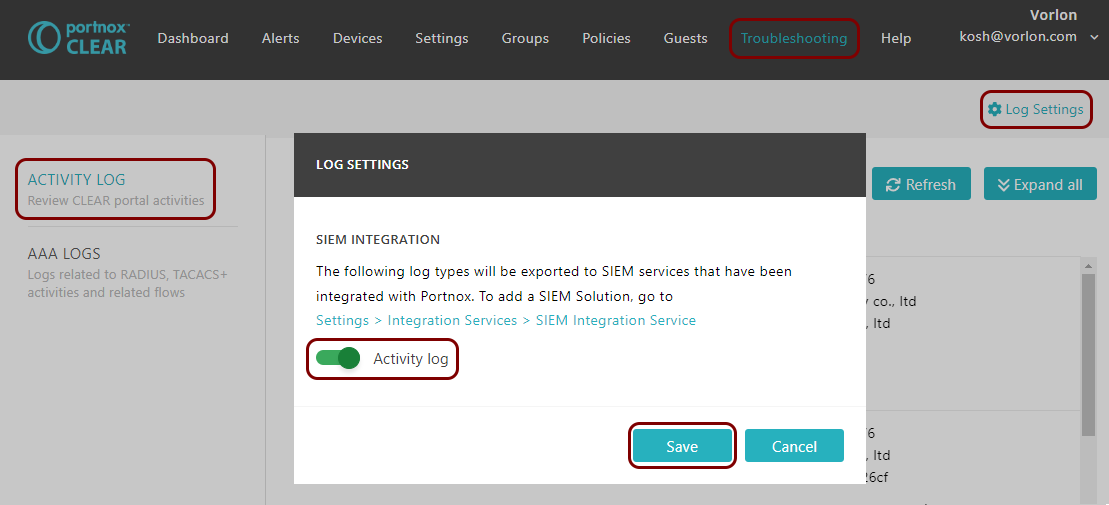
You can also send all of the Portnox Cloud activity log (activities performed by administrators in Portnox Cloud) to your SIEM solution. To do this, go to Troubleshooting > ACTIVITY LOG > Log Settings, activate the Activity log switch, and click on the Save button.
Result: Microsoft Sentinel is receiving alerts from Portnox Cloud.
You can confirm that in the Data section in the Microsoft Sentinel Overview pane.

