Wi-Fi employee access – Aruba wireless controllers

In this topic, you will learn how to configure Aruba wireless controllers to work together with Portnox™ Cloud and 802.1X RADIUS authentication for Wi-Fi connections.

Aruba Central

In this section, you will learn how to configure access points managed using Aruba Central to work together with Portnox™ Cloud and 802.1X RADIUS authentication for Wi-Fi connections.

Note: This configuration was tested using the Aruba AP-505 Access Point.
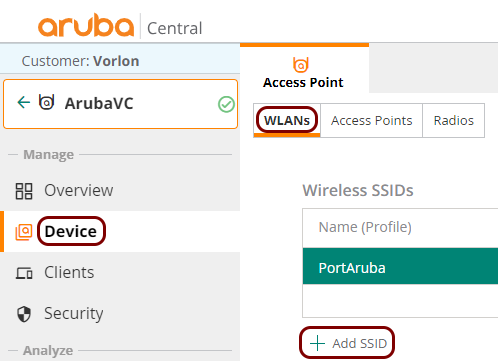
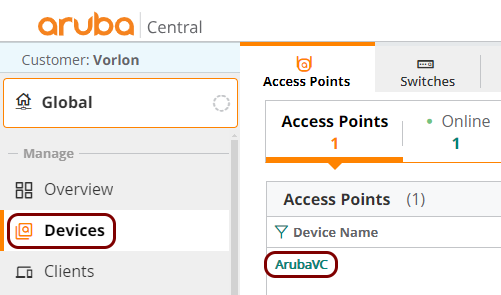
  1. In the left-hand side main menu, click on the Devices option and then, in the right-hand side pane, click on the name of the device that you want to configure.

  2. In the left-hand side menu for the selected device, click on the Device option. Then, in the right-hand side pane, make sure that the WLANs tab is active, and under the Wireless SSIDs list, click on the Add SSID button to add a new SSID.

    Note: You can also edit an existing SSID by clicking on its name on the Wireless SSIDs list.
  3. In the Create a New Network wizard, fill in the fields as required for your new SSID until you get to the Security step.
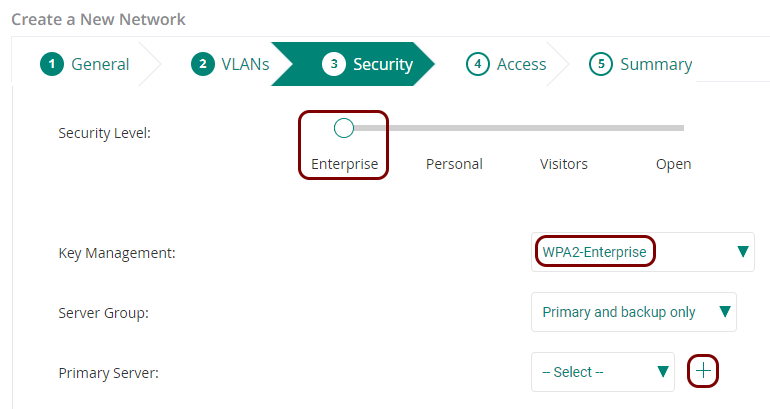
  4. In the Security step:

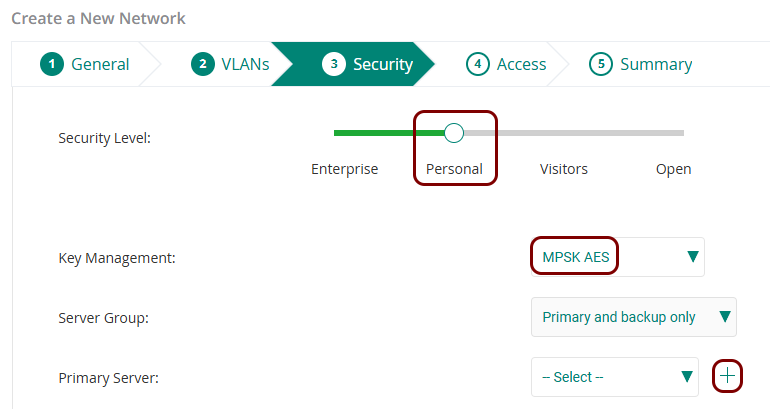
    1. Set the Security Level slider to the Enterprise position.
    2. In the Key Management field, select the preferred key management protocol.
    3. Click on the  +  icon to the right of the Primary Server label to create a RADIUS server configuration.
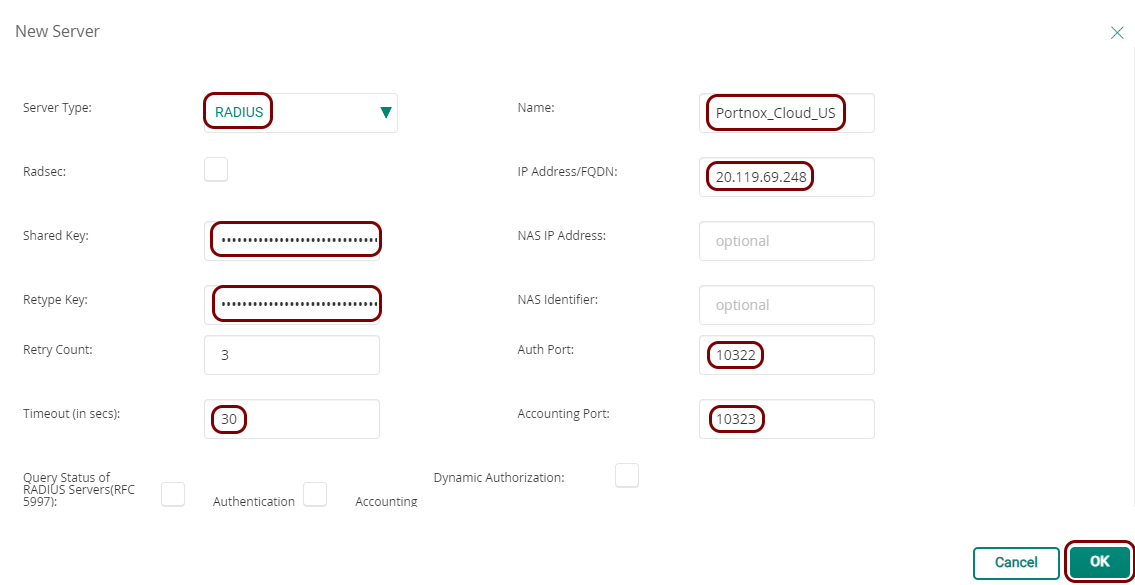
  5. In the New Server window:

    1. In the Server Type field, select the RADIUS option.
    2. In the Name field, enter a name for this RADIUS server configuration.
    3. In the IP Address/FQDN field, enter your Cloud RADIUS IP, which you obtained when you created the cloud RADIUS server.
    4. In the Shared Key and Retype Keyfields, paste your Shared Secret, also obtained when you created the cloud RADIUS server.
    5. In the Auth Port field, enter your Authentication port number, also obtained when you created the cloud RADIUS server.
    6. In the Accounting Port field, enter your Accounting port number, also obtained when you created the cloud RADIUS server.
    7. In the Timeout (in secs) field, enter 30 to avoid timeouts due to any intermittent Internet connection delays.
    8. Click on the OK button to save your configuration.
  6. Optional: Back in the Create a New Network wizard’s Security step, click on the  +  icon to the right of the Secondary Server label to create a second RADIUS server configuration.

    Note: Do this only if your Portnox Cloud tenant is configured with two cloud RADIUS servers or if you’re using a local RADIUS server in addition to the cloud RADIUS server.
  7. Complete the remaining steps of the Create a New Network wizard.

Aruba 7000 Series

In this section, you will learn how to configure Aruba 7000 series of controllers with the ArubaOS operating system to work together with Portnox™ Cloud and 802.1X RADIUS authentication for Wi-Fi connections.

Warning: This topic contains documentation prepared by our support agents more than 12 months ago. It may not cover the newest models or the newest interfaces of NAS devices. We’re working on bringing you updated documentation for NAS devices in the near future. However, the methods of setting up third-party devices may still change when the manufacturers update their firmware or release new models. Therefore, to get the most accurate and current configuration guidance, we strongly recommend that you refer to the documentation provided by the manufacturer. If you need help setting up newer equipment that does not match the description in this topic, contact us at support@portnox.com.
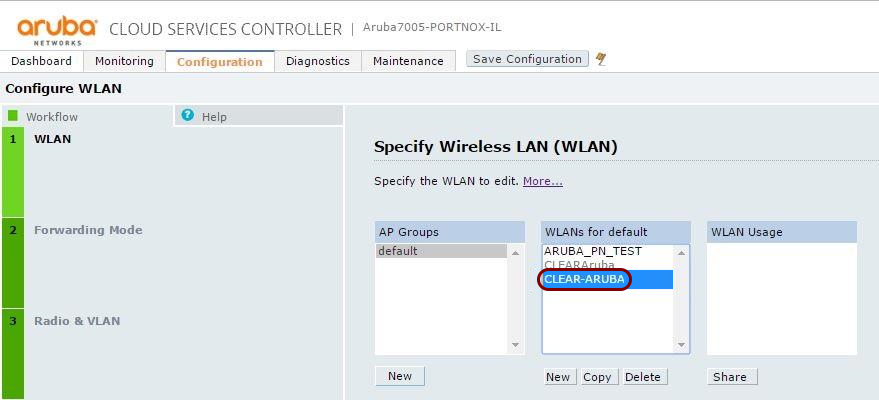
  1. In the Aruba web interface, navigate to Configuration > Wizards > Campus WLAN, and add a new SSID or select an existing one.

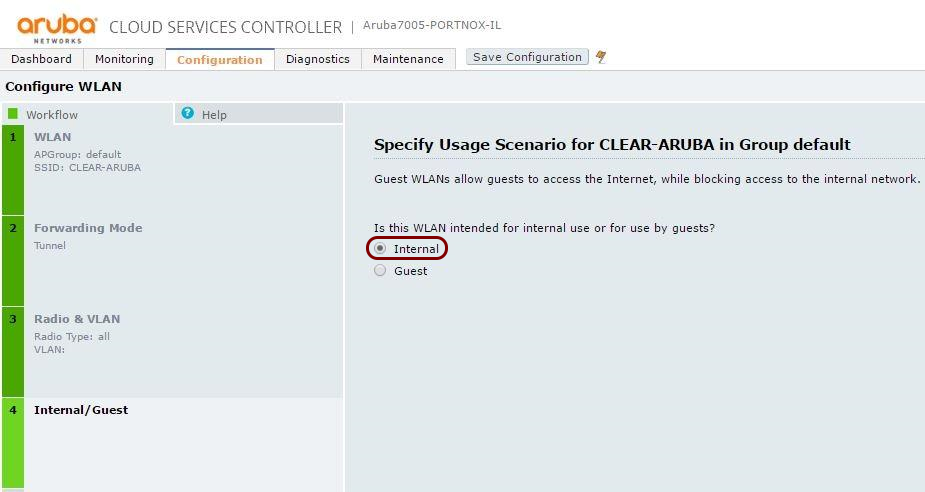
  2. In the Internal/Guest section, select Internal.

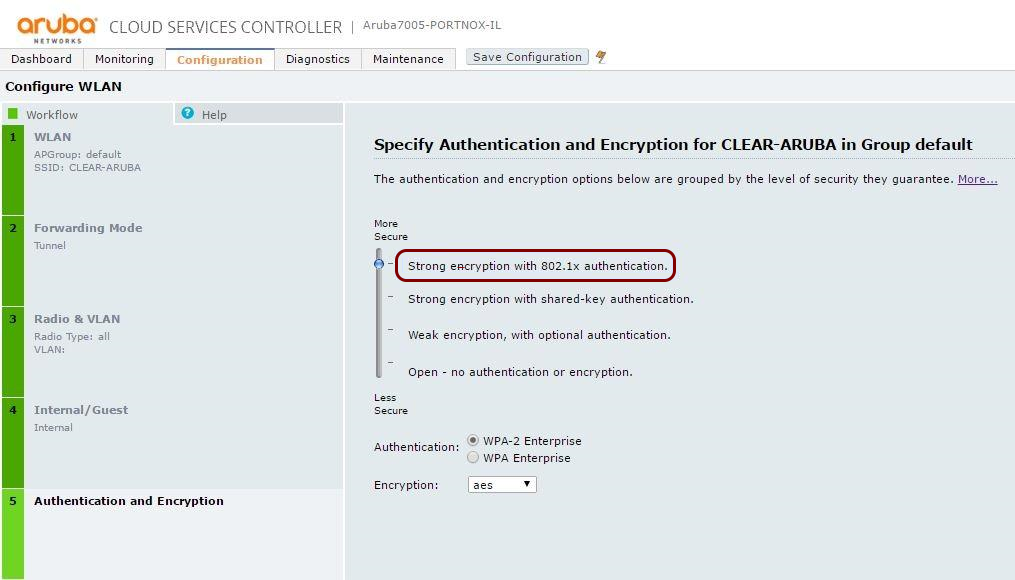
  3. In the Authentication and Encryption section, select Strong encryption with 802.1x authentication.

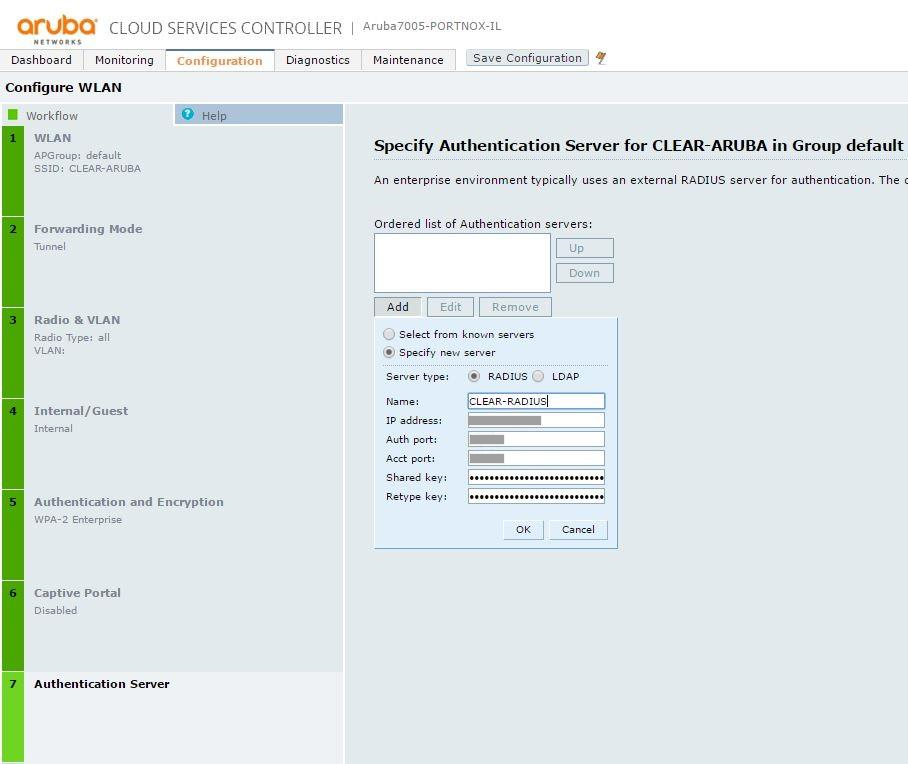
  4. In the Authentication Server section, add a new server.

    1. In Server type, select RADIUS.
    2. Enter your cloud RADIUS details.
  5. Navigate to Configuration > Security > Authentication > Servers, select the RADIUS server that you created in the previous step, and update the Timeout to 30 seconds.

  6. Click on Save Configuration.