Onboard Windows devices with AgentP using Group Policy
In this topic, you will learn how to deploy Portnox™ AgentP remotely on company devices using Group Policy.
Prerequisites:
-
The network must be based on Active Directory Domain Services (AD DS). That is, at least one server must have the AD DS role. To learn more about AD DS, see Active Directory Domain Services Overview on Microsoft Learn.
-
The devices that you want to manage must be joined to the domain, and users that you want to manage must use domain credentials to log on to their devices.
-
You must have permission to edit the Group Policy in the domain.
Perform the following tasks on your AD DS server.
Create and share a GPO folder
In this section, you will create a folder that contains AgentP installation files, and that will be used by other computers for installation.
-
Create a GPO directory in the local file system of the AD DS server.
You can create the directory with any name you like and anywhere in the local file system, as long as you be able to share the directory as a folder.

For example, create the directory C:\GPO\.
-
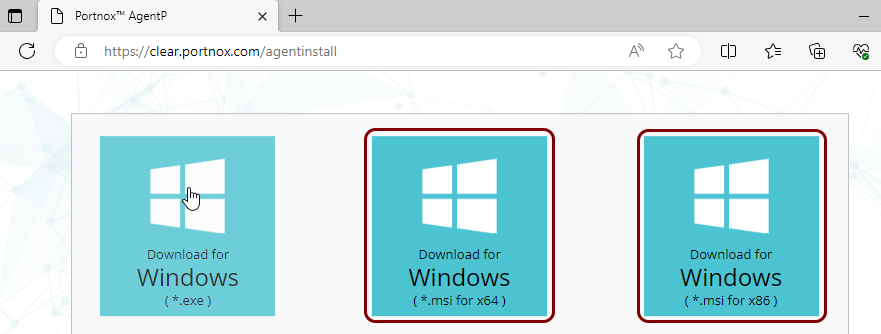
Download AgentP installation files for 32-bit and 64-bit Windows devices.
-
Scroll down to the Windows installation files and click on the tiles: Windows *.msi for
x64 and Windows *.msi for x86.
-
Save the downloaded files in the directory you
created in the previous step.

-
Rename the files to remove the version number.

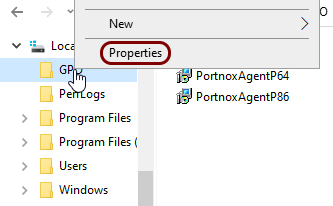
The files should be named PortnoxAgentP64.msi and PortnoxAgentP86.msi and should be located in the directory created earlier.
-
Scroll down to the Windows installation files and click on the tiles: Windows *.msi for
x64 and Windows *.msi for x86.
-
Share the folder that you created previously.
-
Right-click on the folder in the directory tree and select the Properties option
from the context menu.
-
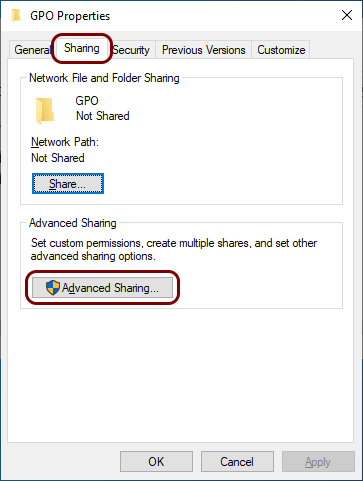
In the Properties window, click on the Sharing tab, and then
click on the Advanced Sharing button.
-
In the Advanced Sharing window, activate the Share this folder
checkbox, and then click on the Permissions button.

-
In the Permissions window, click on the Authenticated Users
group, and make sure that the checkbox is activated in the Read permissions row and
in the Allow column.

-
In the Properties window, click on the Security tab, click on
the Domain Users group, and verify that there are check marks in the
Allow column for the following rows: Read & execute,
List folder contents, and Read.

If not, click on the Edit button to edit permissions.
-
Right-click on the folder in the directory tree and select the Properties option
from the context menu.
Result: You shared a folder with AgentP installation files, which will be used by the GPO objects.

Create GPOs for 64-bit and 32-bit Windows
In this section, you will create a Group Policy Objects (GPOs) that will be used to automatically deploy AgentP on devices with 64-bit or 32-bit versions of Windows.
-
Run the Group Policy Management app.

For example, start typing group into the search field on the taskbar and then click on the Group Policy Management app entry.
-
Create a GPO for 64-bit systems.
-
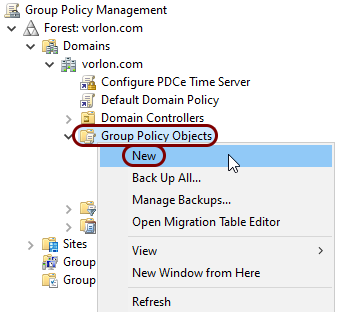
In the left-hand pane of the Group Policy Management window, right-click on the
Group Policy Objects node and select the New option from
the context menu.
-
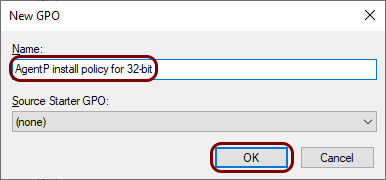
In the New GPO window, enter a Name for the new 64-bit system
GPO, and click on the OK button.
 In this example, we used the name AgentP install policy for 64-bit but you can use any name you like.
-
In the left-hand pane of the Group Policy Management window, right-click on the
Group Policy Objects node and select the New option from
the context menu.
-
Create a GPO for 32-bit systems.
-
In the left-hand pane of the Group Policy Management window, right-click on the
Group Policy Objects node and select the New option from
the context menu.
-
In the New GPO window, enter a Name for the new 32-bit system
GPO, and click on the OK button.
 In this example, we used the name AgentP install policy for 32-bit but you can use any name you like.
-
In the left-hand pane of the Group Policy Management window, right-click on the
Group Policy Objects node and select the New option from
the context menu.
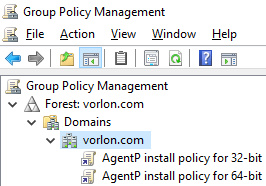
Result: You created two GPOs, one for 64-bit Windows, and one for 32-bit Windows.
Create a software installation package for 64-bit systems and user assignment
In this section, you will create a software installation package that will be used to automatically deploy AgentP on devices with 64-bit versions of Windows and assign it to the users of these devices.
-
Run the Group Policy Management app.
For example, start typing group into the search field on the taskbar and then click on the Group Policy Management app entry.
-
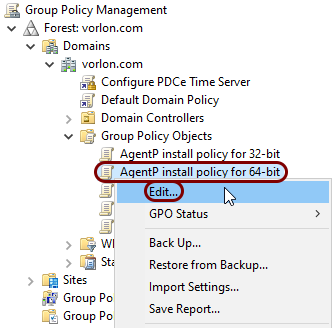
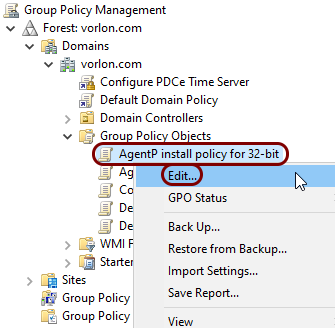
In the left-hand pane of the Group Policy Management window, right-click on the Group Policy Object that you created earlier for 64-bit
systems and select the Edit option from the context menu.
-
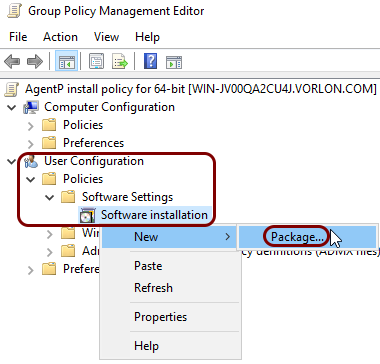
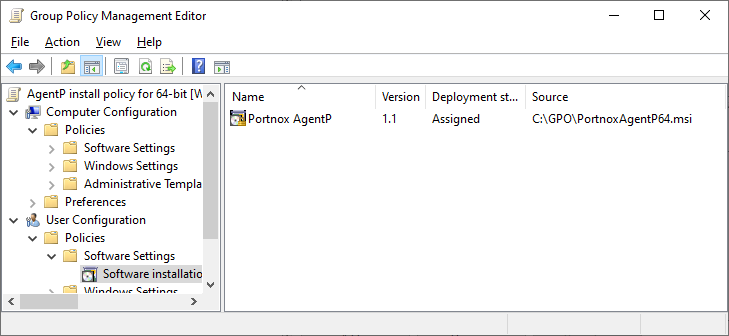
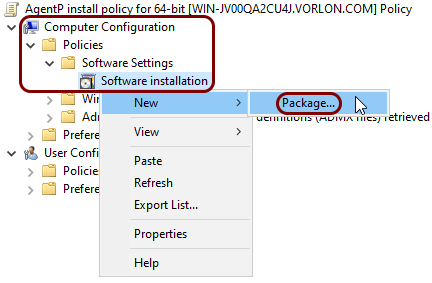
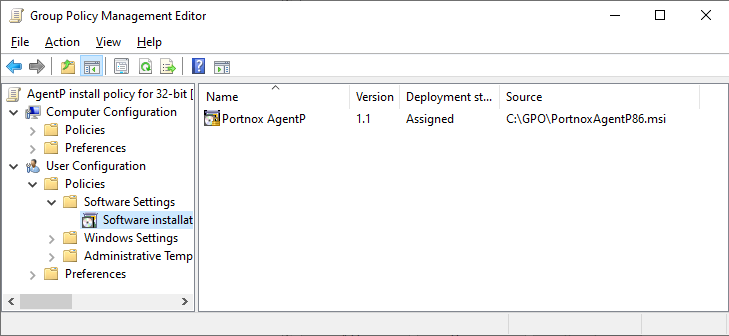
In the left-hand pane of the Group Policy Management Editor window, expand the nodes, right-click on the Software installation node, and select from the context menu.
-
In the Open window, browse to the PortnoxAgentP64.msi file in the folder
that you created and shared in an earlier
task.

If a warning appears saying that Windows cannot verify that the path is a network location, click on the Yes button.
-
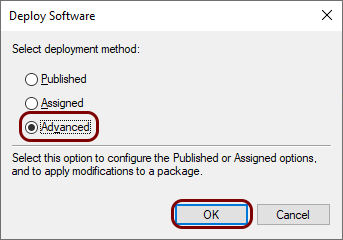
In the Deploy Software window, select the Advanced option and click on
the OK button.
-
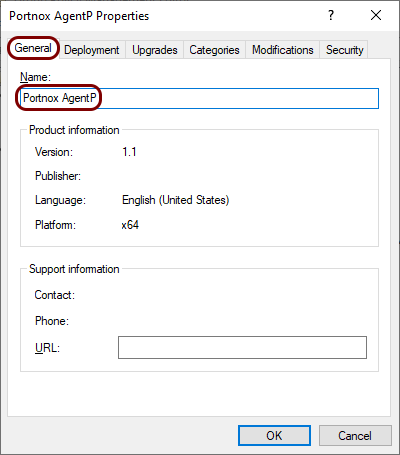
In the Properties window, in the General tab, make sure that the
Name is Portnox AgentP.
-
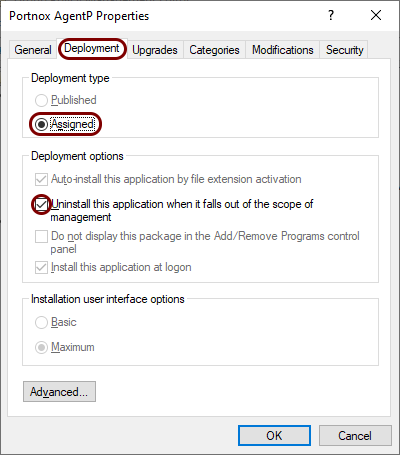
In the Properties window, in the Deployment tab, in the
Deployment type section, select the Assigned option, and then in
the Deployment options section, activate the following checkboxes: Uninstall this
application when it falls out of scope of management and Install this application at
logon.

Result: You created a software installation package for 64-bit systems and user assignment.
Create a software installation package for 64-bit systems and device assignment
In this section, you will create a software installation package that will be used to automatically deploy AgentP on devices with 64-bit versions of Windows and assign it to these devices.
-
Run the Group Policy Management app.
For example, start typing group into the search field on the taskbar and then click on the Group Policy Management app entry.
-
In the left-hand pane of the Group Policy Management window, right-click on the Group Policy Object that you created earlier for 64-bit
systems and select the Edit option from the context menu.
-
In the left-hand pane of the Group Policy Management Editor window, expand the nodes, right-click on the Software installation node, and select from the context menu.
-
In the Open window, browse to the PortnoxAgentP64.msi file in the folder
that you created and shared in an earlier
task.
If a warning appears saying that Windows cannot verify that the path is a network location, click on the Yes button.
-
In the Deploy Software window, select the Advanced option and click on
the OK button.
-
In the Properties window, in the General tab, make sure that the
Name is Portnox AgentP.
-
In the Properties window, in the Deployment tab, in the
Deployment type section, select the Assigned option, and then in
the Deployment options section, activate the following checkbox: Uninstall this
application when it falls out of scope of management.
Result: You created a software installation package for 64-bit systems and device assignment.

Create a software installation package for 32-bit systems and user assignment
In this section, you will create a software installation package that will be used to automatically deploy AgentP on devices with 32-bit versions of Windows and assign it to the users of these devices.
-
Run the Group Policy Management app.
For example, start typing group into the search field on the taskbar and then click on the Group Policy Management app entry.
-
In the left-hand pane of the Group Policy Management window, right-click on the Group Policy Object that you created earlier for 32-bit
systems and select the Edit option from the context menu.
-
In the left-hand pane of the Group Policy Management Editor window, expand the nodes, right-click on the Software installation node, and select from the context menu.

-
In the Open window, browse to the PortnoxAgentP86.msi file in the folder
that you created and shared in an earlier
task.

If a warning appears saying that Windows cannot verify that the path is a network location, click on the Yes button.
-
In the Deploy Software window, select the Advanced option and click on
the OK button.
-
In the Properties window, in the General tab, make sure that the
Name is Portnox AgentP.

-
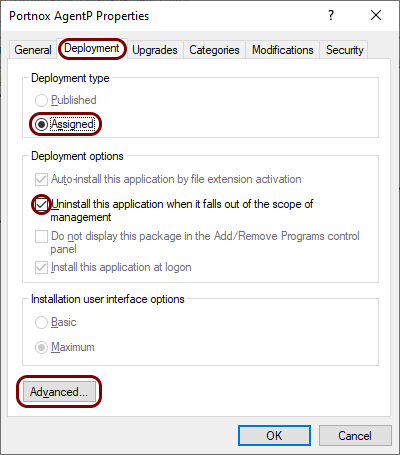
In the Properties window, in the Deployment tab, in the
Deployment type section, select the Assigned option, and then in
the Deployment options section, activate the following checkboxes: Uninstall this
application when it falls out of scope of management and Install this application at
logon. Then, click on the Advanced button.

-
In the Advanced Deployment Options window, deactivate the following checkbox: Make
this 32-bit X86 application available to Win64 machines.

Result: You created a software installation package for 32-bit systems and device assignment.
Create a software installation package for 32-bit systems and device assignment
In this section, you will create a software installation package that will be used to automatically deploy AgentP on devices with 32-bit versions of Windows and assign it to these devices.
-
Run the Group Policy Management app.
For example, start typing group into the search field on the taskbar and then click on the Group Policy Management app entry.
-
In the left-hand pane of the Group Policy Management window, right-click on the Group Policy Object that you created earlier for 32-bit
systems and select the Edit option from the context menu.
-
In the left-hand pane of the Group Policy Management Editor window, expand the nodes, right-click on the Software installation node, and select from the context menu.

-
In the Open window, browse to the PortnoxAgentP86.msi file in the folder
that you created and shared in an earlier
task.
If a warning appears saying that Windows cannot verify that the path is a network location, click on the Yes button.
-
In the Deploy Software window, select the Advanced option and click on
the OK button.
-
In the Properties window, in the General tab, make sure that the
Name is Portnox AgentP.
-
In the Properties window, in the Deployment tab, in the
Deployment type section, select the Assigned option, and then in
the Deployment options section, activate the following checkbox: Uninstall this
application when it falls out of scope of management. Then, click on the
Advanced button.
-
In the Advanced Deployment Options window, deactivate the following checkbox: Make
this 32-bit X86 application available to Win64 machines.
Result: You created a software installation package for 32-bit systems and device assignment.

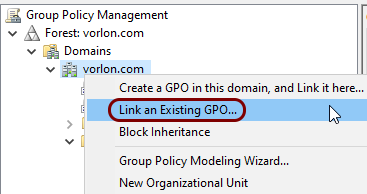
Link the GPOs to an organization unit or domain
In this section, you will link the two GPOs that you created earlier (for two Windows architecture options) to the organizational unit or domain, so that these policies can be enforced for all relevant devices for that organizational unit or domain.
-
Run the Group Policy Management app.
For example, start typing group into the search field on the taskbar and then click on the Group Policy Management app entry.
-
In the left-hand pane of the Group Policy Management window, right-click on a domain or an
organizational unit, and select the Link an Existing GPO option.
-
In the Select GPO window, control-click on the two GPOs you created in previous tasks to
select them, and then click on the OK button.

Result: New devices logging on to this domain will have Portnox™ AgentP installed and configured automatically. If you selected specific organizational units to link the GPOs, this will only apply to these organizational units.
Optional: Create a GPO for wired network authentication
If you prefer to control your wired network configuration using a GPO instead of having it configured via AgentP, you can create a GPO object to configure the wired network.
-
Run the Group Policy Management app.
For example, start typing group into the search field on the taskbar and then click on the Group Policy Management app entry.
-
Create a GPO for wired network configuration.
-
In the left-hand pane of the Group Policy Management window, right-click on the
Group Policy Objects node and select the New option from
the context menu.
-
In the New GPO window, enter a Name for the new wired
configuration GPO, and click on the OK button.
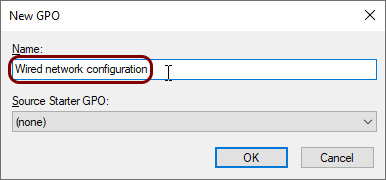 In this example, we used the name Wired network configuration but you can use any name you like.
-
In the left-hand pane of the Group Policy Management window, right-click on the
Group Policy Objects node and select the New option from
the context menu.
-
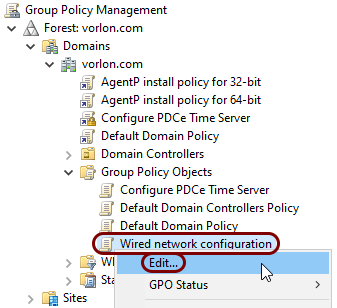
Configure the new wired network configuration GPO:
-
In the left-hand pane of the Group Policy Management window, right-click on the Group
Policy Object that you just created and select the Edit option from the context
menu.
-
In the left-hand pane of the Group Policy Management Editor window, expand the nodes, and then left-click on the System Services node. In the
right-hand pane, scroll down to the Wired AutoConfig entry.

-
Double-click on the Wired AutoConfig entry to open the Wired AutoConfig
Properties window, activate the Define this policy setting checkbox,
and select the Automatic option. Then, click on the OK
button.

-
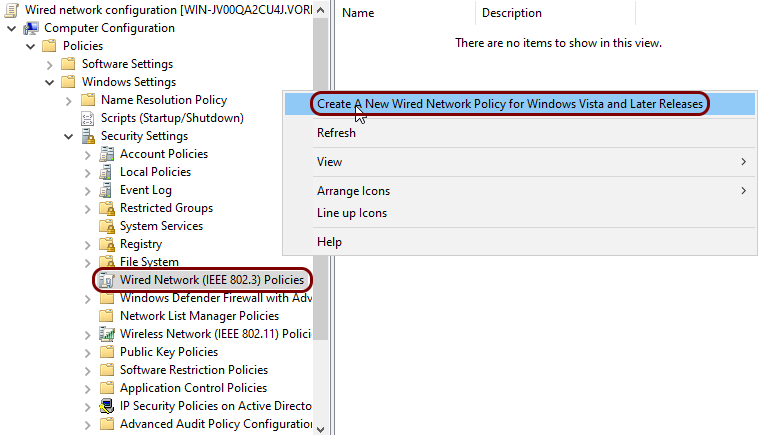
In the left-hand pane of the Group Policy Management Editor window, left-click on the
Wired Network (IEEE 802.3) Policies node. In the right-hand pane, right-click on
the empty space, and then select the Create a New Wired Network Policy for Windows Vista and
Later Releases option from the context menu.
-
In the New Wired Network Policy Properties window, in the
General tab, enter a name for this new policy.
 In this example, we used the name Wired network configuration but you can use any name you like.
 -
In the Security tab, in the Select a network authentication
method field, select the Microsoft: Smart Card or other certificate
option, in the Authentication Mode field, select the Computer
only option, and then click on the Properties button.

-
In the Smart Card or other Certificate Properties window, select the Use a
certificate on this computer option, activate the Use simple certificate
selection (Recommended) checkbox, activate the Verify the server’s identity by
validating the certificate checkbox, and in the Trusted Root Certificate
Authorities list, select the DigiCert Trusted Root G4 certificate
(the Cloud RADIUS server’s root CA
certificate).

-
In the left-hand pane of the Group Policy Management window, right-click on the Group
Policy Object that you just created and select the Edit option from the context
menu.
-
Link the wired network configuration GPO to an organizational unit or domain:
-
In the left-hand pane of the Group Policy Management window, right-click on a domain
or an organizational unit, and select the Link an Existing GPO option.
-
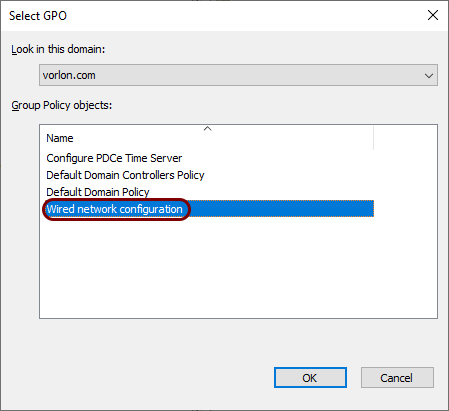
In the Select GPO window, click on the wired network configuration GPO you created and
then click on the OK button.
-
In the left-hand pane of the Group Policy Management window, right-click on a domain
or an organizational unit, and select the Link an Existing GPO option.