Onboard macOS devices with certificates using Kandji, SCEP, and a custom profile
In this topic, you will learn how to deploy Portnox™ Cloud SCEP certificates via Kandji, SCEP, and iMazing Profile Editor to manage macOS devices (Wi-Fi + Ethernet).
Kandji lets you create Wi-Fi profiles using the cloud user interface but does not let you create Ethernet profiles. However, you can distribute custom profiles using Kandji, so you can create a custom profile and then use Kandji for management.
This topic shows you how to create a custom Apple profile for user-based authentication to connect to Portnox Cloud via Wi-Fi and Ethernet. We recommend that you use a free app called iMazing Profile Editor, but you can create a custom profile using a different tool or edit it manually in XML, if you prefer.
If your devices need only Wi-Fi connectivity, we recommend that you follow a simpler procedure in the following topic: Onboard macOS devices with certificates using Kandji and SCEP.
Turn on the Portnox Cloud SCEP services
In this section, you will configure Portnox™ Cloud to provide SCEP services to your devices.
If you have previously turned on the Portnox Cloud SCEP services, skip to the later step in which you get the Cloud SCEP URL and password.
Portnox Cloud SCEP services let devices contact the Cloud SCEP server and get a unique certificate for the device or for the specific user of the device.
-
In the Cloud portal top menu, click on the Settings option.

-
In the Cloud portal left-hand side menu, click on the option.
-
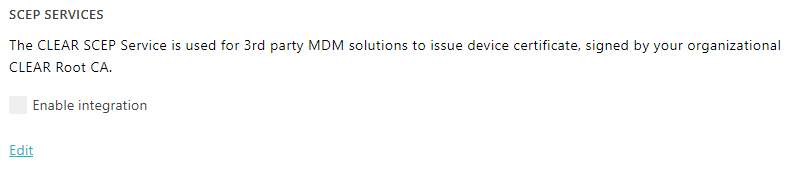
Enable integration with SCEP services.

- Click on the Edit link.
- Activate the Enable integration checkbox.
- Click on the Save button.
-
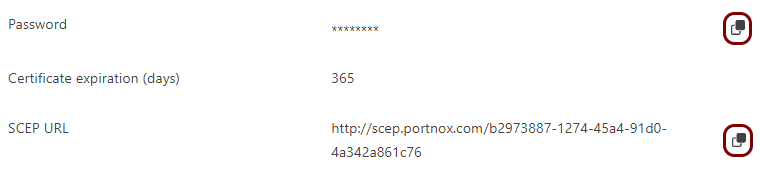
Click on the ⧉ icon next to the Password field to
copy the SCEP password, and paste it in a text file for later use.
Download the root CA certificate
In this section, you will download the root CA certificate from Portnox™ Cloud, which is needed to create a profile.
-
In the Cloud portal top menu, click on the Settings option.
-
In the Cloud portal left-hand side menu, click on the option.
-
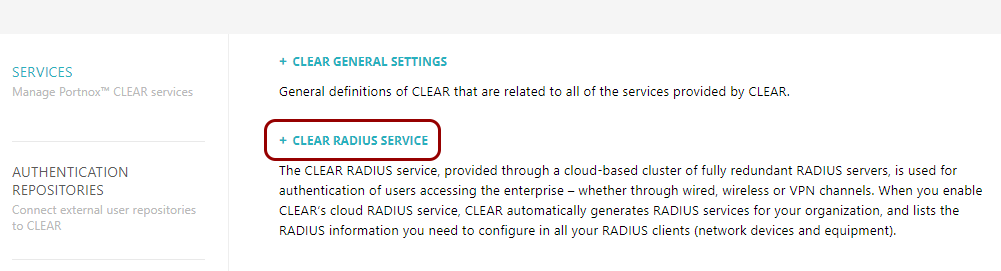
Click on any of the RADIUS servers listed in the right-hand pane to show its configuration.

-
Click on the Download root certificate link.
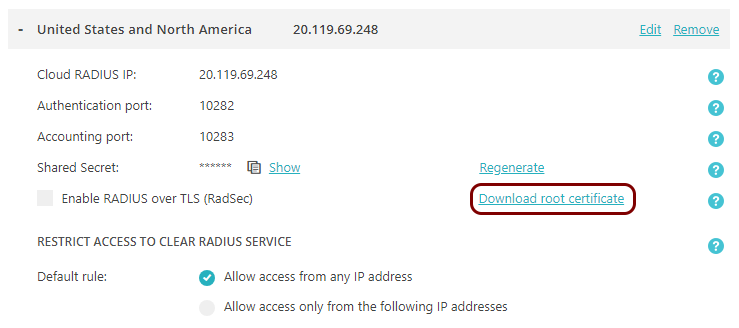
Result: The root CA certificate file is in the Downloads folder on the local disk.
Download the tenant CA certificate
In this section, you will download the Portnox™ Cloud tenant CA certificate from the Cloud portal.
You need the tenant CA certificate from Portnox Cloud so that your managed devices can verify the validity of individual SCEP certificates, which are signed using the tenant CA certificate.
-
In the Cloud portal top menu, click on the Settings option.
-
In the Cloud portal left-hand side menu, click on the option.

-
In the Trusted Root Certificates section, click on the Download CER
link, then save the downloaded file.
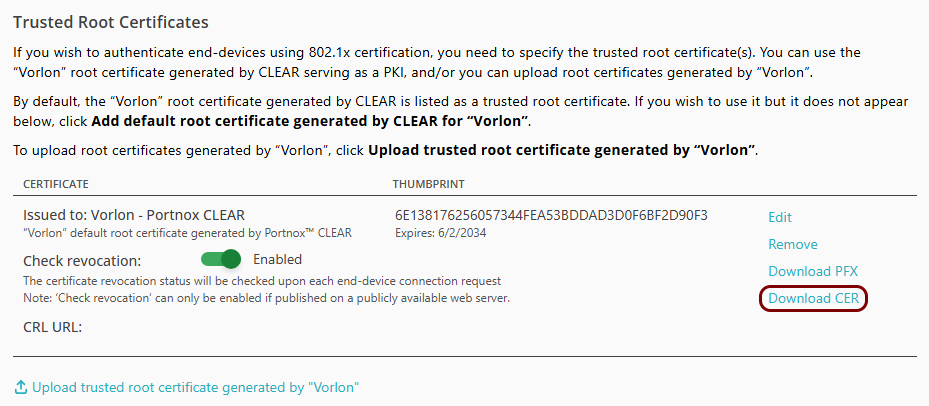
The default name of the file is Your_tenant_name - Portnox CLEAR.cer, for example, Vorlon - Portnox CLEAR.cer.
Optional: Hand over information from the Portnox Cloud team to the Kandji team
In this section, you will learn what information was collected in previous steps from Portnox Cloud, which is needed to configure Kandji to work with Portnox Cloud.
If different people are responsible for managing Portnox Cloud and Kandji, here is the information you need to hand over:
-
The URL of the Portnox Cloud SCEP server. For example, https://scep.portnox.com/b2973887-1274-45d4-91d0-4a342a861c76.
-
The password for the SCEP server.
-
The root CA certificate file in the X.509 format. For example, rootCertificate.cer.
-
The tenant CA certificate file in the X.509 format. For example, tenantCertificate.cer.
Create the custom profile
In this section, you will use the iMazing Profile Editor to create an Apple profile for use in Kandji, which contains the following payloads: the root CA certificate, the tenant CA certificate, the SCEP configuration, the Wi-Fi configuration, and the Global Ethernet configuration.
-
Install the iMazing Profile
Editor and open it from the Launcher.
To install iMazing Profile Editor, follow the links from the iMazing website and the standard installation procedure in the operating system.
Note:By default, when you run iMazing Profile Editor, it opens a new profile window and the General section. If not, select from the top menu to open a new profile window.
-
In the right-hand side pane, in the Name section, enter a name for this profile.

We used the name Vorlon SCEP but you can use any name you like.
-
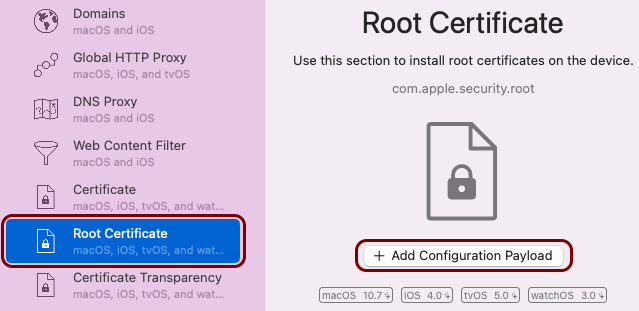
On the left-hand side of the profile window, scroll down to the Root Certificate icon, click
on it, and in the right-hand side pane click on the Add Configuration Payload button.
-
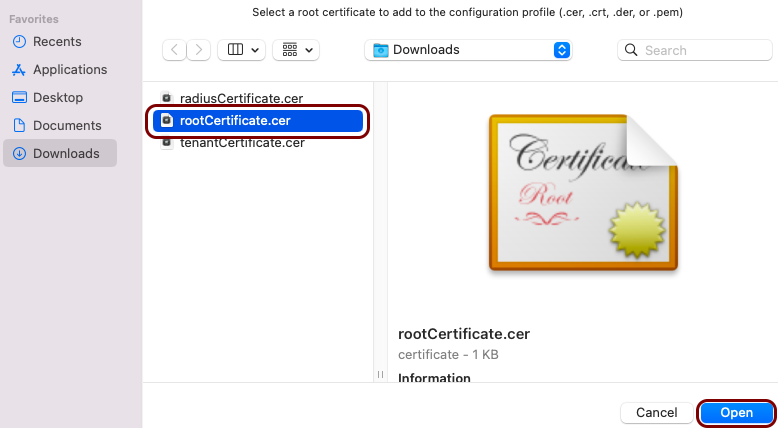
In the file selector, locate and click on the root CA certificate file, downloaded as described in the previous
section, and then click on the Open button.
-
Copy the value of the Payload UUID field and save it for later use.

You will need to add a reference to this root CA certificate in the Wi-Fi and Ethernet payloads later, so that the device can confirm the identity of the RADIUS server.
Note:Make a note next to this value that says root CA UUID. -
In the top-right corner of the right-hand side pane, click on the + button
to add another root certificate payload.

-
In the file selector, locate and click on the tenant CA certificate file, downloaded and converted as described in
the previous sections, and then click on the Open button.

-
Copy the value of the Payload UUID field and save it for later use.

You will need to add a reference to this tenant CA certificate in the Wi-Fi and Ethernet payloads later, so that the device can confirm the SCEP certificate validity.
Note:Make a note next to this value that says tenant CA UUID. -
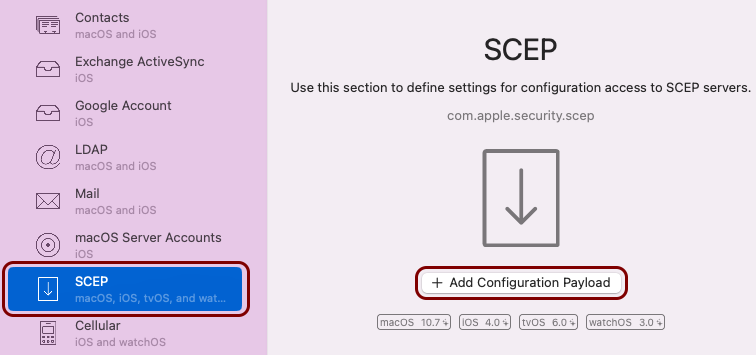
On the left-hand side of the profile window, scroll down to the SCEP icon, click on it, and
in the right-hand side pane click on the Add Configuration Payload button.
-
In the SCEP pane on the right-hand side, configure the following properties:
-
In the URL section, enter the SCEP URL that you copied earlier from Portnox
Cloud.

-
In the Subject section, enter: CN={$EMAIL}.
 Note:
Note:The $EMAIL format is a Kandji global variable. This tag is processed by Kandji and replaced by the email of the user. The full list of Kandji global variables is available in the Kandji documentation. Portnox Cloud then uses the email from the certificate fields to create or align with an account in Cloud.
At this time, Portnox Cloud does not support device-based authentication for Kandji. If you try to use Kandji variables related to device identifiers, Cloud will not be able to align this information with information from the authentication repository, and it will create new Portnox accounts for devices instead of aligning them with accounts from the authentication repository.
-
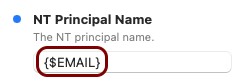
In the NT Principal Name section, enter: {$EMAIL}.
-
In the Challenge section, enter the SCEP password that you copied earlier from
Portnox Cloud.
 Important:Addigy does not support special characters in passwords.
 -
In the Key Size section, select the key size that you want to use.

In this example, we used the value 2048 but you can use 1024. Note that while higher values provide more security, they may cause certificate fragmentation problems in some network topologies. If such problems occur, see the following topic: Certificate fragmentation issues.
-
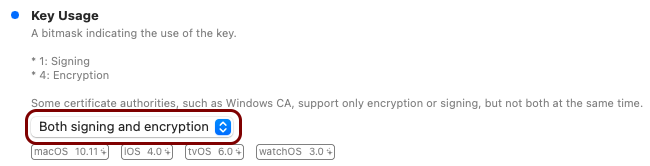
In the Key Usage section, select the Both signing and
encryption option.
-
Copy the value in the Payload UUID and save it for later use.

You will need to add a reference to this SCEP certificate in the Wi-Fi payload later, so that the device can confirm the SCEP certificate validity.
Note:Make a note next to this value that says SCEP UUID.
-
In the URL section, enter the SCEP URL that you copied earlier from Portnox
Cloud.
-
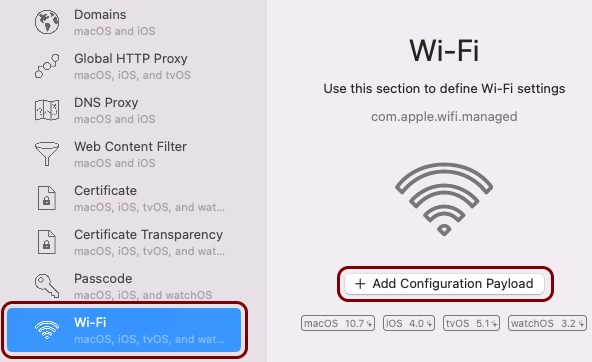
On the left-hand side of the profile window, scroll down to the Wi-Fi icon, click on it, and
in the right-hand side pane click on the Add Configuration Payload button.
-
In the Wi-Fi pane on the right-hand side, configure the following properties:
-
In the Service Set Identifier (SSID) section, enter the SSID of your Wi-Fi
network.

-
In the Accept EAP Types section, click on the + button, click on the added entry, and select
TLS.

-
In the Password field, enter any value (this value is ignored).

This is necessary due to a bug in the iMazing Profile Editor. When you authenticate using TLS, the password is not used, but iMazing Profile Editor requires that you enter a password anyway.
Note:The Wi-Fi profile has two Password sections. The one that requires a value is directly under the Accept EAP Types section. -
In the Certificate Anchor UUID section, click on the + button twice, and in the new entry fields, paste the UUIDs that you
copied earlier as root CA UUID and tenant CA UUID.

You need a reference to the root CA certificate so that the device can confirm that the Portnox RADIUS server is authentic, and you need a reference to the tenant CA certificate so that the device can confirm the validity of the SCEP certificate for the current user or device.
-
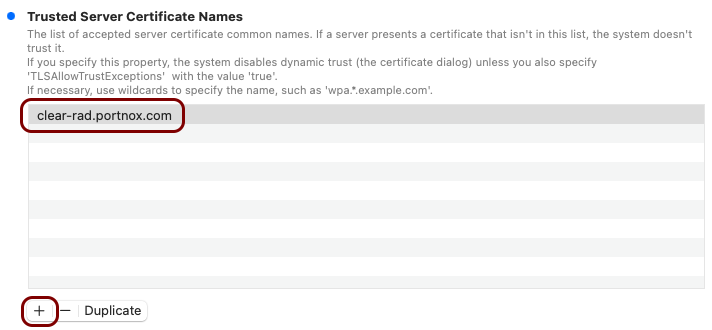
In the Trusted Server Certificate Names section, click on the + button and in the new entry field, type
clear-rad.portnox.com.
 Note:To learn more about this option, read the following topic: Trusted certificate server names.
 -
In the Certificate UUID section, paste the UUID that you copied earlier as SCEP
UUID.

-
Activate the Disable MAC address randomization during association checkbox.
 Important:If you do not turn off MAC address randomization, and the supplicant certificates are not issued by Portnox SCEP, and the certificate’s SAN field does not include a Jamf or Intune device ID, Portnox Cloud assigns a new license to the device each time it connects with a different MAC address. This can significantly increase your licensing costs. Even if you use Portnox SCEP and this issue does not apply, we still recommend turning MAC address randomization off for safety. For more information, see the following topic: MAC address randomization – why it causes problems and how to turn it off.
-
In the Service Set Identifier (SSID) section, enter the SSID of your Wi-Fi
network.
-
On the left-hand side of the profile window, scroll down to the 802.1X Ethernet: Global
icon, click on it, and in the right-hand side pane click on the Add Configuration Payload
button.
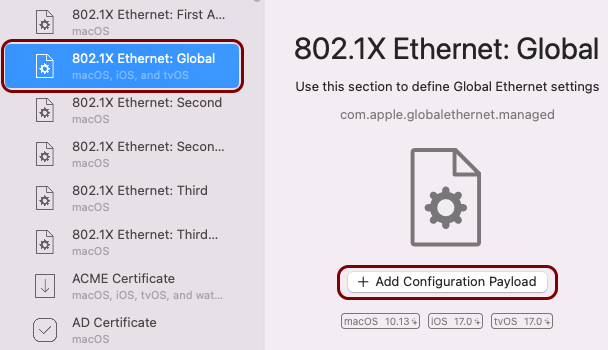 Note:Depending on your hardware configurations, you can choose a different 802.1X Ethernet payload, for example, First Active Ethernet. The setup procedure is almost the same for all 802.1X payloads.
 -
In the 802.1X Ethernet: Global pane on the right-hand side, configure the following
properties:
-
In the Accept EAP Types section, click on the + button, click on the added entry, and select
TLS.
-
In the Password field, enter any value (this value is ignored).

This is necessary due to a bug in the iMazing Profile Editor. When you authenticate using TLS, the password is not used, but iMazing Profile Editor requires that you enter a password anyway.
-
In the Certificate Anchor UUID section, click on the + button twice, and in the new entry fields, paste the UUIDs that you
copied earlier as root CA UUID and tenant CA UUID.
You need a reference to the root CA certificate so that the device can confirm that the Portnox RADIUS server is authentic, and you need a reference to the tenant CA certificate so that the device can confirm the validity of the SCEP certificate for the current user or device.
-
In the Trusted Server Certificate Names section, click on the + button and in the new entry field, type
clear-rad.portnox.com.
Note:To learn more about this option, read the following topic: Trusted certificate server names.
-
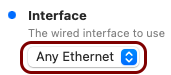
In the Interface section, select the Any Ethernet
option.
-
In the Accept EAP Types section, click on the + button, click on the added entry, and select
TLS.
Result: The custom profile file (.mobileconfig) is saved on the disk and ready for use in Kandji.
Create a blueprint in Kandji
In this section, you will create a blueprint (assignment map) in Kandji that lets you add Wi-Fi and wired profiles for networks as well as other Kandji security features to your managed devices.
-
In the Kandji main menu, click on the BLUEPRINTS option.
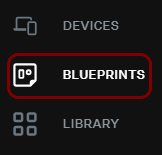
Kandji shows the Blueprints pane on the right-hand side.
-
In the top-right corner of the Blueprints pane, click on the Add
Blueprint button.
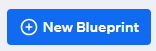
Kandji shows the Create Blueprint window over the right-hand pane.
Note:You can use an existing blueprint instead. If so, skip the steps for creating a new blueprint and when asked to select a blueprint, select your existing blueprint instead. -
In the Create Blueprint window, click on the Start from scratch tile,
enter a Blueprint name, and click on the Create Blueprint
button.

We used the name Vorlon but you can use any name you like.
Add the custom profile to Kandji
In this section, you will upload the custom profile file to Kandji and assign it to an existing blueprint, so that Kandji can distribute it to managed devices.
-
In the Kandji main menu, click on the LIBRARY option.

Kandji shows the Library pane on the right-hand side.
-
In the top-right corner of the Library pane, click on the Add Library
Item button.

Kandji shows the Add Library item pane on the right-hand side.
-
In the Add Library item pane, in the Search box on the right-hand
side, start typing profile and then click on the Custom Profile tile
in the General section.

-
In the Custom Profile section on the bottom of the right-hand side pane, click on the
Add & Configure button.
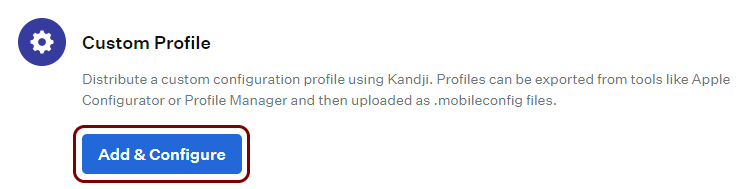
Kandji shows the Custom Profile pane on the right-hand side.
-
In the Add a title field on top of the Custom Profile pane, enter the
name for the new custom profile.
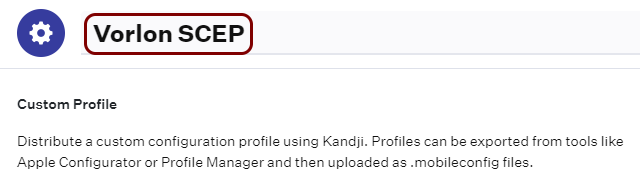
We used the name Vorlon SCEP but you can use any name you like.
-
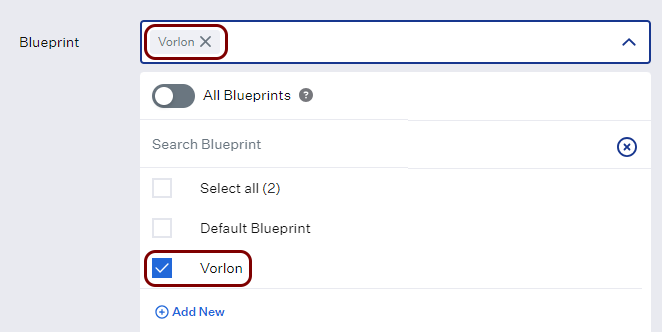
In the Blueprint field, click on the Assign button to select the
blueprint (assignment map) that you created earlier.
-
In the section below, click on the click to upload link and upload the profile file
that you created in the iMazing Profile Editor.

-
Click on the Save button in the bottom-right corner of the custom profile configuration
pane.