Onboard Chromebooks with certificates using Google Workspace and SCEP
In this topic, you will learn how to deploy Portnox™ Cloud certificates via Google Workspace SCEP to manage Chromebook (ChromeOS) devices.
Before you can deploy Portnox Cloud certificates via Google Workspace and SCEP, you must complete the following steps:
-
Prepare a physical or virtual Windows server that can access Portnox Cloud SCEP services (has access to the Internet), where you will install the Google connector.
-
Make sure that the Google administrator account that you will use for this configuration has the Shared Device Settings privileges.
Download and install the Google connector
In this section, you will download and install the Google Cloud Certificate Connector software on a Windows server. Google Workspace needs this connector to connect to the Portnox™ Cloud SCEP server.
When a device managed by Google Workspace needs a certificate to connect to a managed network, the Google Cloud creates a SCEP request for that device. The Google Cloud Certificate Connector, running on a Windows server, polls the Google Cloud for any new requests every 30 seconds. If it finds a new request, the connector contacts the SCEP server, gets the certificate, sends it back to Google Cloud, and then Google Cloud propagates the certificate to the managed device.
Do the following steps on the Windows server prepared earlier.
-
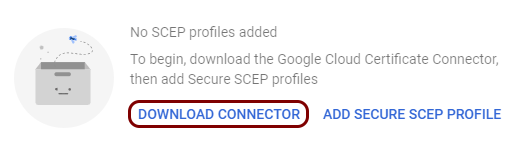
Click on the DOWNLOAD CONNECTOR link to download the Google connector. Then, follow the
installation steps to complete installation.
-
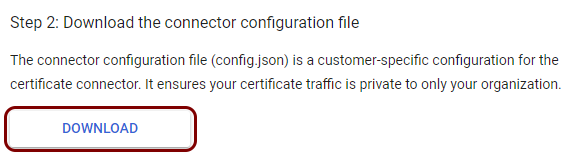
In Step 2 of Google instructions, click on the DOWNLOAD button to
download the connector configuration file (config.json).
-
In Step 3 of Google instructions, click on the GENERATE KEY button to
generate and download the connector key (key.json).

-
Move the downloaded files (config.json and key.json) to the installation
folder as indicated by Google during the installation.

-
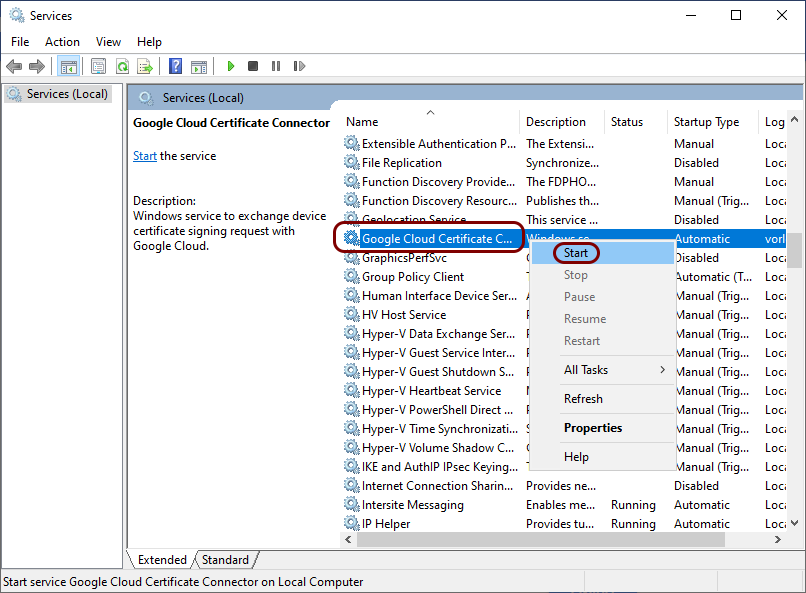
Open the Windows Services application, find the Google Cloud Certificate Connector service,
right-click on it, and select the Start option from the context menu.
If the service doesn’t start, check if the user that you selected earlier has privileges to log on as a service ().
Google connector logs are visible in the Event Viewer under .

If you need to change the connector configuration, for example, download a new key, place new files in the installation directory and restart the service.
Turn on the Portnox Cloud SCEP services
In this section, you will configure Portnox™ Cloud to provide SCEP services to your devices.
If you have previously turned on the Portnox Cloud SCEP services, skip to the step in which you get the Cloud SCEP URL and password.
Portnox Cloud SCEP services let devices contact the Cloud SCEP server and get a unique certificate for the device or for the specific user of the device.
-
In the Cloud portal top menu, click on the Settings option.

-
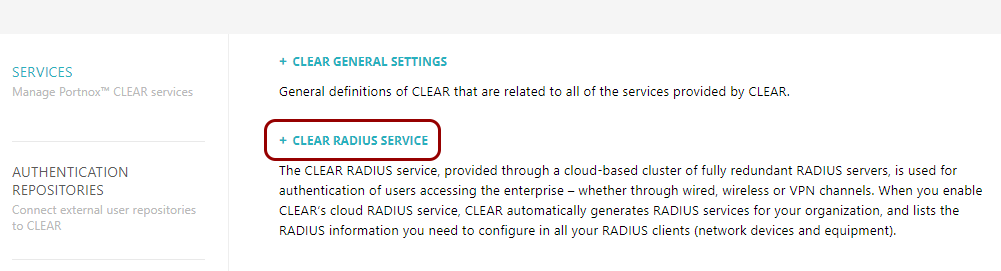
In the Cloud portal left-hand side menu, click on the option.
-
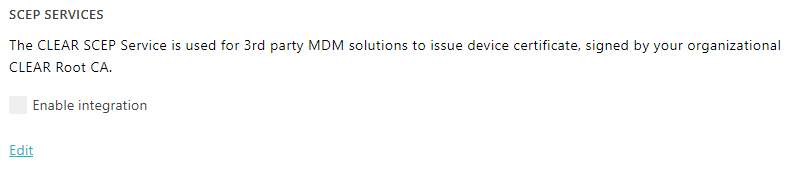
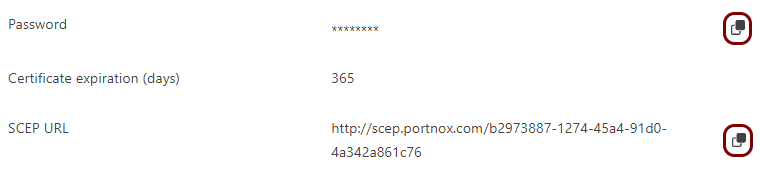
Enable integration with SCEP services.

- Click on the Edit link.
- Activate the Enable integration checkbox.
- Click on the Save button.
-
Click on the ⧉ icon next to the Password field to
copy the SCEP password, and paste it in a text file for later use.
Download the root CA certificate from Portnox Cloud
In this section, you will download the Portnox™ Cloud root CA certificate from the Cloud portal and convert it to the Base-64 encoded X.509 format.
You need the root CA certificate so that your managed devices can verify the validity of Cloud RADIUS servers, which have certificates signed by this root CA certificate. If the root CA certificate is not distributed to managed devices, some devices may show a security warning each time that the user connects to networks managed by Portnox Cloud.
-
In the Cloud portal top menu, click on the Settings option.
-
In the Cloud portal left-hand side menu, click on the option.
The right-hand pane shows the list of active servers.

-
Click on the Download root certificate link to download the root CA certificate.
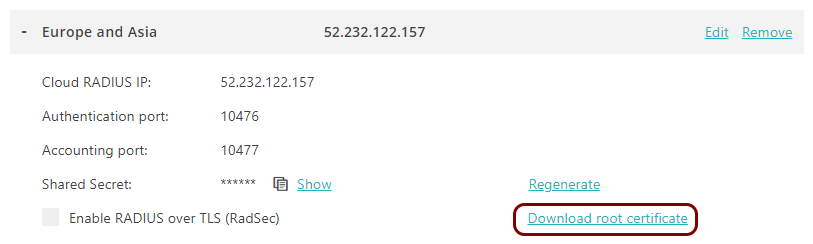
Save the file on your disk. The default name of the file is rootCertificate.cer.
-
In Windows, double-click on the downloaded file. In the Open File - Security Warning window,
click on the Open button.
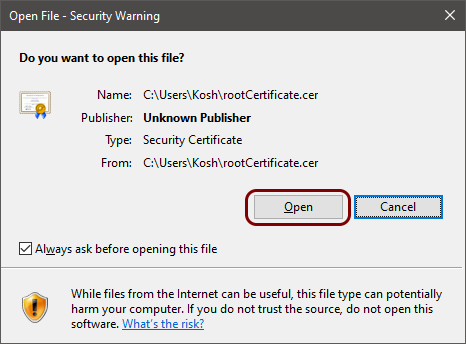
The file will be opened in the Windows certificate manager.
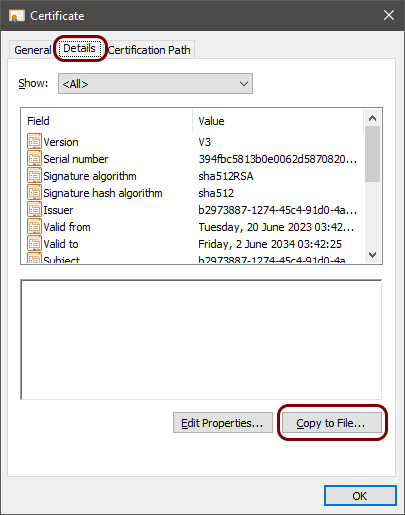
-
In the Certificate window, click on the Details tab and then click on
the Copy to File button.

-
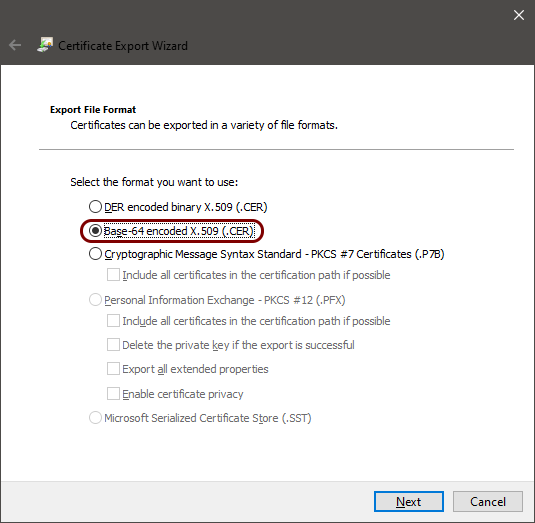
In the Certificate Export Wizard, export the certificate in base-64 encoded format.
Download the tenant CA certificate from Portnox Cloud
In this section, you will download the Portnox™ Cloud tenant CA certificate from the Cloud portal and convert it to the Base-64 encoded X.509 format.
You need the tenant CA certificate from Portnox Cloud so that your managed devices can verify the validity of individual SCEP certificates, which are signed using the tenant CA certificate.
-
In the Cloud portal top menu, click on the Settings option.
-
In the Cloud portal left-hand side menu, click on the option.

-
In the Trusted Root Certificates section, click on the Download PFX
link, then save the downloaded file.
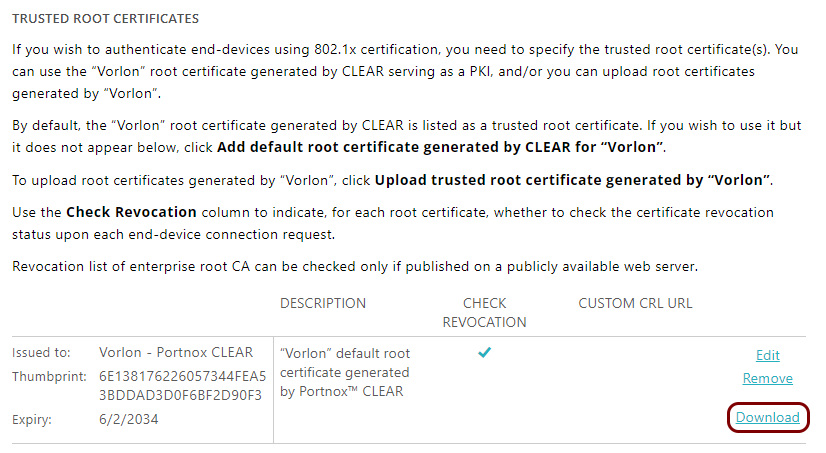
The default name of the file is Your_tenant_name - Portnox CLEAR.pfx, for example, Vorlon - Portnox CLEAR.pfx.
-
In Windows, right-click on the downloaded file and select Open from the context menu.
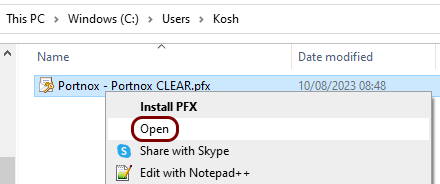
The file will be opened in the Windows certificate manager.
-
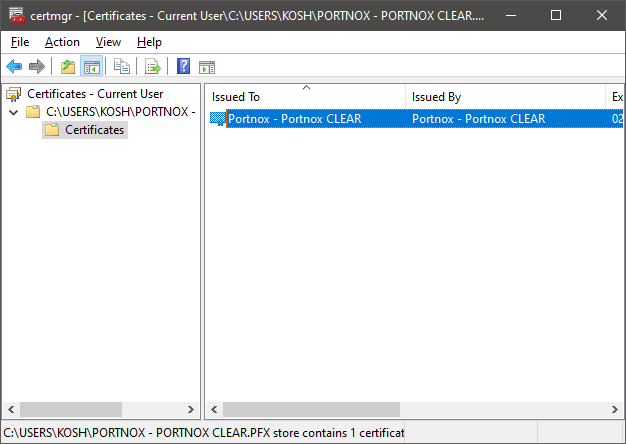
In the certificate manager window, open the Certificates section in the left-hand pane and
then double-click on Your_tenant_name - Portnox CLEAR in the right-hand
side pane.
-
In the Certificate window, click on the Details tab and then click on
the Copy to File button.
-
In the Certificate Export Wizard, export the certificate in base-64 encoded format.
Create a profile for the root CA certificate
In this section, you will create a profile in Google Workspace for the downloaded Portnox™ Cloud root CA certificate.
-
Click on the ADD CERTIFICATE link.

The Add certificate pane opens.
-
In the Add certificate pane, enter the name for the profile and then click on the
UPLOAD button. Then, select the root CA certificate downloaded and converted
earlier.
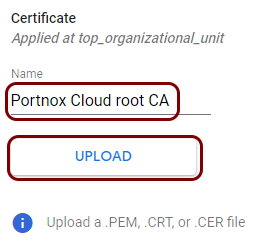
In this example, we used the name Portnox Cloud root CA, but you can use any name you like.
You will see basic information about the root CA certificate.

-
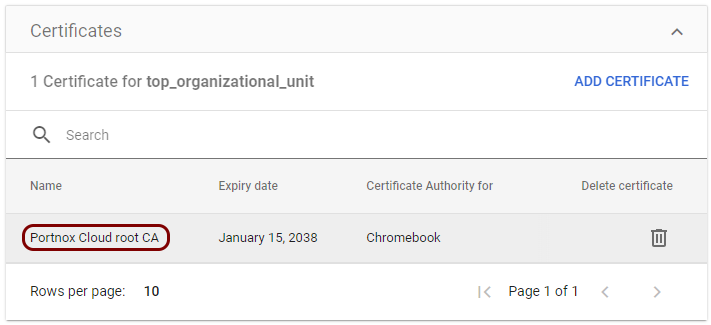
In the Certificate Authority section of the Add certificate pane,
select Chromebook and optionally all other managed device platforms that you will use this
certificate with, and then click on the Add button.

Result: You created a profile for the Portnox Cloud root CA certificate.
Create a profile for the tenant CA certificate
In this section, you will create a profile in Google Workspace for the downloaded Portnox™ Cloud tenant CA certificate.
-
Click on the ADD CERTIFICATE link.
The Add certificate pane opens.
-
In the Add certificate pane, enter the name for the profile and then click on the
UPLOAD button. Then, select the tenant CA certificate downloaded and converted
earlier.

In this example, we used the name Portnox Cloud tenant CA, but you can use any name you like.
You will see basic information about the tenant CA certificate.

-
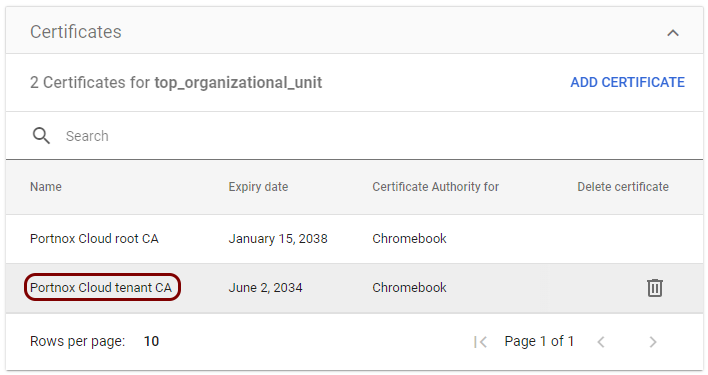
In the Certificate Authority section of the Add certificate pane,
select Chromebook and optionally all other managed device platforms that you will use this
certificate with, and then click on the Add button.
Result: You created a profile for the Portnox Cloud tenant CA certificate.
Create a secure SCEP profile
In this section, you will create a secure SCEP profile in Google Workspace. The secure SCEP profile lets devices managed by Google Workspace contact the Portnox™ Cloud SCEP server via the connector.
-
Click on the ADD SECURE SCEP PROFILE link to create a secure SCEP profile.

The Add Secure SCEP pane opens.
Note:Adjust the values proposed below to your requirements and your environment, if needed. -
In the Device platforms section of the Add Secure SCEP pane, activate
the Chromebook (user) checkbox.
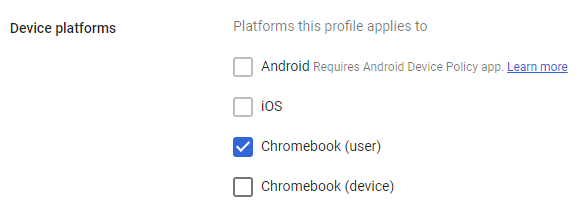 Important:When managing Chromebooks using Google Workspace, you can only use user certificates for your Chromebooks with Portnox Cloud. This is because Google Workspace does not create device-based accounts in its authentication repository, so there is no way for Portnox Cloud to know your list of devices and to be able to authenticate based on any device identifiers. This also means you cannot use SCEP-based authentication in the managed guest mode, which is not associated with any Google user.
 -
In the SCEP profile name section, enter the SCEP profile name for this secure SCEP
profile.

In this example, we used the name Portnox Cloud SCEP User, but you can use any name you like.
-
In the Subject name format section, select the Fully Distinguished
Name option.
-
In the Common name field, enter ${USER_EMAIL} as a variable
to set subject common names for generated certificates.

-
In the Common name field, enter ${USER_EMAIL} as a variable
to set subject common names for generated certificates.
-
In the Subject alternative name section, select the Custom option.
Then, click on the + icon to add SANs and add a User
Principal entry with the ${USER_EMAIL} variable string.
 Note:By default, Portnox Cloud checks for user identity information in the SAN UPN field. To understand how Portnox Cloud matches the identity in the certificates with the authentication repository, read the following section: Certificate identity information.
 -
In the SCEP server attributes section:
-
In the SCEP server URL field, copy and paste the SCEP URL that you saved in the previous task in
this series.

-
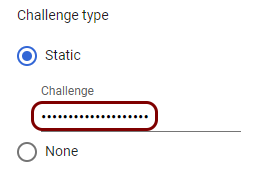
In the Challenge type field, select the Static option and
then copy and paste the SCEP password that you saved in the previous task in this series.
-
In the Certificate Authority field, select the tenant CA certificate profile
that you created in the earlier
task.
 Note:Do not select the root CA certificate here. The root CA certificate is used in the Wi-Fi profile to confirm the identity of the Cloud RADIUS servers.
-
In the SCEP server URL field, copy and paste the SCEP URL that you saved in the previous task in
this series.
Result: You created a trusted SCEP profile.

Create a Wi-Fi profile
In this section, you will create a Wi-Fi profile in Google Workspace for Chromebooks managed by Portnox™ Cloud.
-
Click on the ADD WI-FI link.

The Add Wi-Fi pane opens.
-
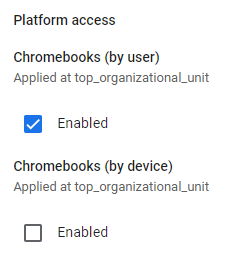
In the Platform access section of the Add Wi-Fi pane, activate the
Enabled checkbox in the Chromebooks (by user) section.
-
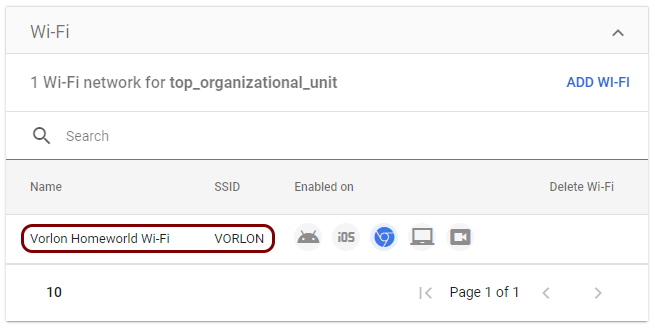
In the Details section, enter a friendly name for the Wi-Fi profile in the
Name field and enter the network SSID in the SSID field.
 Note:The value of the Name field is used only in Google Workspace for organizational purposes. Users see the network SSID in their Chromebooks network configuration.
 -
In the Security settings section, in the Security Type field, select
the WPA/WPA2 Enterprise (802.1X) option and in the Extensible Authentication
Protocol field that appears, select the EAP-TLS option.

-
In the Server Certificate Authority field, select the root CA profile you created in
the earlier task..
 Note:This root certificate is used to validate the RADIUS server. Do not select the tenant CA certificate here. The tenant CA certificate is used in SCEP profiles to verify the validity of SCEP certificates.
 -
In the SCEP profile field, select the trusted SCEP profile you created in the earlier task.

-
In the Issuer pattern section, in the Common name field, paste the
issuer name that you copied from Portnox Cloud in the earlier task.

Result: You created a Wi-Fi profile for the network managed by Portnox Cloud.
Test your configuration on a managed Chromebook
In this section, you will test the configuration you created in Google Workspace by connecting a Chromebook to the network managed by Portnox™ Cloud.
-
Click on the ⌔ icon in the notification area to open the Status Tray.
-
Click on the ▼ icon next to the current network name in the Status
Tray to show the list of available Wi-Fi networks.

-
Click on the name of the network managed by Portnox Cloud to connect to it.

The symbol on the right side of the network SSID confirms that this network is managed by the organization.