Onboard Windows devices with certificates using IBM MaaS 360 UEM and SCEP
In this topic, you will learn how to deploy Portnox™ Cloud certificates to Windows devices via MaaS 360 UEM and SCEP.
Turn on the Portnox Cloud SCEP services
In this section, you will configure Portnox™ Cloud to provide SCEP services to your devices.
If you have previously turned on the Portnox Cloud SCEP services, skip to the later steps.
Portnox Cloud SCEP services let devices contact the Cloud SCEP server and get a unique certificate for the device or for the specific user of the device.
-
In the Cloud portal top menu, click on the Settings option.
-
In the Cloud portal left-hand side menu, click on the
option.
-
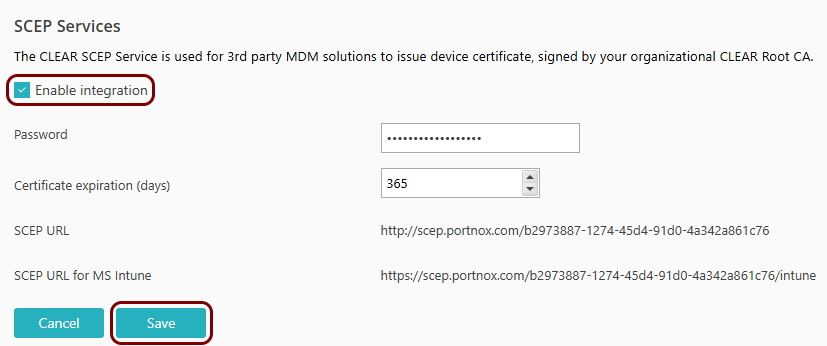
Enable integration with SCEP services.
- Click on the Edit link.
- Activate the Enable integration checkbox.
- Click on the Save button.
- Click on the ⧉ icon next to the SCEP URL field to copy the SCEP URL, and paste it in a text file for later use.
-
Click on the ⧉ icon next to the Password field to
copy the SCEP password, and paste it in a text file for later use.
Download the root CA certificate from Portnox Cloud
In this section, you will download the Portnox™ Cloud root CA certificate from the Cloud portal.
You need the root CA certificate so that your managed devices can verify the validity of cloud RADIUS servers, which have certificates signed by this root CA certificate. If the root CA certificate is not distributed to managed devices, some devices may show a security warning each time that the user connects to networks managed by Portnox Cloud.
-
In the Cloud portal top menu, click on the Settings option.
-
In the Cloud portal left-hand side menu, click on the
option.
The right-hand pane shows the list of active servers.
- Click on any of the active RADIUS services to show its configuration.
-
Click on the Download root certificate link to download the root CA certificate.
Save the file on your disk to use it later. The default name of the file is rootCertificate.cer.
Optional: Hand over information from the Portnox Cloud team to the MaaS 360 team
In this section, you will learn what information was collected in previous steps from Portnox Cloud, which is needed to configure MaaS 360 to work with Portnox Cloud.
If different people are responsible for managing Portnox Cloud and MaaS 360, here is the information you need to hand over:
-
The URL of the Portnox Cloud SCEP server. For example, https://scep.portnox.com/b2973887-1274-45d4-91d0-4a342a861c76.
-
The password for the SCEP server.
-
The root CA certificate file in the Base-64 encoded X.509 format. For example, rootCertificate.cer.
Install the IBM Cloud Extender on a Windows machine
In this section, you will download IBM Cloud Extender and install it on a Windows virtual or physical machine. Cloud Extender is required by MaaS 360 to support the SCEP protocol.
-
In your browser, go to the MaaS 360 Login URL.
You received this URL in the initial email from MaaS 360, which IBM sent to you after you registered for MaaS 360.
-
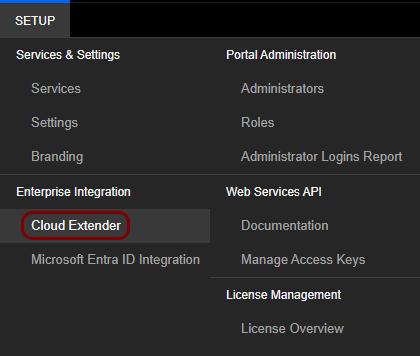
In your MaaS 360 dashboard, in the top menu, select
.
-
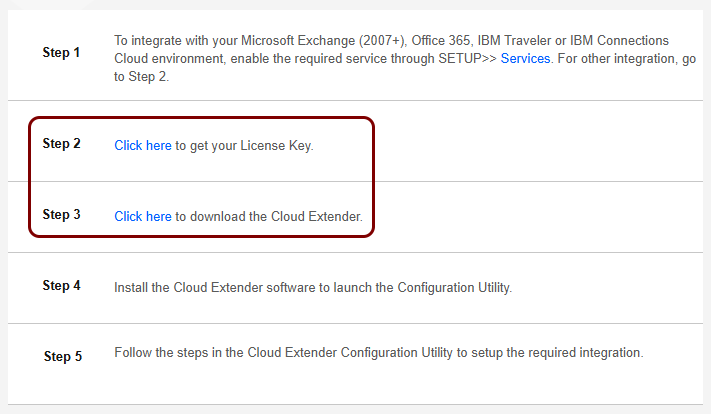
Follow steps 2 and 3 on the screen to get your Cloud Extender license key (sent to your email) and download the
Cloud Extender installer file (MaaS360_Cloud_Extender.exe).
Note: If the Windows machine where you want to install Cloud Extender is different than the machine you are accessing the dashboard with, copy the file to the destination machine.
-
Run the installer file on the destination machine and follow the installer wizard steps to install the
software.
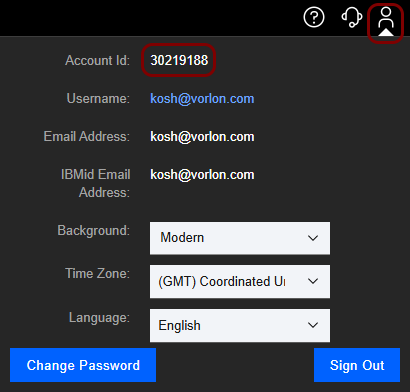
When installing Cloud Extender, you will be asked to enter the license key (received via email) and your Account ID. You can find the Account ID in your MaaS 360 dashboard by clicking on the user icon in the top-right corner of the screen.
Result: You have installed Cloud Extender on the destination Windows machine.
Create the SCEP CA configuration in Cloud Extender
In this section, you will create the SCEP CA configuration using the Cloud Extender Configuration Tool on the destination Windows machine. This configuration and this template will be used by the profiles that you will create later in the MaaS 360 tenant.
-
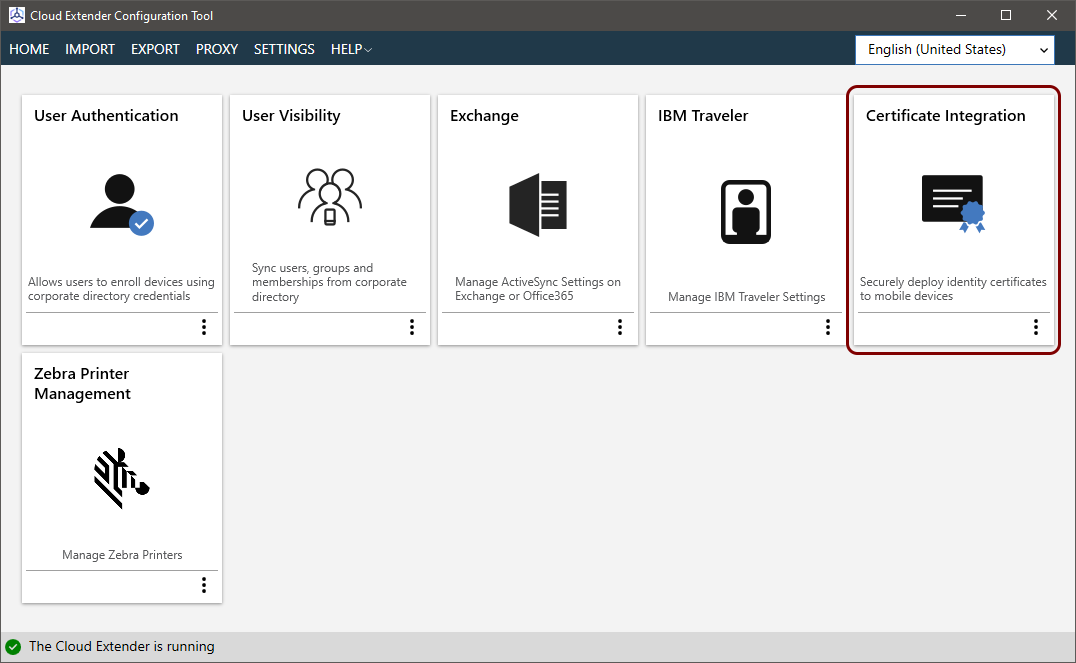
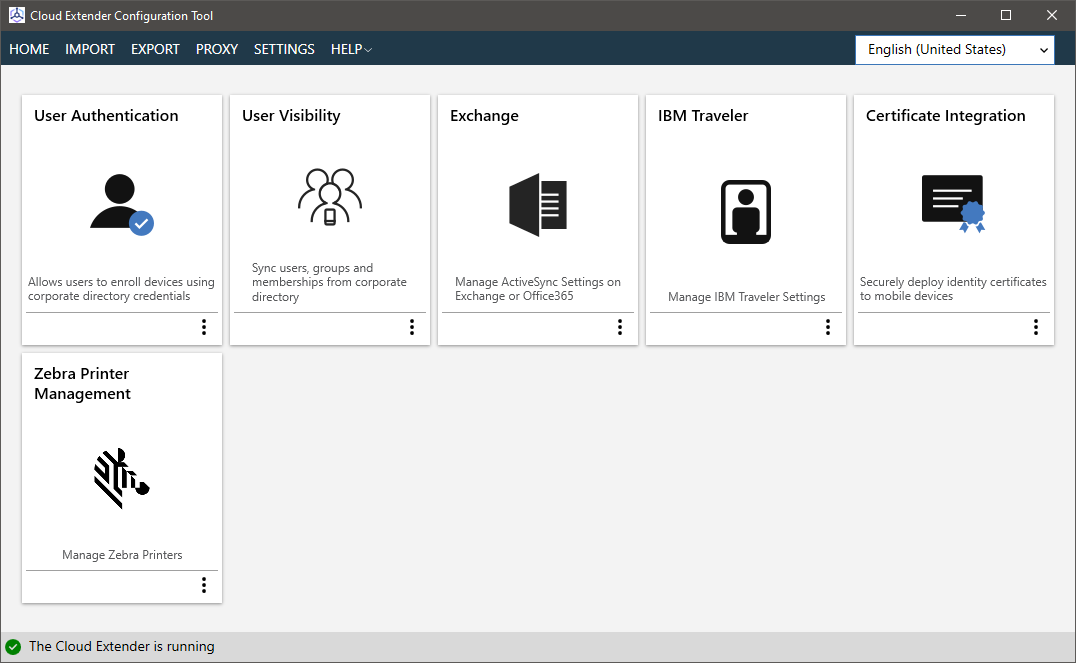
In the Cloud Extender Configuration Tool, click on the Certificate Integration tile.
-
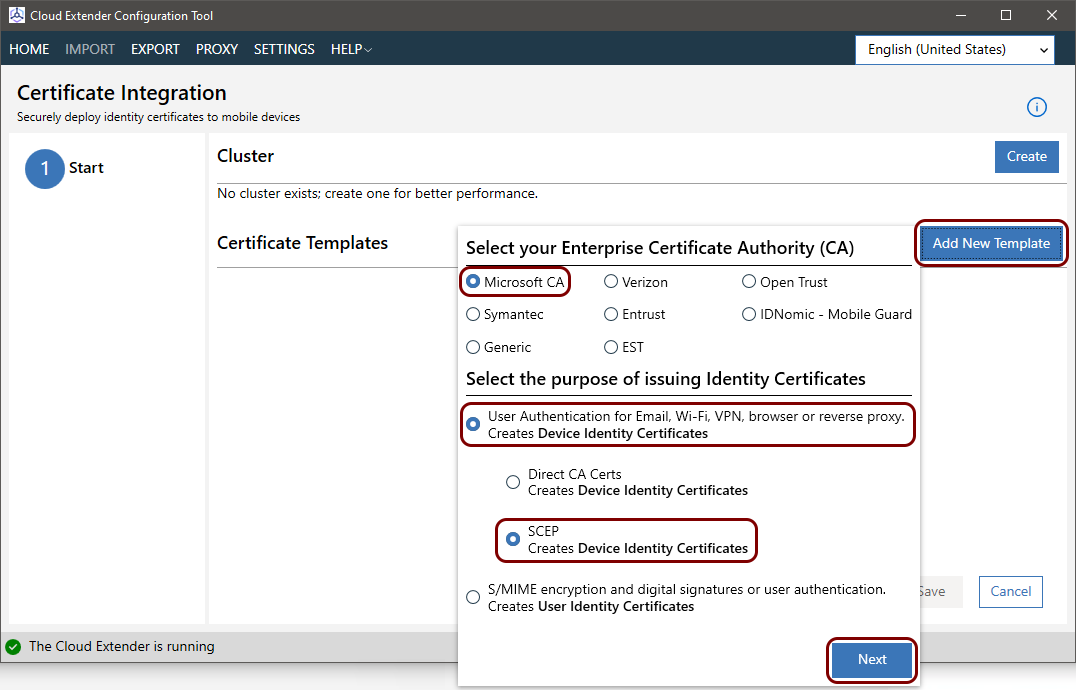
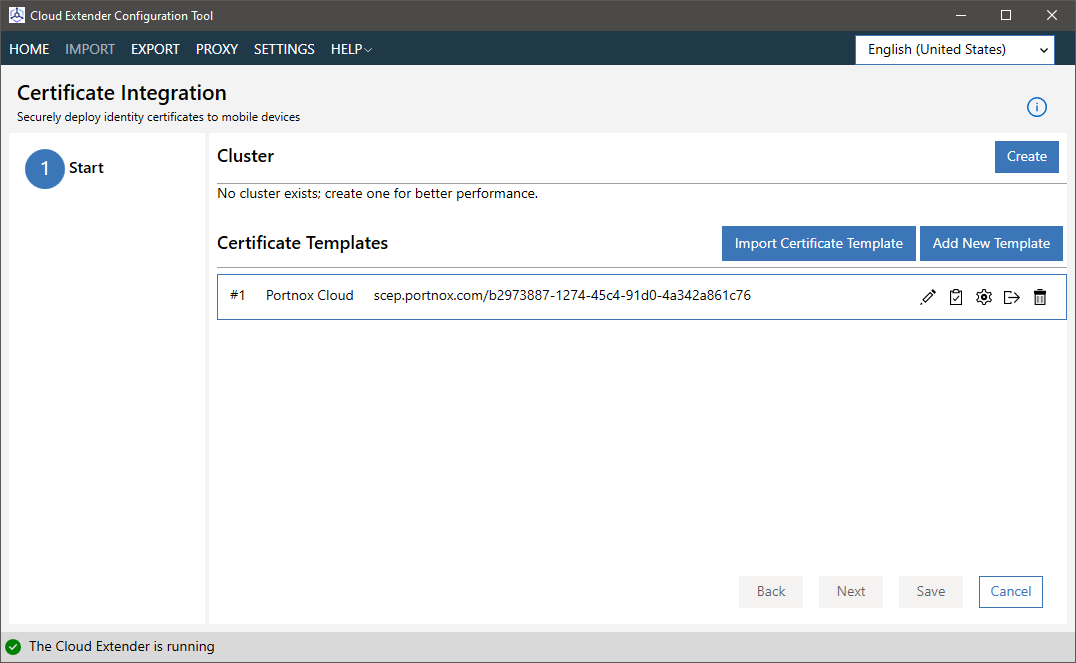
In the Certificate Integration pane, click on the Add New Template
button and then select the following options:
- In the Select your Enterprise Certificate Authority (CA) section, select the Microsoft CA option.
- In the Select the purpose of issuing Identity Certificates section, select the option.
- Click on the Next button.
-
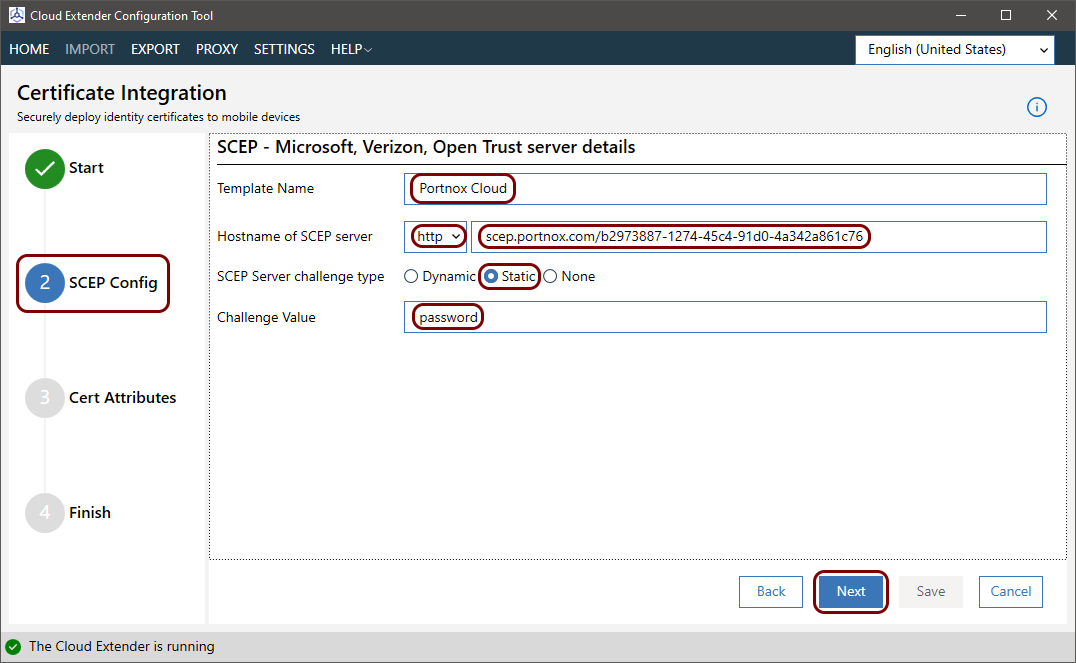
In the SCEP Config step:
-
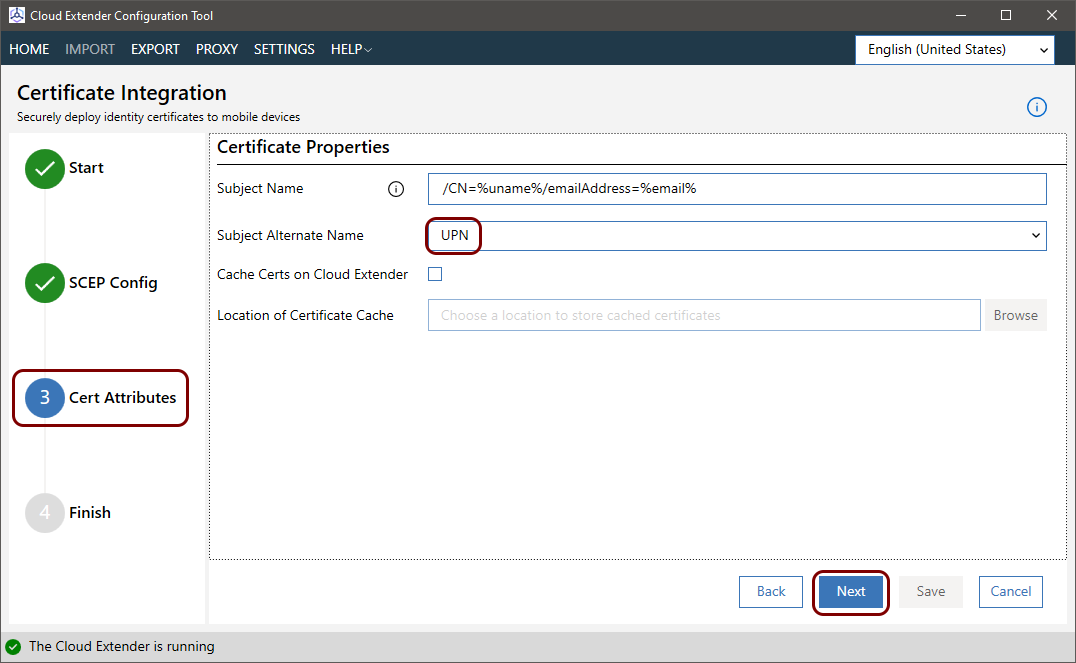
In the Cert Attributes step:
-
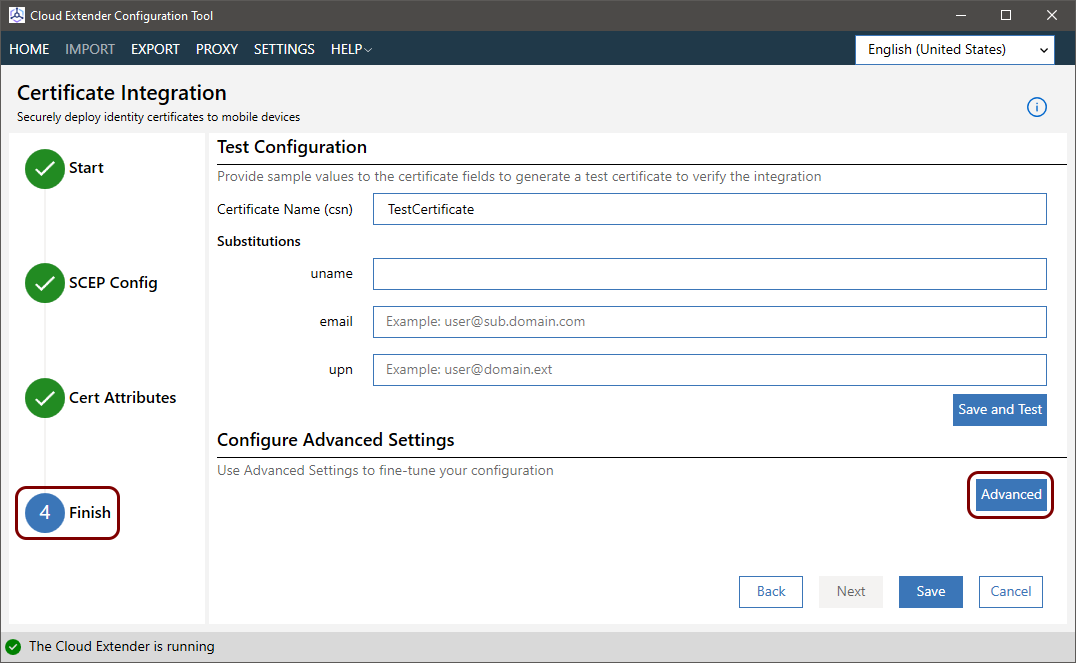
In the Finish step, click on the Advanced button.
-
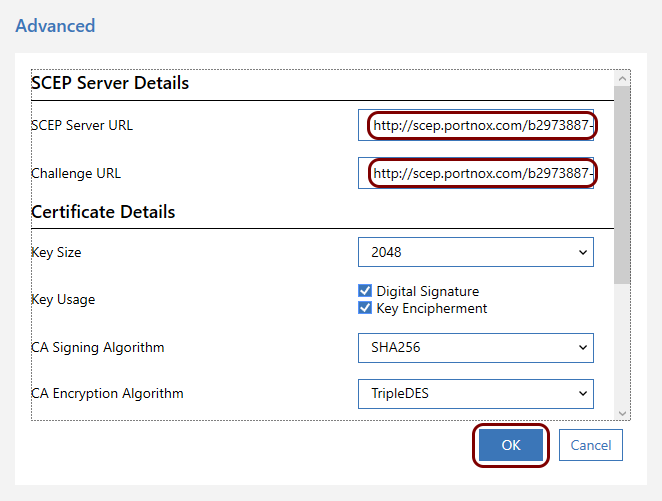
In the Advanced window:
- In the SCEP Server URL field and the Challenge URL field, paste the SCEP URL that you copied earlier from Portnox Cloud.
- Adjust the other fields according to your preferences, then click on the OK button.
-
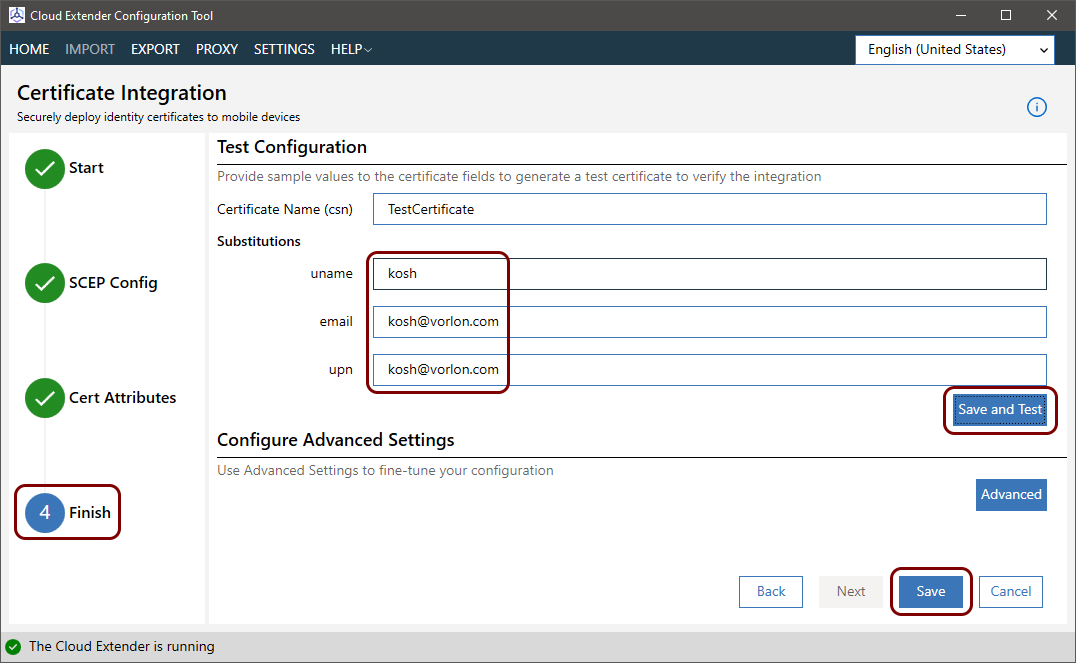
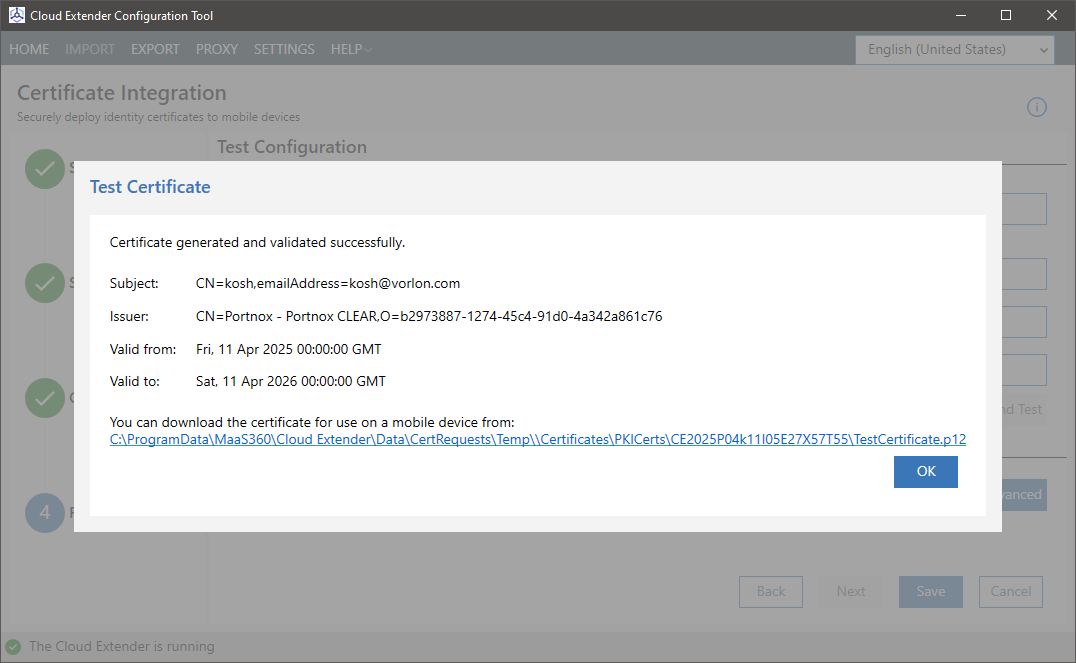
In the Finish step:
Result: You created a configuration for the Portnox Cloud SCEP CA.
Create a Windows profile in MaaS 360
In this section, you will create a Windows profile in the MaaS 360 tenant for obtaining the SCEP certificate.
-
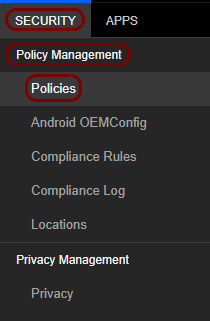
In the Policies pane, click on the Add Policy button.
-
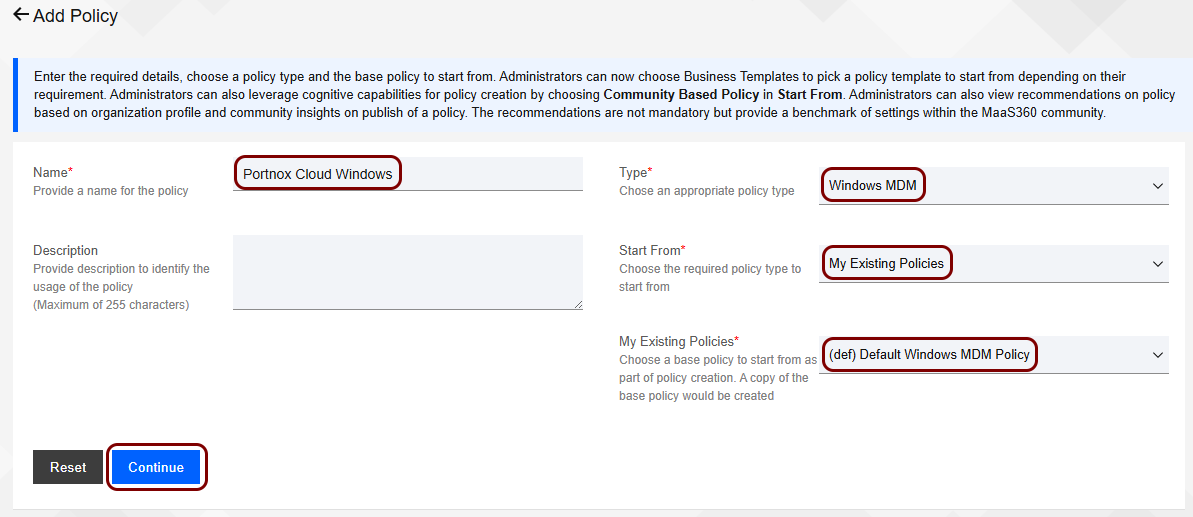
In the Add Policy pane:
Note: You can also edit the Default Windows MDM Policy directly if you want all your Windows devices to use the same policy.
-
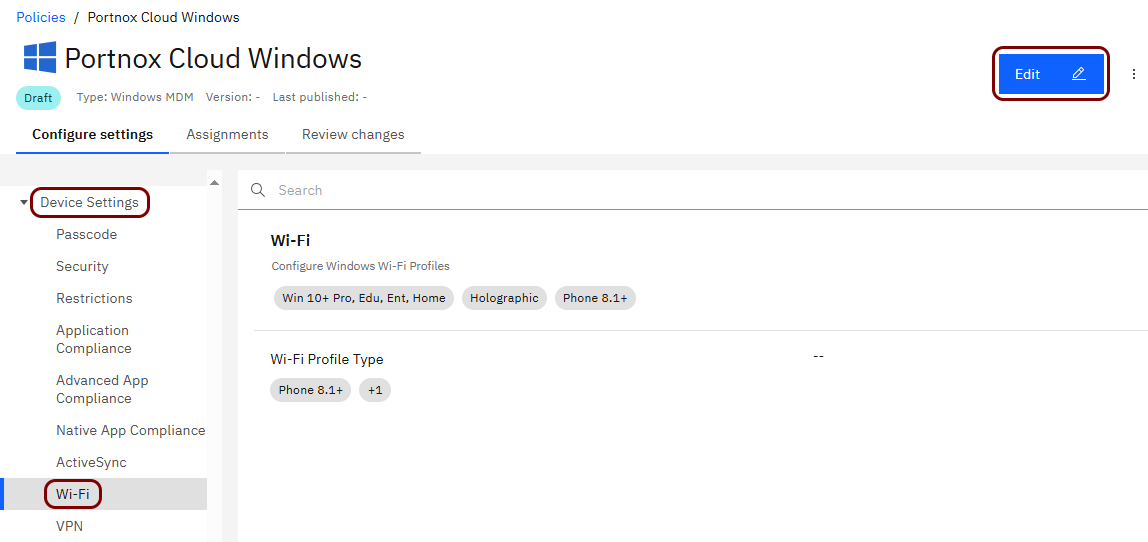
In the new policy pane, in the left-hand side menu, select the Edit button.
option. Then, click on the
-
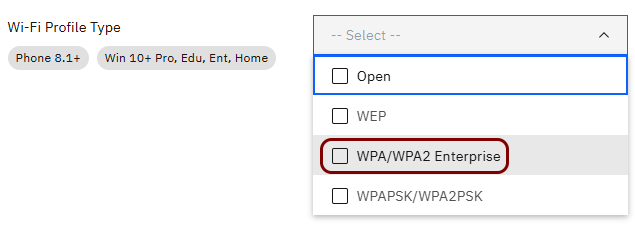
In the Wi-Fi Profile Type field, select the WPA/WPA2 Enterprise
option.
-
In the SSID field, type the SSID of your Wi-Fi network.
-
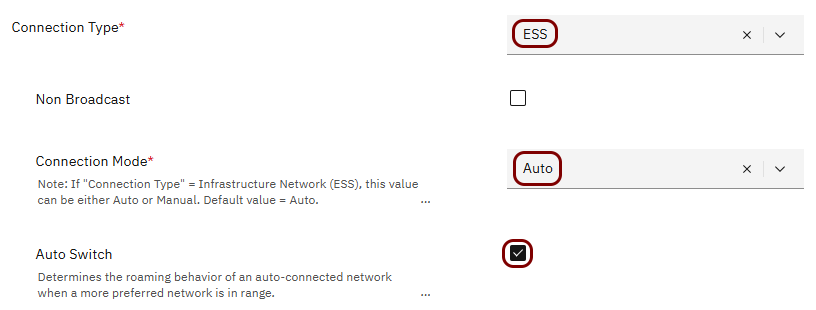
In the Connection Type field, select the ESS option, then in the
Connection Mode field, select the Auto option, and activate the
Auto Switch checkbox.
-
In the Authentication Type field, select the WPA2 option.
-
In the Encryption field, select the AES option.
-
In the EAP Authentication type field, select the EAP TLS
option.
-
Activate the Validate Server during connection checkbox, and then click on the + button.
Note: If you already added the Portnox Cloud root certificate when creating or editing another MaaS 360 profile for Windows, select the certificate by clicking on the Trusted Root CA field instead.
-
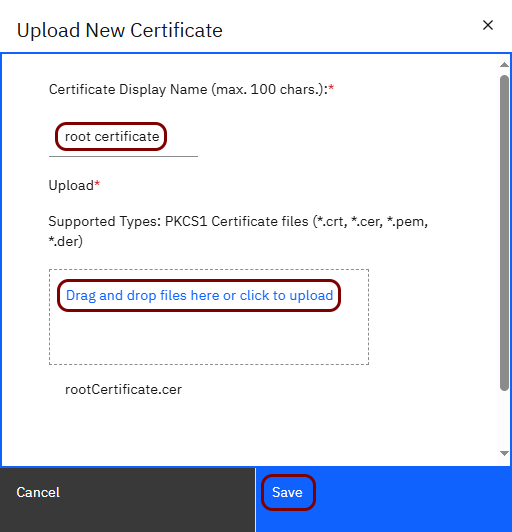
In the Upload New Certificate window:
-
In the Identity Certificate field, select the SCEP CA configuration that you added earlier
in the Cloud Extender.
-
In the Server Names field, type: clear-rad.portnox.com.
- Click on the Next button twice, and then on the Publish button to publish this policy. Then, follow the steps as requested, including confirming and entering your MaaS 360 password.
Result: You created a profile for Portnox Cloud and Windows devices. You can now assign this profile to devices by following MaaS 360 documentation.