Onboard devices using your own root certificate authority and Group Policy
In this topic, you will learn how to create your own certificate authority in Windows Server, generate user certificates using Group Policy, and then use these certificates to onboard devices.
Create a Certification Authority
In this section, you will learn how to configure Windows Server with an Active Directory Certificate Services role, and create and configure the Certification Authority (CA).
-
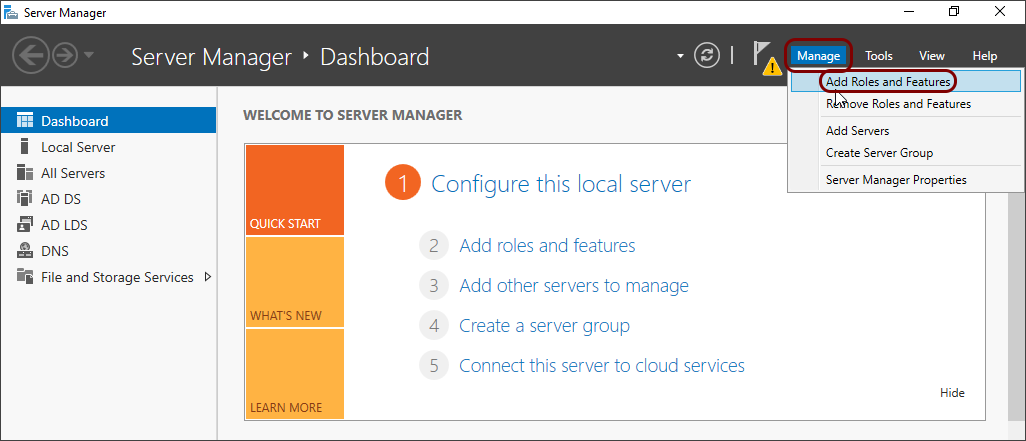
In the Server Manager > Dashboard window, click on the
Manage top menu and select the Add Roles and Features option to
open the Add Roles and Features Wizard.
-
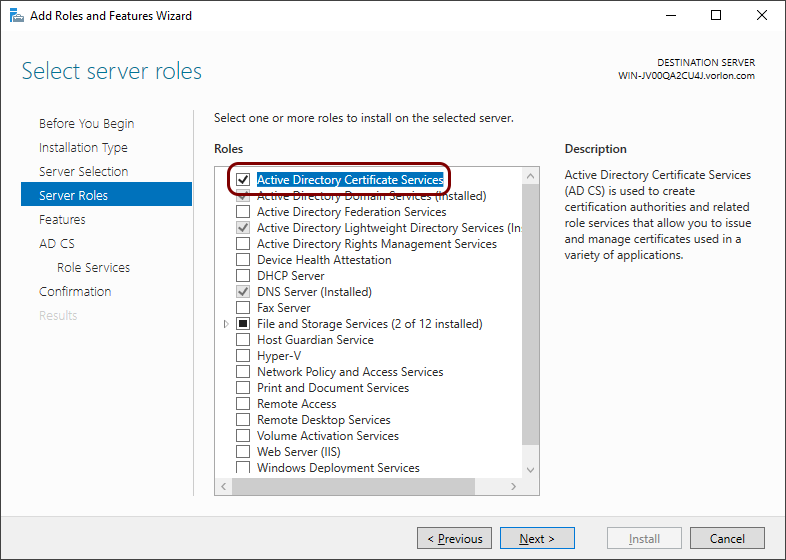
In the Server Roles step, activate the Active Directory Certificate
Services checkbox.
-
In the Add Roles and Features Wizard pop-up, click on the Add
Features button. Then, click on the Next button in the parent
window.

-
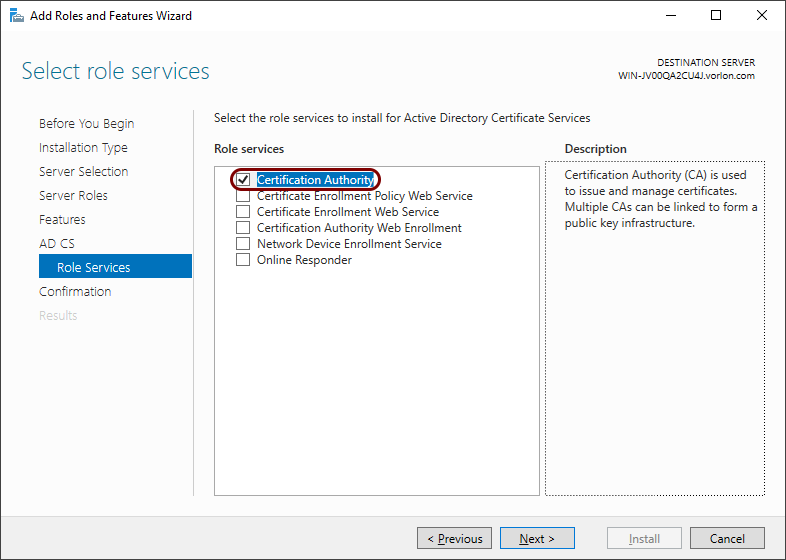
In the Role Services step, make sure that the Certification
Authority checkbox is selected, and then click on the Next
button.
-
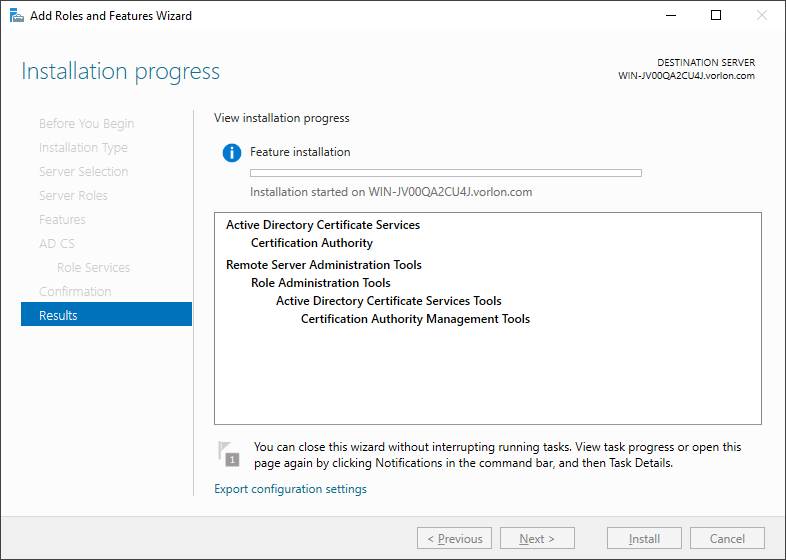
In the Confirmation step, click on the Install button.

Result: The Active Directory Certificate Services will be installed in the background.
-
In the Server Roles step, activate the Active Directory Certificate
Services checkbox.
-
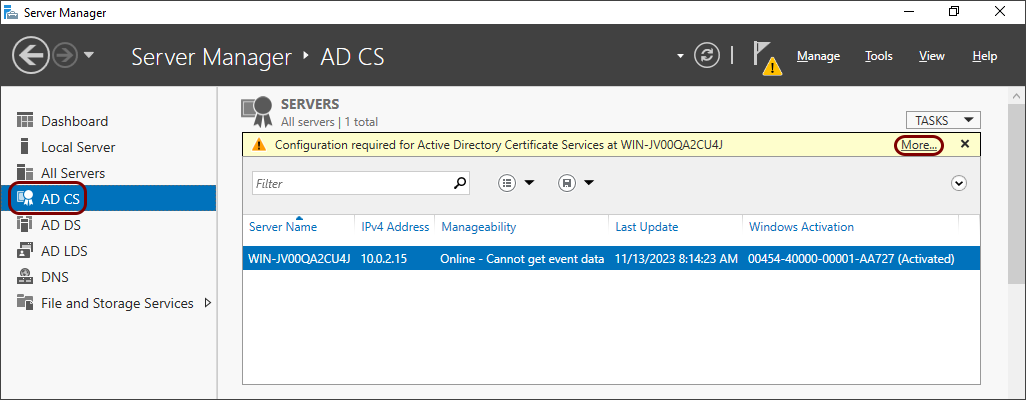
In the Server Manager > Dashboard window, click on the AD CS option
in the left-hand side menu, and then click on the More link in the warning
notification.
-
In the All Servers Task Details and Notifications window, click on the Configure
Active Directory Certificate Services link to open the AD CS Configuration
wizard.

-
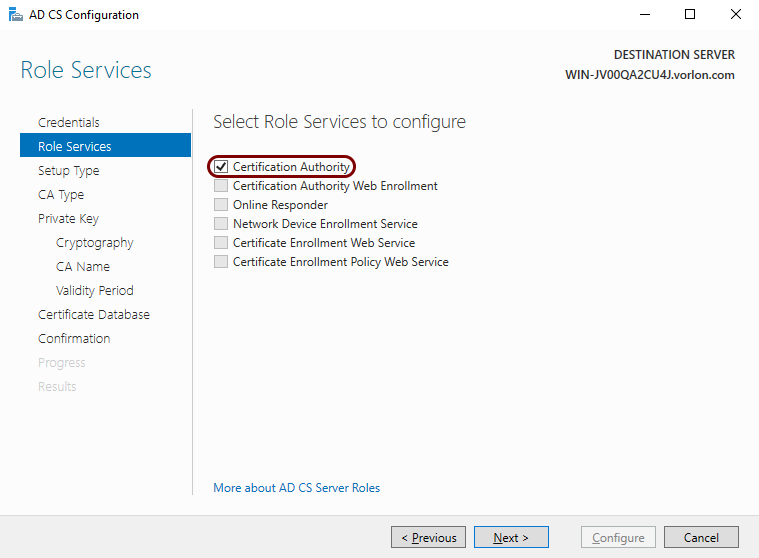
In the Role Services step, activate the Certification
Authority checkbox and then click on the Next button.
-
In the Setup Type step, select the Enterprise CA option and
then click on the Next button.

-
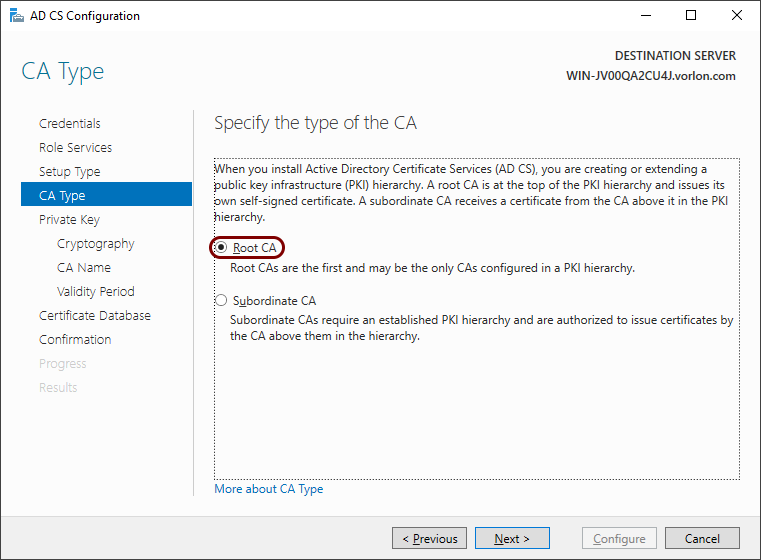
In the CA Type step, select the Root CA option and then click
on the Next button.
-
In the Private Key step, select the Create a new private key
option and then click on the Next button.

-
In the Cryptography step, select the desired cryptographic provider and hash
algorithm for the new private key, and then click on the Next button.
You can leave the default values for the provider and hash algorithm.

-
In the CA Name step, enter a name for your CA, and then click on the
Next button.
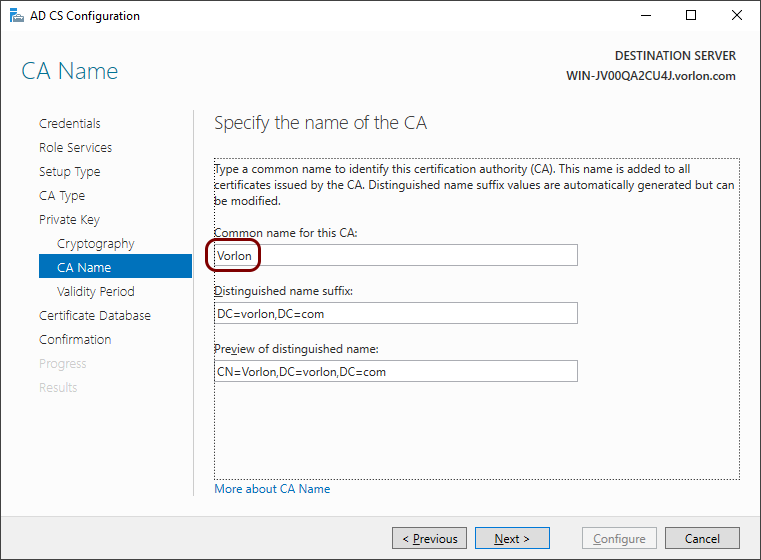 Important:The name of your CA should be exactly the same as the name of your tenant in Portnox Cloud. Otherwise, you will not be able to import and use the root CA certificate.
 -
In the Validity Period step, enter a validity period for your CA certificate and
then click on the Next button.
 Note:We recommend a long validity period of at least 5 years. If the CA certificate expires, all devices will have to renew their certificates, which may cause organizational problems.
 -
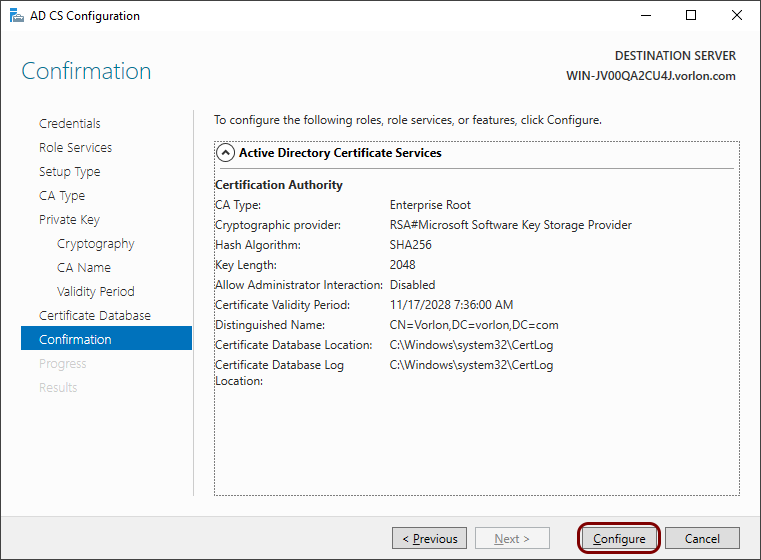
In the Confirmation step, click on the Configure button and
then in the Results step, click on the Close button.
-
In the Role Services step, activate the Certification
Authority checkbox and then click on the Next button.
Create a certificate template
In this section, you will learn how to create a certificate template, which you will later distribute via GPO to client devices so they can request certificates from the CA.
-
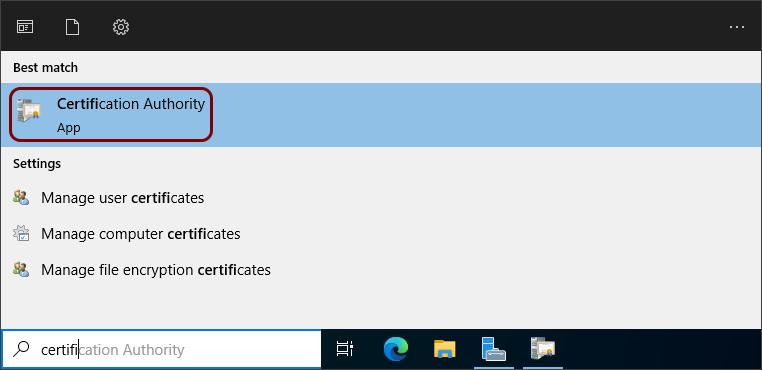
In the Windows search bar, start typing certification authority and then click on the
Certification Authority app icon.
-
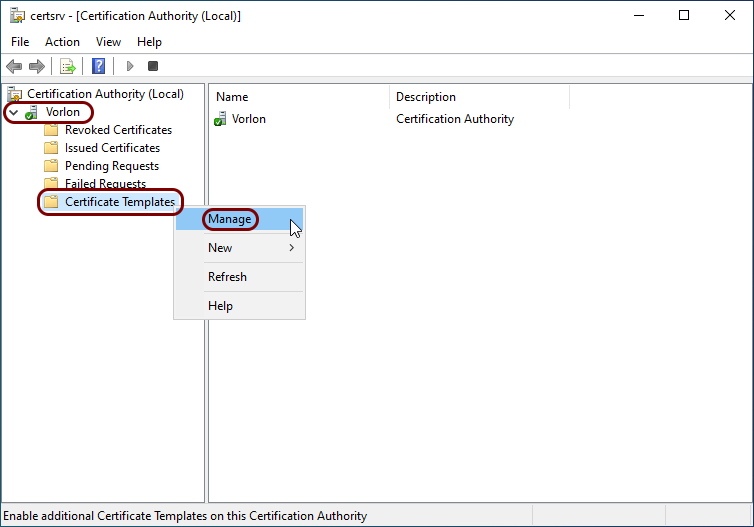
In the Certification Authority app window, expand your CA node, right-click on the
Certificate Templates entry, and from the context menu, select the
Manage option.
-
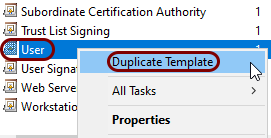
In the Certificate Templates Console window, scroll down to the User
entry, right-click on it, and from the context menu, select the Duplicate Template
option.
-
In the Properties of New Template window, in the General tab, enter a
name for the new user template.
If you change the Template display name, the Template name field changes accordingly.

In this example, we used the name Vorlon but you can use any name you like.
-
In the Subject Name tab, make sure that the Build from this Active Directory
information option is selected and that the Include e-mail name in subject
name checkbox is active.
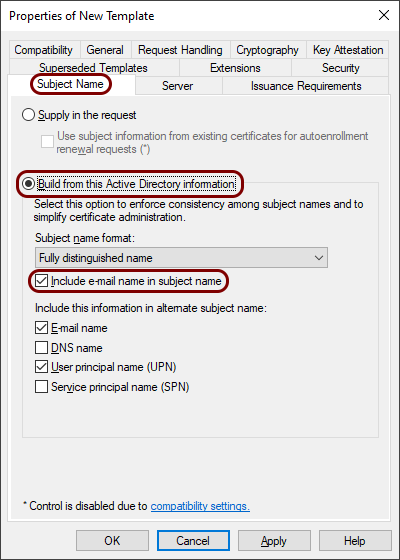 Important:All users that you want to automatically enroll with a certificate need to have an email address specified in their Active Directory. If there is no email specified for a given user, enrollment will fail.
 -
In the Security tab, make sure that any users that you want to automatically enroll with a
certificate have an active checkbox in the Autoenroll row in the Allow
column.

-
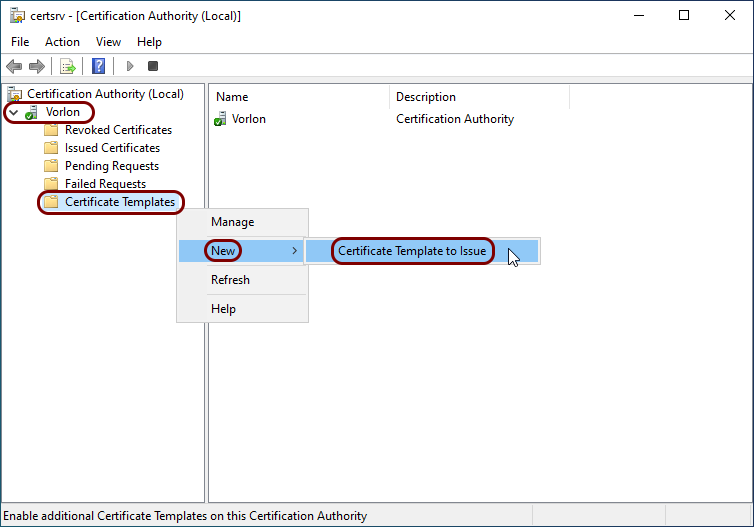
In the Certificate Authority app window, expand your CA node, right-click on the
Certificate Templates entry, and from the context menu, select the option.
-
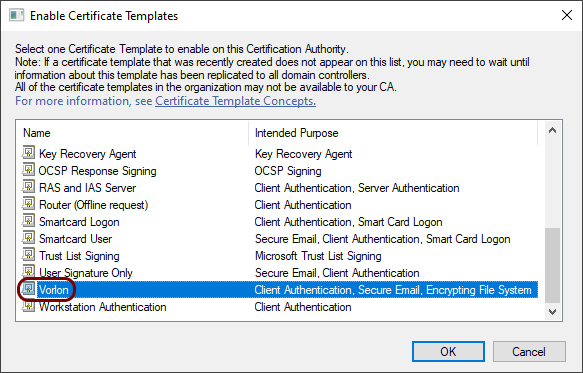
In the Enable Certificate Templates window, scroll to the newly created template, select it,
and then click on the OK button.
Configure certificate enrollment via Group Policy
In this section, you will learn how to configure the Group Policy to automatically enroll client devices with user certificates.
-
In the Windows search bar, start typing group policy management and then click on the
Group Policy Management app icon.

-
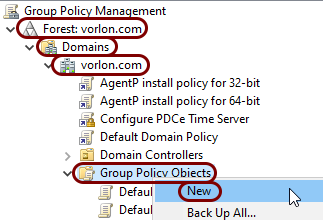
In the Group Policy Management app window, expand: , then right-click on the Group Policy Objects entry, and from the context
menu, select the New option.
-
In the New GPO window, enter the name for the new group policy object, and then click on the
OK button.
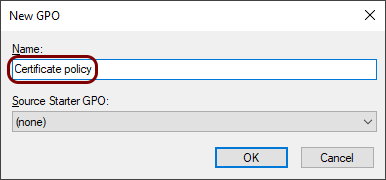
In this example, we used the name Certificate policy but you can use any name you like.
-
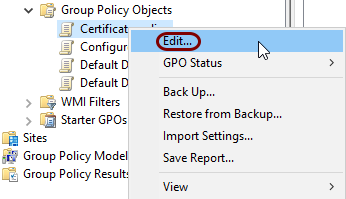
Right-click on the newly created group policy object, and from the context menu, select the
Edit option.
-
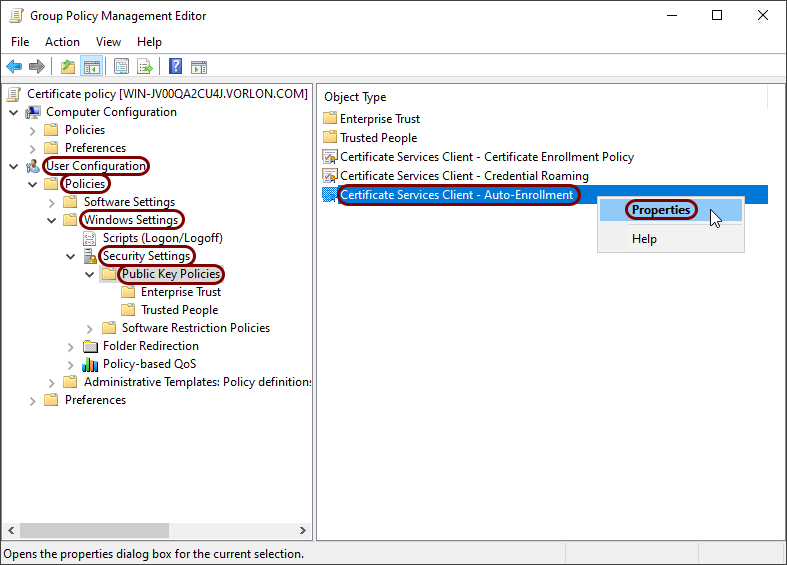
In the Group Policy Management Editor window, expand , click on the Public Key Policies option, and in the right-hand side pane,
right-click on the Certificate Services Client - Auto-Enrollment entry and from the context
menu, select the Properties option.
-
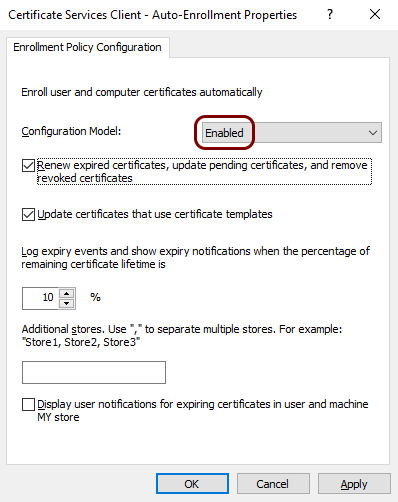
In the Certificate Services Client - Auto-Enrollment Properties window, in the
Configuration Model section, select the Enabled option, activate
the checkboxes Renew expired certificates, update pending certificates, and remove revoked
certificates and Update certificates that use certificate templates, and then
click on the OK button.
-
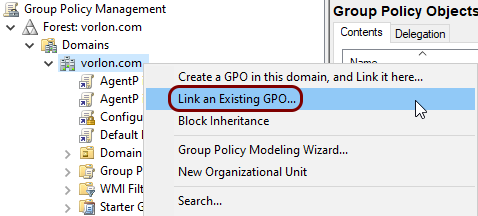
In the Group Policy Management window, right-click on your domain name, and from the context
menu, select the Link an Existing GPO option.
-
In the Select GPO window, select the GPO you just created, and then click on the
OK button.

Export the root CA certificate
In this section, you will export the root CA certificate so that you can upload this certificate to Portnox™ Cloud. This will let Cloud verify the validity of certificates issued by your CA.
-
In the Windows search bar, start typing certification authority and then click on the
Certification Authority app icon.
-
In the Certification Authority app window, right-click on your CA node, and select the
Properties option to open the Properties window.

-
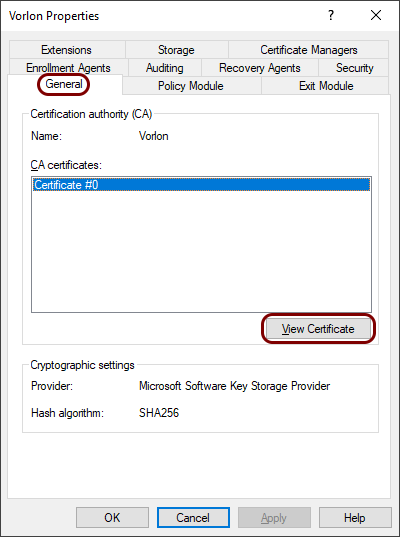
In the Properties window, in the General tab, click on the
View Certificate button to open the Certificate window.
-
In the Certificate window, go to the Details tab, and then click on
the Copy to File button to open the Certificate Export Wizard.

-
In the Certificate Export Wizard window, click on the Next button to go
to the Export File Format step, and select DER encoded binary X.509
(.CER) format, then click on the Next button.
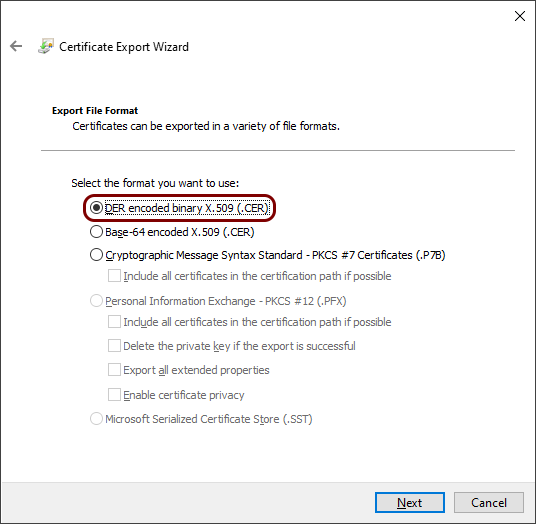
Result: Your root CA certificate will be exported to a file with a cer extension, in the DER encoded binary X.509 format.
Upload the root CA certificate to Cloud
In this section, you will upload the exported root CA certificate as a tenant CA certificate to Portnox™ Cloud. This will let Cloud recognize and authenticate your devices that have user certificates, which you generated using your own root CA.
-
In the Cloud portal top menu, click on the Settings option.

-
In the Cloud portal left-hand side menu, click on the option.

-
In the Trusted Root Certificates section, click on the Upload trusted root
certificate generated by “Your tenant name” link. Then, select the file using the ↥ button and click on the Save button to upload the
file.

Create a GPO for wired network authentication
If you want to control your wired network configuration using a GPO, you can create a GPO object to configure the wired network.
-
In the Windows search bar, start typing group policy management and then click on the
Group Policy Management app icon.
-
Create a GPO for wired network configuration.
-
In the Group Policy Management app window, expand: , then right-click on the Group Policy Objects entry, and from the context
menu, select the New option.
-
In the New GPO window, enter a Name for the new wired
configuration GPO, and click on the OK button.
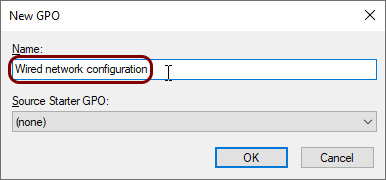 In this example, we used the name Wired network configuration but you can use any name you like.
-
In the Group Policy Management app window, expand: , then right-click on the Group Policy Objects entry, and from the context
menu, select the New option.
-
Configure the new wired network configuration GPO:
-
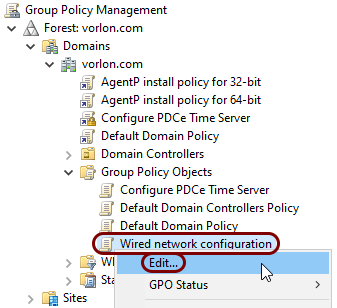
In the left-hand pane of the Group Policy Management window, right-click on the Group
Policy Object that you just created and select the Edit option from the context
menu.
-
In the left-hand pane of the Group Policy Management Editor window, expand the nodes, and then left-click on the System Services node. In the
right-hand pane, scroll down to the Wired AutoConfig entry.

-
Double-click on the Wired AutoConfig entry to open the Wired AutoConfig
Properties window, activate the Define this policy setting checkbox,
and select the Automatic option. Then, click on the OK
button.

-
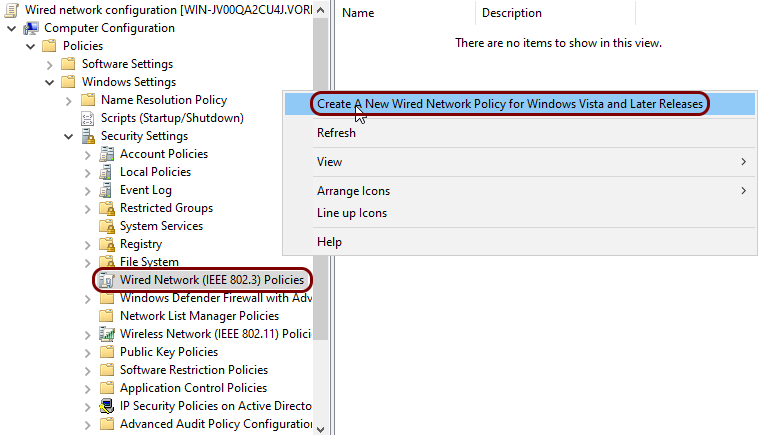
In the left-hand pane of the Group Policy Management Editor window, left-click on the
Wired Network (IEEE 802.3) Policies node. In the right-hand pane, right-click on
the empty space, and then select the Create a New Wired Network Policy for Windows Vista and
Later Releases option from the context menu.
-
In the New Wired Network Policy Properties window, in the
General tab, enter a name for this new policy.
 In this example, we used the name Wired network configuration but you can use any name you like.
 -
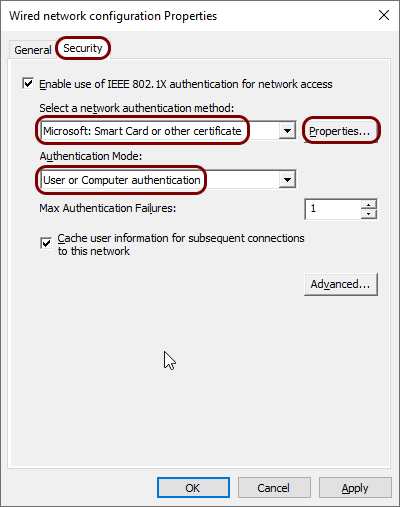
In the Security tab, in the Select a network authentication
method field, select the Microsoft: Smart Card or other certificate
option, in the Authentication Mode field, select the User or Computer
authentication option, and then click on the Properties button.
-
In the Smart Card or other Certificate Properties window, select the Use a
certificate on this computer option, activate the Use simple certificate
selection (Recommended) checkbox, activate the Verify the server’s identity by
validating the certificate checkbox, and in the Trusted Root Certificate
Authorities list, select the DigiCert Trusted Root G4 certificate
(the Cloud RADIUS server’s root CA
certificate).

-
In the left-hand pane of the Group Policy Management window, right-click on the Group
Policy Object that you just created and select the Edit option from the context
menu.
-
Link the wired network configuration GPO to an organizational unit or domain:
-
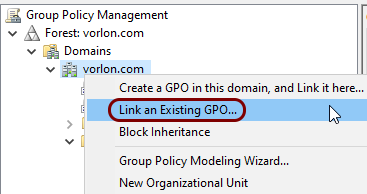
In the left-hand pane of the Group Policy Management window, right-click on a domain
or an organizational unit, and select the Link an Existing GPO option.
-
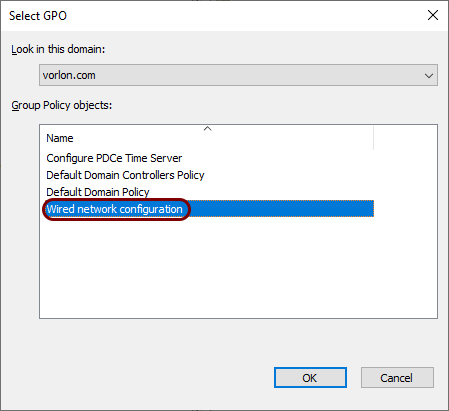
In the Select GPO window, click on the wired network configuration GPO you created and
then click on the OK button.
-
In the left-hand pane of the Group Policy Management window, right-click on a domain
or an organizational unit, and select the Link an Existing GPO option.
Create a GPO for wireless network authentication
If you want to control your wireless network configuration using a GPO, you can create a GPO object to configure the wireless network.
-
In the Windows search bar, start typing group policy management and then click on the
Group Policy Management app icon.
-
Create a GPO for wireless network configuration.
-
In the Group Policy Management app window, expand: , then right-click on the Group Policy Objects entry, and from the context
menu, select the New option.
-
In the New GPO window, enter a Name for the new wireless
configuration GPO, and click on the OK button.
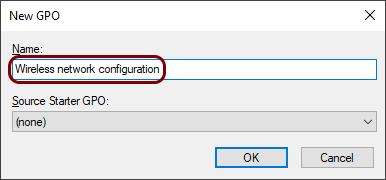 In this example, we used the name Wireless network configuration but you can use any name you like.
-
In the Group Policy Management app window, expand: , then right-click on the Group Policy Objects entry, and from the context
menu, select the New option.
-
Configure the new wireless network configuration GPO:
-
In the left-hand pane of the Group Policy Management window, right-click on the Group
Policy Object that you just created and select the Edit option from the context
menu.

-
In the left-hand pane of the Group Policy Management Editor window, expand the nodes, and then left-click on the Wireless Network (IEEE 802.11)
Policies node. In the right-hand pane, right-click on the empty space, and then select the
Create a New Wireless Network Policy for Windows Vista and Later Releases option
from the context menu.

-
In the New Wireless Network Policy Properties window, in the
General tab, enter a name for this new policy.
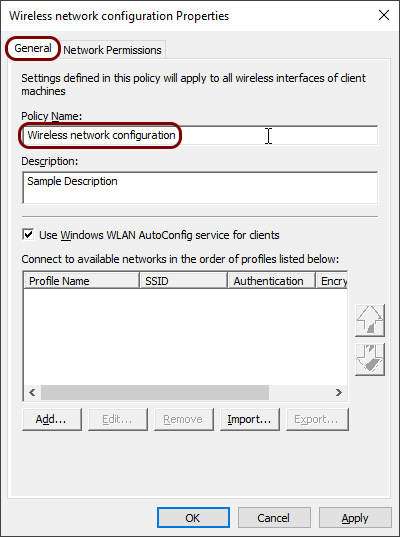 In this example, we used the name Wireless network configuration but you can use any name you like.
 -
Click on the Add button and select the Infrastructure
option.

-
In the New Profile properties window, in the Profile field,
select a name for this profile, in the Network Name(s) (SSID) field, enter the SSID
of your network, and then click on the Add button.
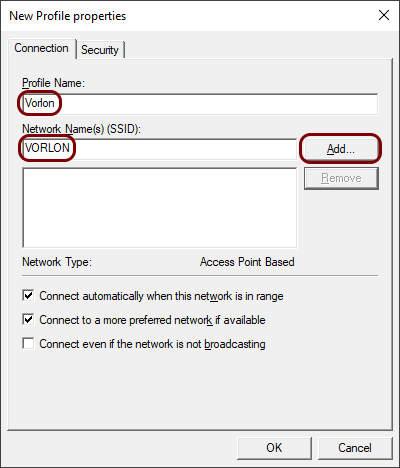
In this example, we used the profile name Vorlon but you can use any name you like.
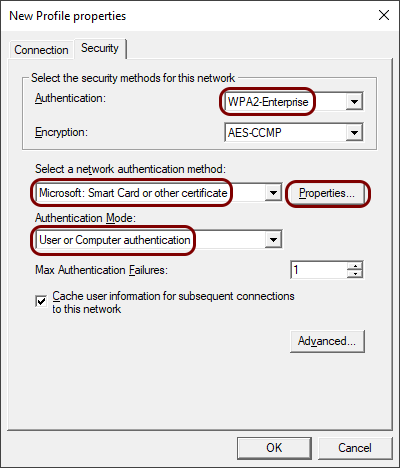
-
In the Security tab, in the Authentication field, select the
WPA2-Enterprise option, in the Select a network authentication
method field, select the Microsoft: Smart Card or other certificate
option, in the Authentication Mode field, select the User or Computer
authentication option, and then click on the Properties button.
-
In the Smart Card or other Certificate Properties window, select the Use a
certificate on this computer option, activate the Use simple certificate
selection (Recommended) checkbox, activate the Verify the server’s identity by
validating the certificate checkbox, and in the Trusted Root Certificate
Authorities list, select the DigiCert Trusted Root G4 certificate
(the Cloud RADIUS server’s root CA
certificate).
-
In the Network Permissions tab, click on the Add button. In
the New Permission Entry pop-up, in the Network Name (SSID)
field, enter the SSID of your network, in the Network Type field, select
Infrastructure, and in the Permission field, select
Allow. Then, click on the OK button.

-
In the left-hand pane of the Group Policy Management window, right-click on the Group
Policy Object that you just created and select the Edit option from the context
menu.
-
Link the wireless network configuration GPO to an organizational unit or domain:
-
In the left-hand pane of the Group Policy Management window, right-click on a domain
or an organizational unit, and select the Link an Existing GPO option.
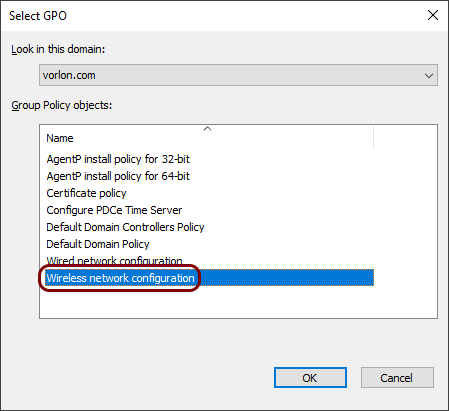
-
In the Select GPO window, click on the wireless network configuration GPO you created
and then click on the OK button.
-
In the left-hand pane of the Group Policy Management window, right-click on a domain
or an organizational unit, and select the Link an Existing GPO option.