Onboard Linux devices with certificates using Certmonger and SCEP
In this topic, you will learn how to obtain Portnox™ Cloud user certificates for managed Linux devices using Certmonger and SCEP.
To connect managed Linux devices to networks managed by Portnox Cloud, you can use a configuration management tool like Ansible, Chef, or Puppet to distribute commands to managed devices. These commands use the Certmonger package to request, download, and monitor user certificates for Cloud and then configure network settings on these devices to use these certificates to connect to the network.
This topic helps you prepare scripts for Ansible, Chef, Puppet, or other configuration management tools by teaching you how to request, download, and monitor device certificates.
Turn on the Portnox Cloud SCEP services
In this section, you will configure Portnox™ Cloud to provide SCEP services to your devices.
If you have previously turned on the Portnox Cloud SCEP services, skip to the step in which you get the Cloud SCEP URL and secret.
-
In the Cloud portal top menu, click on the Settings option.

-
In the Cloud portal left-hand side menu, click on the option.
-
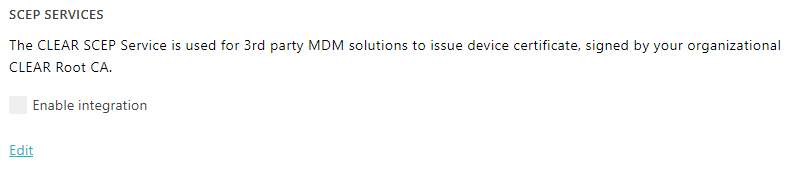
Enable integration with SCEP services.

- Click on the Edit link.
- Activate the Enable integration checkbox.
- Click on the Save button.
-
Click on the ⧉ icon next to the Password field to
copy the SCEP password, and store it in a text file in your Linux system.
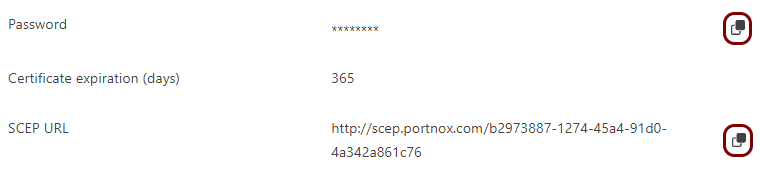
For example:
$nano /var/portnox/secret
Download and convert the root CA certificate
In this section, you will download the Portnox™ Cloud root CA certificate> from the Cloud portal and convert it to a format that you can later use to connect to the network.
-
In the Cloud portal top menu, click on the Settings option.
-
In the Cloud portal left-hand side menu, click on the option.
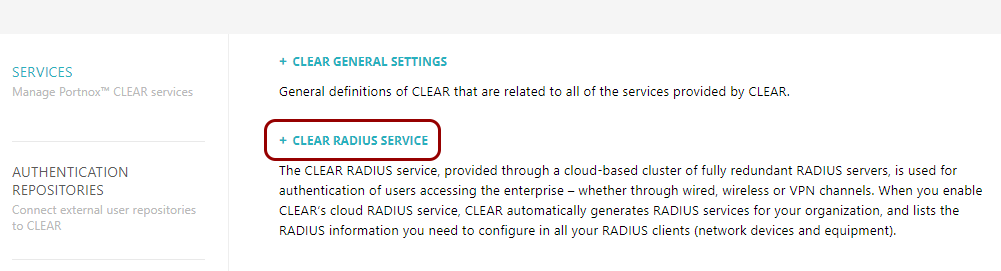
The right-hand pane shows the list of active servers.

-
If you’re working on a Windows desktop, double-click on the downloaded certificate file and click on the
Open button in the Security warning window.

-
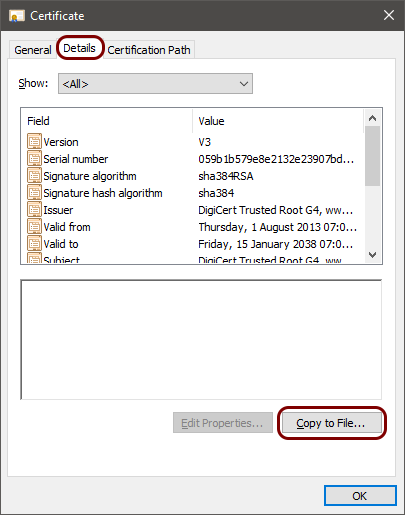
In the Certificate window, click on the Details tab and then click on
the Copy to File button.
-
In the Certificate Export Wizard, export the certificate in base-64 encoded format.
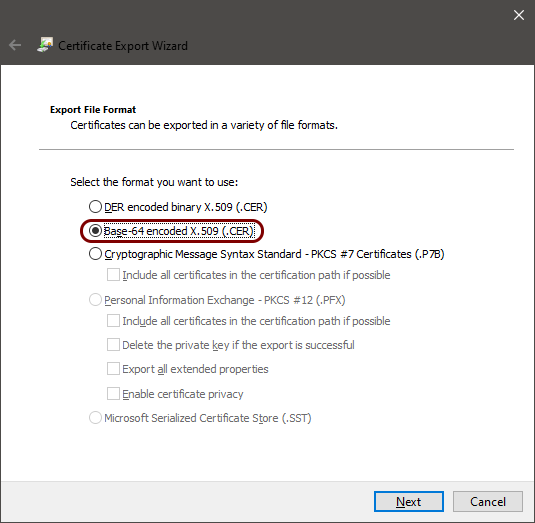
- In the first step of the wizard, click on the Next button.
- In the second step of the wizard, select the Base-64 encoded X.509 (.CER) option.
- In the third step of the wizard, select a file to save the exported certificate, and click on the Next button.
- In the last step of the wizard, click on the Finish button. Then, close the Certificate window.
Request the device certificate using Certmonger
In this section, you will use the Certmonger software available on all Linux distributions to request a certificate for your device using the SCEP protocol and Portnox™ Cloud SCEP services.
Result: You have obtained a private/public key pair for your device, which you can now use to configure your connections to your networks managed by Portnox Cloud.
Troubleshooting: use $sudo getcert list to list your Certmonger request and see any reasons for
potential problems.
Configure your network connection with the Portnox Cloud certificate
In this section, you will configure NetworkManager on Linux to connect to the network managed by Portnox™ Cloud using your user certificate and private key.
Distribute the prepared configuration using configuration management
Refer to the documentation of your selected solution, such as Ansible, Chef, or Puppet, to use the above commands in scripts that are distributed to managed devices.