
Onboard macOS devices with certificates using Jamf School and SCEP
In this topic, you will learn how to deploy Portnox™ Cloud certificates via Jamf School and SCEP to manage macOS devices.
This guide covers only network authentication. It assumes that you already manage your devices in Jamf School. If you plan to use user certificates, make sure that all devices enrolled in Jamf School have an assigned owner whose email address is the same as in the Portnox Cloud authentication repository used for the group. Also decide how to deploy the profile to your devices, for example, scope the profile to a device group so that Jamf School installs the profile automatically on each device in the group at the next device check-in.
Observed potential issues:
-
If Portnox Cloud shows email as the user in the certificate instead of the user’s email address, and authentication fails, check that the device has an owner in Jamf School, in the same location as the device. Without an owner, Jamf School sends variables such as %Email% as literal text.
-
Jamf School doesn’t renew SCEP certificates automatically, and Portnox Cloud doesn’t track their validity. When a certificate expires, the device loses network access. macOS devices can display a warning before the certificate expires, so users can remind you, but iOS devices don’t display any warnings. You need to manually track expiration dates and renew certificates before they expire.
To renew a certificate, reinstall the profile on the device page, or edit and save the profile to send it again to all devices in scope.
Turn on the Portnox Cloud SCEP services
In this section, you will configure Portnox™ Cloud to provide SCEP services to your devices.
If you have previously turned on the Portnox Cloud SCEP services, skip to the later step in which you get the Cloud SCEP URL and password.
Portnox Cloud SCEP services let devices contact the Cloud SCEP server and get a unique certificate for the device or for the specific user of the device.
-
In the Cloud portal top menu, click on the Settings option.

-
In the Cloud portal left-hand side menu, click on the option.
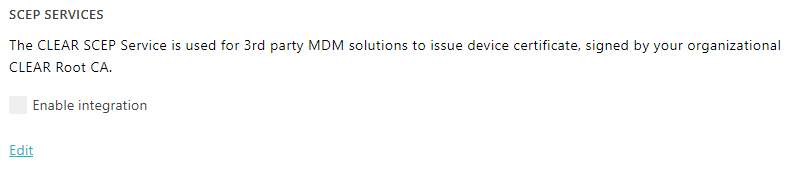
-
Enable integration with SCEP services.
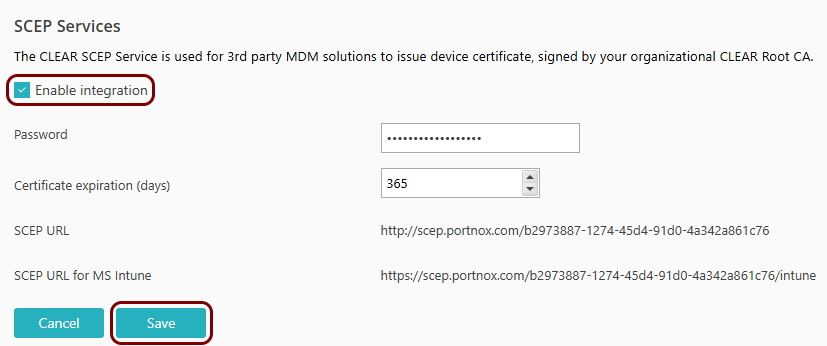
- Click on the Edit link.
- Activate the Enable integration checkbox.
- Click on the Save button.
-
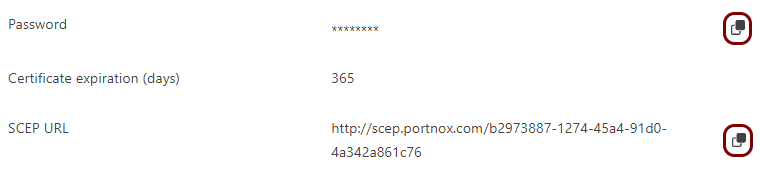
Click on the ⧉ icon next to the Password field to
copy the SCEP password, and paste it in a text file for later use.
Download the root CA certificate
In this section, you will download the root CA certificate from Portnox™ Cloud, which is needed to create a profile.
-
In the Cloud portal top menu, click on the Settings option.
-
In the Cloud portal left-hand side menu, click on the option.
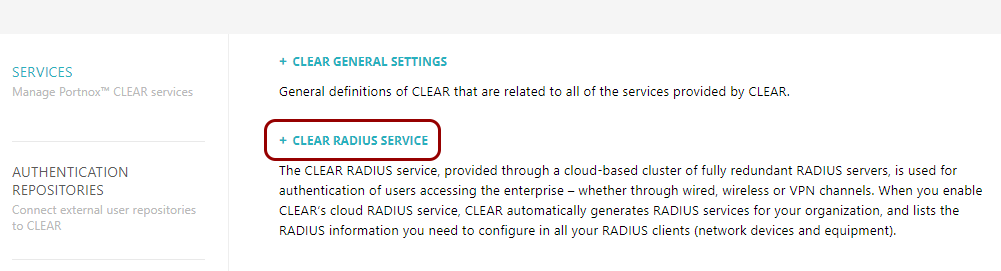
-
Click on any of the RADIUS servers listed in the right-hand pane to show its configuration.

-
Click on the Download root certificate link.
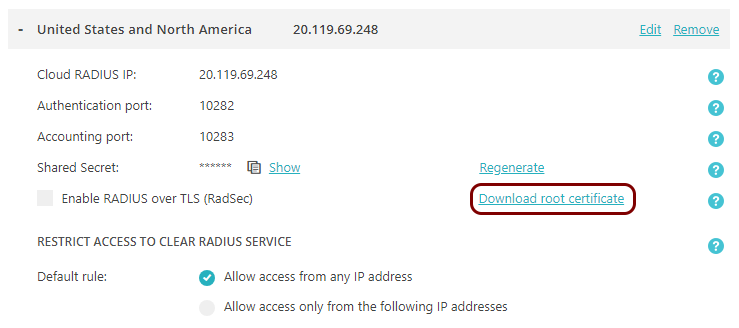
Result: The root CA certificate file is in the Downloads folder on the local disk.
Optional: Hand over information from the Portnox Cloud team to the Jamf School team
In this section, you will learn what information was collected in previous steps from Portnox Cloud, which is needed to configure Jamf School to work with Portnox Cloud.
If different people are responsible for managing Portnox Cloud and Jamf School, here is the information you need to hand over:
-
The URL of the Portnox Cloud SCEP server. For example, https://scep.portnox.com/b2973887-1274-45d4-91d0-4a342a861c76.
-
The password for the SCEP server.
-
The root CA certificate file in the X.509 format. For example, rootCertificate.crt.
Create a Jamf School profile
In this section, you will create a profile in Jamf School that lets managed devices get certificates from the Portnox™ Cloud SCEP server.
-
In the left-hand menu, click on the Profiles option.
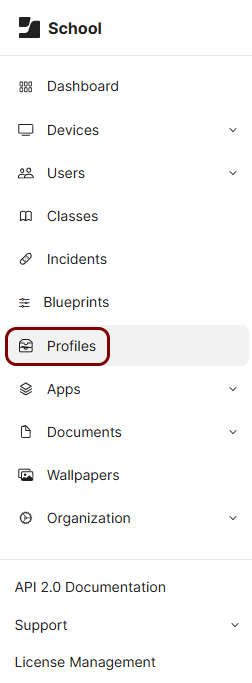
Jamf School shows the Profiles pane.
-
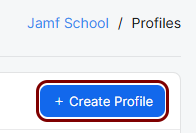
In the top-right corner of the Profiles pane, click on the Create
Profile button.
-
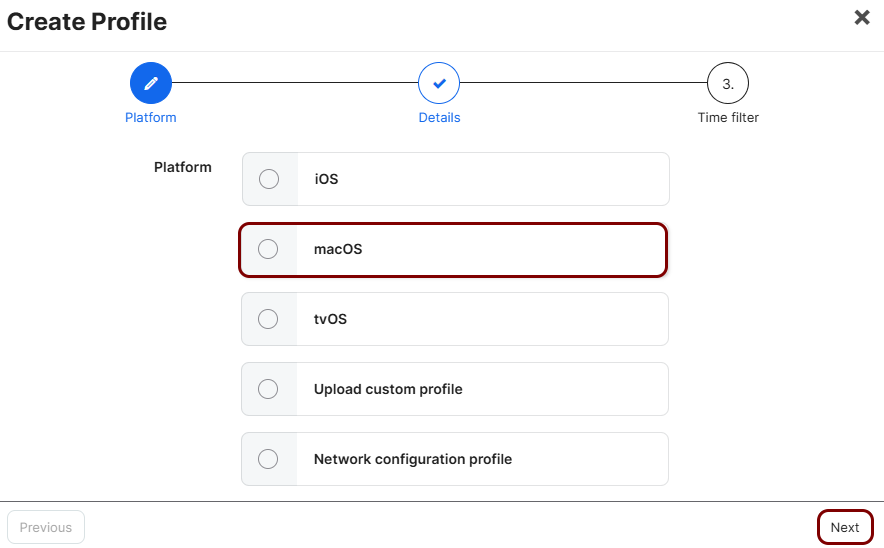
In the Create Profile window, select the platform and the profile type:
Note:In this guide, we use the macOS platform and the User Enrollment profile type. The process is almost identical for other choices, with small differences such as profile section names or availability.
-
In the Platform field, select the macOS or
iOS option, depending on the devices that you want to manage. Then, click on the
Next button.
-
In the Enrollment type field, select the Device Enrollment or
User Enrollment option, depending on how your devices are enrolled in Jamf
School. Then, click on the Next button.
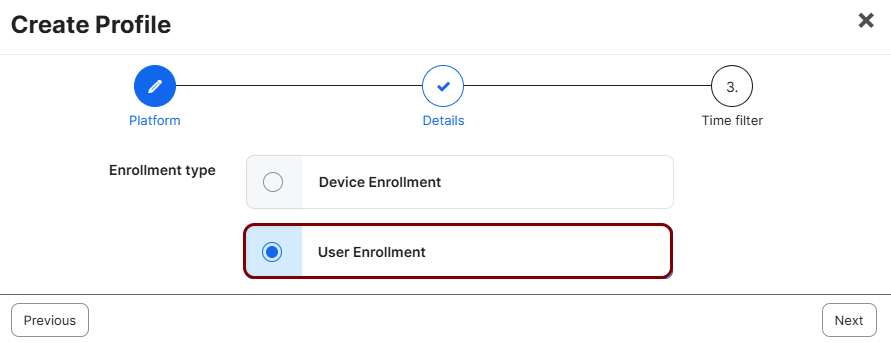
This setting refers to the device enrollment method in Jamf School, not to the type of certificate. You can use user certificates or device certificates with both enrollment types.
-
In the Profile name field, enter the name for this SCEP profile. Optionally, enter a
description in the Description field. Then, click on the Next
button.
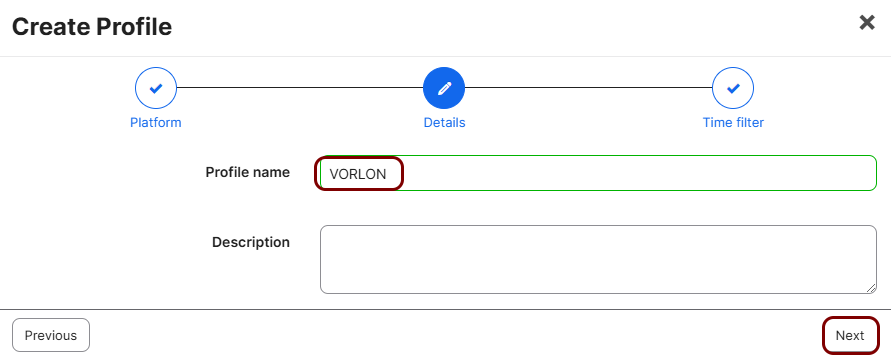
We used the name VORLON but you can use any name you like.
-
Leave the Use time filter checkbox cleared, and click on the
Finish button.
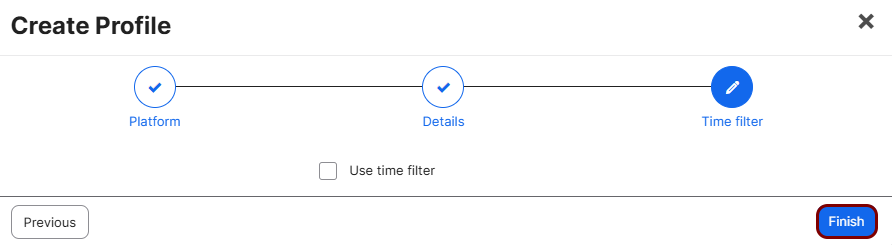
-
In the Platform field, select the macOS or
iOS option, depending on the devices that you want to manage. Then, click on the
Next button.
-
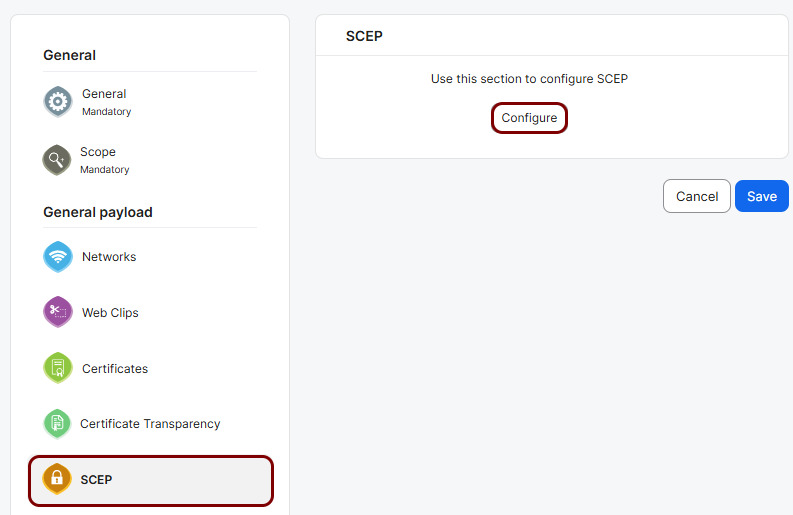
In the left-hand menu of the profile pane, click on the SCEP option. Then, on the right-hand
side, click on the Configure button, and configure SCEP properties for the profile:
-
In the URL field, enter the SCEP URL that you copied earlier from
Portnox Cloud.

-
In the Subject field, enter a string to use to generate the Subject field in the
user/device certificates.

The string can contain Jamf School variables. We recommend the following values:
-
For user certificates: CN=%Email%
-
For device certificates: CN=%Name% or CN=%SerialNumber%
Jamf School replaces these variables with the owner’s email address (%Email%), the device name (%Name%), or the device serial number (%SerialNumber%). Portnox Cloud uses the Subject field for display purposes. To link the certificate to an account in your authentication repository, Portnox Cloud uses the SAN UPN field (NT Principal Name), configured in the next step.
If you use device certificates, Portnox Cloud creates Portnox accounts for the devices. Use a human-readable device name in the Subject field so that you can identify the device on the Devices screen.
For more information about Jamf School variables, click on the Learn how to use payload variables in your profiles link in the Need help? section at the top of the profile pane.
-
-
In the Subject Alternative Name Type field, select the Uniform Resource
Identifier option. In the Subject Alternative Name Value field, enter
https://jamfdeviceid/%udid% if you manage macOS devices or
https://jamfmobiledeviceid/%udid% if you manage iOS devices. In the NT
Principal Name field, enter %Email% for user certificates, or leave
the field empty for device certificates.
 Note:Portnox Cloud uses the NT Principal Name field (SAN UPN) to link the certificate to an account in your authentication repository. For user certificates, this field must contain the user’s email address or UPN as it appears in the authentication repository. If this field is empty or contains an incorrect value, Portnox Cloud creates a new Portnox account instead. To understand how Portnox Cloud matches the identity in the certificates with the authentication repository, see the following topic: Certificate identity information.
 -
For macOS devices, in the Certificate Expiration Notification Threshold (macOS only)
field, enter the number of days before certificate expiration at which macOS shows a notification.

This setting only shows a notification to the user. It doesn’t renew the certificate. Tell your users to contact IT when they see this notification. This field isn’t available for iOS devices.
-
In the Challenge field, paste the password that you copied earlier from
Portnox Cloud.

-
In the Key Size field, select the key size that you want to use.

In this example, we used the value 2048. Higher values provide more security. Values other than 1024 may cause certificate fragmentation problems in some network topologies. If such problems occur, see the following topic: Certificate fragmentation issues.
-
In the Key usage options field, activate the Use as digital
signature and Use for key encipherment checkboxes.

-
In the URL field, enter the SCEP URL that you copied earlier from
Portnox Cloud.
-
In the left-hand menu of the profile pane, click on the Certificates option. Then, in the
Upload new certificate section, click on the Choose File button,
select the root CA certificate file that you downloaded
earlier, for example, rootCertificate.crt, and click on the Upload
certificate button.
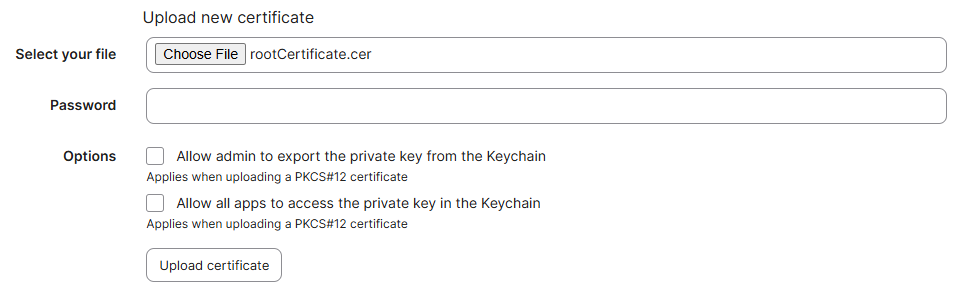
Leave the Password field empty and the Options checkboxes cleared. They apply only to PKCS#12 certificates.
Configure the profile for Wi-Fi
In this section, you will edit the profile and add a Wi-Fi network configuration. This will let your managed devices access the Wi-Fi network configured in Portnox™ Cloud by using certificates obtained from the Portnox SCEP server.
-
In the left-hand menu, click on the Profiles option.
Jamf School shows the Profiles pane.
-
Find the profile that you created earlier, and click on the ✎ icon in
its row.

-
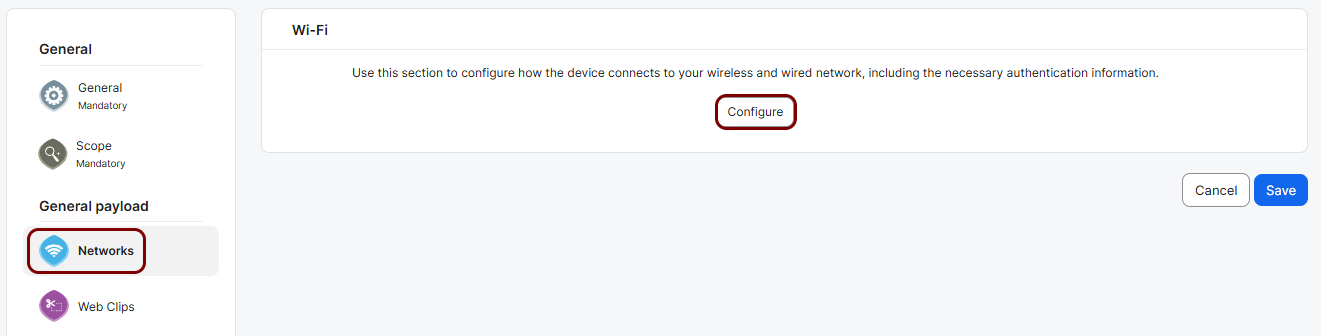
In the left-hand menu of the profile pane, click on the Networks option for macOS devices or
the Wi-Fi option for iOS devices. Then, on the right-hand side, click on the
Configure button, and configure the network properties:
-
In the Network Interface field, select the Wi-Fi
option.

On iOS, this field only has one option available, because iOS supports only Wi-Fi networks.
-
In the Network SSID field, enter the SSID of the Wi-Fi network that you configured
in Portnox Cloud for your managed devices.

-
In the MAC Randomization field, activate the Disable MAC Address
Randomization checkbox.
 Important:If you do not turn off MAC address randomization, and the supplicant certificates are not issued by Portnox SCEP, and the certificate’s SAN field does not include a Jamf or Intune device ID, Portnox Cloud assigns a new license to the device each time it connects with a different MAC address. This can significantly increase your licensing costs. Even if you use Portnox SCEP and this issue does not apply, we still recommend turning MAC address randomization off for safety. For more information, see the following topic: MAC address randomization – why it causes problems and how to turn it off.
 -
In the Security field, select the WPA2 Enterprise
option.
 Note:You can also select another option in the Enterprise group, for example, Automatic Enterprise or WPA / WPA2 Enterprise, if it better suits your network.
 -
In the Protocols tab, in the Supported types field, activate
only the TLS checkbox.

-
In the Identity certificate field, select the SCEP option
with your Portnox Cloud SCEP URL.

-
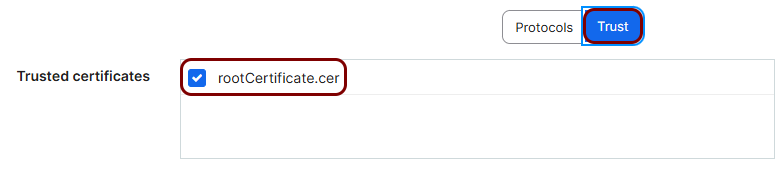
Click on the Trust tab. Then, in the Trusted certificates
field, activate the checkbox next to the root CA certificate that you uploaded earlier.
-
Click on the + button below the Trusted servers field, and
add the following name: clear-rad.portnox.com.
 Note:To learn more about this option, see the following topic: Trusted certificate server names.
-
In the Network Interface field, select the Wi-Fi
option.
Configure the profile for Ethernet
In this section, you will edit the profile and add an Ethernet network configuration. This will let your managed macOS devices access the Ethernet network configured in Portnox™ Cloud by using certificates obtained from the Portnox SCEP server.
-
In the left-hand menu, click on the Profiles option.
Jamf School shows the Profiles pane.
-
Find the profile that you created earlier, and click on the ✎ icon in
its row.
-
In the left-hand menu of the profile pane, click on the Networks option. Then, on the
right-hand side, click on the Configure button, and configure the network properties:
-
In the Network Interface field, select the Any Ethernet
interface option.
 Note:You can also select another option in the 802.1x Active Ethernet or 802.1x Ethernet group, for example, First Active Ethernet interface, if it better suits your environment.
 -
In the Protocols tab, in the Supported types field, activate
only the TLS checkbox.
-
In the Identity certificate field, select the SCEP option
with your Portnox Cloud SCEP URL.
-
Click on the Trust tab. Then, in the Trusted certificates
field, activate the checkbox next to the root CA certificate that you uploaded earlier.
-
Click on the + button below the Trusted servers field, and
add the following name: clear-rad.portnox.com.
Note:To learn more about this option, see the following topic: Trusted certificate server names.
-
In the Network Interface field, select the Any Ethernet
interface option.